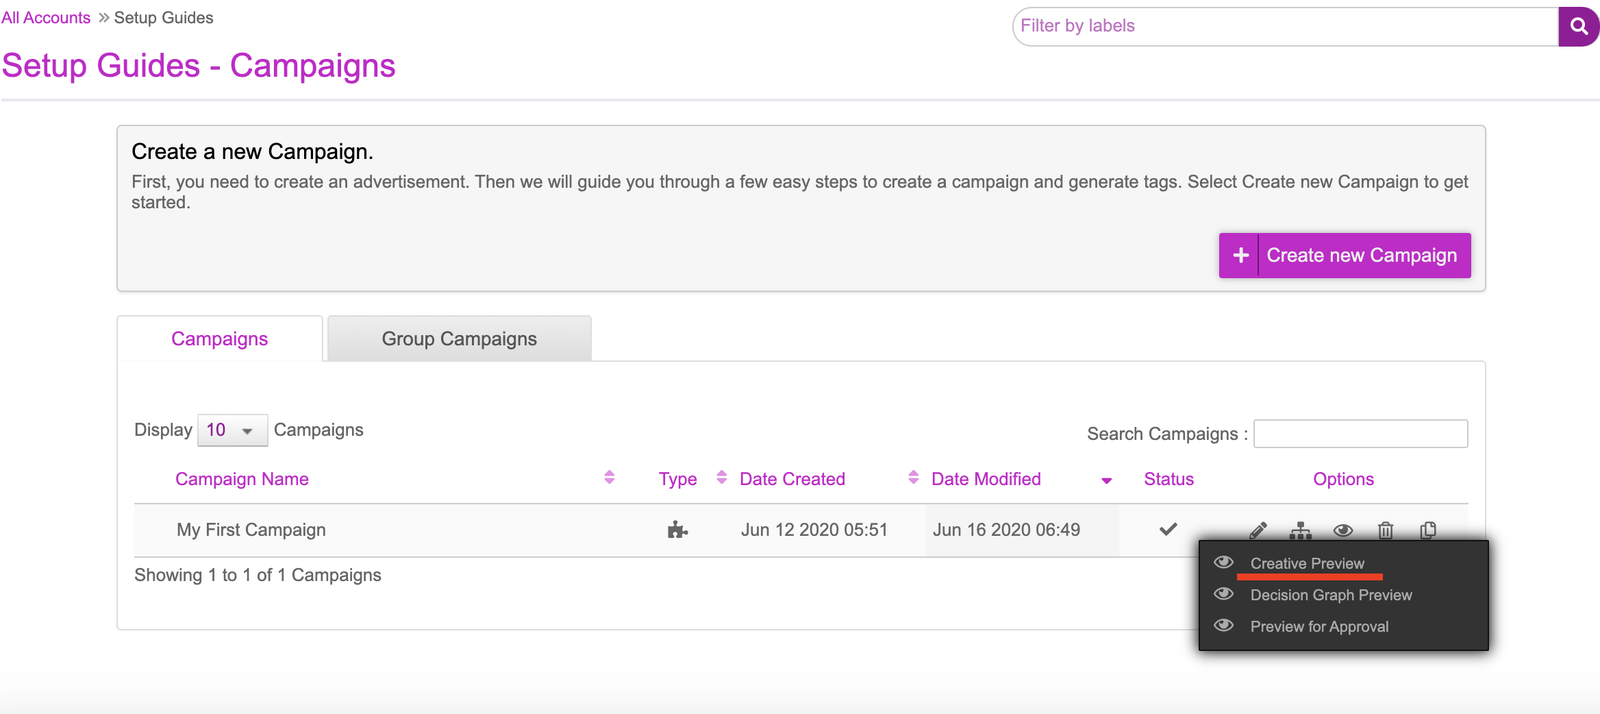
Upon saving the campaign, you will be taken to a dashboard that will show the campaign that was created. You can go back into the campaign at any time by clicking onto the pencil icon to edit it.
- Before proceeding to generating the tags, it’s worth previewing the creatives to ensure that everything was mapped accordingly and there aren’t any issues with the creative. This can be done by clicking onto the ‘eye’ icon and selecting ‘Creative Preview’
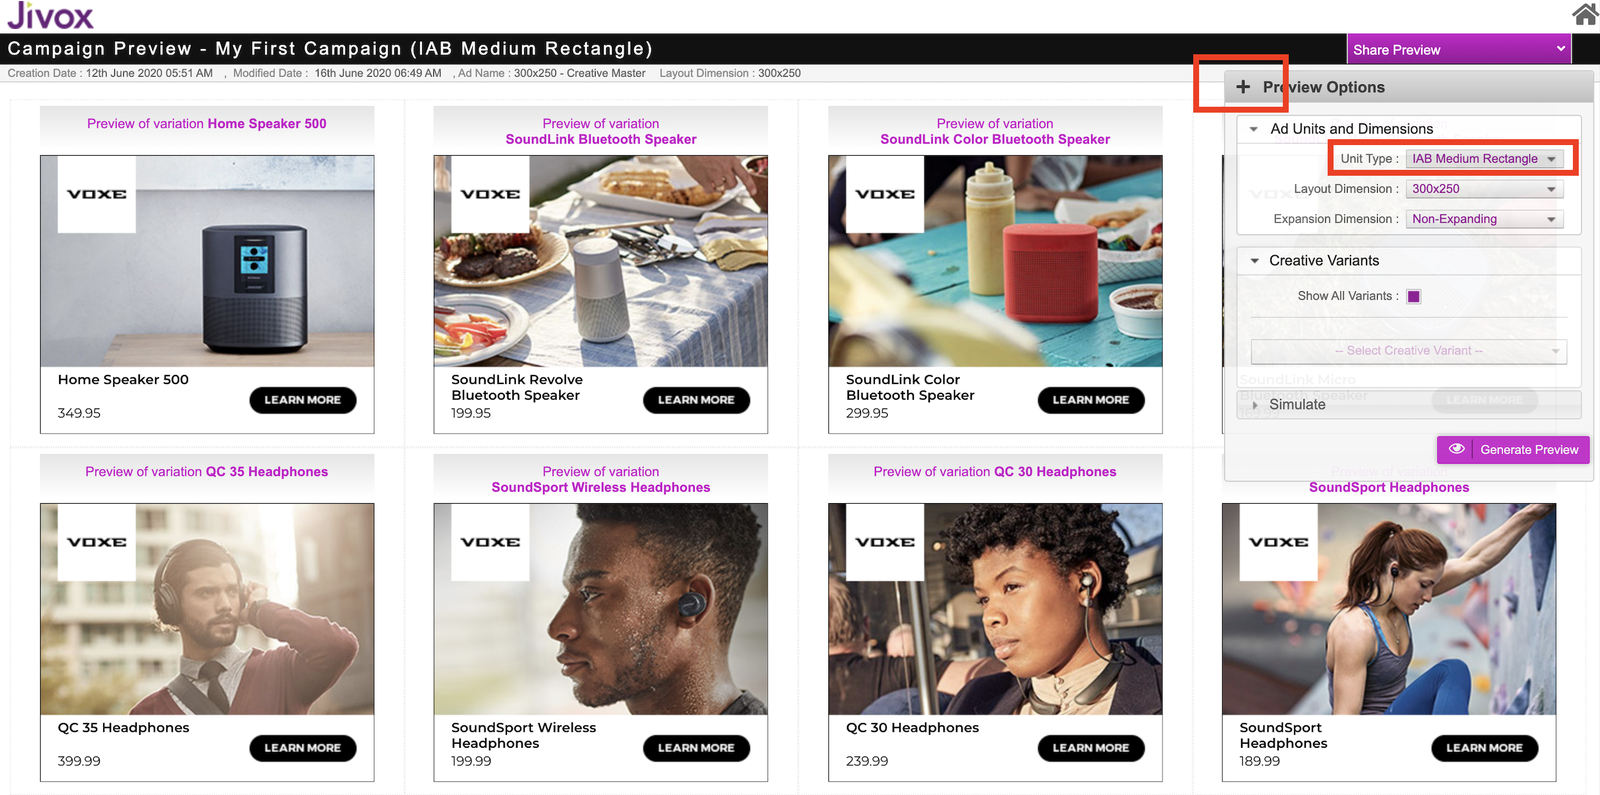
On the creative preview page, you will now see all the variations that have been produced. These will be the final output of what will be served to users. If multiple sizes have been created that you wish to view, click onto the ‘+’ icon to expand the preview options and change the unit type to preview other units. Once you’re happy with the previews, you can now exit this window and return to the campaign dashboard.
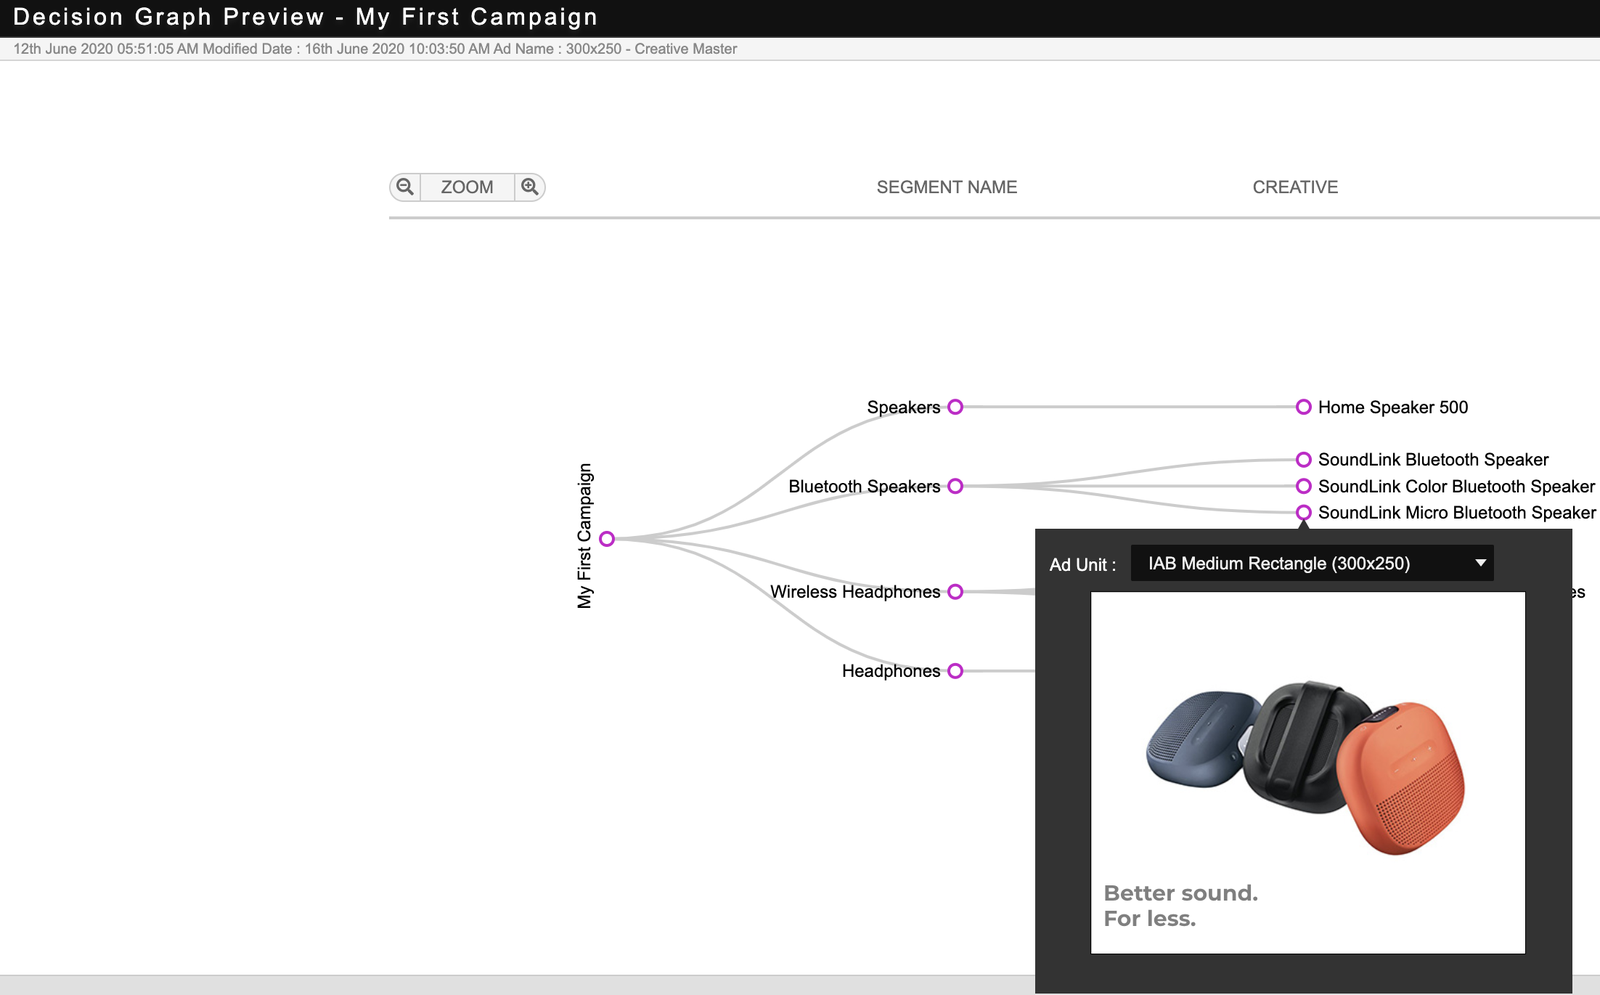
There is also an option to select a preview of the Decision Graph that we saw. This can accessed by clicking onto the Creative Preview Dropdown and selecting ‘Decision Graph Preview’ as seen in step 6. In the DecisionGraph, by hovering over the ‘Segment’ nodes on the left, you can preview the rules set up and by previewing the ‘Creative’ nodes on the right, you can preview the creatives that will appear when the corresponding node rules are met.
Next Steps
Here's what you must do next: