Before diving into the platform, let’s take a look into what an Asset Source is, how you can create it and upload it into JivoxIQ.
The Asset Source is a database that lists all information to generate the different ad variants. Each row in the Asset Source spreadsheet corresponds to a unique creative variation. The unique creative variation is identified by an assetKey. Each unique creative variation ought to have a unique assetKey. It will serve as a look up value and if that value is present, the appropriate creative will be served.
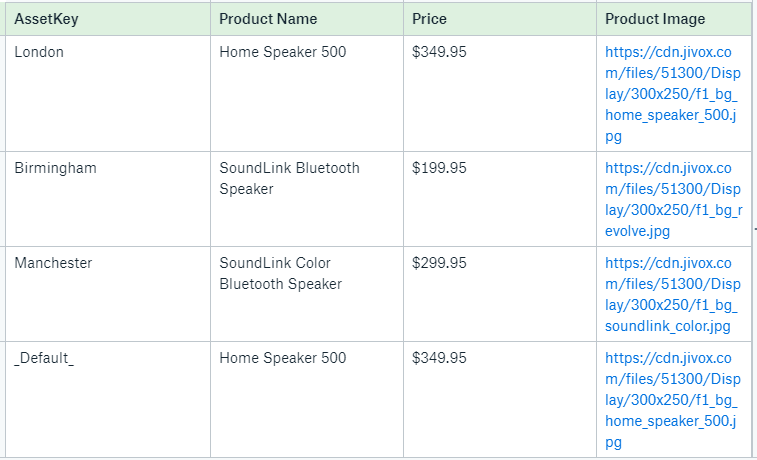
Below is an example of a simple Asset Source file. You can see that the location of the user acts as an AssetKey (key identifier).
In this example, if the user is located in London, they will be served a creative variation with the ‘Home Speaker 500’ product along with the ‘$349.95’ price and the relevant image. Whereas, if the user was in Birmingham or Manchester, the appropriate creative variation will be identified and served to the user.
There is also a default specified as “__Default __". If no conditions are met, the creative will serve the creative variation that you’ve specified. In this example, if no location information is passed through, Jivox will serve the default creative specified, which in this case will be the Home Speaker 500 creative.
Whilst the above example works great for a single data input, it’s hard to scale up when you want to leverage multiple data inputs and also rotate different creative variations for the same combination of data.
In those cases, we can leverage the ‘Rotation Group’ input. Rather than the assetKey being the lookup value, the Rotation Group will take its place. The benefit of this is that you can now leverage multiple data trigger inputs, serve a rotation of creatives and specify the percentage against each creative variation in the rotation group.

In the above example:
- The assetKey is no longer the key look up value. It has to remain unique as it’s still used to identify unique creative variations. In this example, we’ve numbered them.
- The Rotation Group is now our key lookup value, these values don’t have to be unique. Multiple data triggers can be leveraged here (they’re configured in the decision graph, which we’ll discuss more further on). This also applies to the “Default" as it will now be within the Rotation Group column. To give an example, if the weather is 30 degrees and the user is in London, we’ll configure it so that ‘Bluetooth Speakers’ is assigned to it. If those conditions are met, the user will now be served a rotation of the creatives that belong to ‘Bluetooth Speakers’ Rotation Group. If there are 500 types of bluetooth speakers that you sell, they can all be assigned to the ‘Bluetooth Speakers’ group and rotate between the creatives shown. This is a how Jivox supports multivariate testing and analysis. JivoxIQ supports auto-optimization of creatives within a Rotation Group.
- The Weightage columns allows you to specify how much weight is against the creatives. What this means is, in your rotation group, how often would you like one creative to show more than the other. In the below example, ‘Bluetooth Speakers’ has 3 creatives assigned to it. The weightage is set to 40, 30, 30 meaning in 10 times of the creatives being served, the first will have served four times and the other will have served three times each. If no weightage column is used, the creatives within those rotation groups will rotate evenly.
- The Reporting Name columns serves as a way to label the assetKey value. In this example, ‘SoundLink Bluetooth Speaker’ will appear in the reports rather than the number 1. This can also be leveraged within the the prior example. So rather than ‘London’ or ‘Birmingham’ appearing, you could label it to what you define as the creative name e.g. London_Sunny_ Creative.
How to Add Asset Source
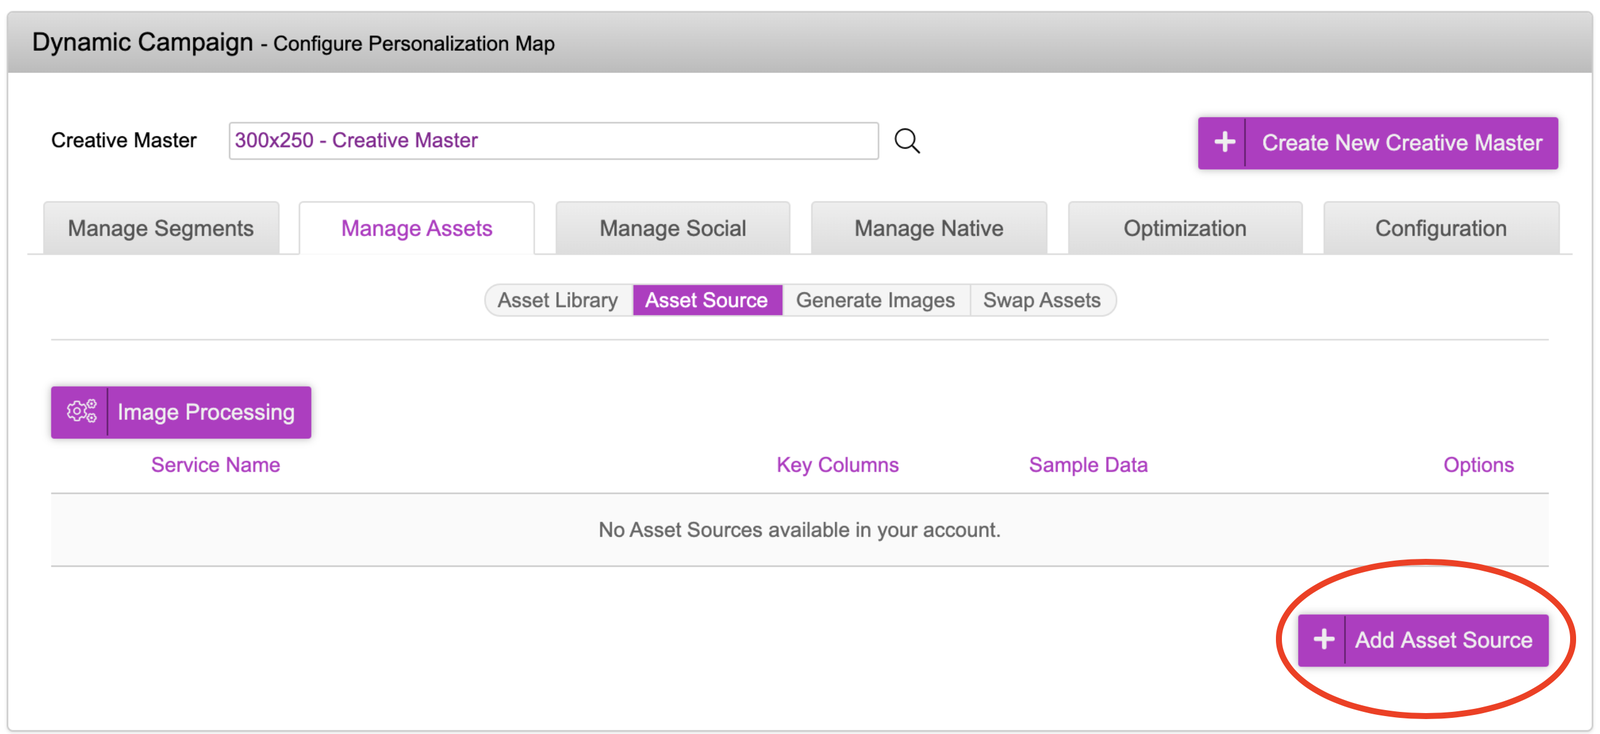
Inside the ‘Asset Source’ tab, click onto ‘Add Asset Source’.
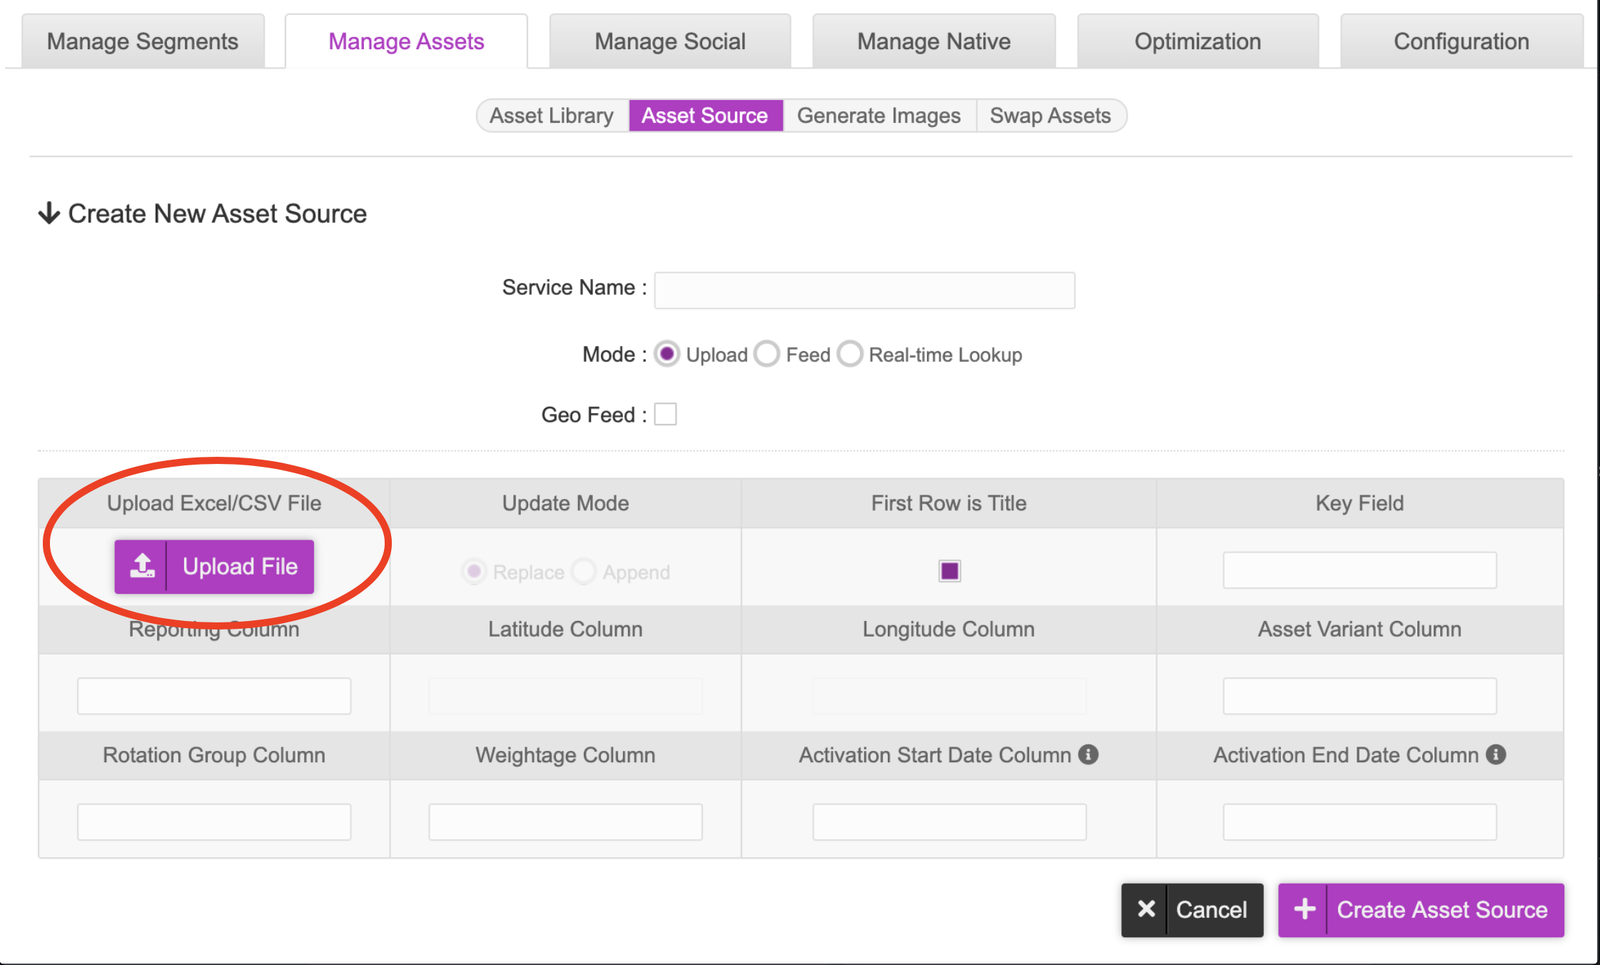
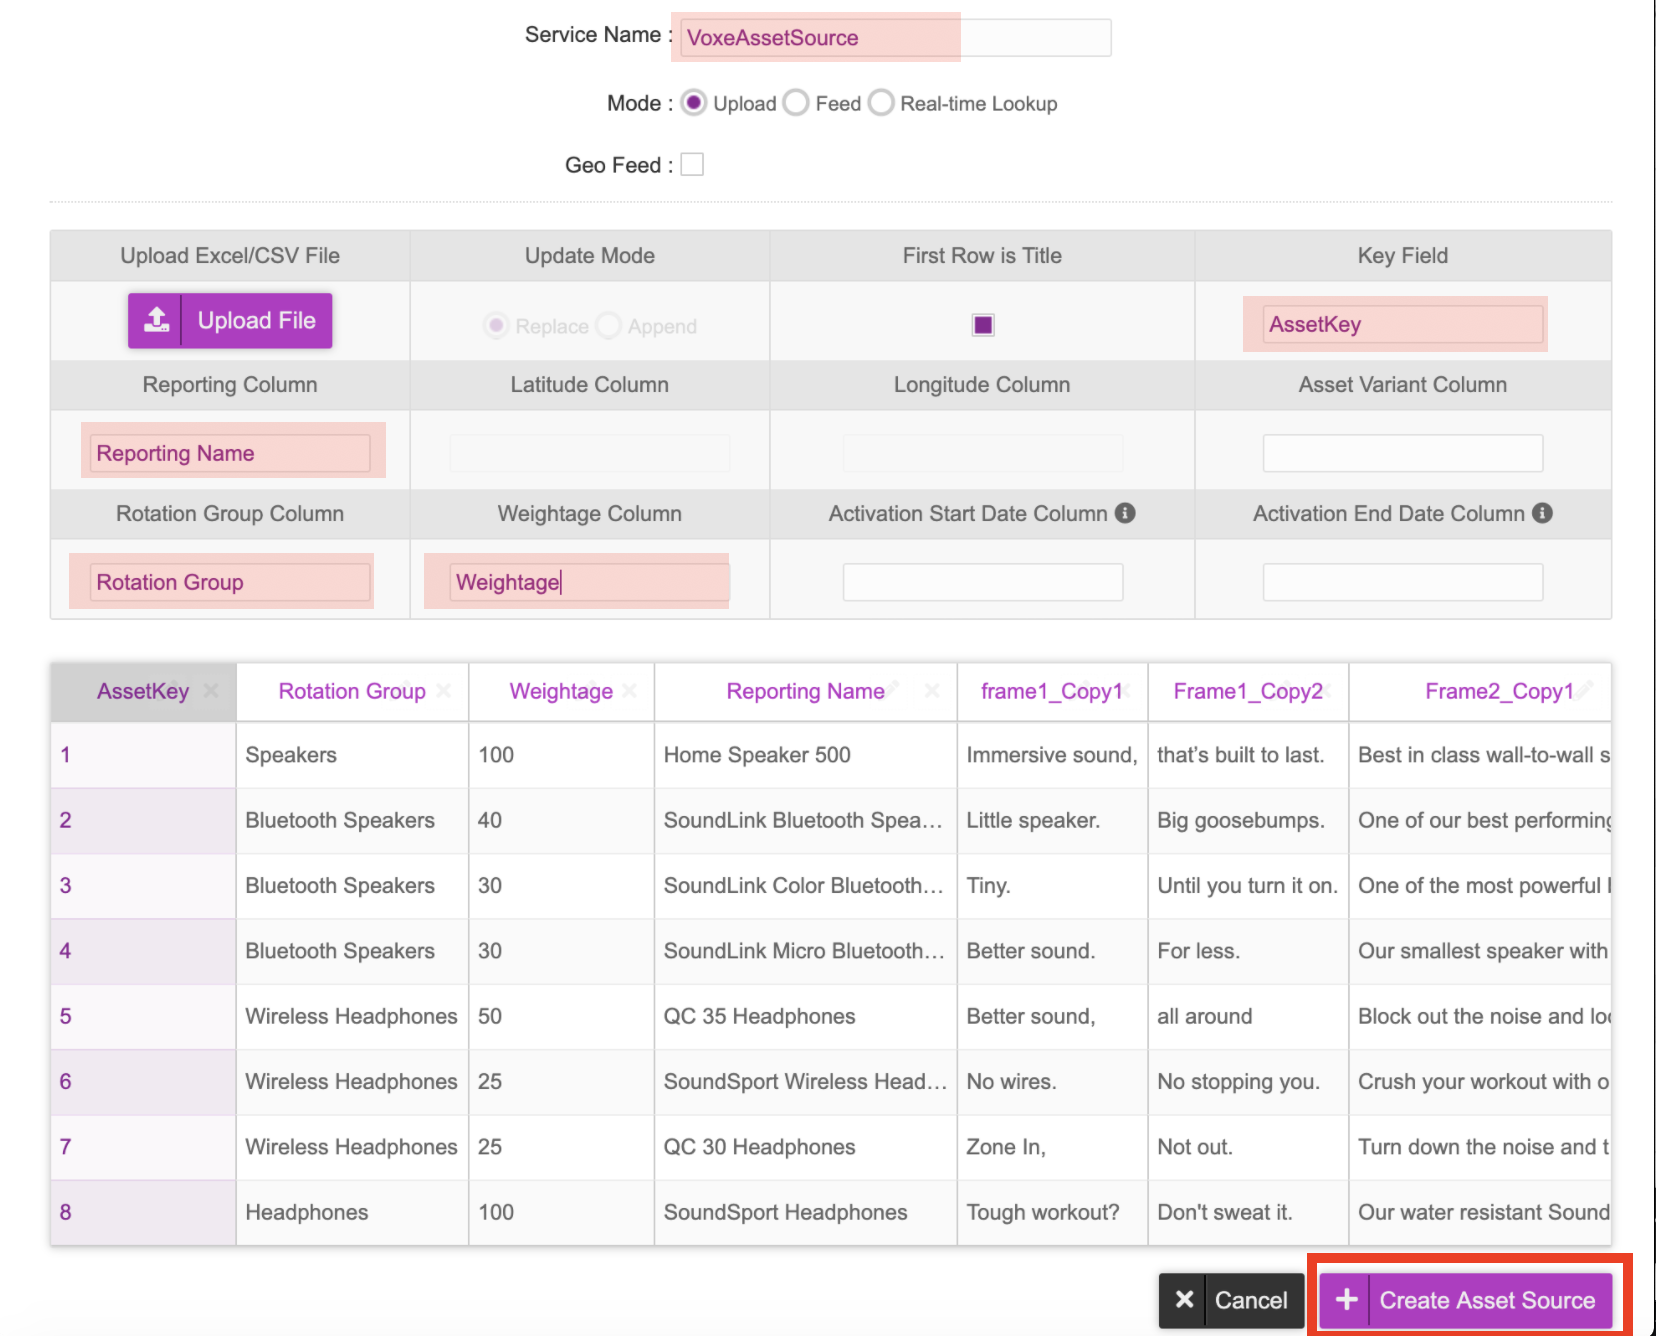
You’ll now be presented with a few fields that can be filled in as seen in the picture. We will first click on the Upload File button and upload the Voxe 300x250 asset source. Voxe 300x250 Asset Source
Once you have uploaded the asset source, you will be shown a snippet of the Asset Source as a preview. This is where we will configure mapping our columns in our asset source to the fields here.
In the picture, you can see that the following mappings have been done:
assetKey to Key Field,
Reporting Name to reporting column
Rotation Group to Rotation Group Column
Weightage to Weightage Column
Just to note, the column names in the asset source can be named anything you like as long as they are mapped accordingly.
When this has been completed, assign the asset source a name at the top and click onto the ‘Create Asset Source Button’.
You will now be taken to the Asset Source section and can see your Asset Source. If you wish to re-upload the asset source & make amendments, click onto the pencil icon and make the necessary changes such as re-uploading an asset source and editing the mappings. You can also download the asset source by clicking onto the download icon or excel sheet next to it.
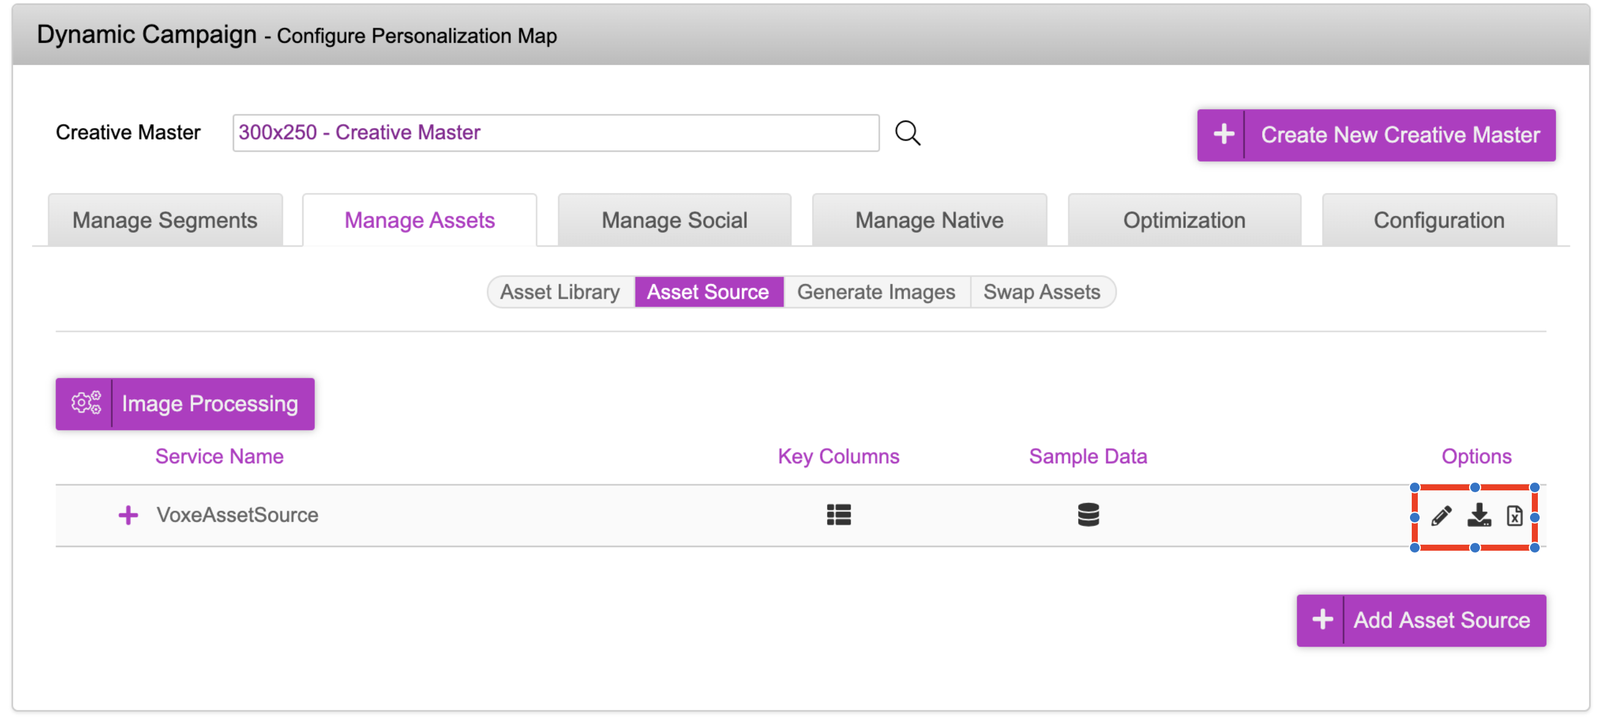
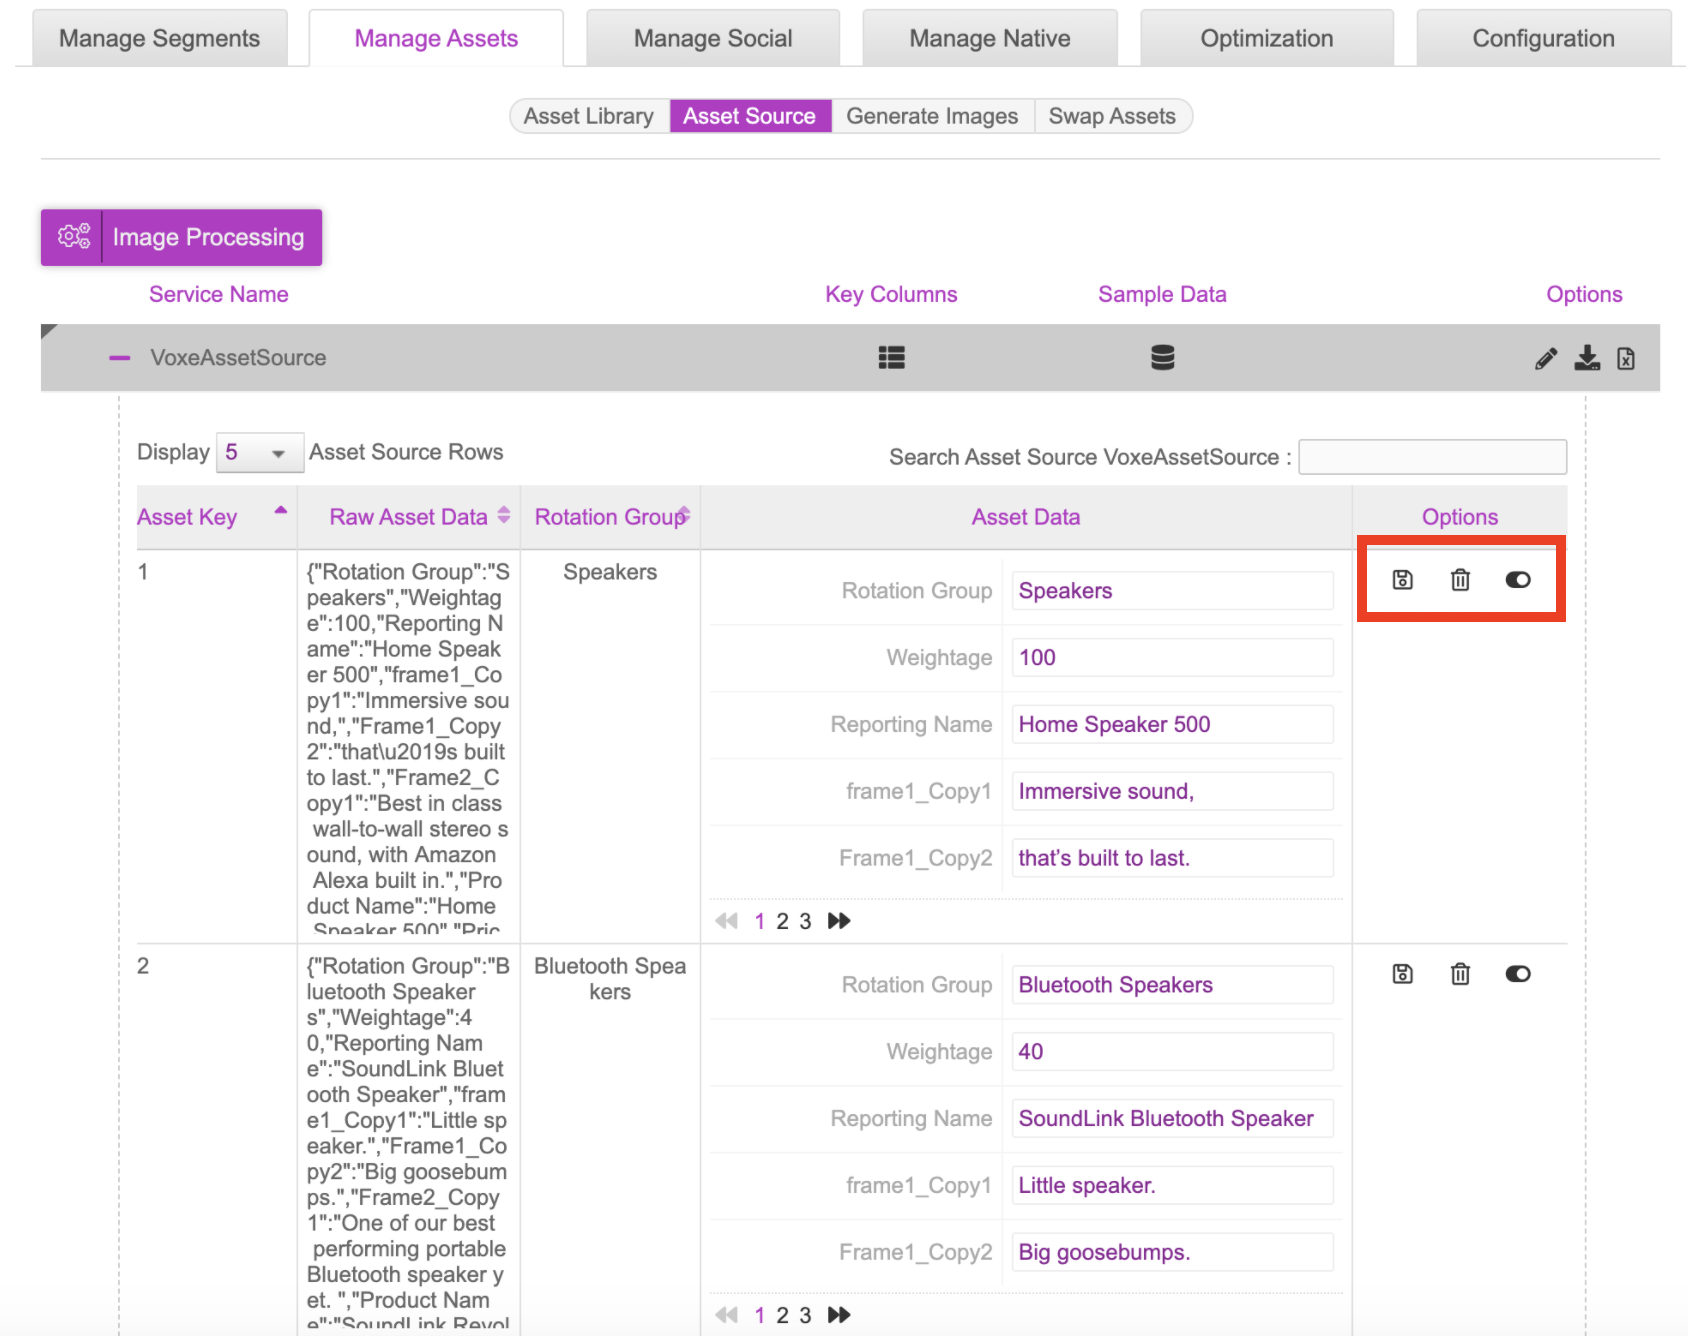
You can view the asset source in the dashboard by clicking onto the plus icon. In this section you’re able to update, delete and deactivate rows here. Any changes made here will be reflected in real time so the creative versions being served will always be the most up to date.
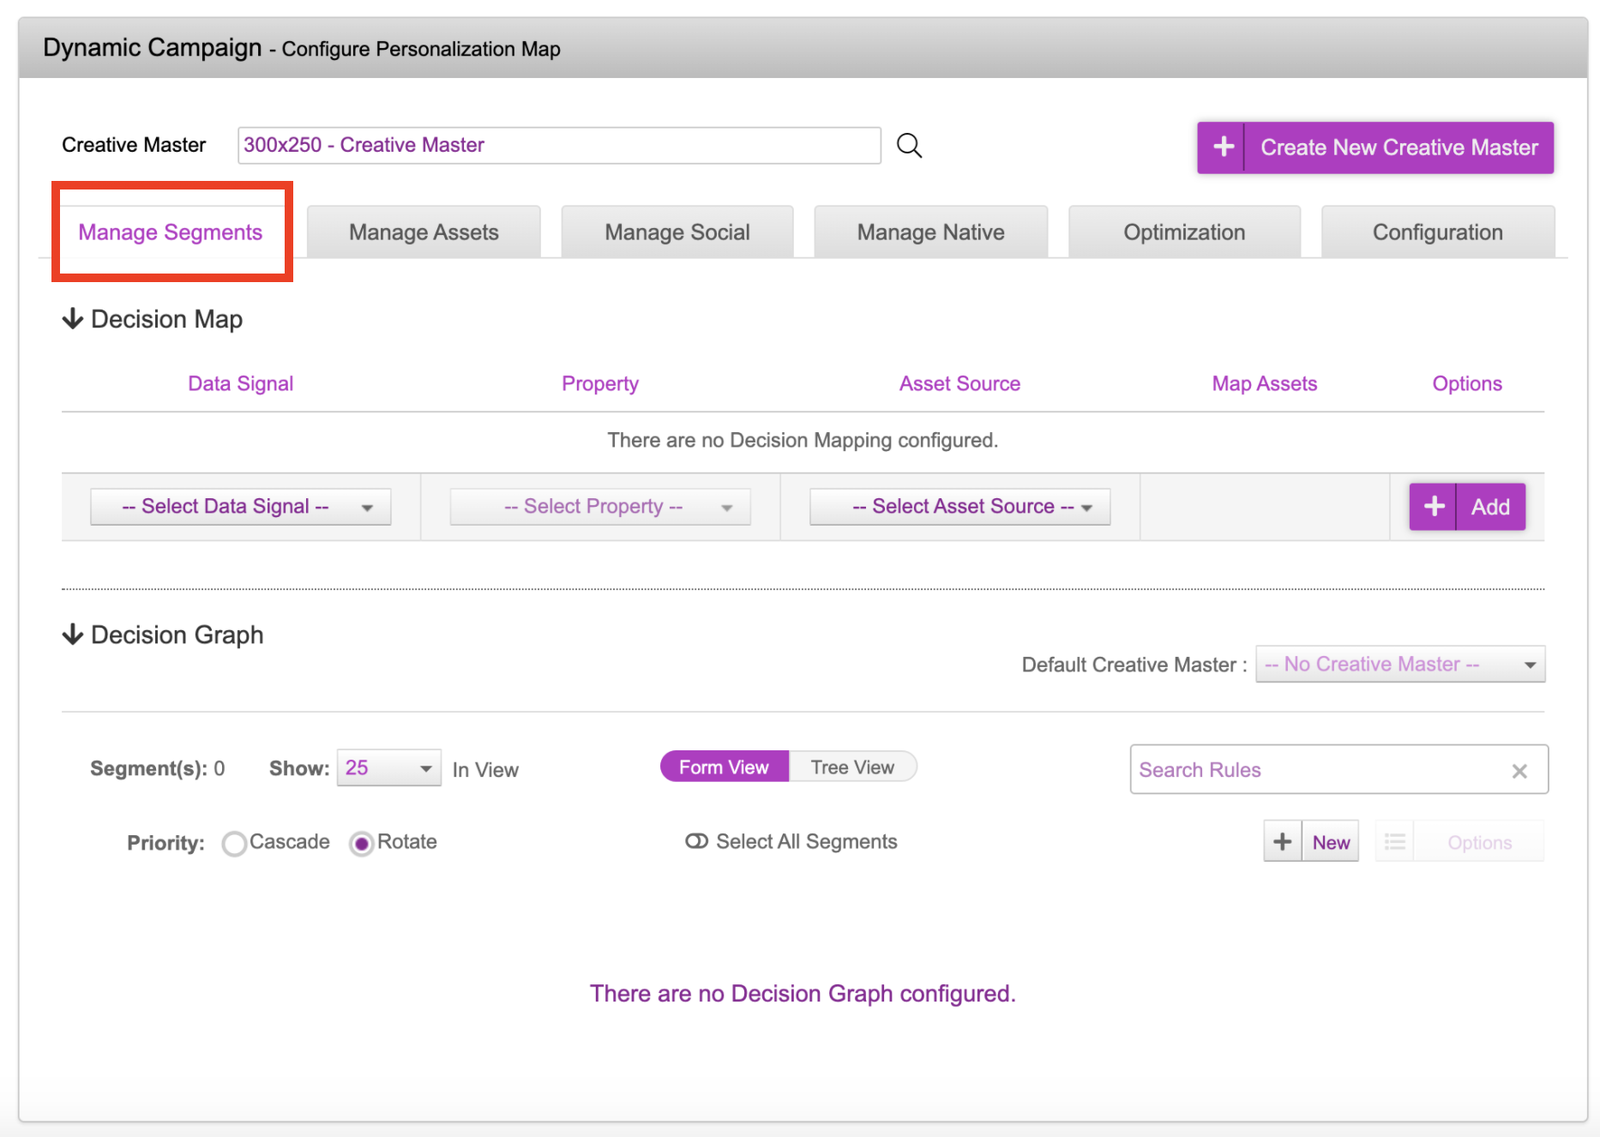
In the next section, we will look at the Decisioning tools available. Once you’re done with the Asset Source part of the platform, click onto the ‘Manage Segments’ tab to take you to the decisioning engine.