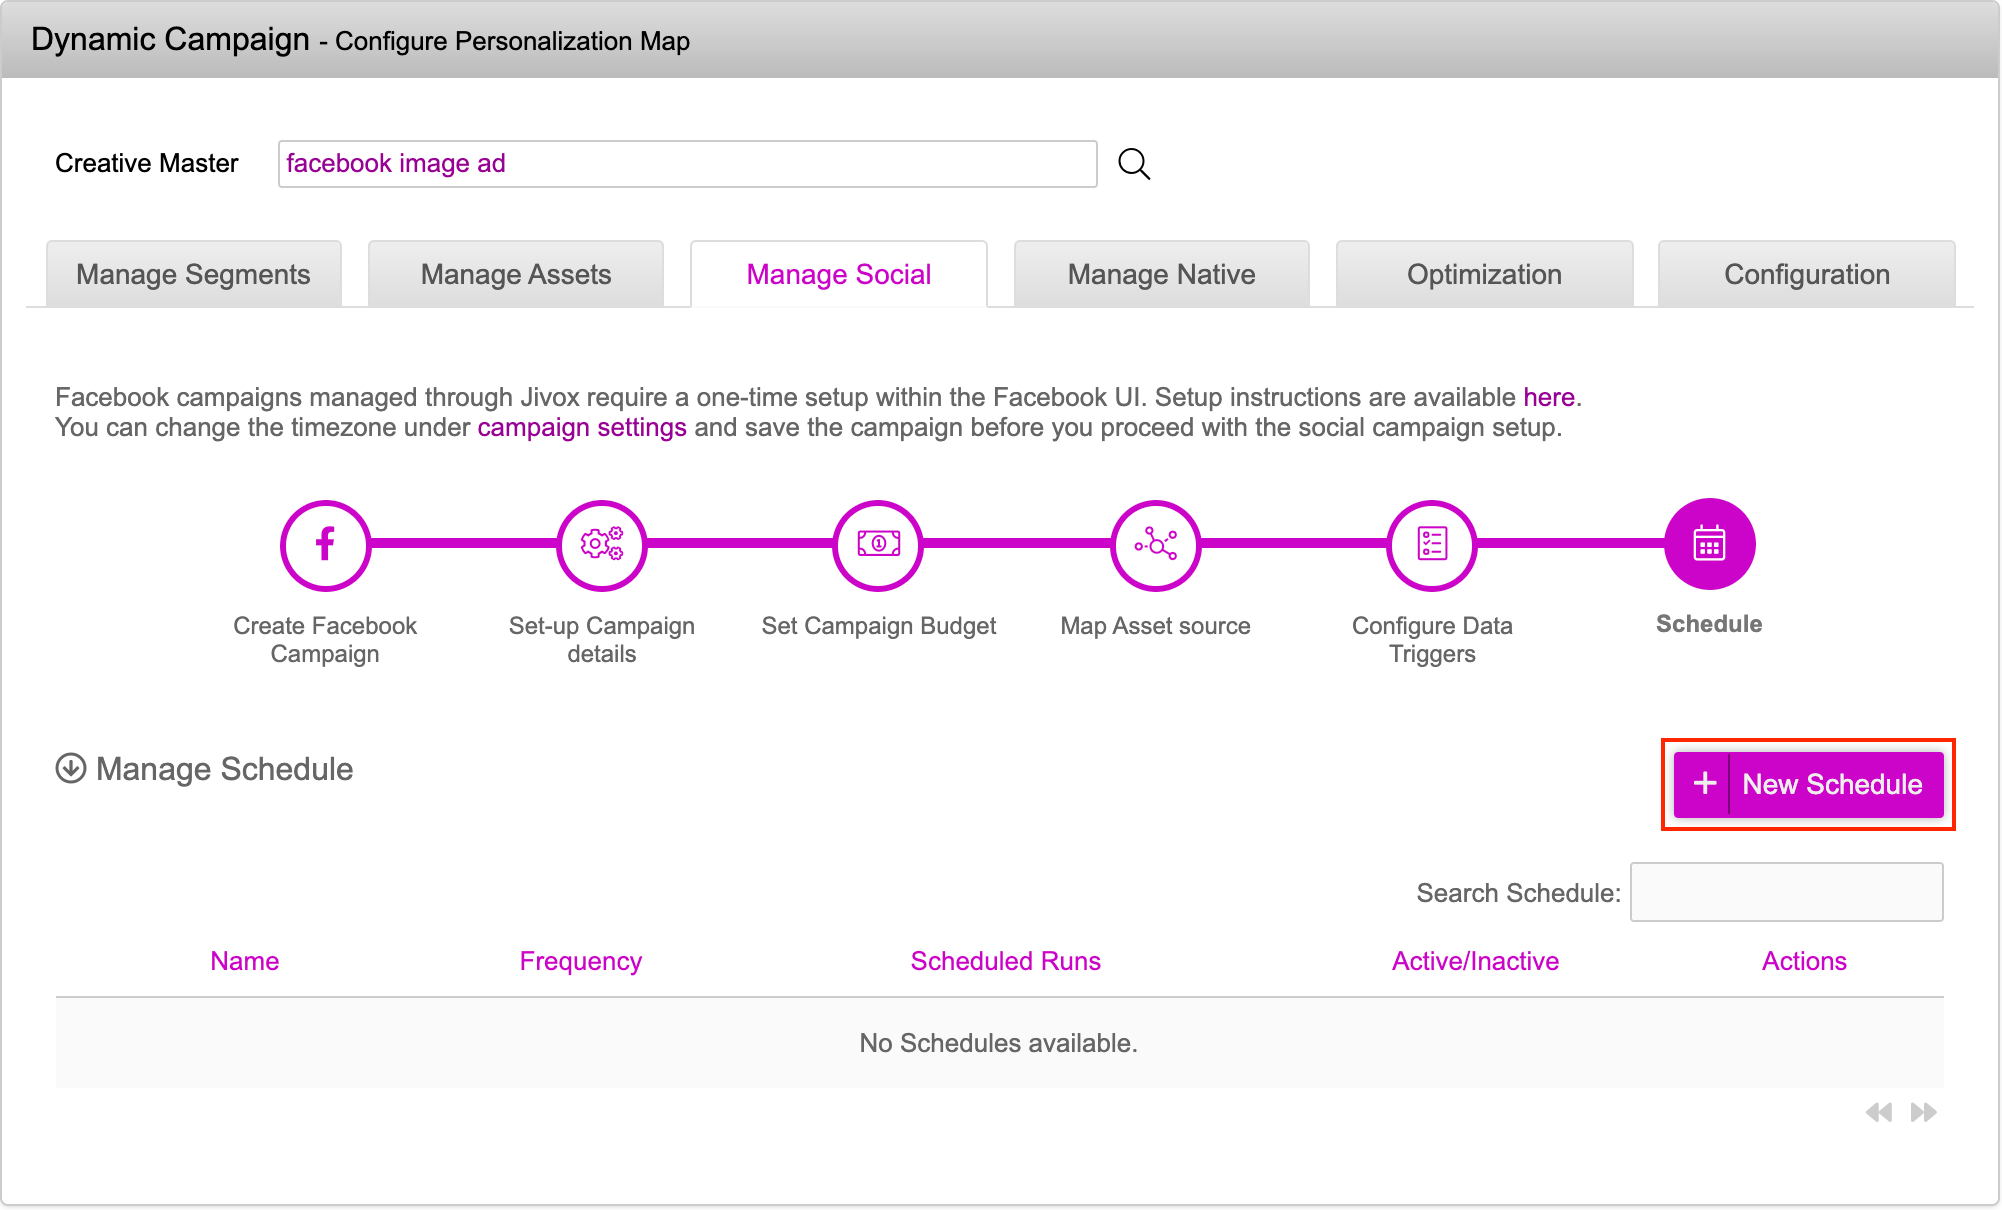
Once the triggers are successfully configured, we can set a schedule to run the campaign from the Schedule screen.
The scheduler will enable or disable the published ads based on the set contextual triggers. To set the schedule, click on the New Schedule button.
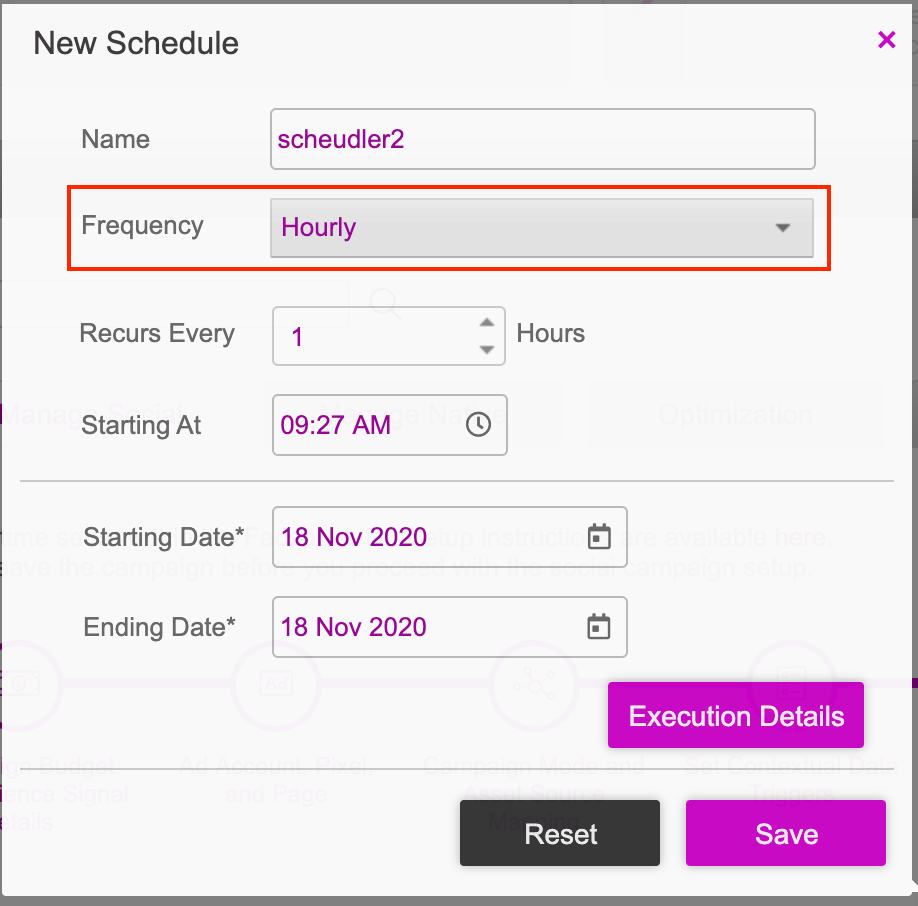
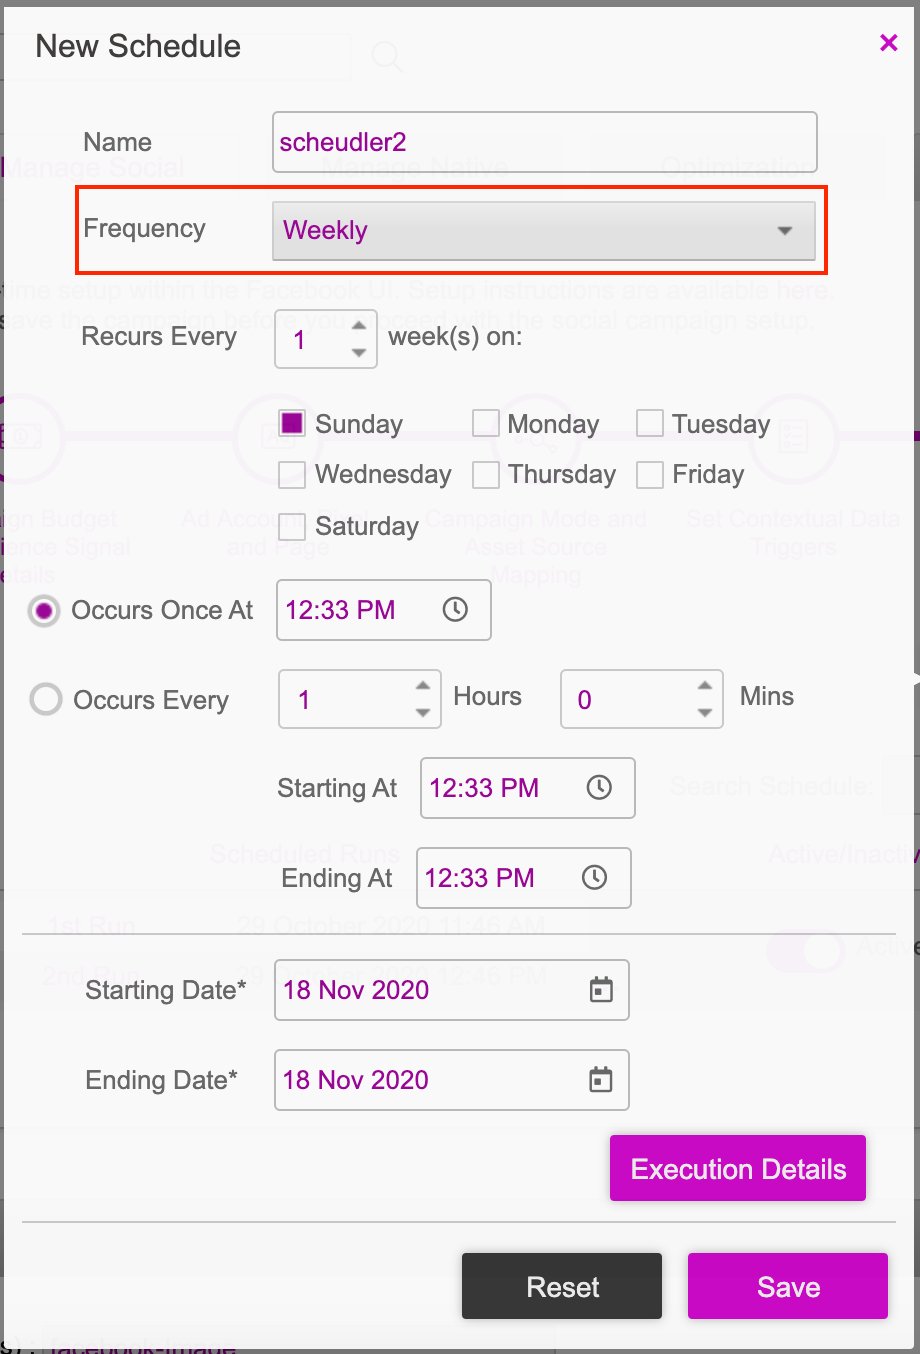
Enter the values in the fields based on the Frequency required: Hourly, Daily or Weekly. The table shown below lists the frequency scheduler options.
Frequency | Description |
|---|---|
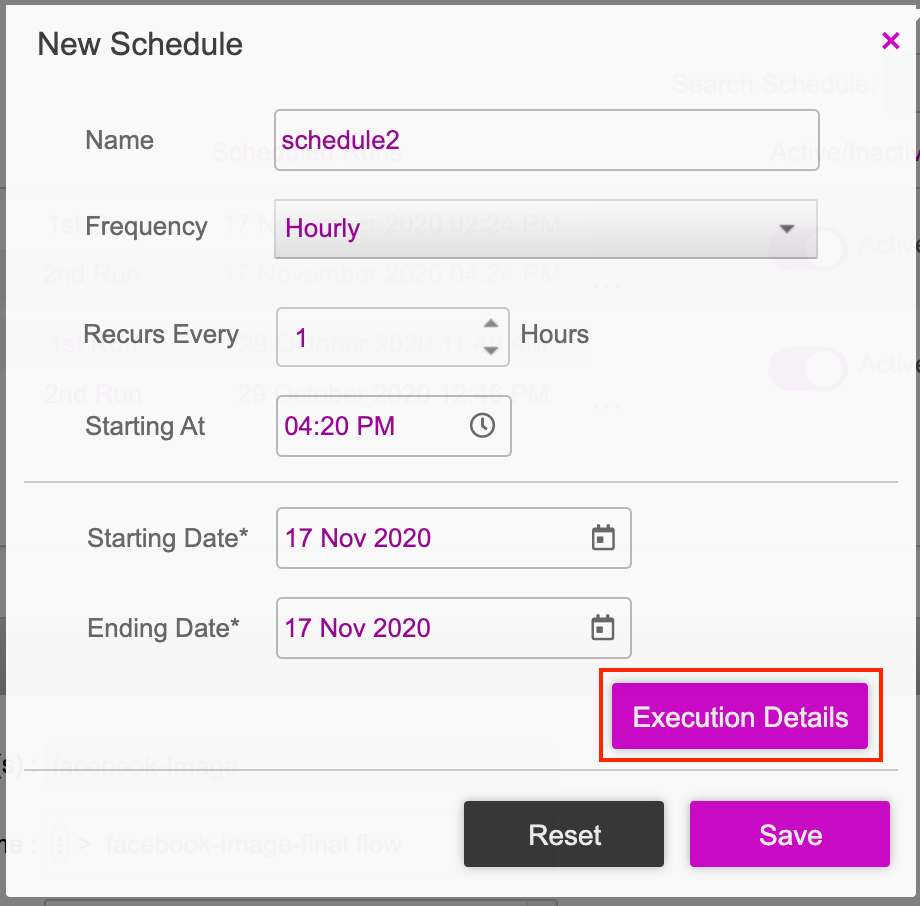
Hourly | The hourly scheduler allows the user to run the triggers after every x hours for any number of days based on the start and end day provided. Name - Enter a name for the scheduler. Frequency - Enter a number to run the scheduler every x hours. If you enter frequency as 6, then the scheduler will run every 6 hours. The default value is 1. Recurs Every - Enter in hours. If you enter 2, then the scheduler will run every 2 hours. Starting At - Enter the time at which you want to trigger the scheduler. The scheduler will start at the time mentioned. Starting Date - Enter the date on which you want the scheduler to start. Ending Date - Enter the date on which you want the scheduler to end. |
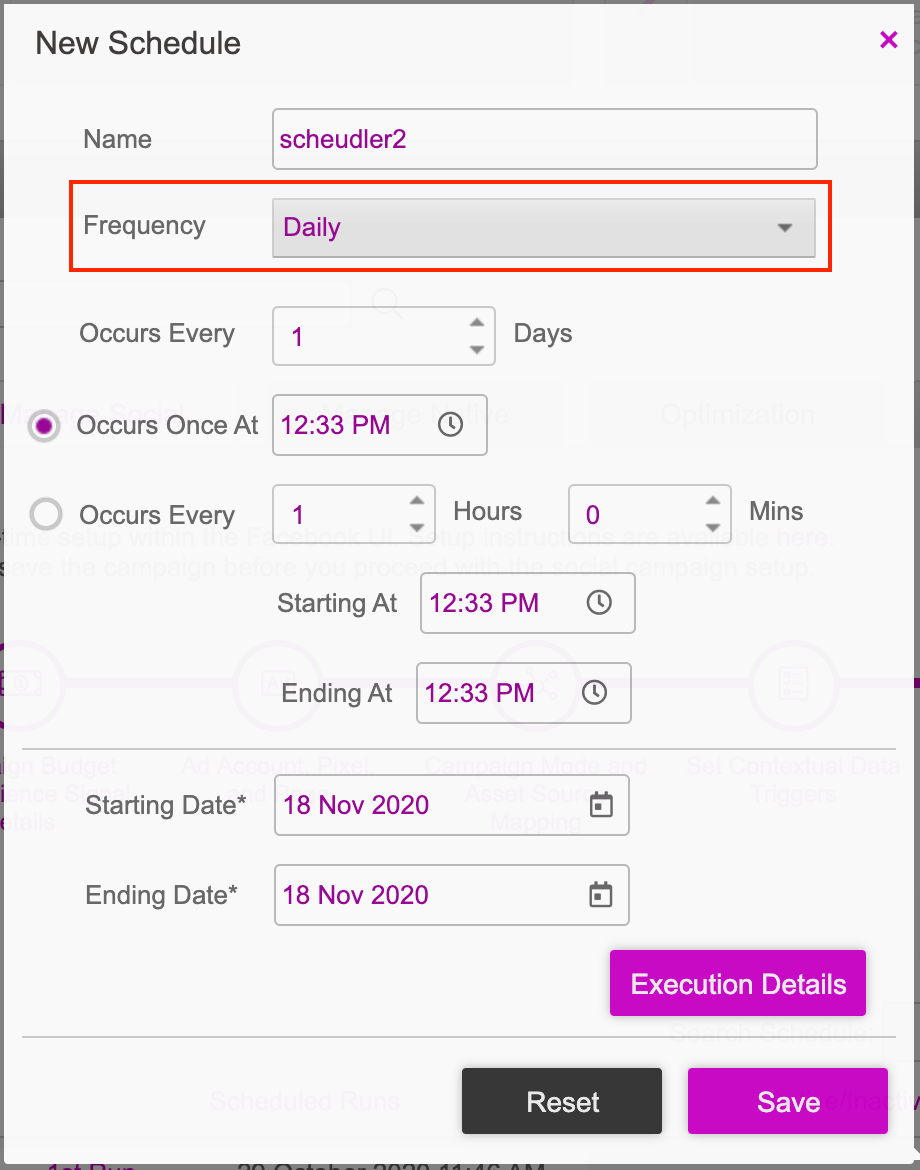
Daily | The daily scheduler allows users to run the job after every x days for a given start and end date. You have the options of running the scheduler once a day or more than once a day. Occurs Every (Days) - Enter a number to run the scheduler for the number of days mentioned. If you enter 1, then the scheduler will run once in a day. Occurs Once At - Enter the time to start at and run the scheduler once every day. Occurs Every (Hours, Mins) - Enter the frequency at which you want the scheduler to run. If you enter 2 hrs and 15 mins, then for every 2 hours 15 minutes, the scheduler will run based on the starting at and ending at time specified. Starting At - Enter the time at which you want to trigger the scheduler. The scheduler will start at the time mentioned. Ending At - Enter the time at which you want to end the scheduler. The scheduler will end at the time mentioned. Starting Date - Enter the date you want the scheduler to start on. Ending Date - Enter the date you want the scheduler to end on. |
Weekly | The weekly scheduler allows users to schedule the job every week or every x weeks. Users can select the weekdays on which the scheduler should run. The occurs once and occurs every x hours options indicate if the scheduler has to be run once or more than once on the selected weekdays. Recurs Every week(s) - Enter a weekday to run the scheduler . If you select Sunday and Monday, then the scheduler will run every Sunday and Monday. Occurs Once At - Enter the time at which to start and run the scheduler once on the selected weekday(s). Occurs Every (Hours, Mins) - Enter the frequency at which you want to run the scheduler. If you enter 2 hrs and 15 mins, then after every 2 hours and 15 minutes, the scheduler will run based on the configured starting at and ending at time. Starting At - The scheduler will start at the time configured. Ending At - The scheduler will end at the time configured. Starting Date - Enter the date on which you want the scheduler to start. Ending Date - Enter the date on which you want the scheduler to end. |
After setting the scheduler, click the on Execution Details button.
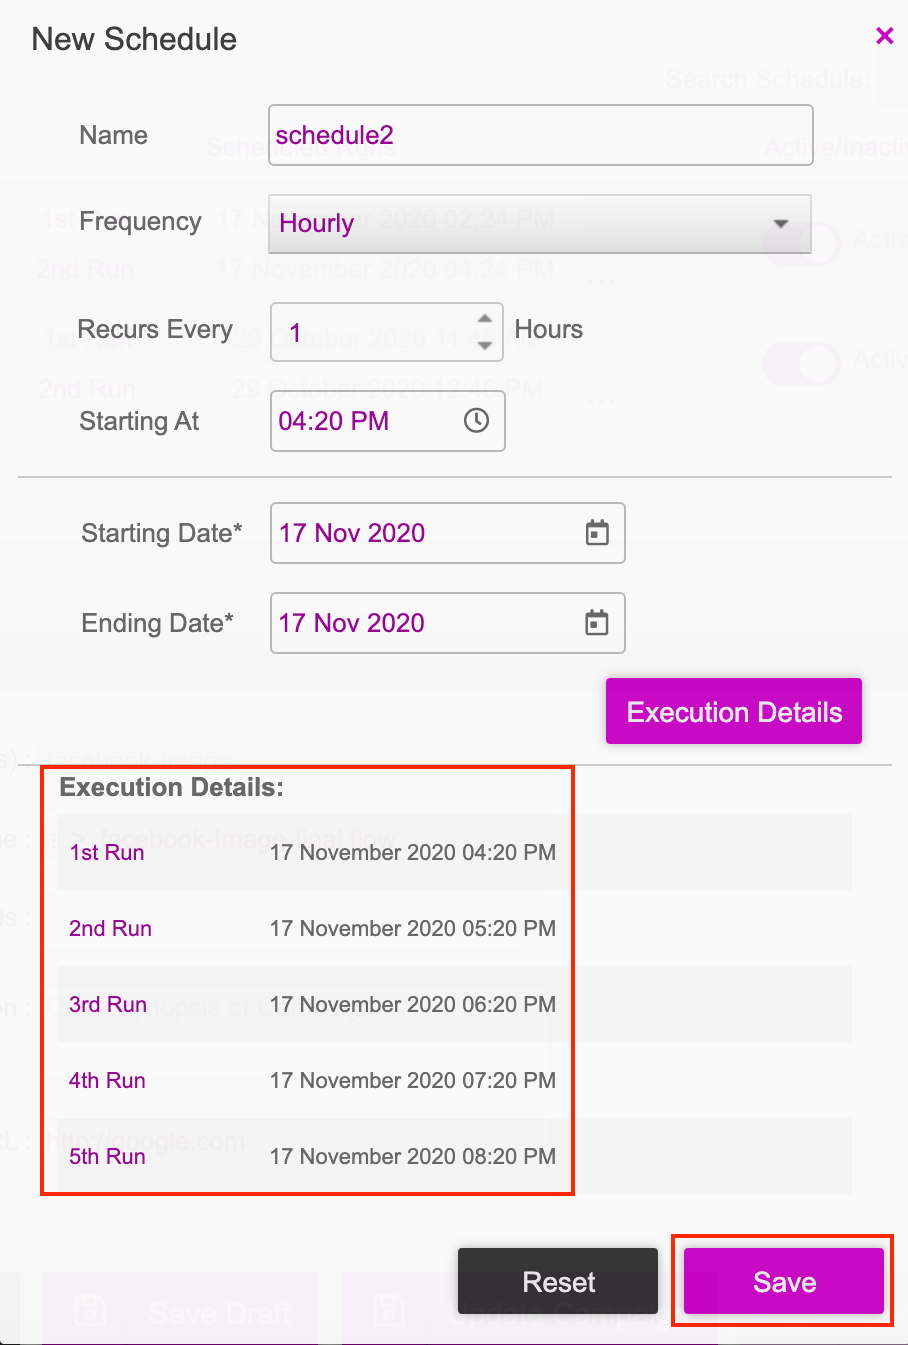
The execution details are displayed including the frequency and time of the scheduled runs. Click on the Save button to save your schedule.
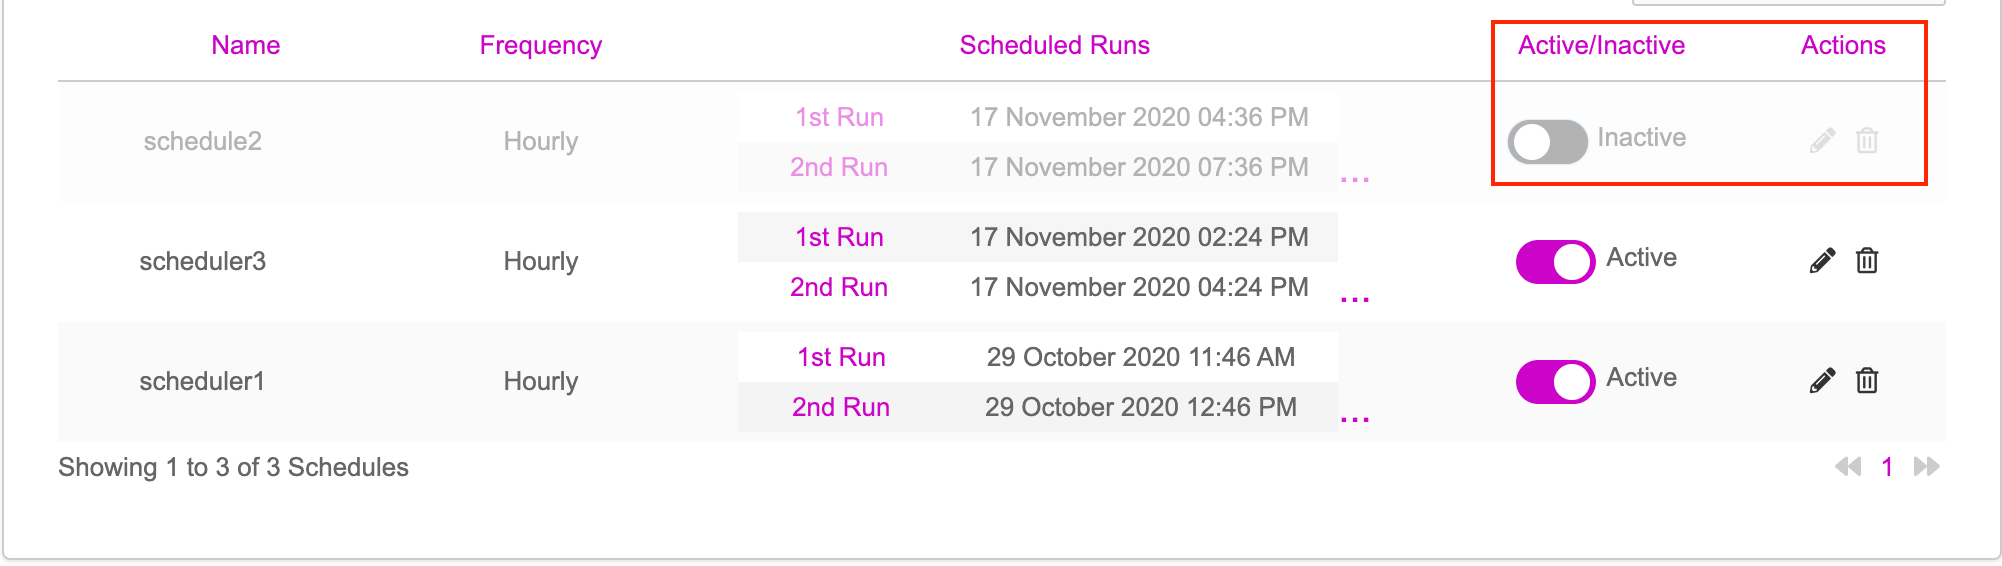
The saved schedule will be listed under the Manage Schedule section.
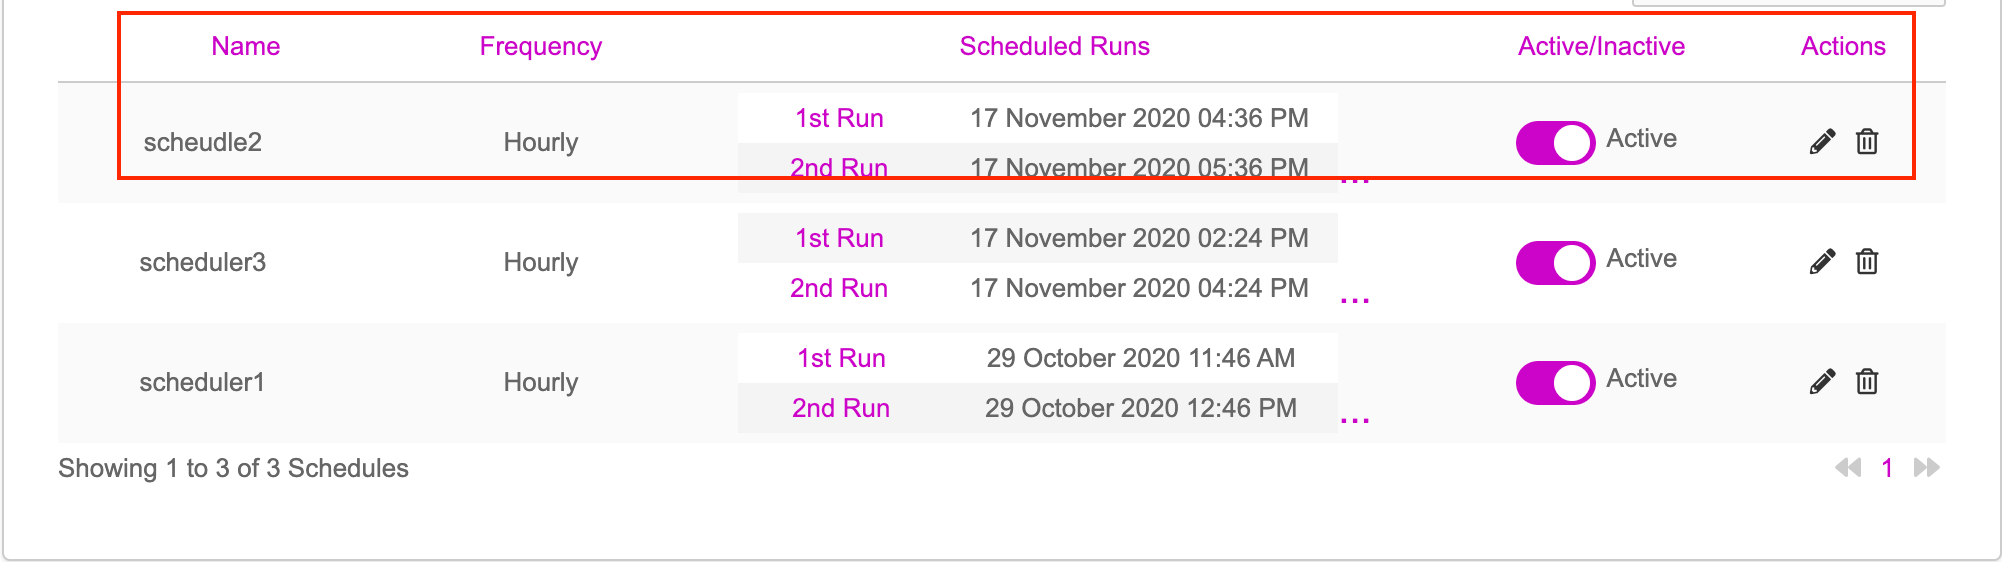
You can edit, delete, activate or pause any schedule that is listed in the table. Click on the edit or delete icons below the Actions column to edit or delete a schedule. To pause or deactivate a schedule, click on the toggle button below the Active/Inactive column. This will deactivate the selected schedule.