Jivox IQ allows you to edit an existing Facebook/Instagram campaign that has already been created in Facebook Business Manager. You can now push new AdSets and Ads into an existing campaign, leveraging Jivox's unique creative production tools.
In order to get started with this, follow steps 1 to 5 in Creating a New Campaign before returning here. This will take you as far as the Facebook Setup.
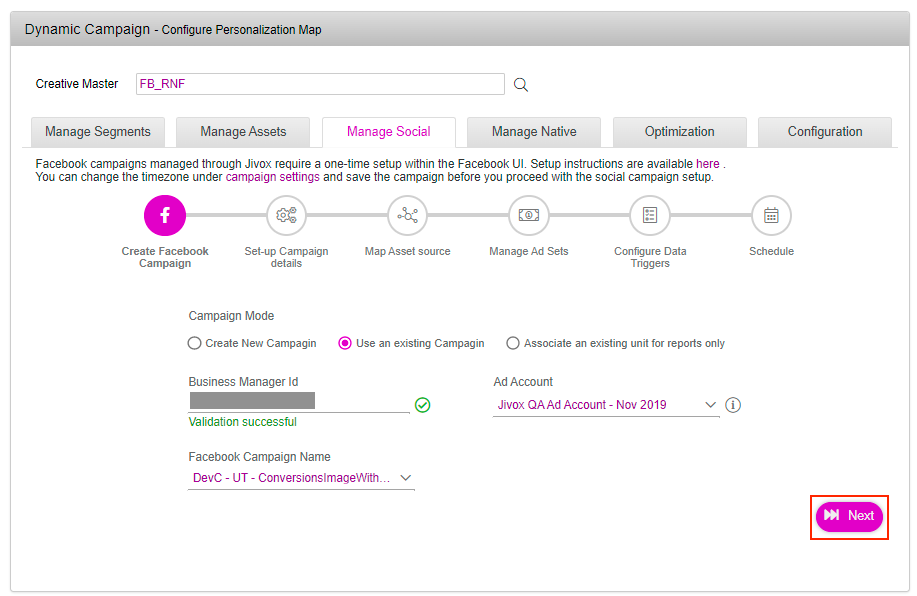
1- Under Create Facebook Campaign select the Use an existing Campaign option. Proceed to enter your Business Manager ID, select your Ad Account from the dropdown and choose your existing Facebook Campaign Name from the drop-down. Once completed, click on Next.
2- The next step to setup campaign details gets enabled.
For the Campaign mode Use an existing Campaign, the Buying Type and Campaign Objective fields are disabled (greyed out). The values populated are taken from the Campaign created in Facebook Business Manager.
3- Once you enter the details, click on the Validate Configuration button. This will validate the details entered.
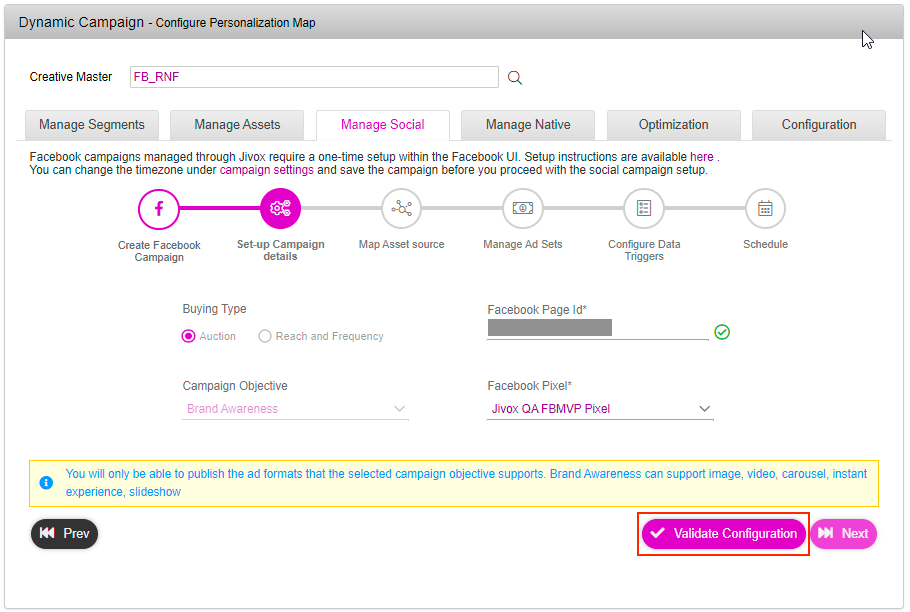
The Next button gets enabled only after you validate the configuration. At this point, the platform checks if the entered Facebook pixel ID and page ID are valid.
4- Click on the Next button.
Refer to the following sections for the next steps: