Once we have created a Facebook ad campaign, set the campaign entities, mapped the asset source and published the campaign, we can configure contextual data triggers. These triggers act as a set of rules and conditions for the ads. Let's start.
Go to the Configuration screen. Before setting the triggers, change the timezone based on the region for which the triggers are set. You can set the timezone under Campaign Settings.
The timezone setting step is recommended before starting with social campaign setup.

The default timezone is set to EST. To modify the timezone, use Time as the data signal, with time zone as the property and choose the value from the dropdown.
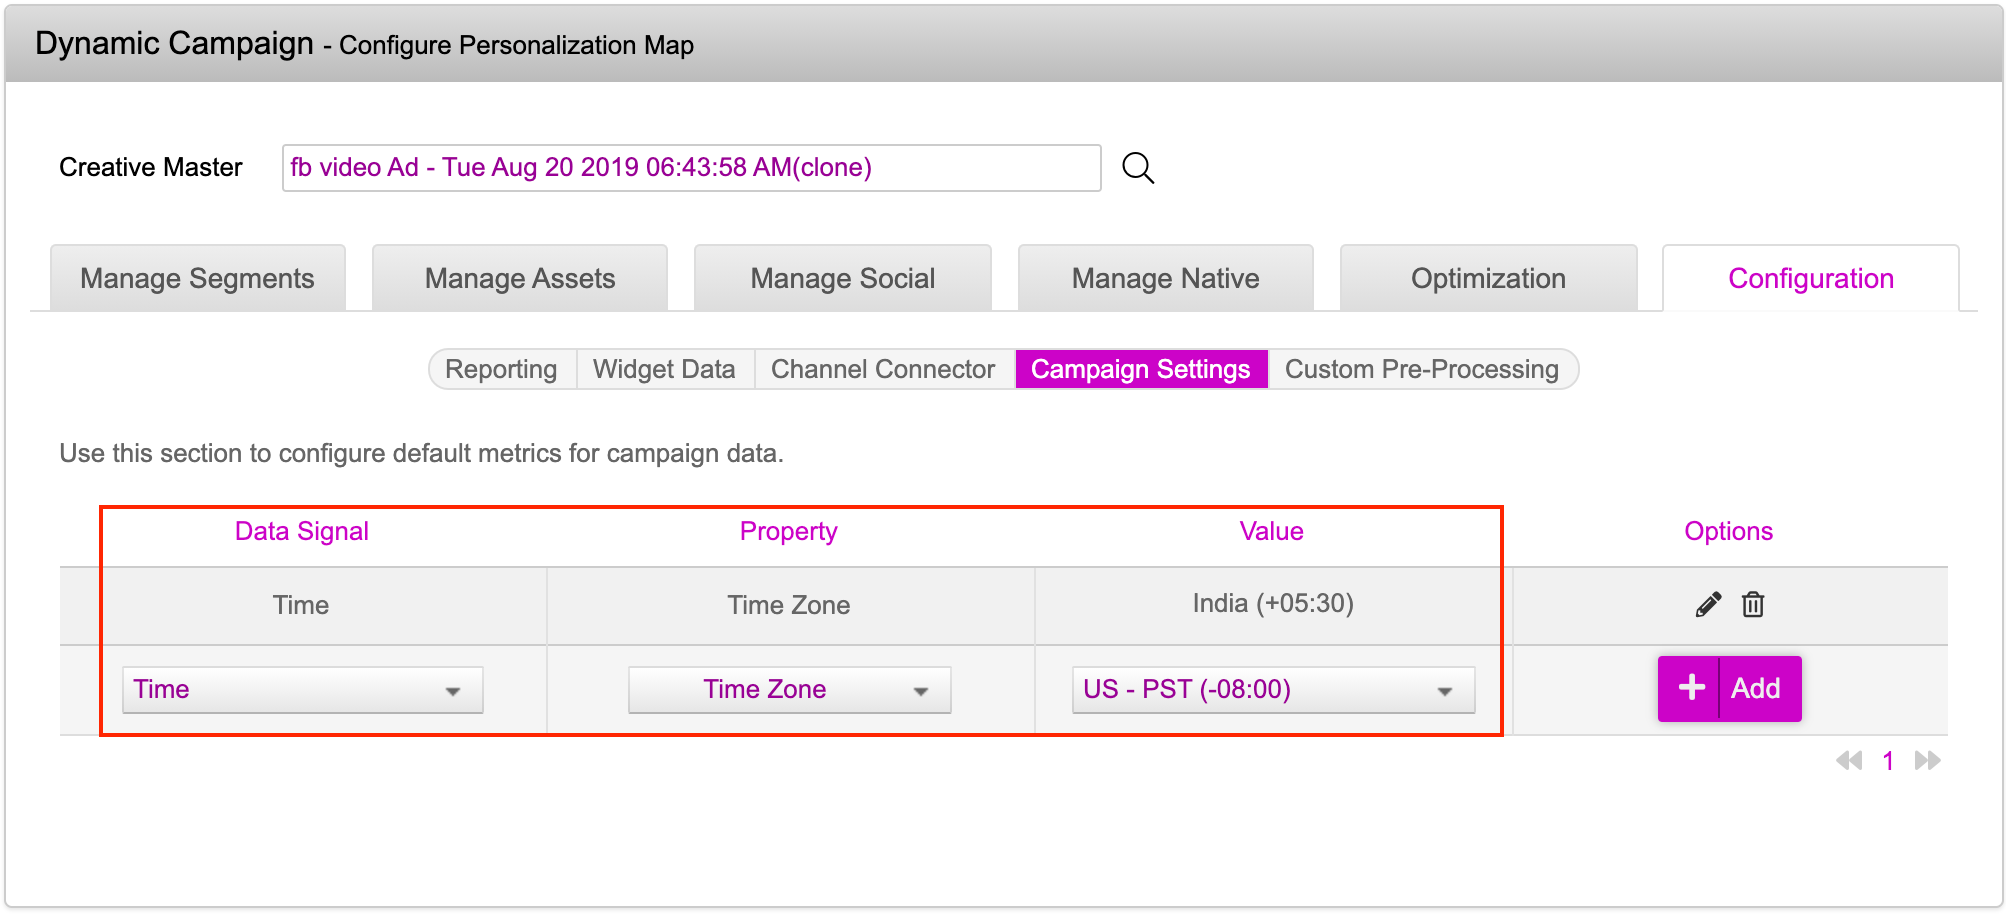
Under the Options column, the time zone can be edited or deleted using the edit or delete icons. Scroll down the screen to find the Update Campaign button. This will take you to the campaign listing page. From here, click on the Edit button against that campaign for which you have set the timezone values and proceed to the Contextual Data Triggers setup.
You will see the set timezone values, only after you update and edit the campaign.
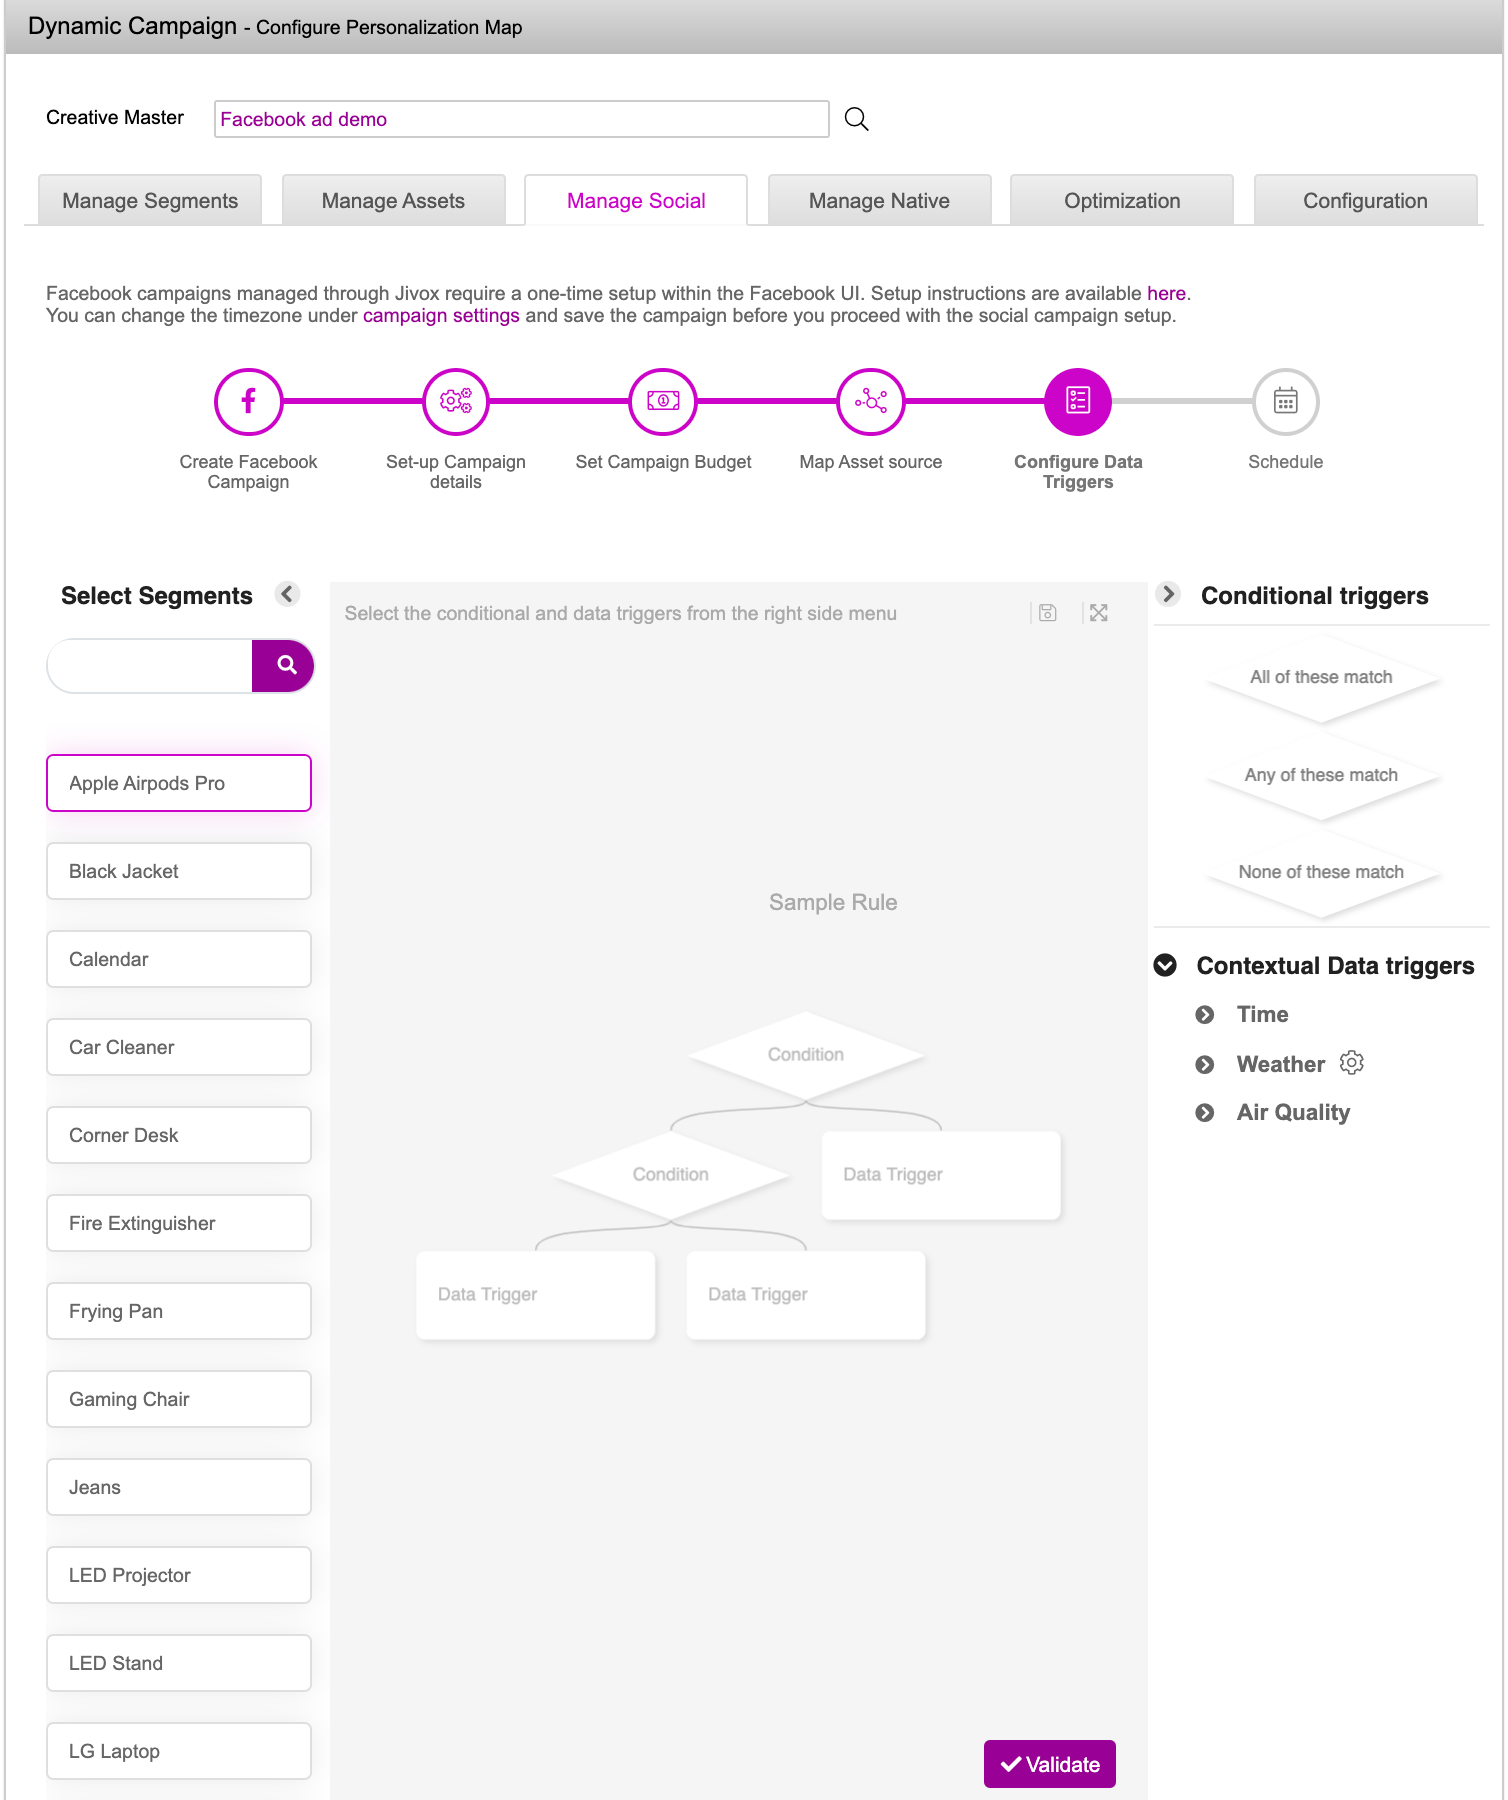
On the Configure Data Triggers screen, you will see the following components. The table shown below lists the functionalities on the set contextual triggers screen.
Components | Description |
|---|---|
Segments | This is the list of values in the Rotation Group column of the asset source. You can select more than one segment at a time if they have the same rules and conditions. |
Rule Builder | Allows you to create the rule set for the selected segment. |
Contextual Data triggers | The right-hand side menu displays the contextual triggers that are available on the platform. The available contextual triggers are: Time of Day, Day of Week, Weather triggers (Weather conditions, weather forecast, weather parameters) and Air quality triggers (LAQI, BAQI, dominant pollutants, air quality forecast) |
Conditional Triggers | Allows you to create conditional nodes in the rule builder. Choose from All of these, Any of these or None of these. |
All the ad sets are listed under the Select Segments column (ie. all the values that you see in the rotation group column of your asset source). To set up a conditional trigger, select an ad set for which you want to set the trigger. You will have two nodes, Conditional Nodes which are rhombus shaped boxes and Trigger Nodes which are rectangular boxes.

On clicking on any one of the conditional triggers from the menu, the node gets highlighted and subsequently gets added to the rule builder. For example, if we click on All of these match, the conditional node gets added to the rule builder. Every node in the rule builder has a hook at the bottom. When you hover your mouse over the hook of the parent node, two dotted boxes appear, so you can choose the child node type.

Let us create a child node to set the conditional data triggers. Child nodes can be created in the following ways: Using the dotted boxes (i.e. hooks), using the right-hand-side menu.
Creating a child node using the dotted boxes: When you hover your mouse over on the hook, two dotted nodes i.e. conditional node and the trigger node, appear. Click on the type of child node you want to create. An empty node is created. Click on the conditional trigger you want to use for this node.

**Creating a child node using the right-hand-side menu:**Right click anywhere on the node directly or click on the three dots of the parent node. Select the appropriate option to either create a condition node or a trigger node.

Conditional Trigger Name | Type | Operators |
|---|---|---|
Time | Time of Day | Greater Than, Less Than, Greater Than equal to, Less than equal to |
Time | Day of Week | Equal To |
Conditional Trigger Name | Type | Service Frequency | Operators |
|---|---|---|---|
Weather | Weather Conditions | Current, Forecast 24 hours upto 120 hours | Is Not Contained in, Is Contained In |
Weather | Temperature | Current, Forecast 24 hours upto 120 hours | Greater Than, Less Than, Greater Than Equal To, Less Than Equal To |
Weather | Relative humidity | Current, Forecast 24 hours upto 120 hours | Greater Than, Less Than, Greater Than Equal To, Less Than Equal To |
Weather | UV Index | Current, Forecast 24 hours upto 120 hours | Greater Than, Less Than, Greater Than Equal To, Less Than Equal To |
Weather | Feels Like Temperature | Current, Forecast 24 hours upto 120 hours | Greater Than, Less Than, Greater Than Equal To, Less Than Equal To |
Weather | Wind Speed | Current, Forecast 24 hours upto 120 hours | Greater Than, Less Than, Greater Than Equal To, Less Than Equal To |
Weather | Wind Direction | Current, Forecast 24 hours upto 120 hours | Greater Than, Less Than, Greater Than Equal To, Less Than Equal To |
Weather | Wind Gust | Current, Forecast 24 hours upto 120 hours | Greater Than, Less Than, Greater Than Equal To, Less Than Equal To |
Weather | Pressure | Current, Forecast 24 hours upto 120 hours | Greater Than, Less Than, Greater Than Equal To, Less Than Equal To |
Weather | Visibility | Current, Forecast 24 hours upto 120 hours | Greater Than, Less Than, Greater Than Equal To, Less Than Equal To |
Weather | Dew Point | Current, Forecast 24 hours upto 120 hours | Greater Than, Less Than, Greater Than Equal To, Less Than Equal To |
Weather | Cloud Cover | Current, Forecast 24 hours upto 120 hours | Greater Than, Less Than, Greater Than Equal To, Less Than Equal To |
Weather | Precipitation Probability | Current, Forecast 24 hours upto 120 hours | Greater Than, Less Than, Greater Than Equal To, Less Than Equal To |
Conditional Trigger Name | Type | Service Frequency | Operators |
|---|---|---|---|
Air Quality | LAQI | Current, Forecast 24 hours upto 96 hours | Greater Than, Less Than, Greater Than Equal To, Less Than Equal To |
Air Quality | BAQI | Current, Forecast 24 hours upto 96 hours | Greater Than, Less Than, Greater Than Equal To, Less Than Equal To |
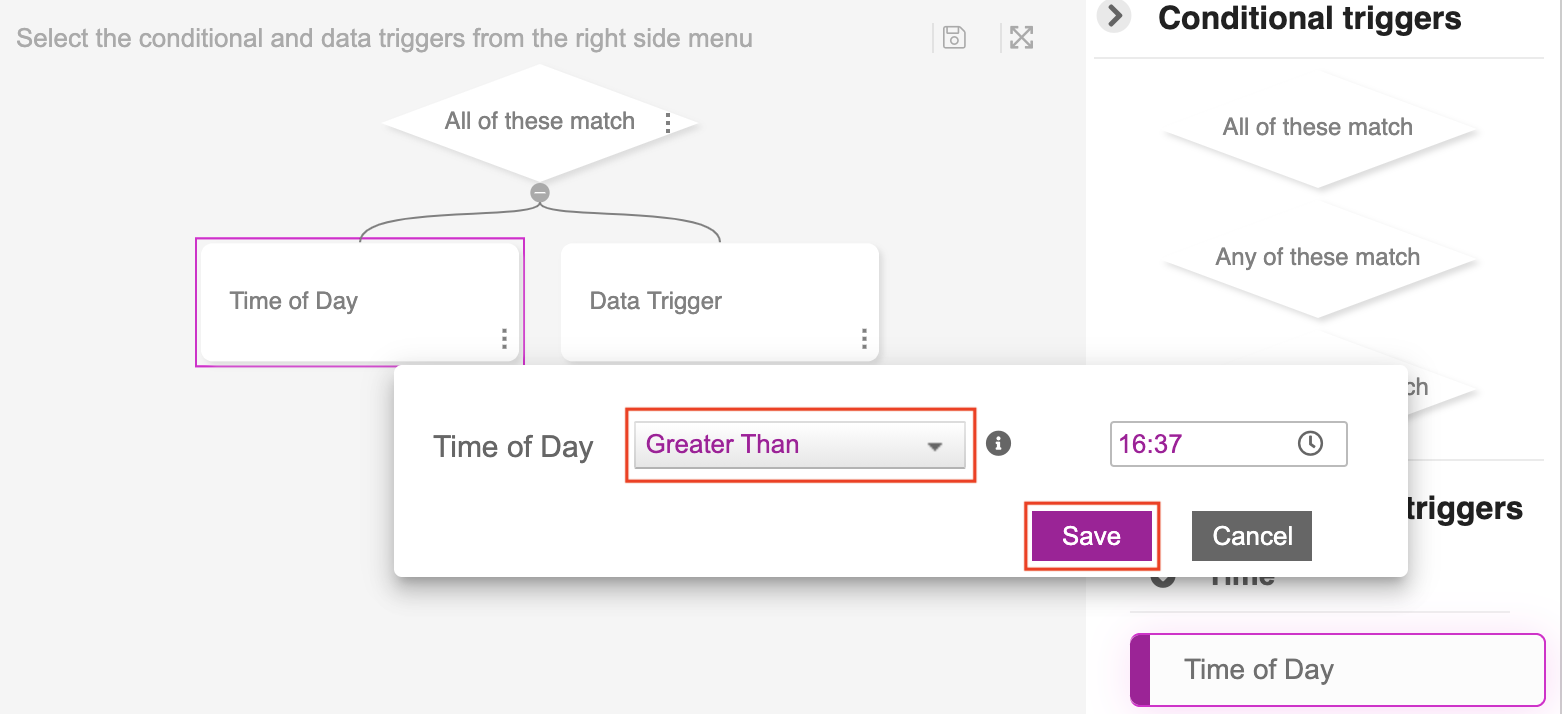
Enter the value (we selected 16:37), after selecting the desired operator. In this case, Greater Than is selected. Click on the Save button. The selected conditions will show up in the node. You can apply as many data triggers related to Time, Weather, and Air Quality.
To add a weather data trigger, set the data trigger as Weather Conditions, the weather forecast as Forecast 48 hours now and set the weather condition as Is Contained In.
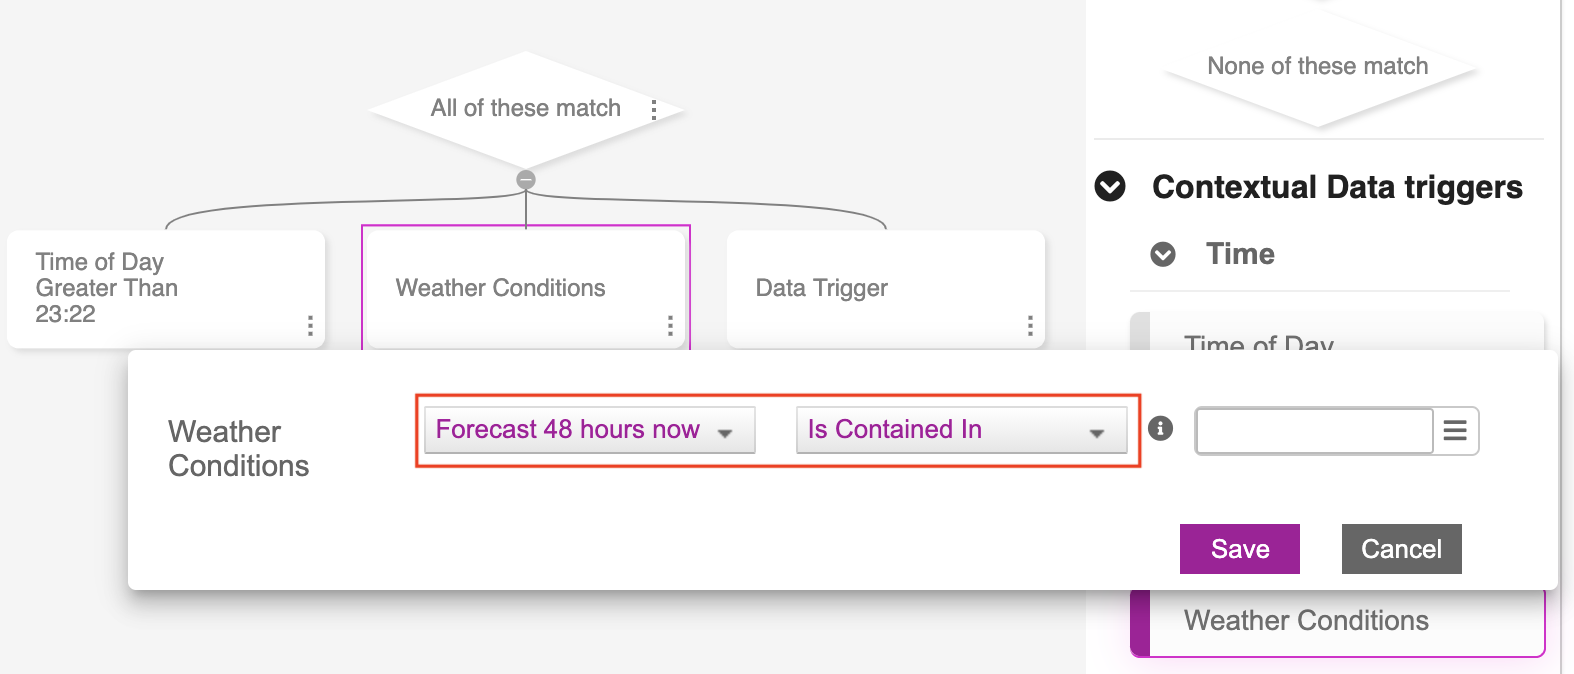
Next, click on the hamburger icon in the empty text box at the end. A list of weather categories will be displayed.
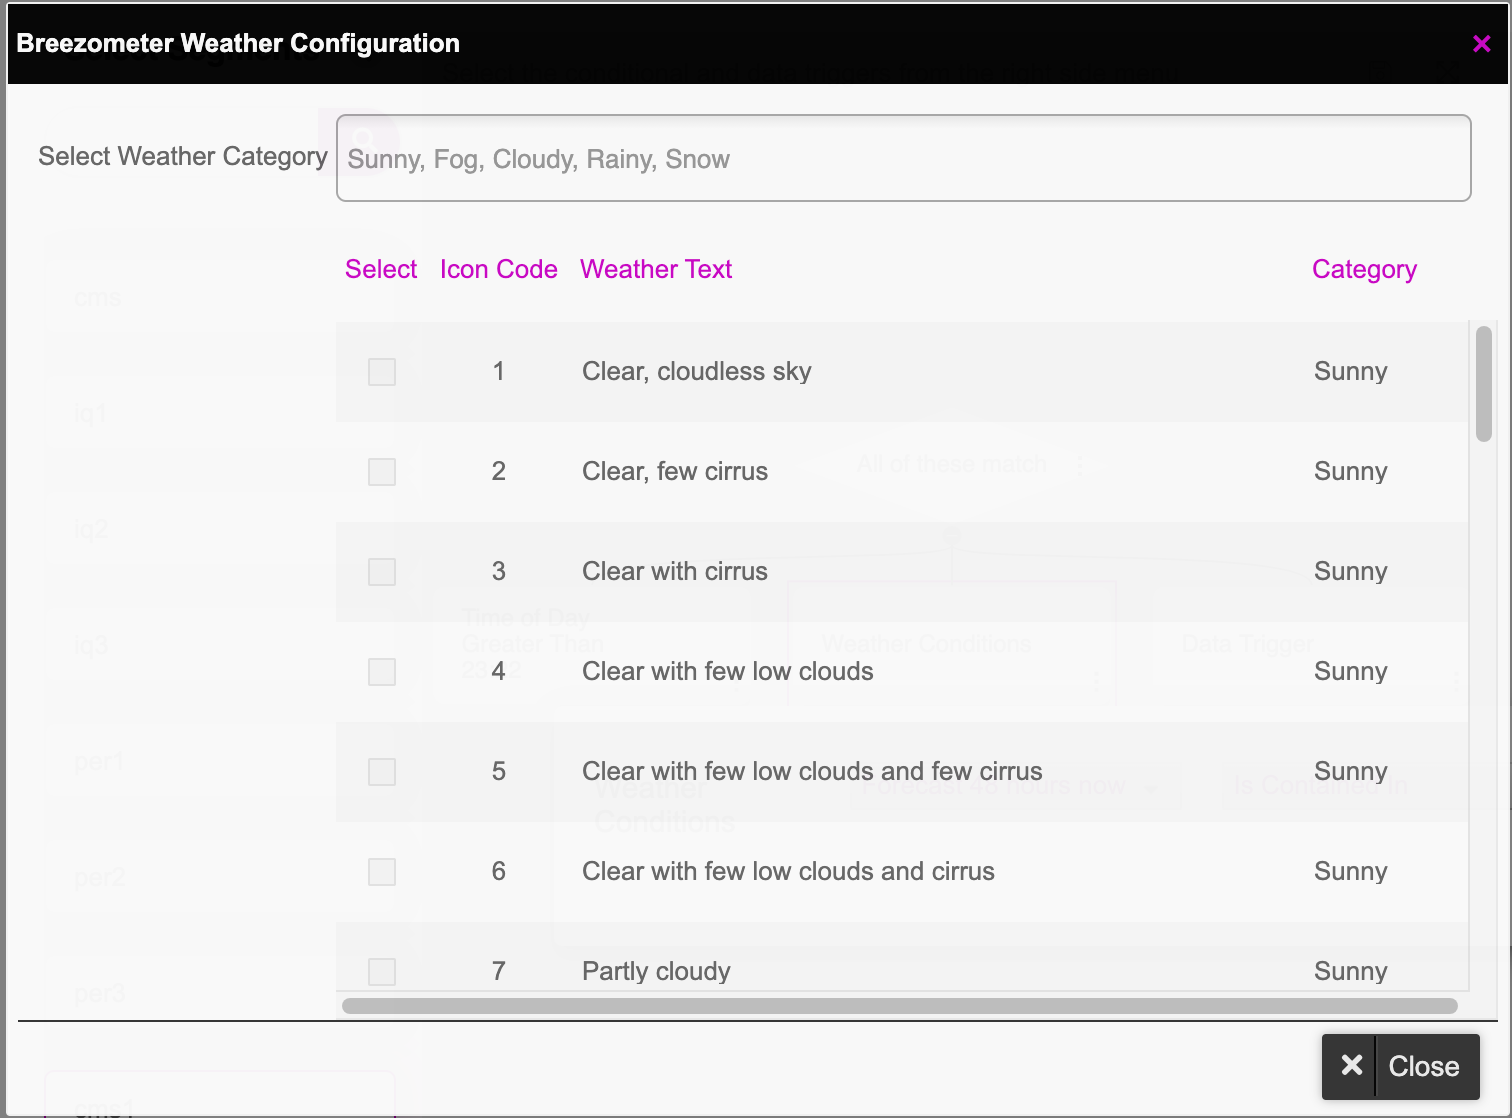
Enter one of these categories: Sunny, Fog, Cloudy, Rainy, Snow. When you click the text field, a list of weather categories will be displayed.
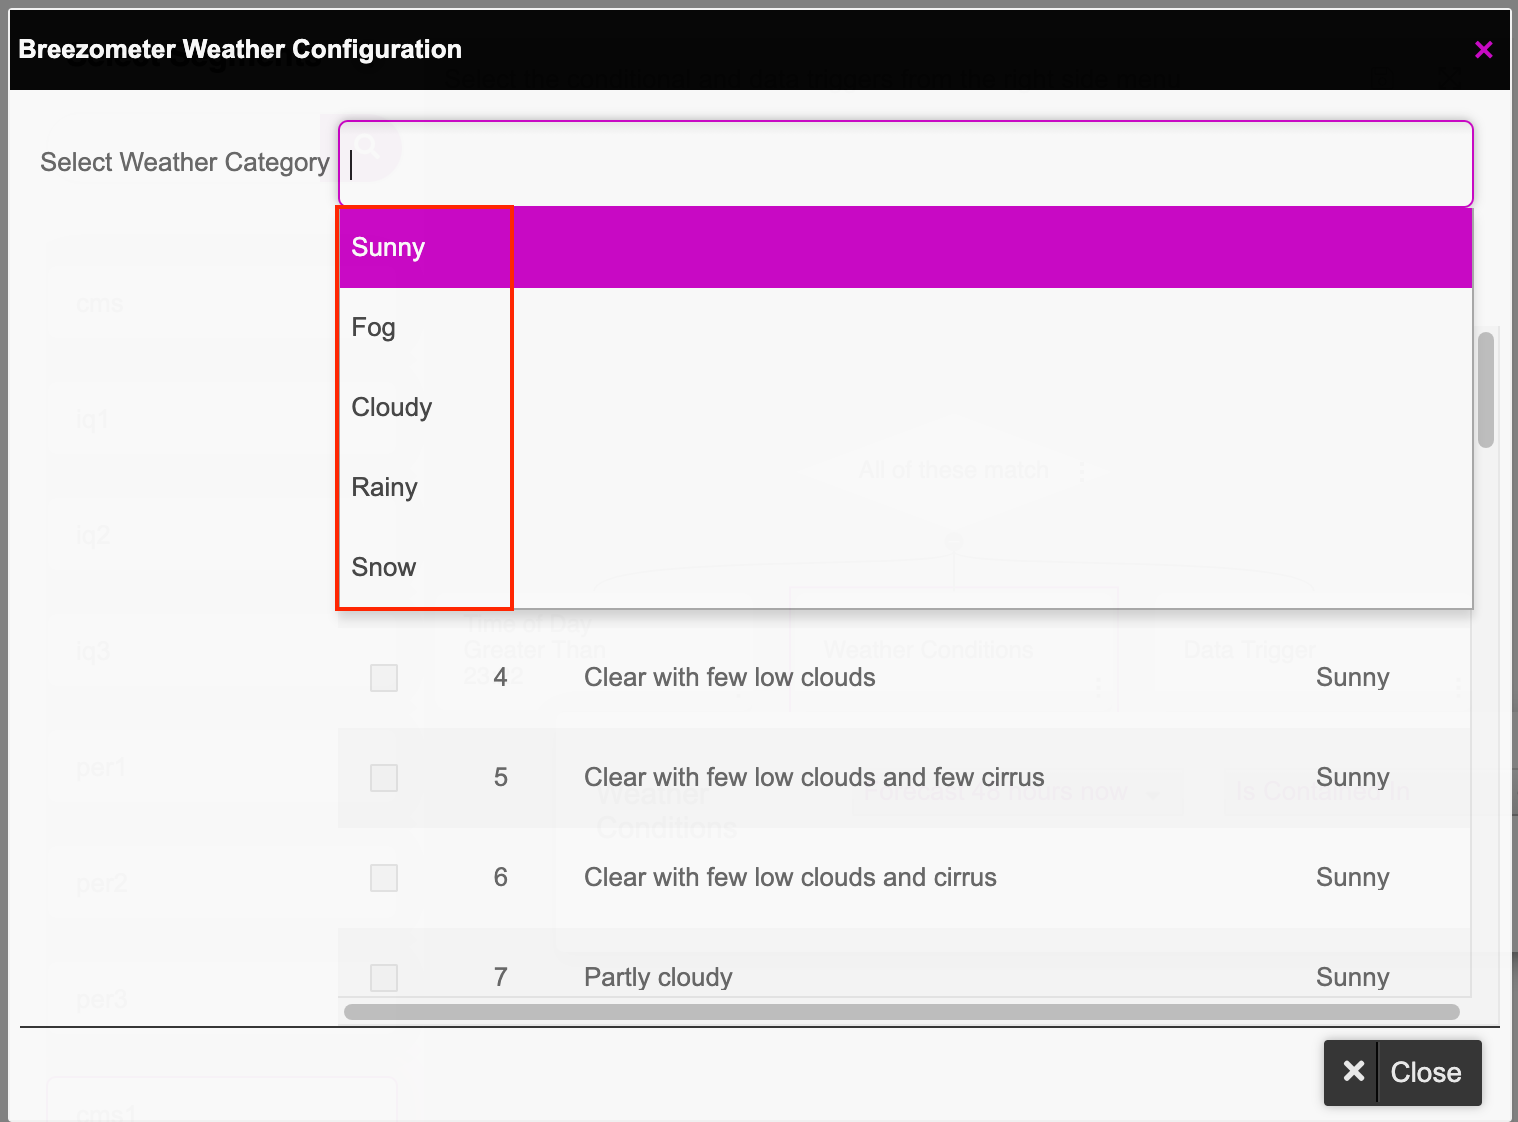
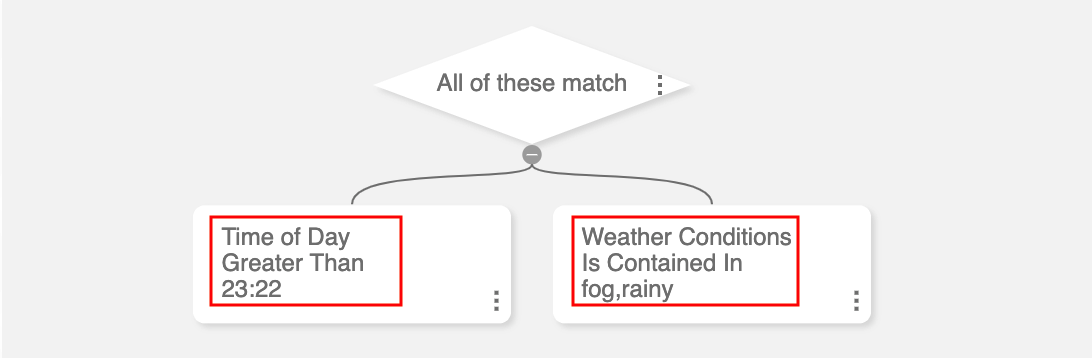
Select one or more categories. For example, we selected Fog and Rainy. All the conditions under Fog and Rainy get selected. Click on the Close button.

The configured data triggers will now be displayed in the rule builder.
Once a trigger is set, it can be copied, edited and deleted. The table shown below will explain this in detail.
Option | Description |
|---|---|
Cut, Paste | To cut and copy a node:
|
Copy, Paste | To copy a node:
|
Edit | You can edit a node in two ways:
OR
|
Delete | You can delete a node in two ways:
OR
|
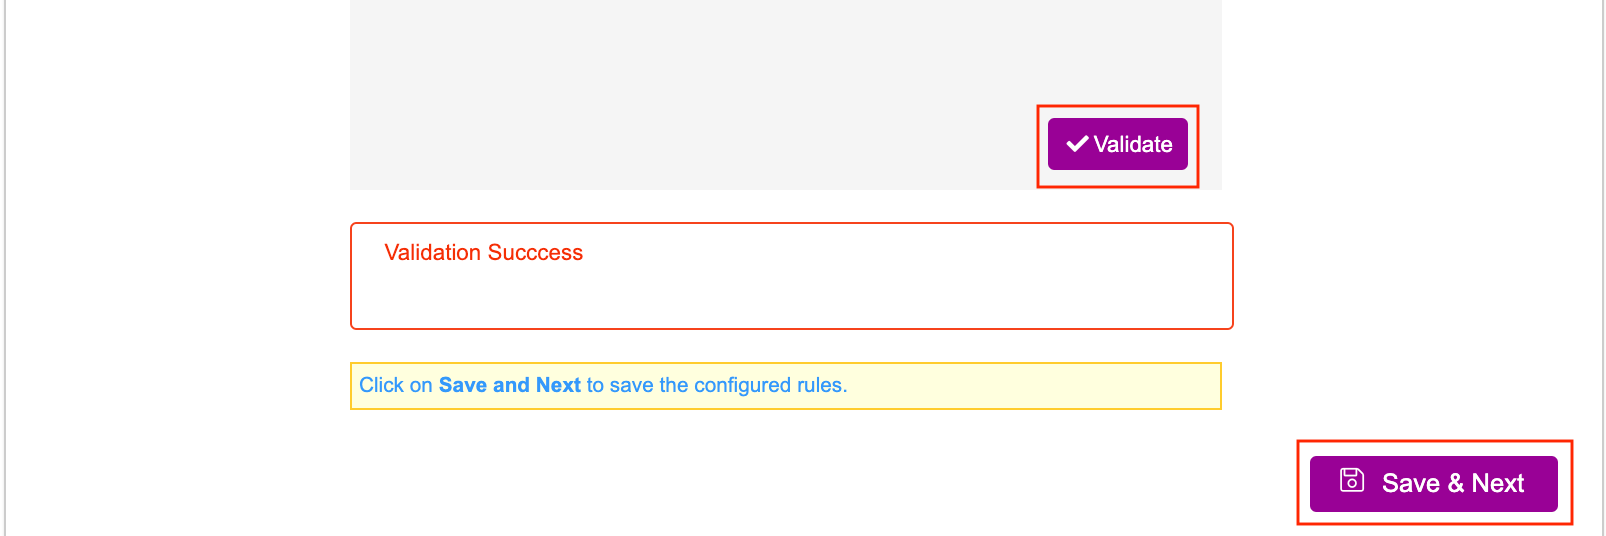
After setting the rule builder with the desired conditions and triggers, we need to confirm if all the nodes are connected. Click on the Validate button at the bottom of the screen. A message displaying Validation Success appears. Click on the Save & Next button to save the configured rule.