Let us now look into how we can configure Placement Asset Customisation in the Jivox platform.
Create a new Social ad with Image or Video as the ad unit type. To create a new Facebook Ad, refer to Creating a New Ad.
Once the ad has been created, create a Facebook campaign. This can be done by creating a dynamic campaign and then configuring the Facebook setup. For more details, refer to Creating a Facebook Campaign.
Next, we will set up campaign details. Under Setup Campaign Details', you will see the following options:
Buying Type: Select the Buying Type to meet your business goals. This is a method to pay for and target ads in your campaigns. This indicates how media is bought via Facebook. You have two options: Auction and Reach and Frequency.
Reach and Frequency: Select the Reach and Frequency option when your main objective is brand awareness and targeting a larger customer base.
Auction: Select Auction to target a specific audience base.
Placement: Select Facebook to publish the campaign only on Facebook. Select Facebook & Instagram to publish campaigns on both Facebook and Instagram.
If you are using Instagram placements in Placement Asset Customisation, then you have to choose Facebook & Instagram as the placement while creating a campaign.
Facebook Page ID - Enter the ID. This will be the ID of the Facebook Page.
Instagram Account: This field appears when you select Facebook & Instagram as the Placement type. Select the Instagram account where the campaign will be published.
Campaign Objective: It is the business goal associated with your campaign. The Campaign Objectives drop-down will be determined based on the selected Buying Type.
Facebook Pixel: Select the relevant pixel for Facebook.
Once the set up is complete, click on the Validate Configuration button.
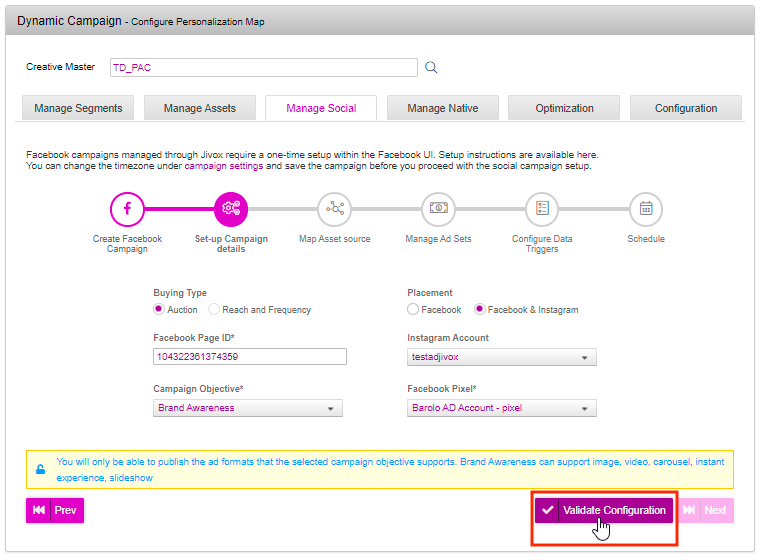
The next button gets enabled only after you click the Validate Configuration button. At this point the platform checks if the entered Facebook pixel ID and page ID are valid.
Click on the Next button.

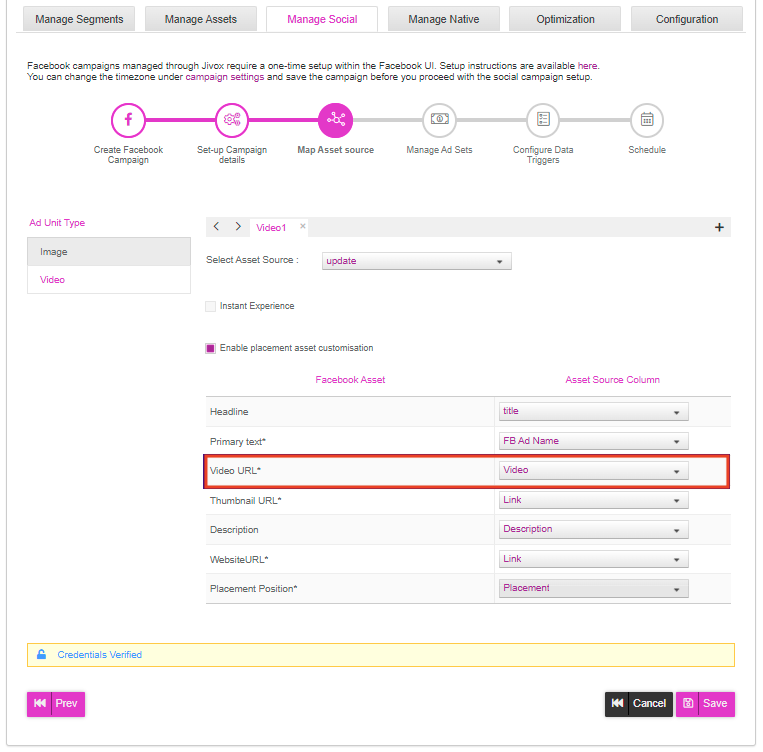
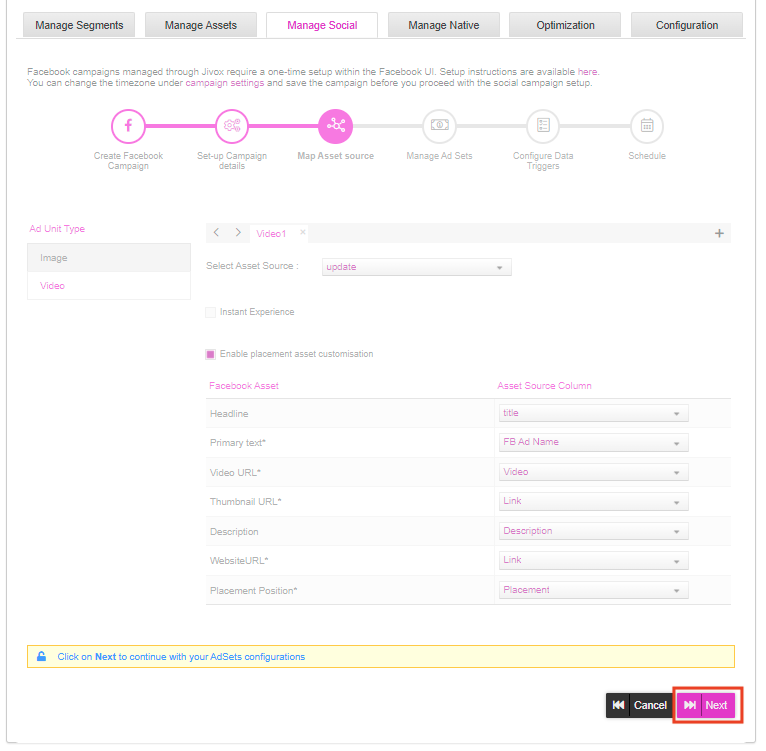
You will now see the map asset source page. Under Map Asset Source, you can map the asset source to the required Facebook components. You will find the following options on the Map Asset Source screen.
Ad Unit Type: This shows all the ad units selected when the ad was created.
Select Asset Source: This displays the asset sources available in the account.
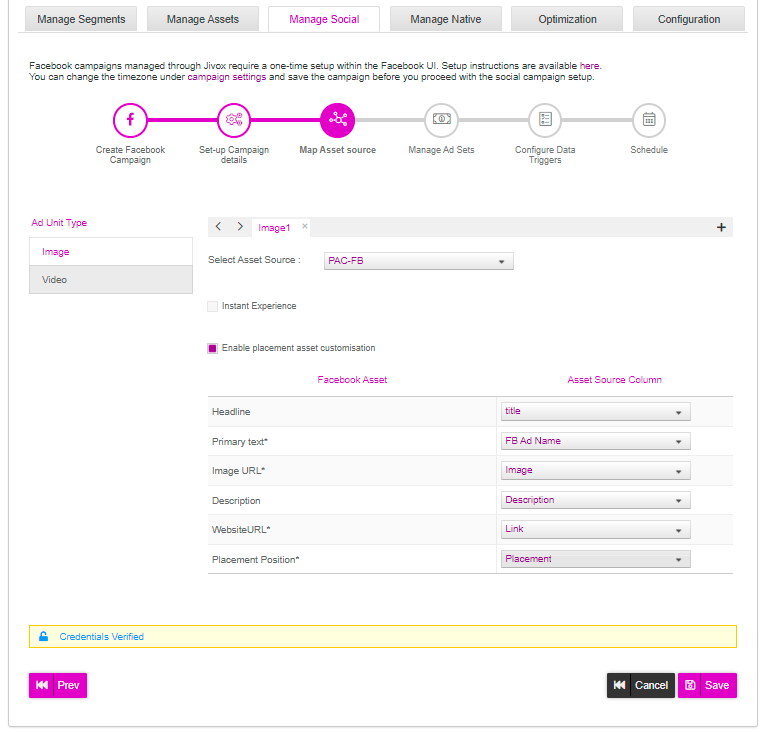
Enable placement asset customisation: This option allows you to customize the creative assets displayed in every placement for a given Facebook ad.
Facebook Asset: This represents the Facebook columns.
Asset Source Column: The options in this list are derived from the asset source.
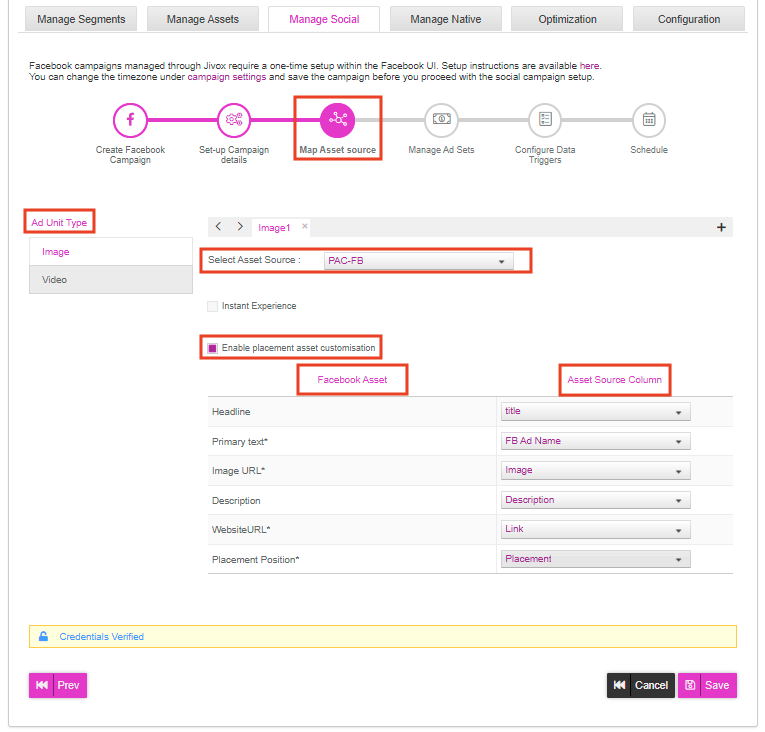
Select the desired assert source from the dropdown.
Mark the Enable placement asset customisation checkbox. The placement position appears under the Facebook Asset column and the corresponding drop down appears under the Asset Source column.
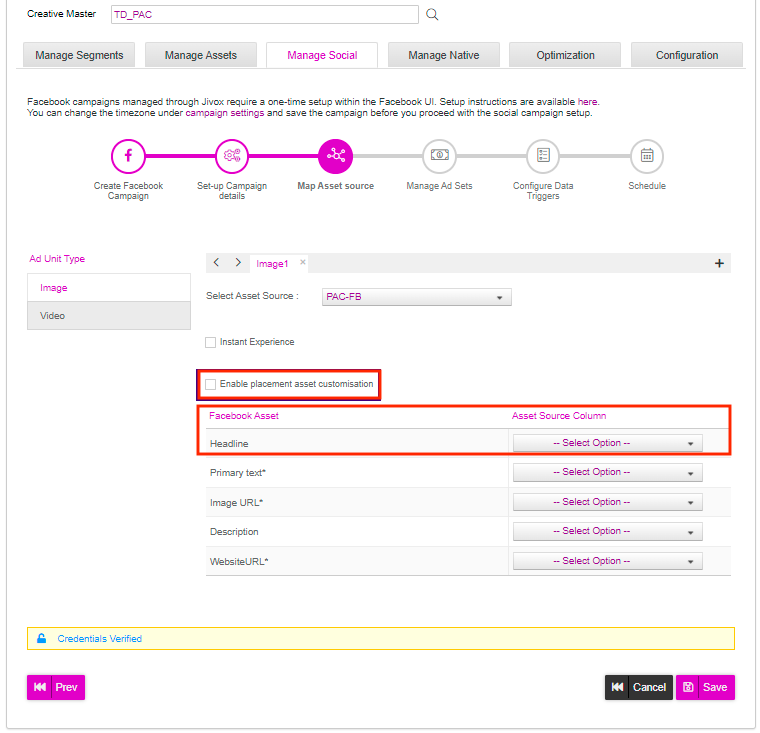
The Enable placement asset customisation checkbox is disabled when the Instance Experience checkbox is marked. Similarly, The Instance Experience checkbox is disabled when the Enable placement asset customisation checkbox is marked.
Map the asset source columns to the Facebook asset and map the Placement Position asset with the Placement column.
For a video ad unit type, the Video URL component will appear under the Facebook Asset column and the corresponding drop down appears under the Asset Source column. Map the Video URL asset with the Video column in the selected asset source.
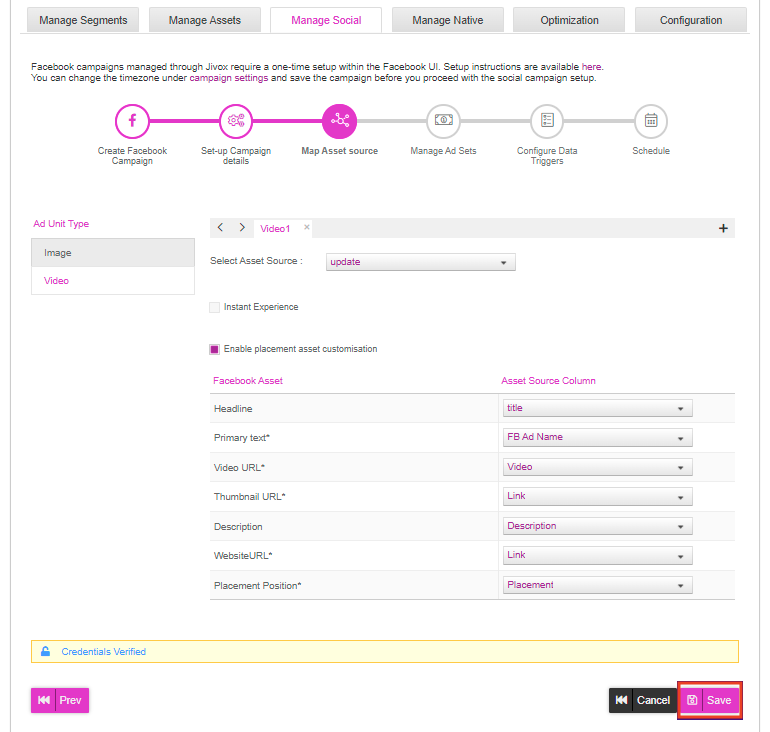
Once the mapping is done, click the Save button. The platform checks if all the mandatory fields are mapped and if the data type of the Facebook asset and asset source column is the same. After saving the mapping, the Next button appears.
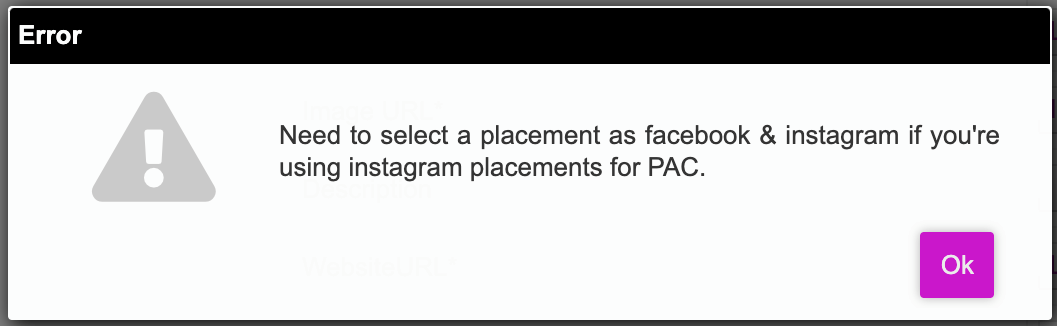
For an unsupported or incorrectly mapped Placement Position, the following an error message will be displayed:

If you selected only Facebook as the Placement type in the Set-up Campaign Details screen but selected an asset source that has both Facebook and Instagram placement positions defined, the following error message will be displayed:
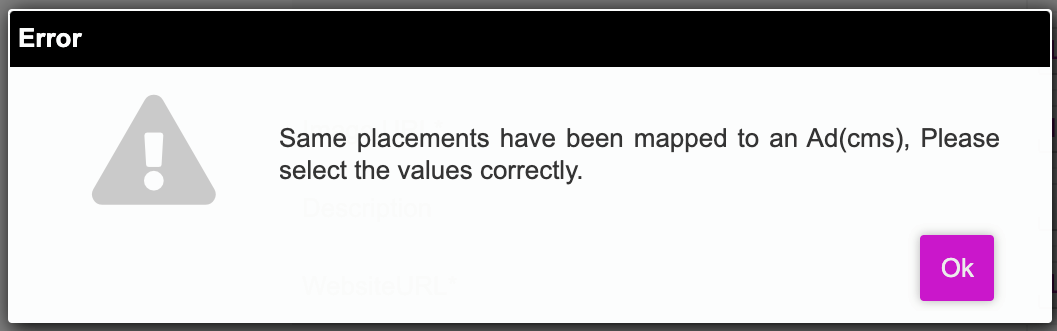
If placement positions in the asset source are duplicated for the same ad, the following error message will be displayed:
Click on the Next button. The manage ad sets screen gets displayed where we can set the budget for the selected ad set(s).
To configure Facebook setup and publish ads, refer to Managing Ad Sets.
General tips for creating an asset source for Placement Asset Customisation
The Placement column value is not case-sensitive.
The Placement column value can be comma-separated values of valid placements.
If the Placement column value is all or empty, by default, all possible placements are considered.
Description and Headline are not mandatory.
The values in the following columns are mandatory fields-
For Image ads: PrimaryText, Placement, WebsiteURL, and Image.
For Video ads: PrimaryText, Placement, WebsiteURL, Thumbnail and Video.