In this section, we will set up create a dynamic ad campaign using the ad unit that was created eariler and associate it with Facebook ads.
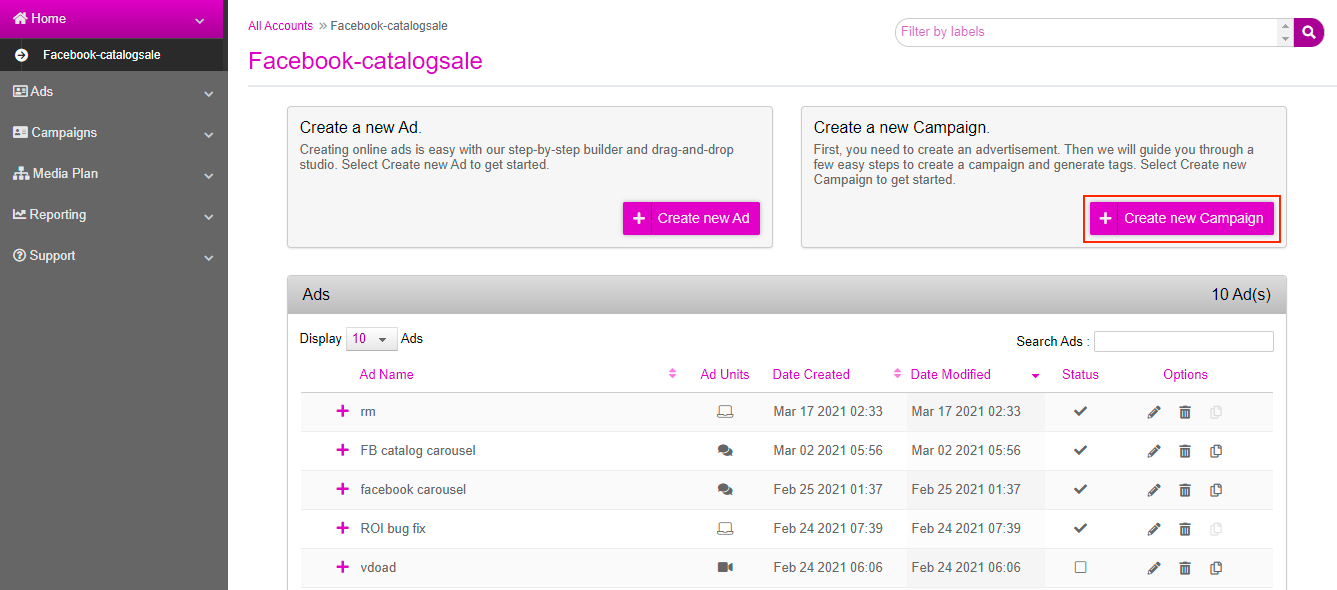
Firstly, we will create a dynamic campaign. Click on Create New Campaign on the dashboard.
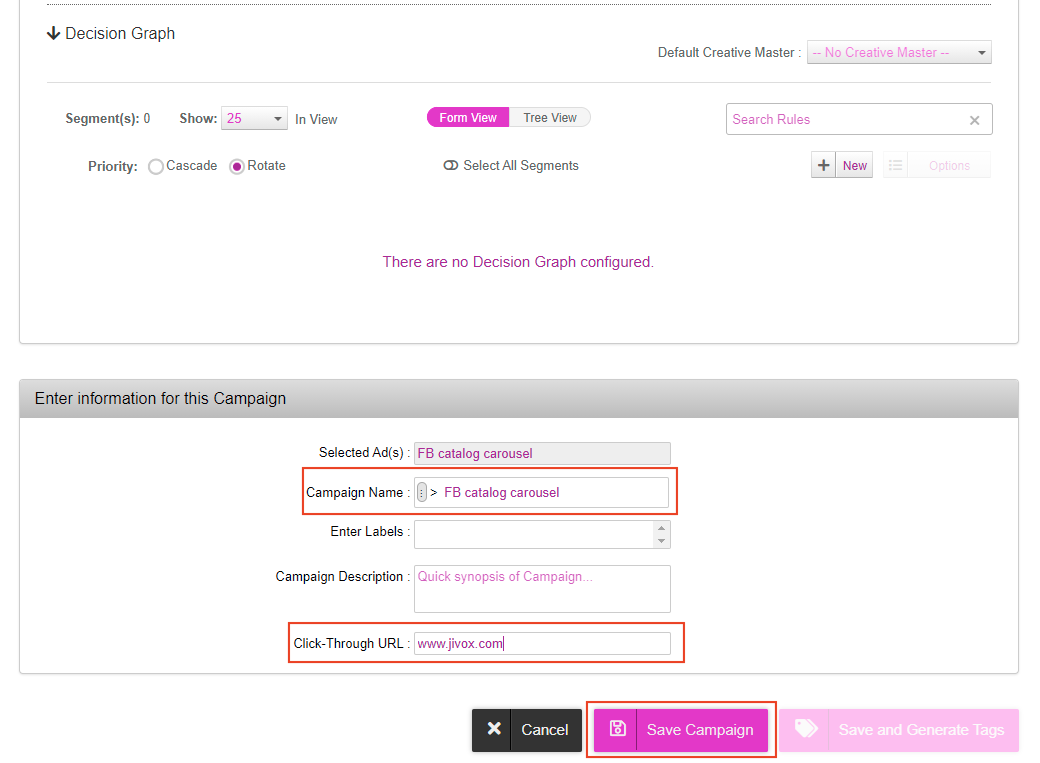
Once you are in the campaign section, scroll down to the bottom of the page. Enter a name for your campaign in the Campaign Name field and the URL in the Click-Through URL field. Click on Save Campaign.
You will not be able to create a Facebook campaign without saving the campaign first.
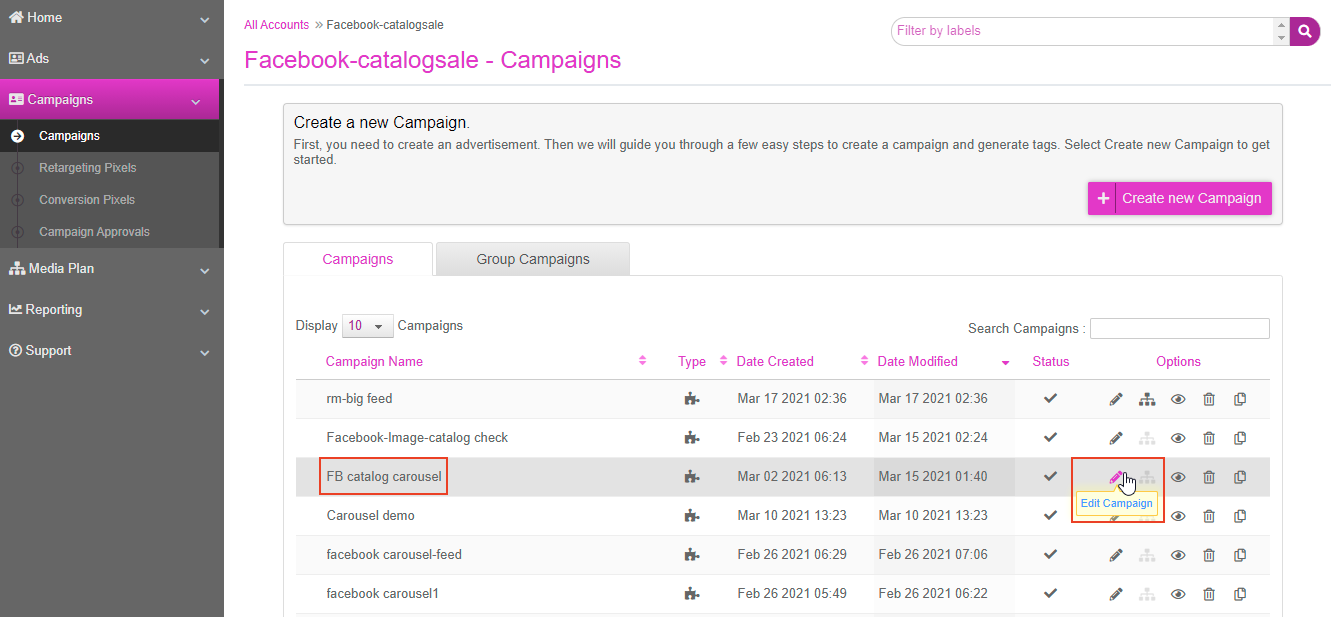
After saving the campaign, you will be taken back to the campaigns page. Your campaign name will be listed in the Campaigns section under the Campaign Name column. Click on the Edit icon next to your campaign.
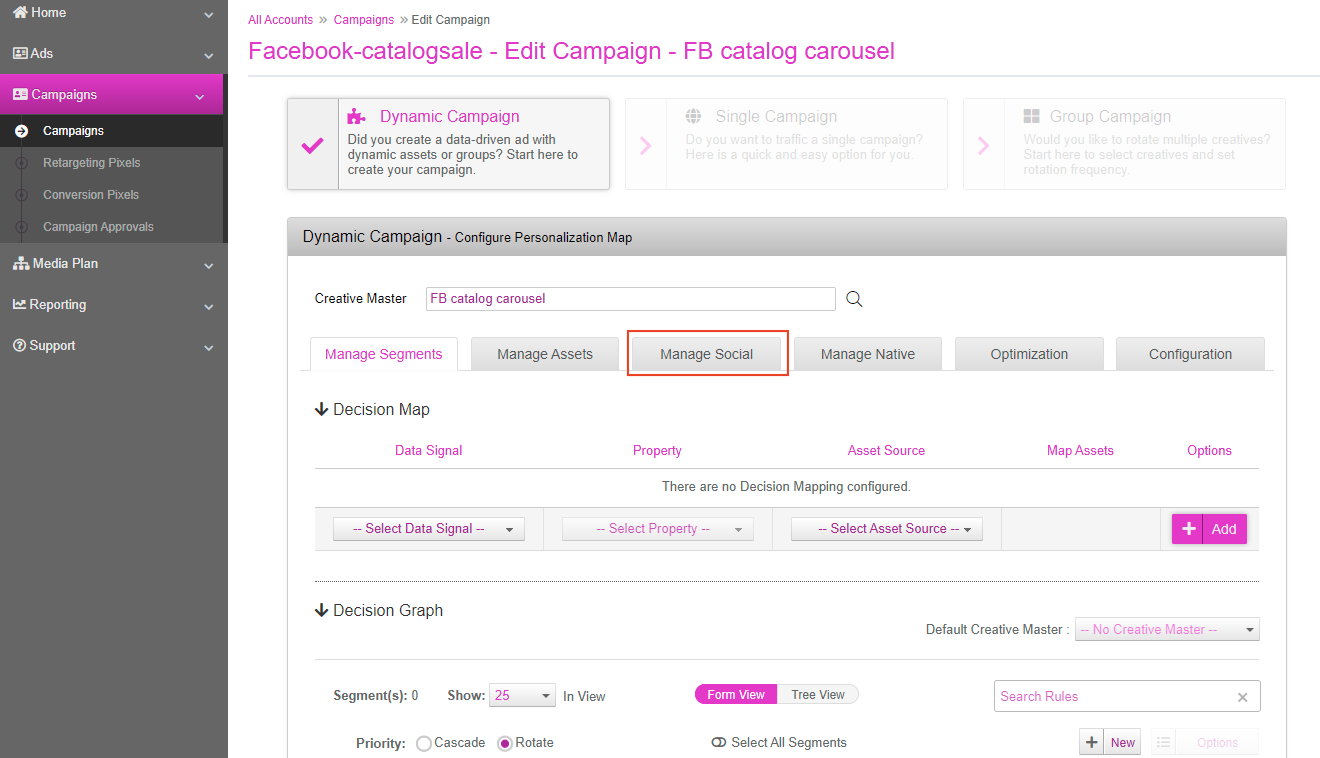
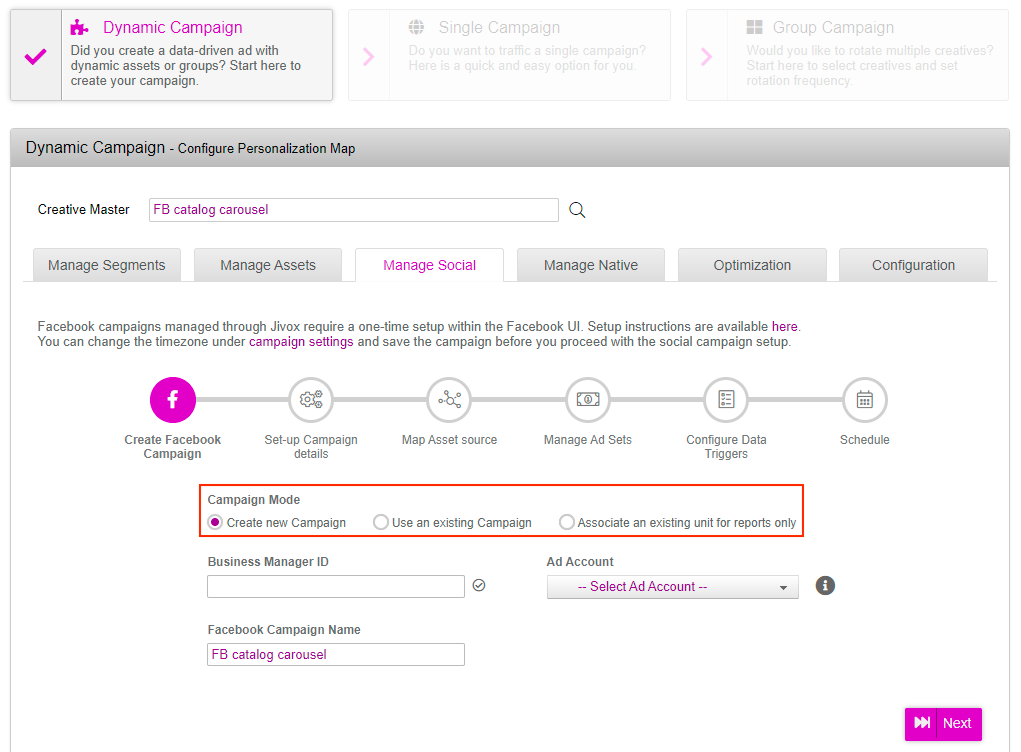
On the campaign page, click on the Manage Social tab. This is where we can complete all the Facebook setup.
Under Campaign Mode, you will see the following options:
Create a New Campaign- select this to create a new campaign.
Use an existing Campaign- select this if you wish to work on an existing campaign created on Facebook business manager.
Associate this unit with an existing campaign in Facebook- This option enables you to avail the reporting capabilities from our platform for a manually created campaign. You will need to provide the details of the existing campaign. The other prerequisites will be the same as the ones for an existing campaign.
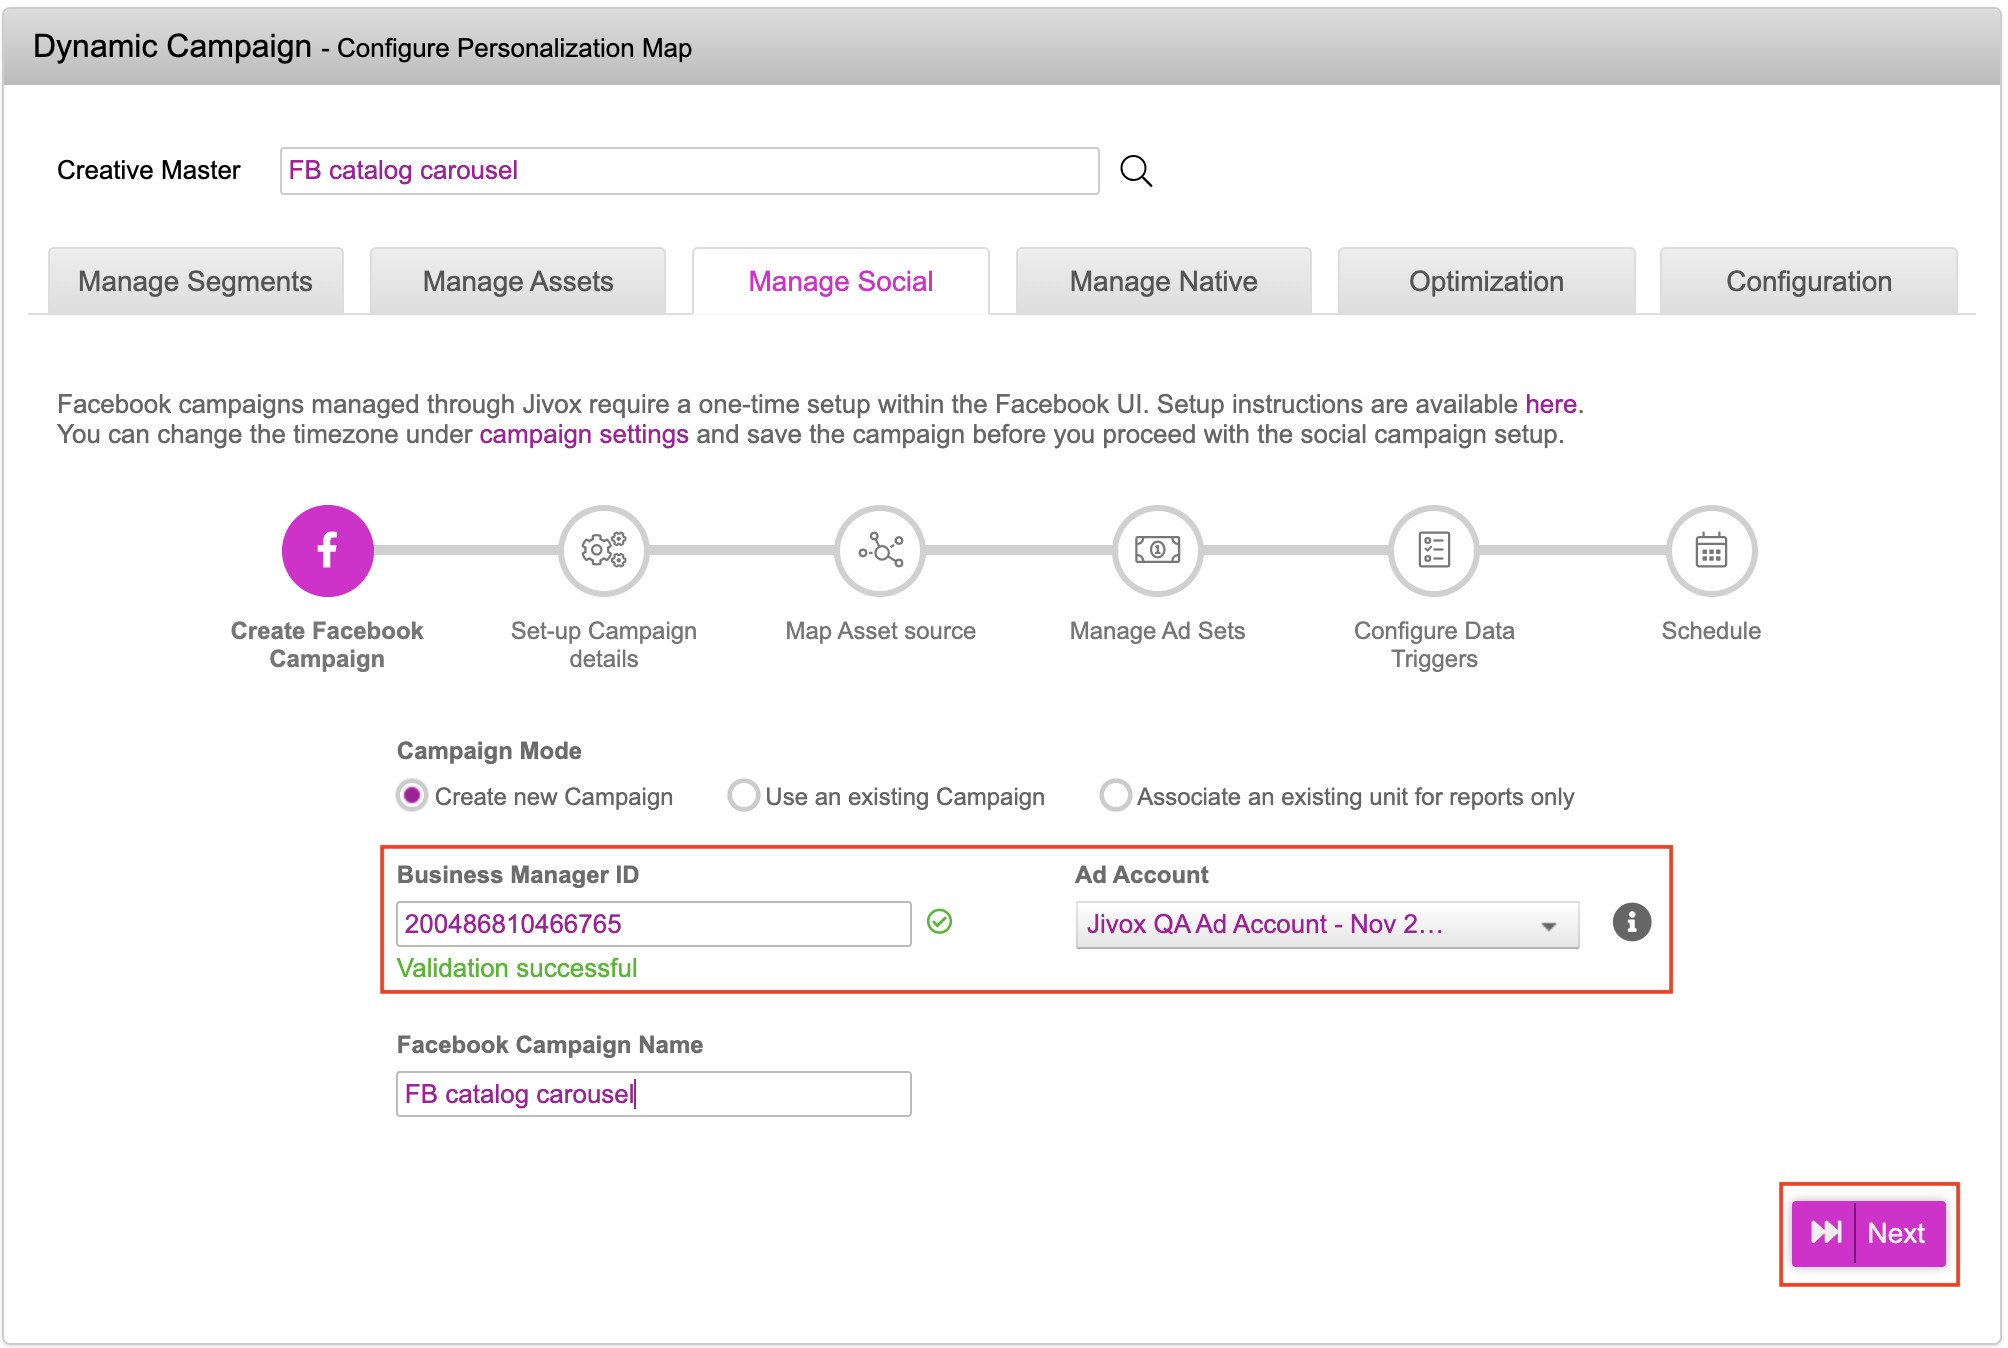
Let us now start campaign creation by entering the Business Manger ID. The platform will list the available ad accounts and campaigns for the selected ad account. Enter your Business Manager ID.
Once the business manager ID is validated, you will be allowed to select the ad account from the Ad Account dropdown. Click on the Next button.
You will be redirected to the Campaign Setup page. Here are some definitions for the fields on this page:
Buying Type: Select the Buying Type based on your business goals. This is a method to pay for and target ads in your campaigns and it indicates how media is bought via Facebook. You have two options Auction and Reach and Frequency.
Reach and Frequency: Select this option when your main objective is brand awareness and targeting a larger customer base.
Auction: Select this option to target a specific audience base.
Placement: Select Facebook to publish the campaign only on Facebook or Facebook & Instagram to publish your campaigns on both Facebook and Instagram.
Facebook Page ID: Enter the ID of your Facebook Page.
Campaign Objective: Select Catalog Sales as your Campaign Objective. The Campaign Objectives drop-down will be determined based on the selected Buying Type.
Facebook Pixel: Select the relevant Pixel for Facebook.
Catalog Name: Select the asset source from the dropdown that you want to use as a catalog.
Catalog Type: Select inventory type from the dropdown.
We can now validate the configuration for all the details entered. Click on the Validate Configuration button.

The next button gets enabled only after you click the Validate Configuration button. At this point the platform checks if the entered Facebook pixel ID and page ID are valid.
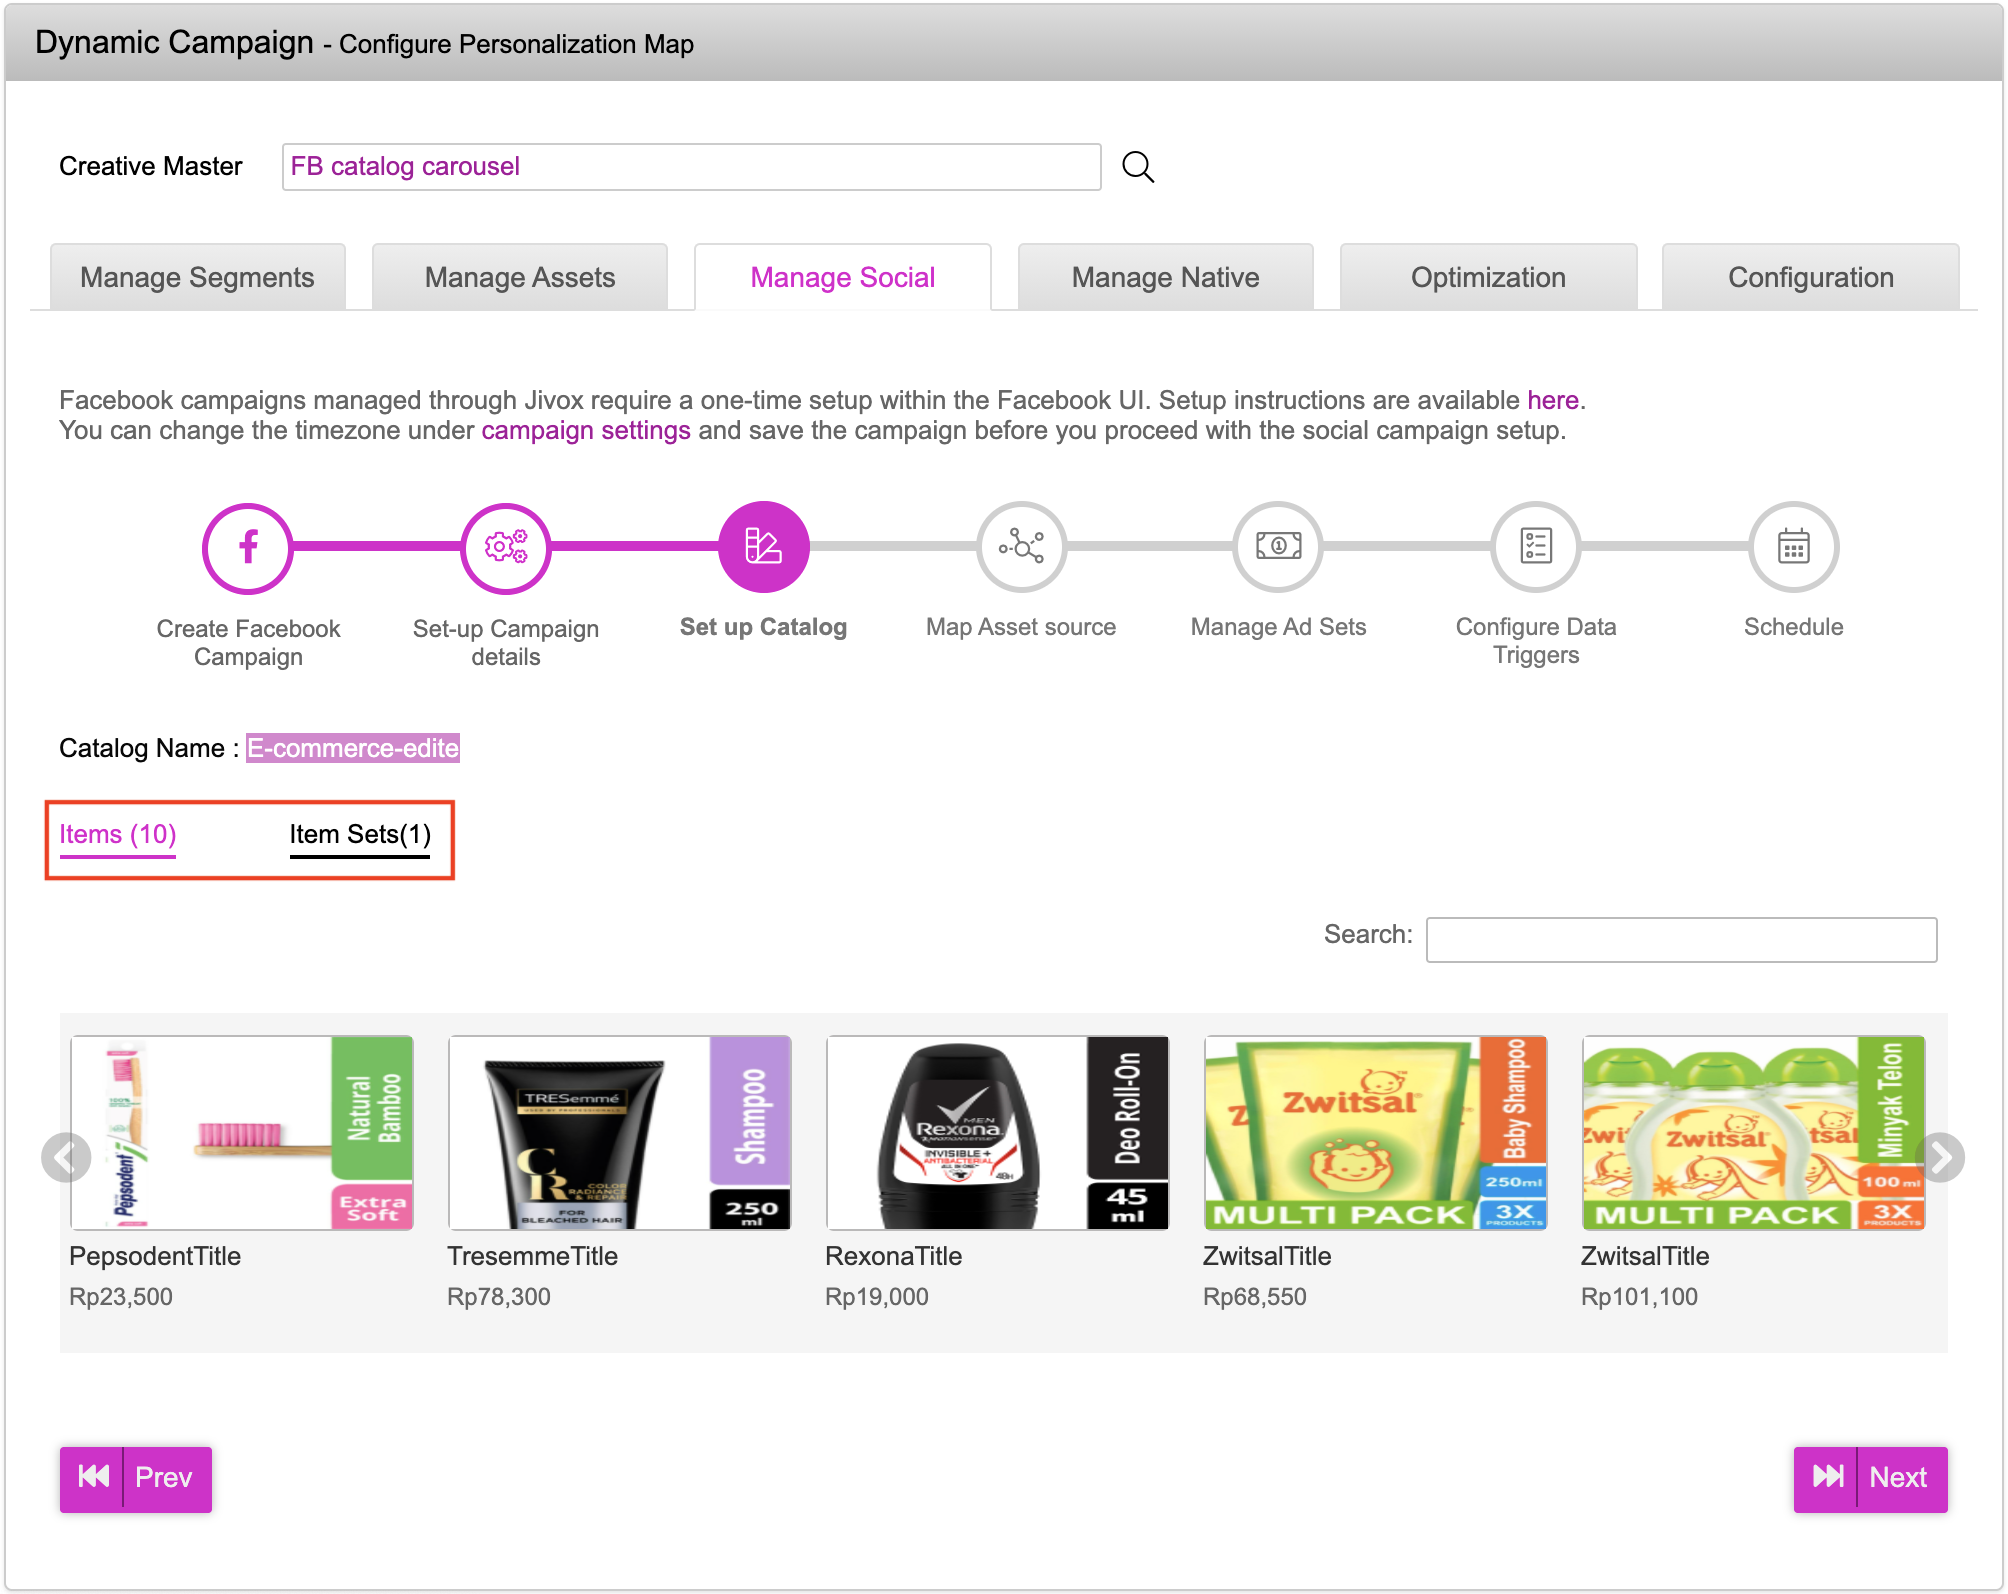
Click on the Next button. You will now see the Catalog Setup page. The Catalog page displays the name of the catalog which was uploaded and has two tabs:
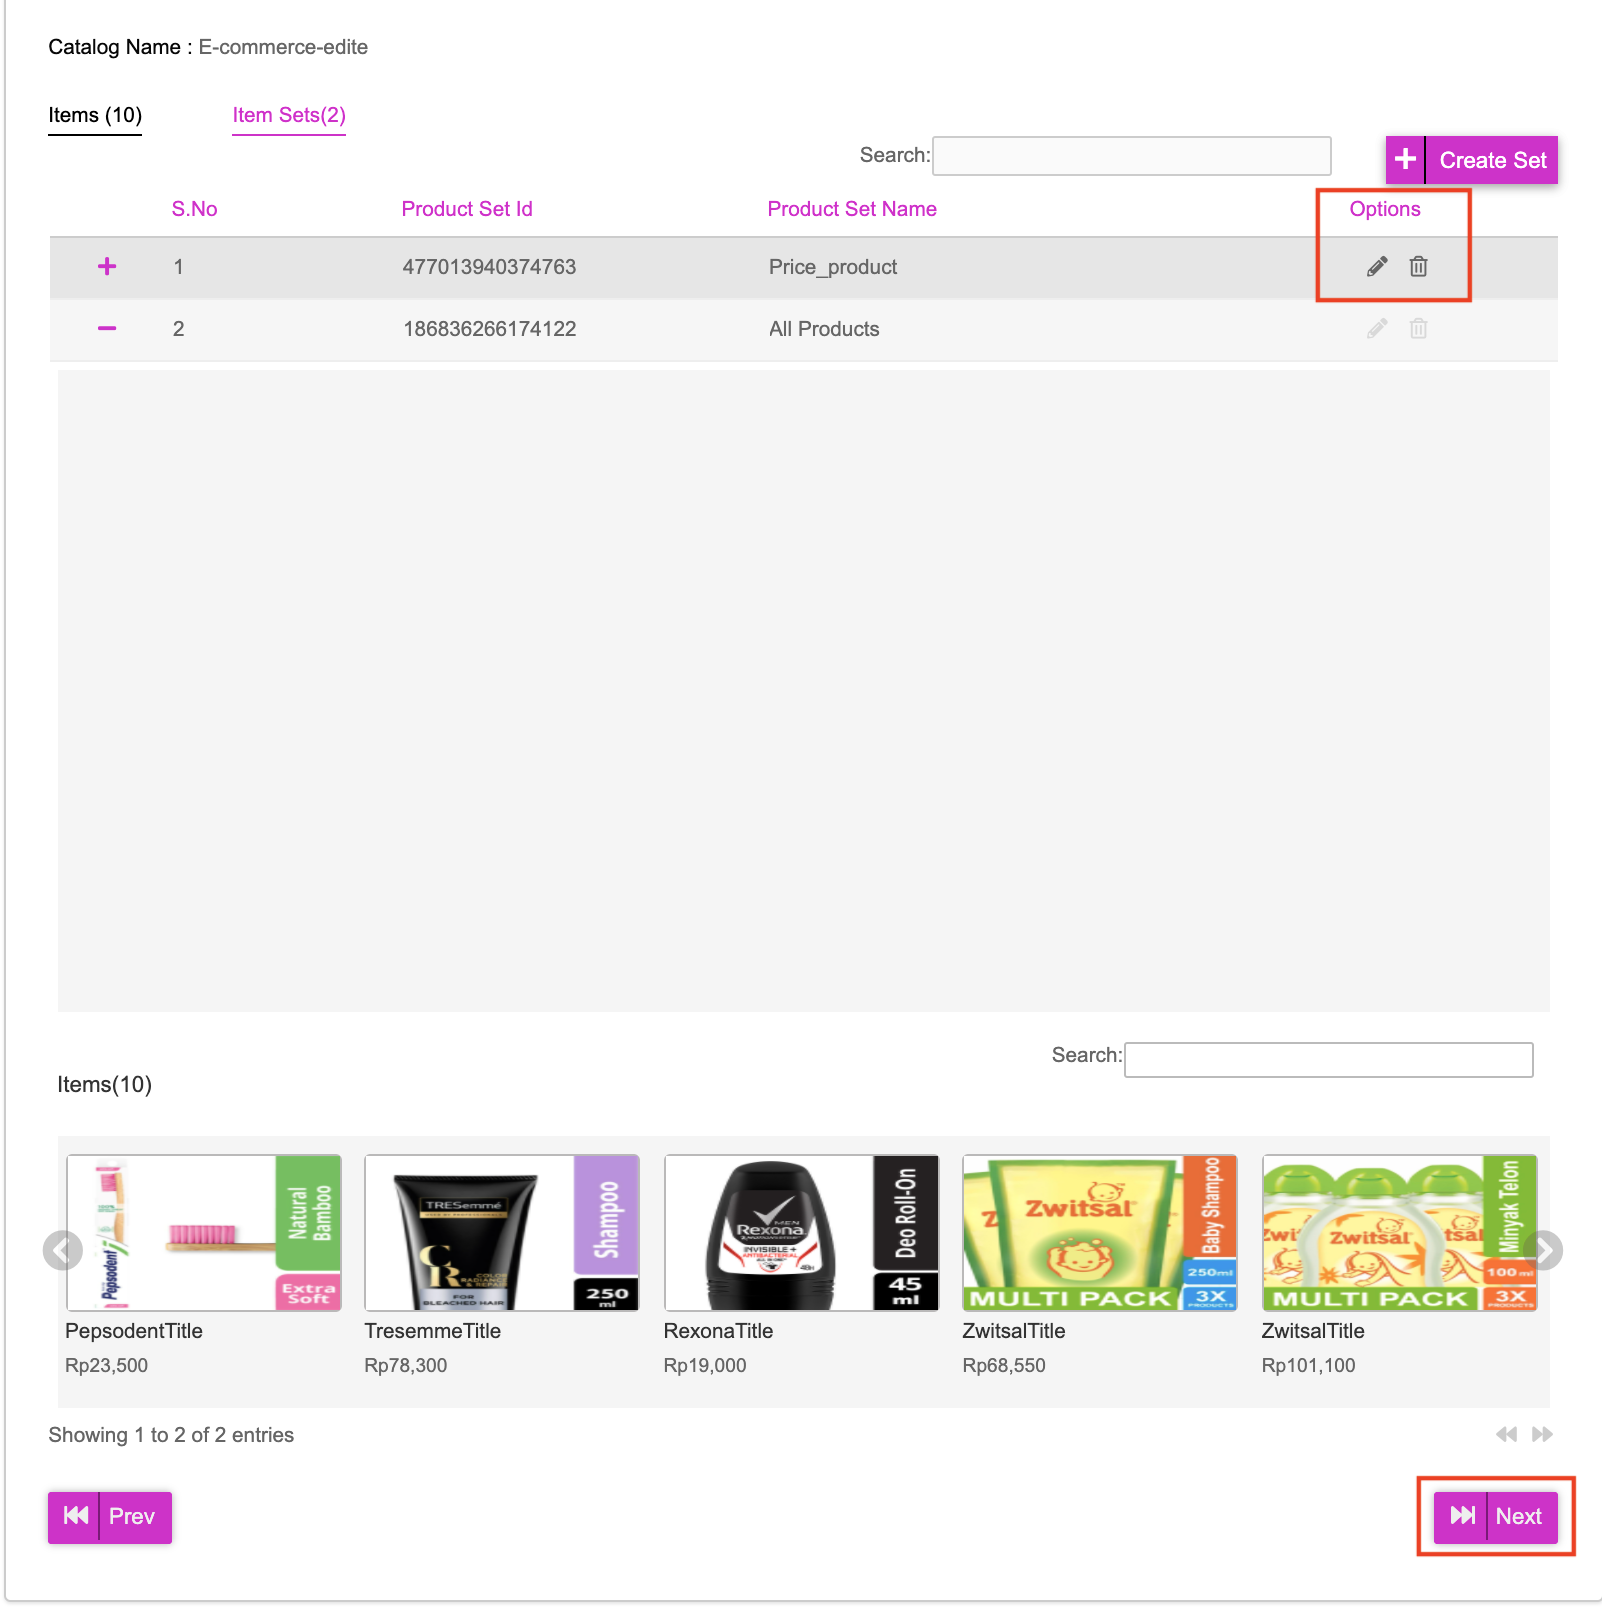
Items: Clicking on the Items tab displays all the products, with preview and product details, which are available in the catalog. Clicking on the left arrow icon or right arrow icon lets you scroll through the products.
Item Sets: You can group the products available in the catalog into different item sets using different filters in the platform. By default all the products available in the catalog are grouped into one set called All Products. You cannot edit or delete this item set.
To create a new item set, follow these steps:
Click on the Create Set button to initiate the process of grouping the products. The Create New Item Set page will be displayed.
Enter the name of the item set in the Name field.
Select any one of the conditional triggers from the Conditional triggers menu, to set up the conditional trigger.
Select the data triggers from the Filters menu to set up rules and to combine the data triggers, if you are using more than one data trigger to make decisions. See Facebook Contextual Data Triggers to know more about configuring conditional triggers and data triggers.
You can see a preview of all the products available in the item set that you have created at the bottom of the catalog setup section.
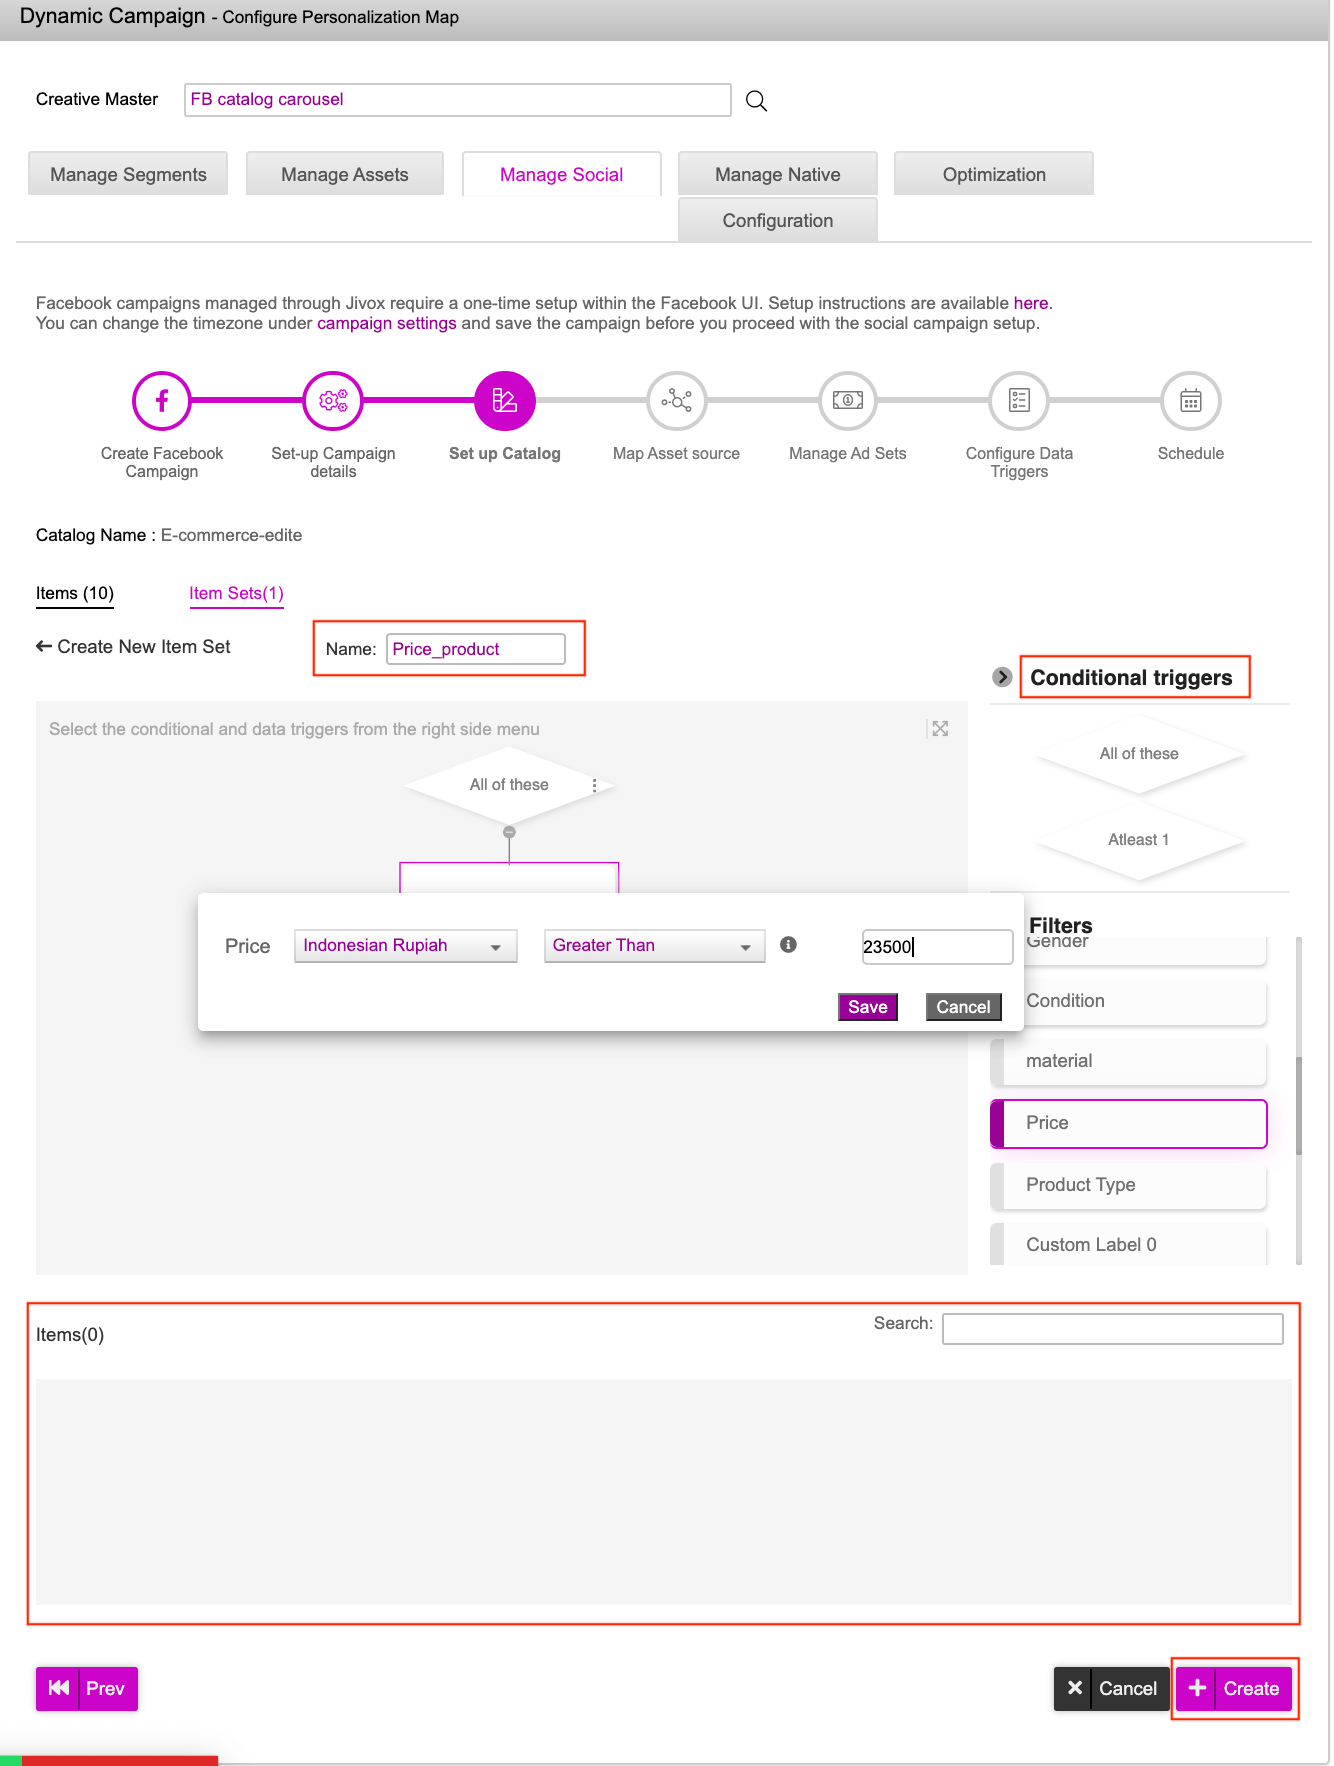
Click on the Create button.
Click on the plus icon to expand and view the rule setup. You can edit or delete the Item Set by clicking on the pencil or bin icon respectively, available under the Options column for each Item Set.
Click on the Next button.
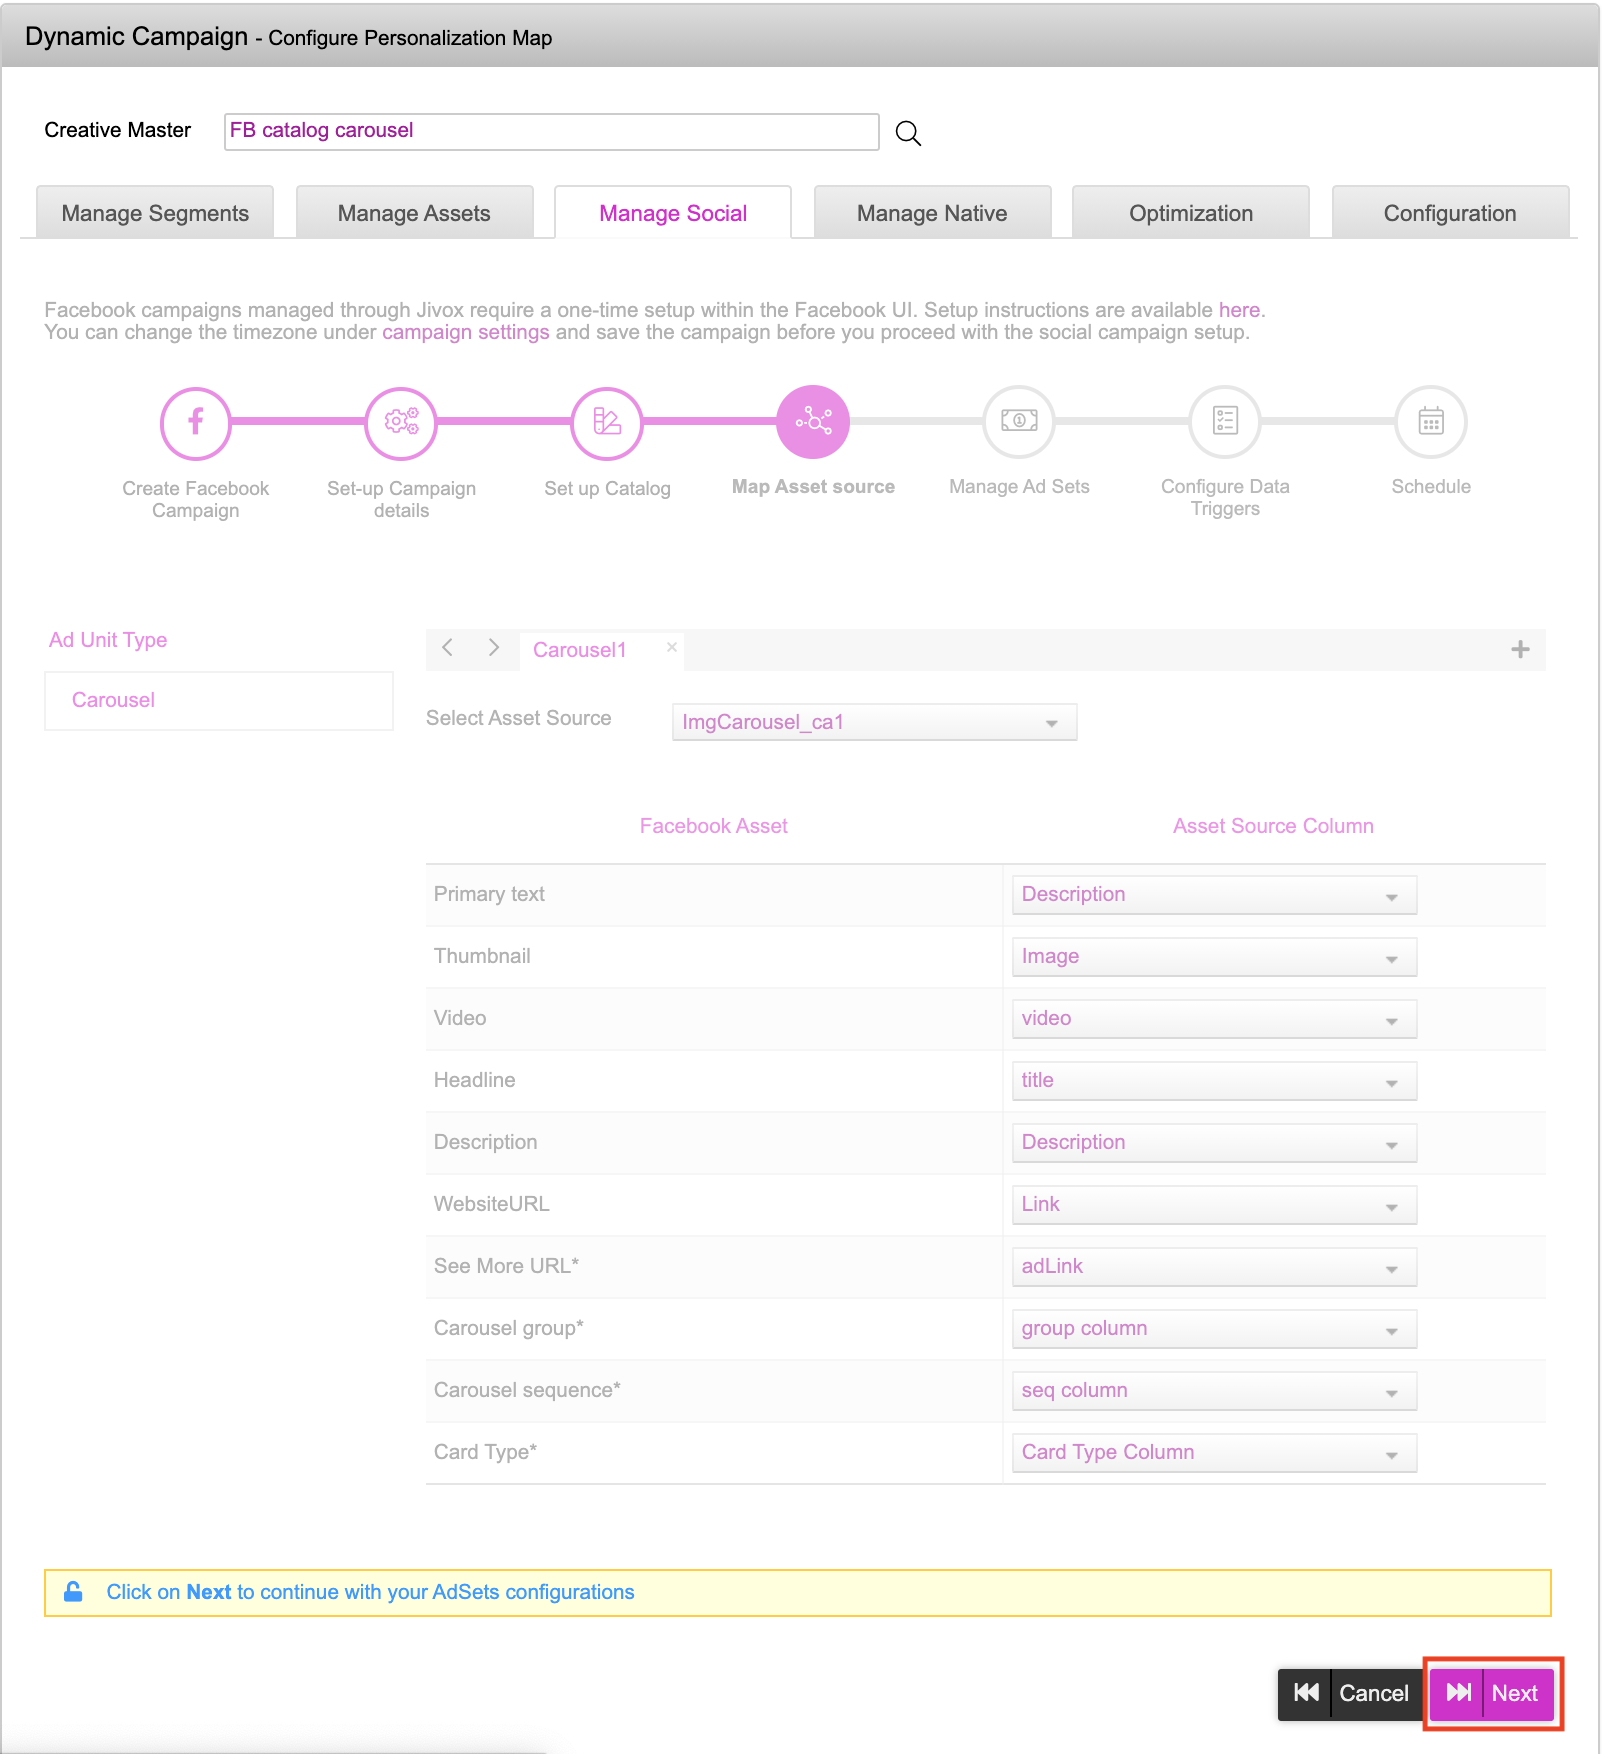
The Map Asset source page is displayed. Select the asset source, that contains all the assets of the ads and ad sets from the Select Asset source dropdown.
We can now map the entities under Facebook Assets with the appropriate columns in the asset source . If the assets are not mapped correctly, an error message will be displayed. After mapping all the assets, click on the Save button.

The platform checks if all the mandatory fields are mapped and if the data type of the Facebook asset and asset source column match and saves the mapping. Once the mapping is saved, the Next button appears. Click on the Next button. This will take you to the Manage Ad Sets page.
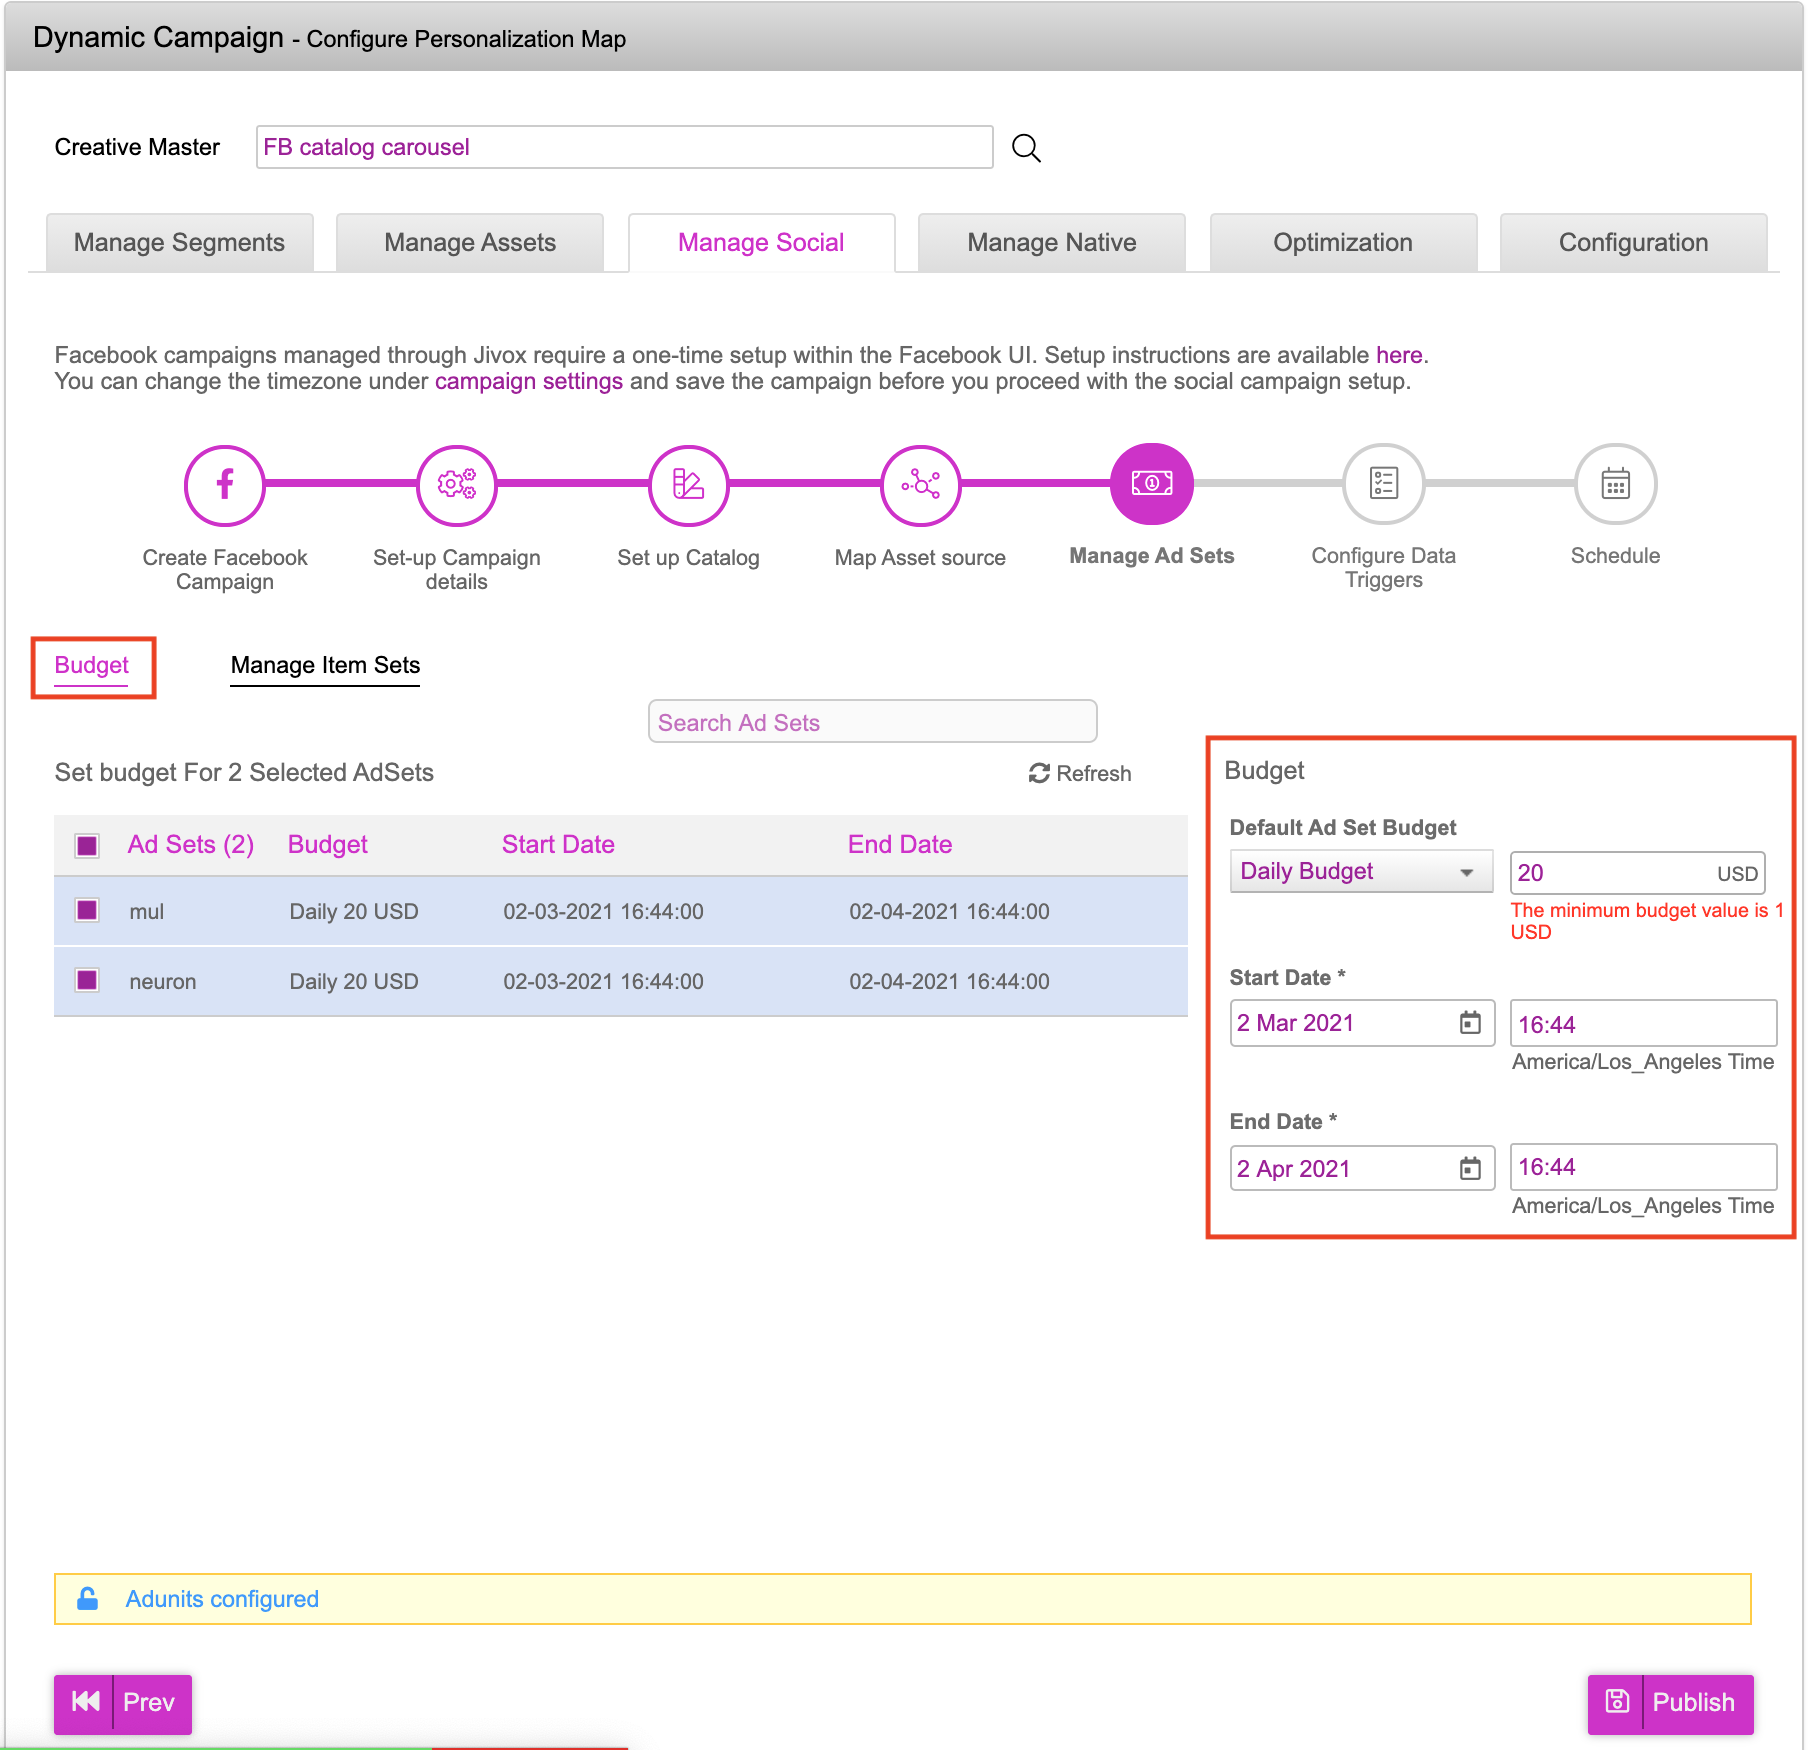
The Manage Ad Sets page has two tabs:
Budget:TheBudget screen displays the Set budget table. We can set a campaign budget and duration of that budget for selected ad sets in this section.
The campaign configuration cannot be updated from the platform once the campaign is published.
Let us set up the campaign budget and duration:
Select the ad set for which you want to set the budget from the list. By default, all the ad sets from the list are selected.
Select the Default Ad Set Budget from the dropdown. You can either select Daily Budget or Lifetime Budget.
Enter your budget amount. Set the duration for the budget by entering the start date with time and end date with time.
Click on the Refresh button to list an ad set in the Set budget table, this can be appended to the previous ad set or replace previous ad sets in the asset source.
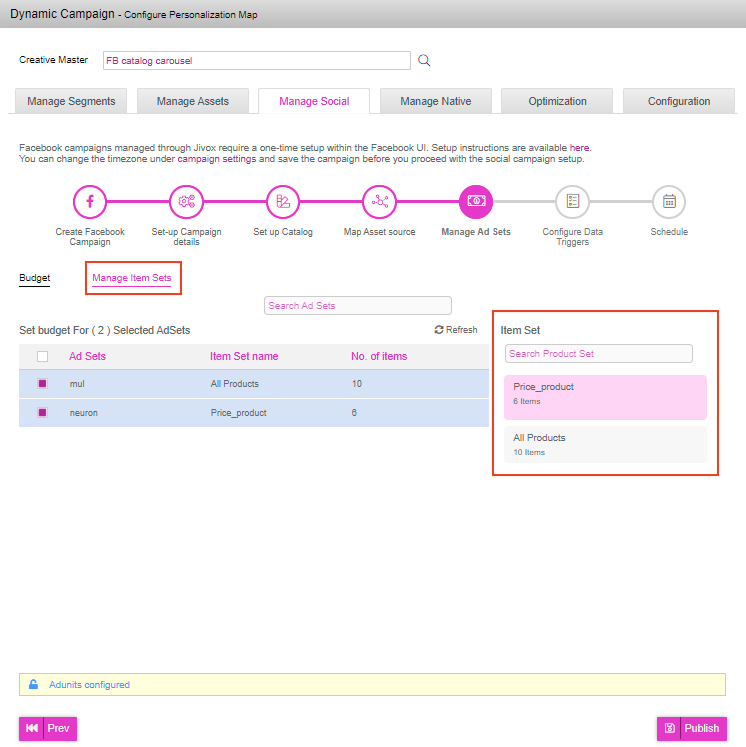
** Manage Item Sets: The Manage Item Sets screen displays the Set Item Sets table. This is where we can map the ad sets with the relevant item sets.
To map the ad set with an item set, follow these steps:
Select an ad set from the list of ad sets in the Set budget table.
Select the relevant item set, listed under Item Set.
The selected item set automatically appears in the Set Budget table under Item Set name.
Click on the Refresh button to add the newly created item set to the existing item set list.
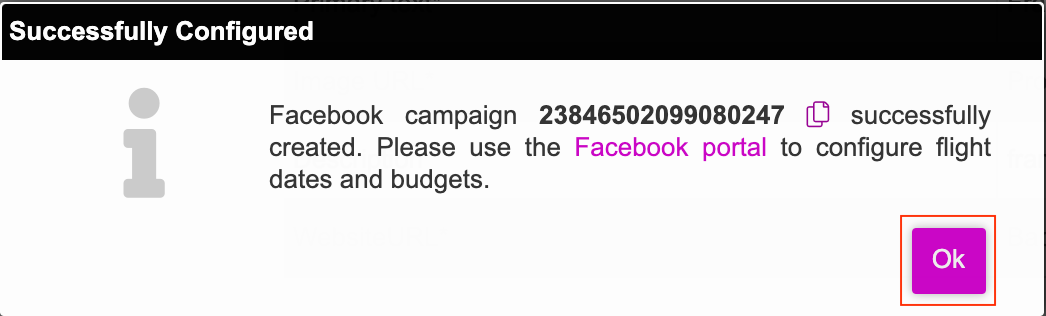
Click on the Publish button and click Ok once the campaign has been successfully published.
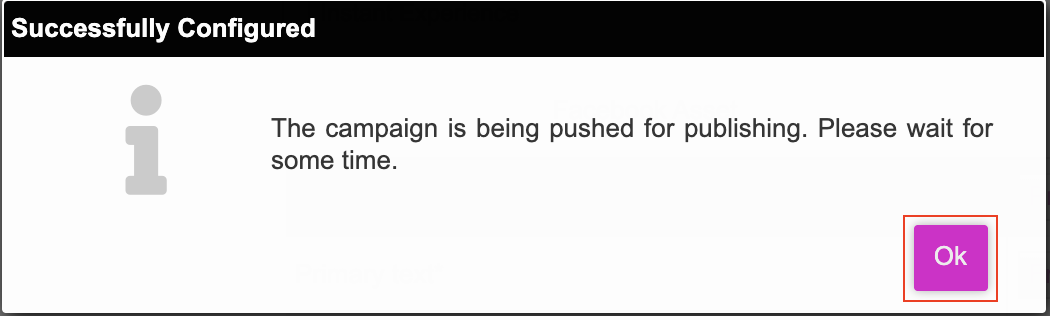
Once the campaign has been published successfully, you will see the following confirmation window. Click on the Ok button.