So far we have:
- Uploaded the Creative Master
- Created the Asset Source and saved the Ad
This section details the steps to generate a creative variation by uploading an asset source file created outside the Jivox platform. The platform allows you to download an Asset Source Template that includes the column headers named as per the Creative Master. To ensure that the Asset Source file has the correct column headers, we recommend to download the template from the platform. We will cover the following:
Downloading the Asset Source Template
You can download the Asset Source template and then fill the columns outside the platform. The Download Asset Source option is available only when you save the ad.
To download the Asset Source Template, first you must save the ad. See Saving the Ad for details.
Next, follow these steps:
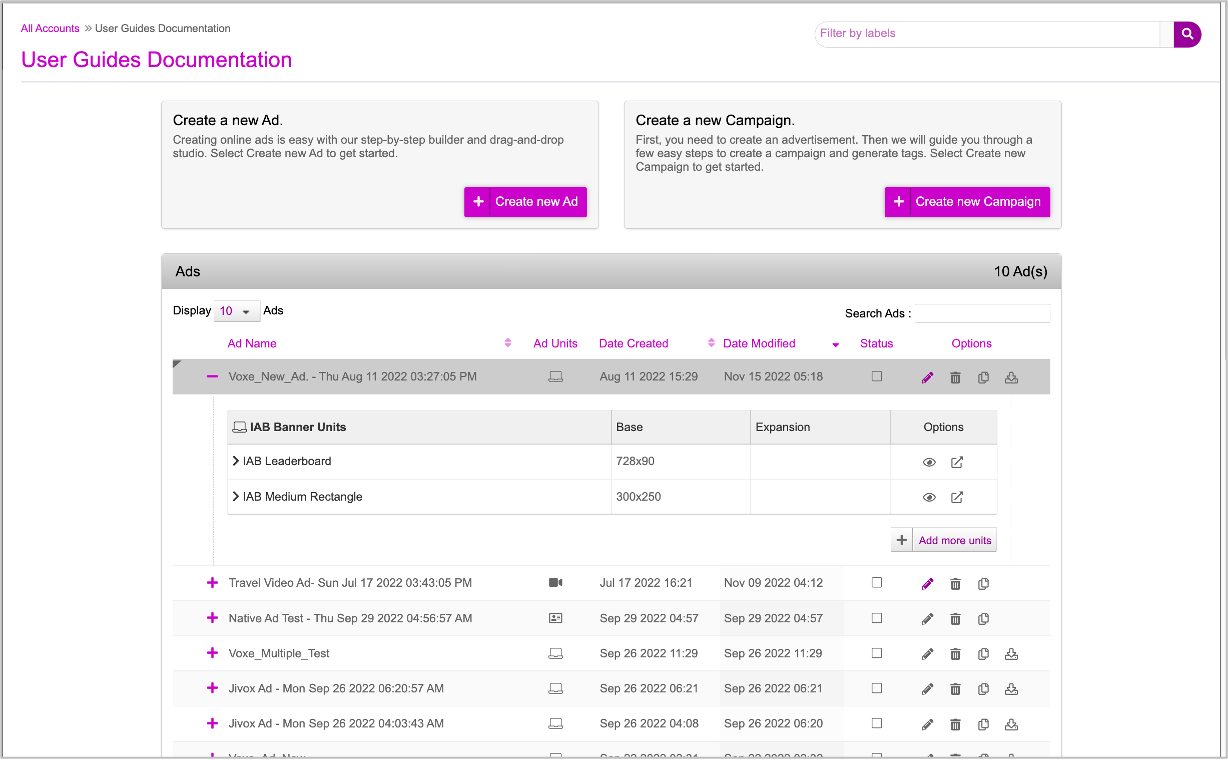
1- On the Edit page, you will see all the Ad units of different sizes. You can expand each Ad Unit to view all the creative masters added to each Ad unit.
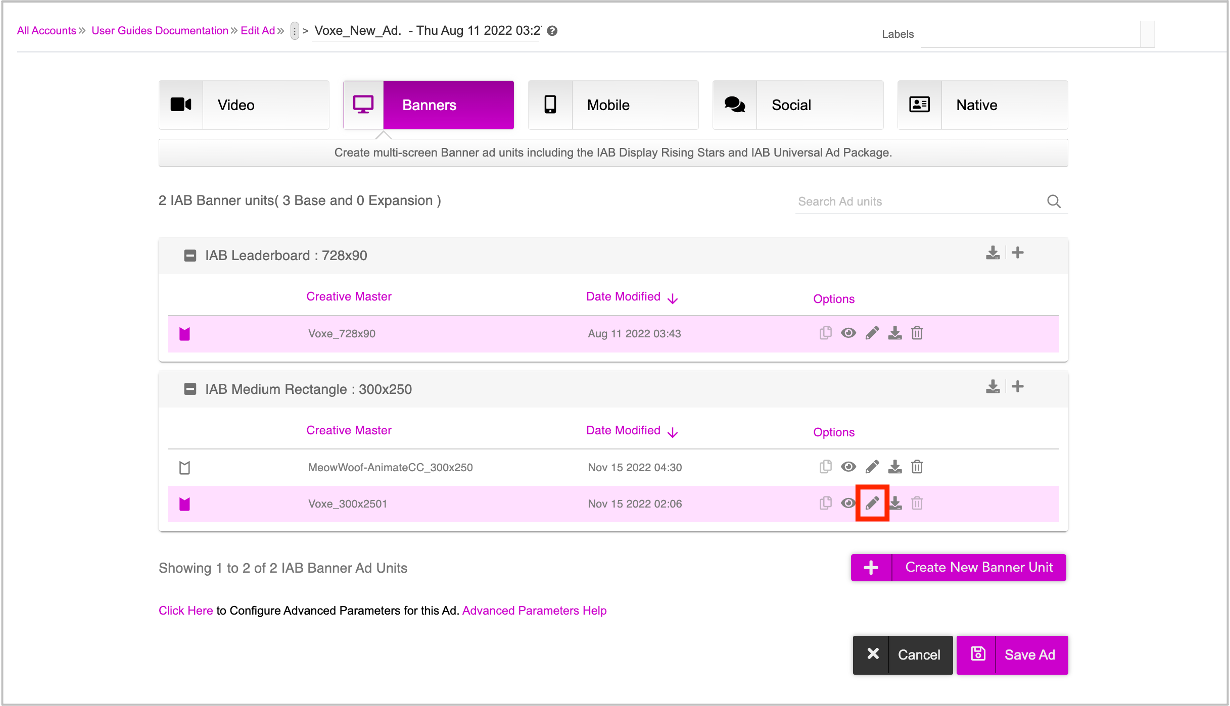
2- Click the pencil icon (highlighted in the image above) next to the creative master that you want to edit. You will be redirected to the DCS UI. You can use the Select Creative Master drop-down to switch to another creative master and work on it.
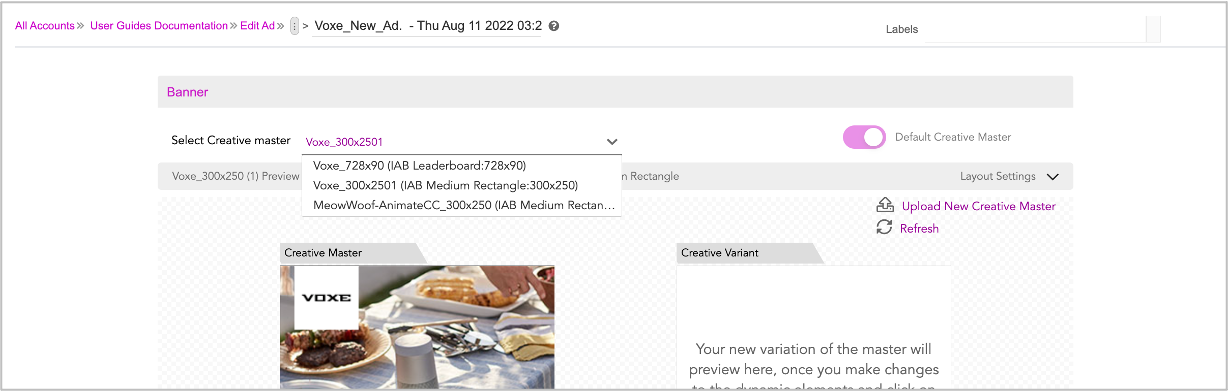
The Creative Master that you select here, will be displayed in the DCS window, with all the dynamic assets.
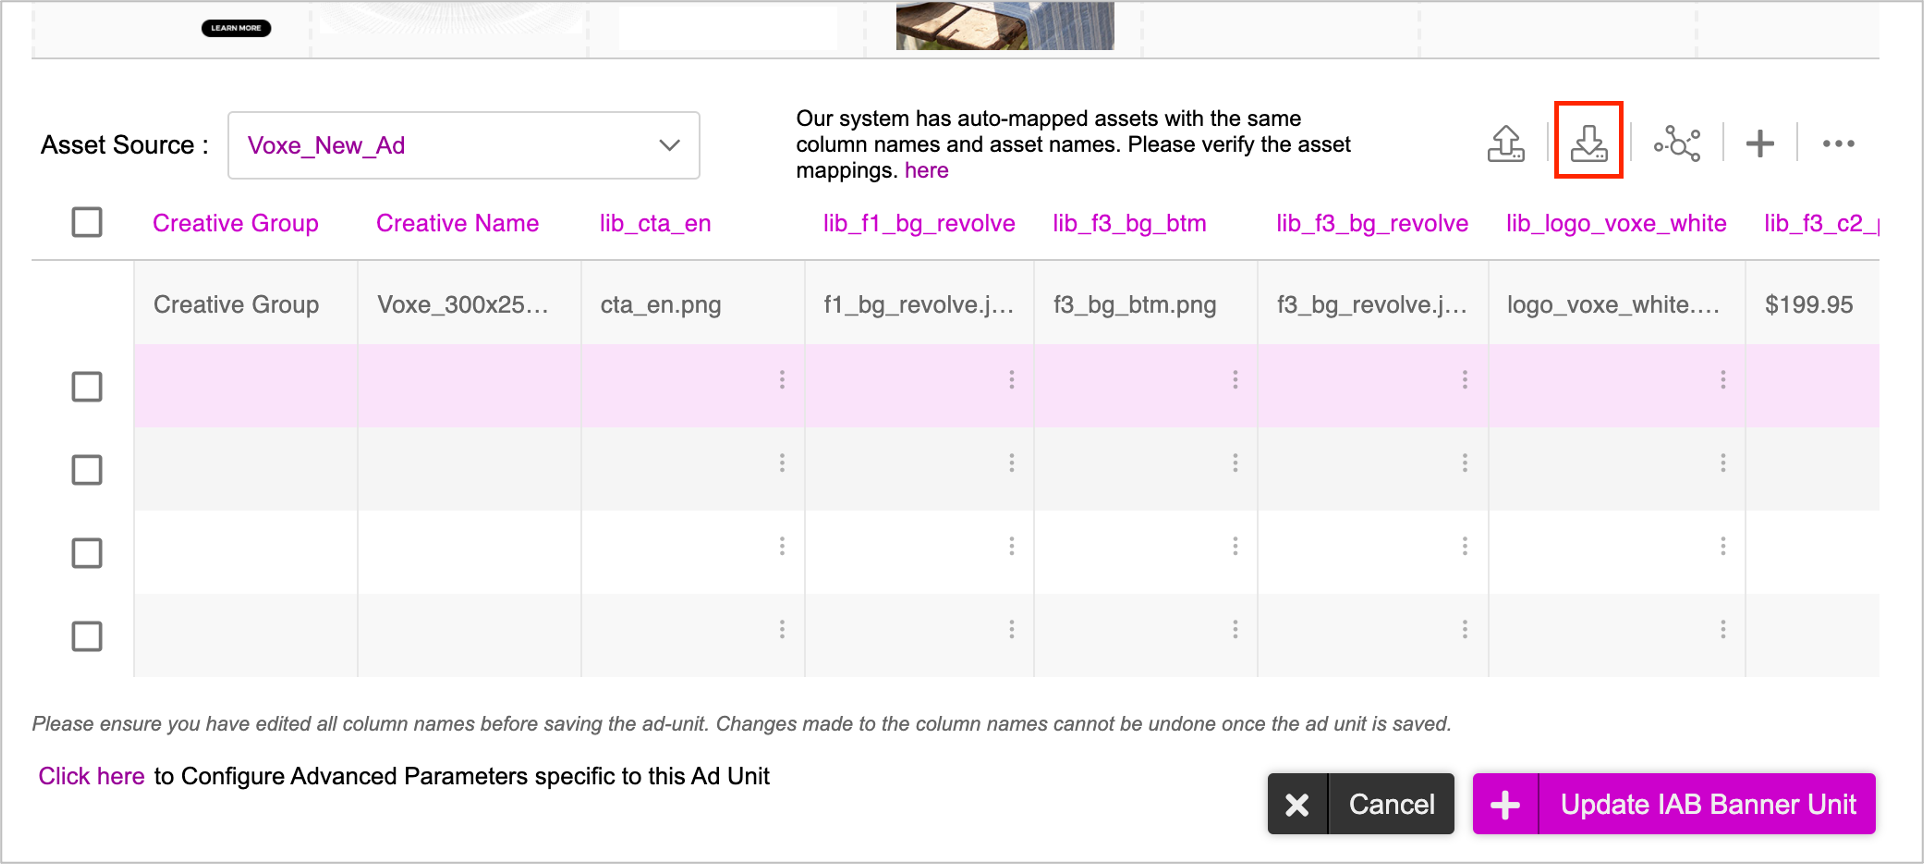
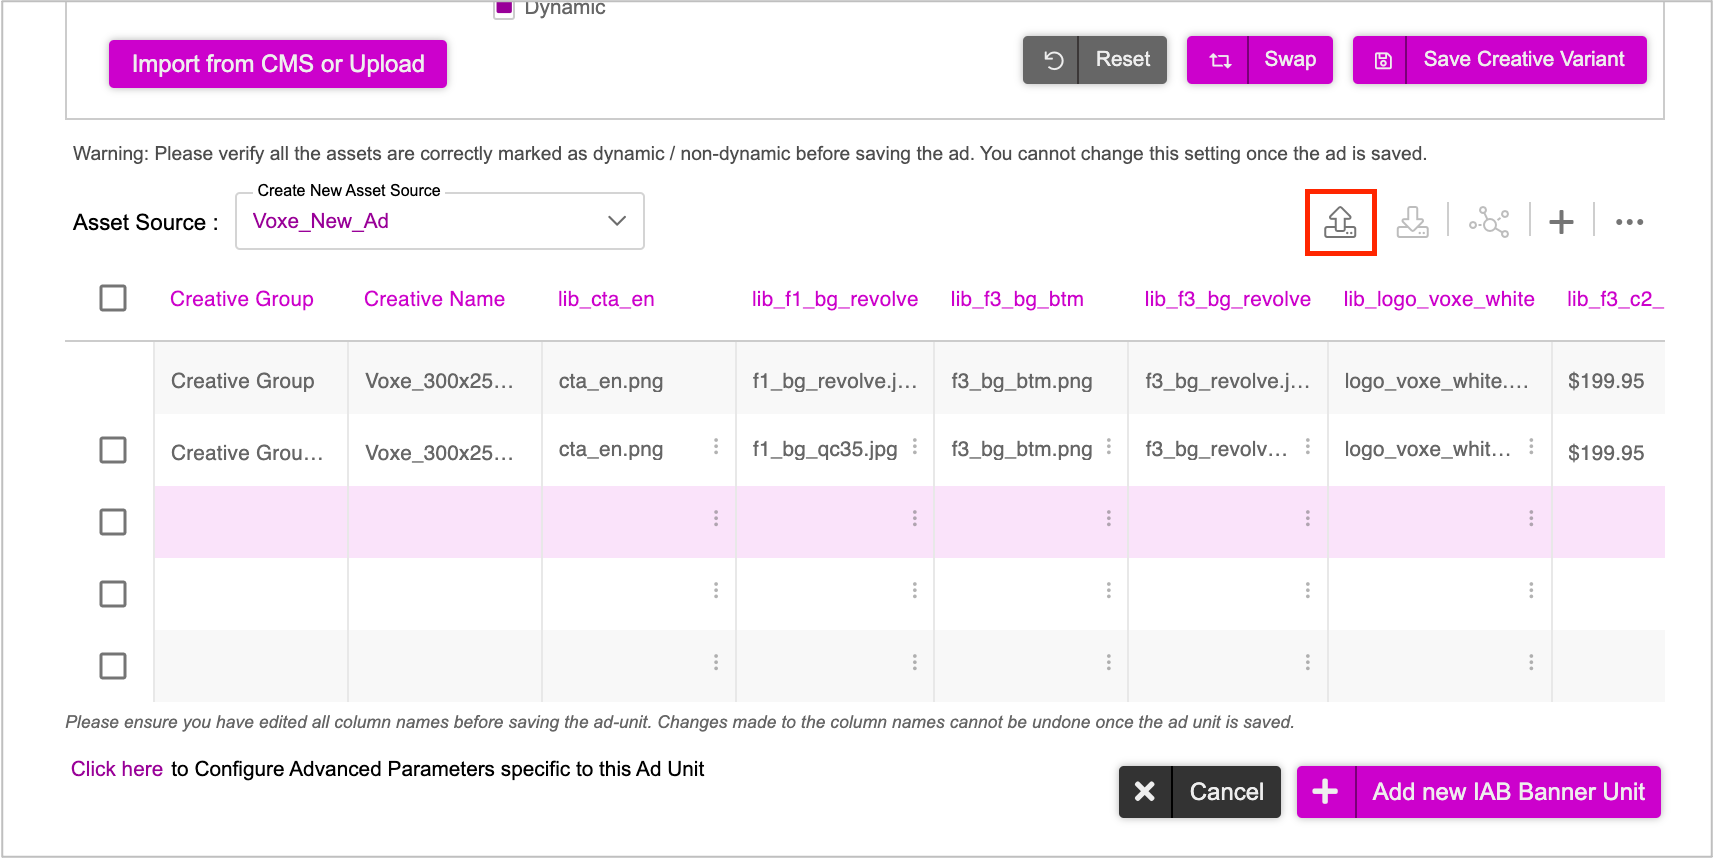
Your Ad will be displayed with the Download Asset Source option enabled. You can click the Download Asset Source icon (highlighted below) to download the asset source template. The asset source template is downloaded in .zip format in your computer.
Open the downloaded file. It contains all the column names as well as the Default row. If no conditions are met, the system will serve the default creative variation. You cannot modify the assets in the default creative variation.
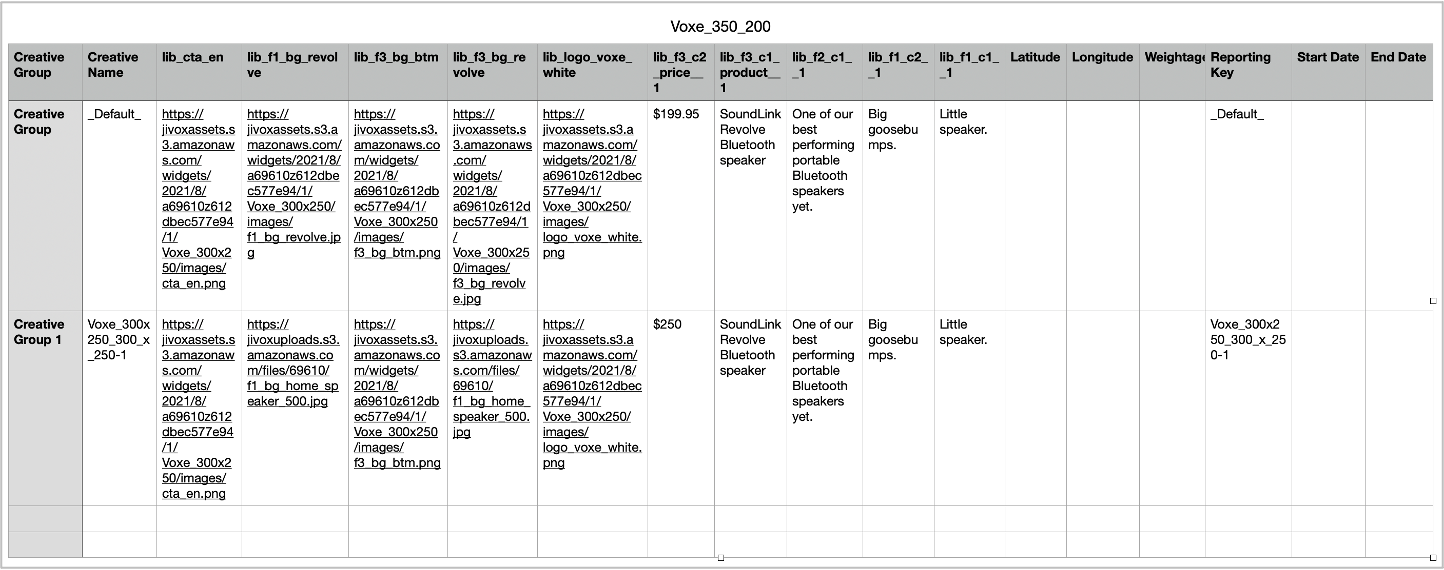
Here's a list of the important columns in the Asset Source.
| Column Name | Description |
|---|---|
| Creative Name | Assigned to every unique creative variation, this serves as the key identifier. This act as the lookup value which is matched with the specified conditions in the campaign. If a match is found, the specific creative is served. This works best for single data input. |
| Creative Group | When you want to leverage multiple data inputs and also rotate different creative variations for the same combination of data, this can serve as the input and key identifier instead of Creative Name.The benefit of this is that you can now leverage multiple data trigger inputs, serve a rotation of creatives and specify the percentage in the Weightage column against each creative variation within the creative group. |
| (abc_123) | Each asset is assigned a specific column in the Asset Source. The Jivox platform names column headers as per the naming convention of the corresponding assets in the Creative Master. It is important to assign relevant names for your assets in the Creative Master, so they are easily recognizable. Also, follow a consistent naming convention for the assets, for eg. frame1_copy1_ ,_ frame1_copy2, etc. |
| Weightage (%) | This allows you to specify how often you would like one creative variation to show more than the others within the Creative Group. |
| Reporting Key | This is an identifier used by brand/agency/anyone who wants to track impressions and clicks against each variation. This helps in identifying how each of the creative variation(s) is performing. This may be different from Asset Key and Asset Group. |
Enter the data across all rows and columns. You can enter data for any number of rows.
- Do not enter irrelevant or wrong information in the asset source. This might reflect in the live creative variations.
- Do not add space in the Reporting Key column.
- Ensure that URLs for media assets (images/videos/audio) follow https protocols.
- Ensure each column name is unique and relevant.
- Make sure to have the unique identifier under Creative Name column.
- Reporting string must not exceed 128 characters.
- Always have a Default row to ensure the ad is not served blank.
- Make sure to populate variation specific data under Reporting Key column.
The best way to get the CDN links for your creative assets is to upload them onto the Jivox platform in the Asset Library tab and then download CDN links using the download option. Navigate to the Create Campaign page. In the Dynamic Campaign section, go to Manage Assets > Asset Library.
For detailed steps to upload your assets and download the CDN links, refer to the Asset Library section.
Once you are done, save the file.
Uploading Asset Source File
Now, you must upload the asset source file by following these steps:
Click the Upload Asset Source icon highlighted below. On the Upload window, you can either drag and drop or browse and select the required file from your computer.
For this session, you can either use the file that you created after downloading the template or this sample Asset Source.
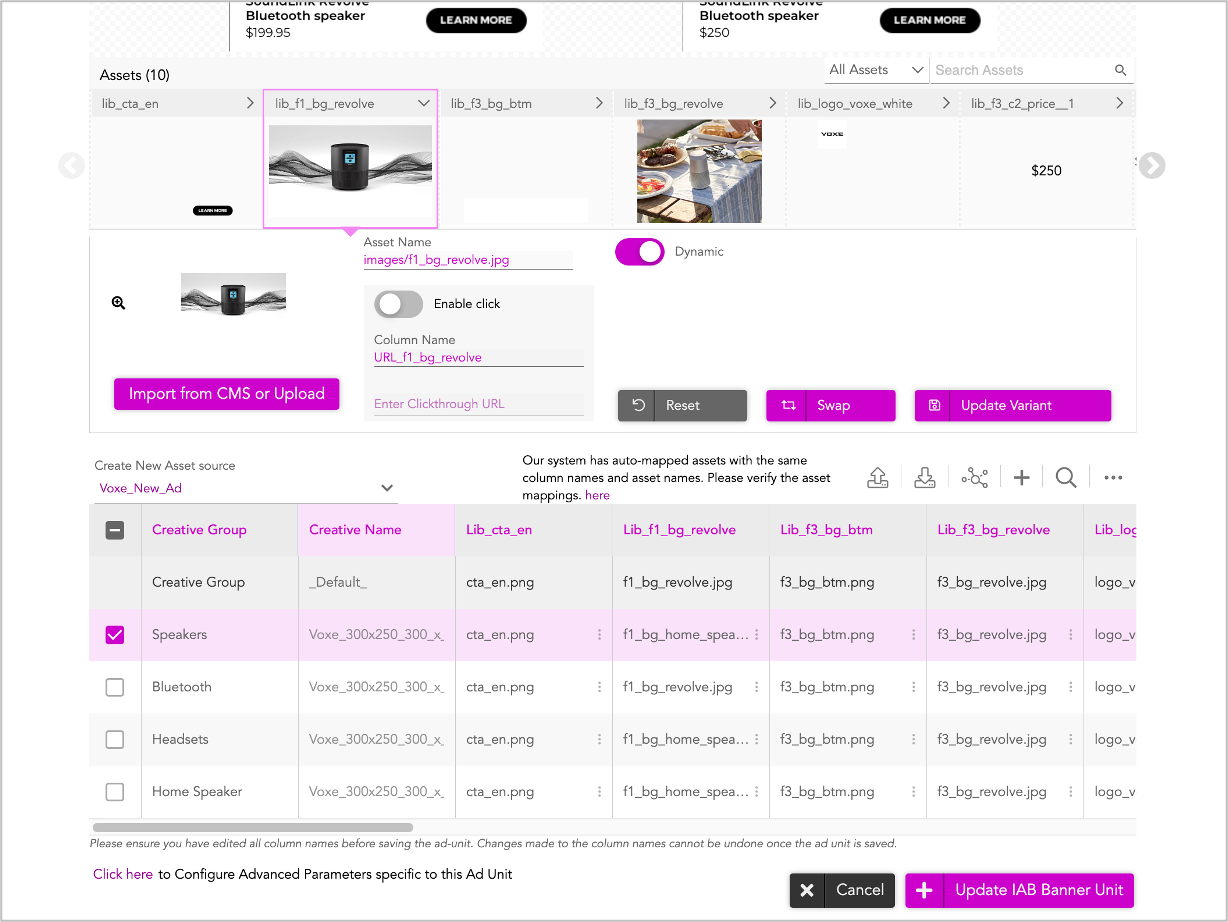
Once the Asset Source above has been uploaded, you can see the rows in the Interactive Asset Source populated. The maximum number of rows shown in the UI is 50, however there is no limit on the number of rows that the Asset Source can have.
When uploading the asset source, the platform validates that the column names in the uploaded file are the same, as they were at the time of download.
If the column names are different, the platform displays an error “Invalid Asset source uploaded. Kindly check all the columns in the asset source”.
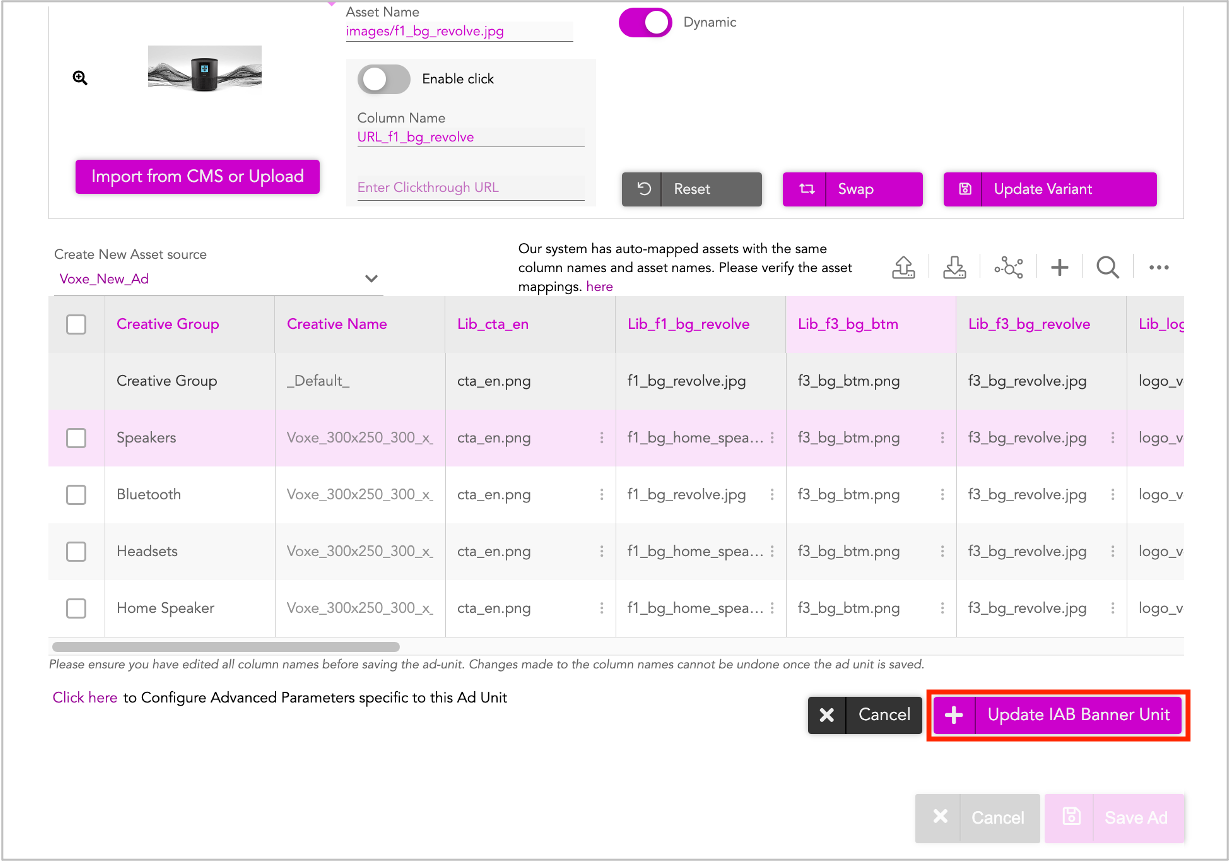
After uploading the Asset Source, if you want to make any changes to image and text assets, you can use the Interactive Asset Source.
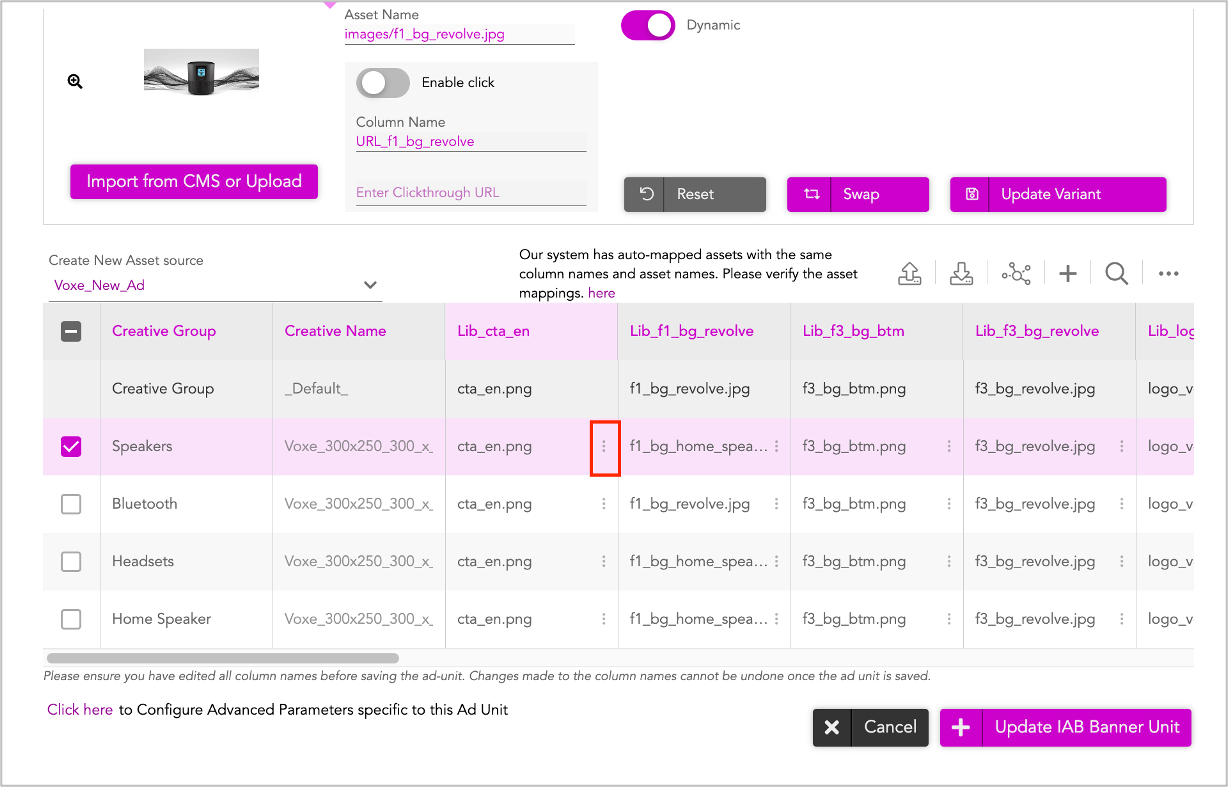
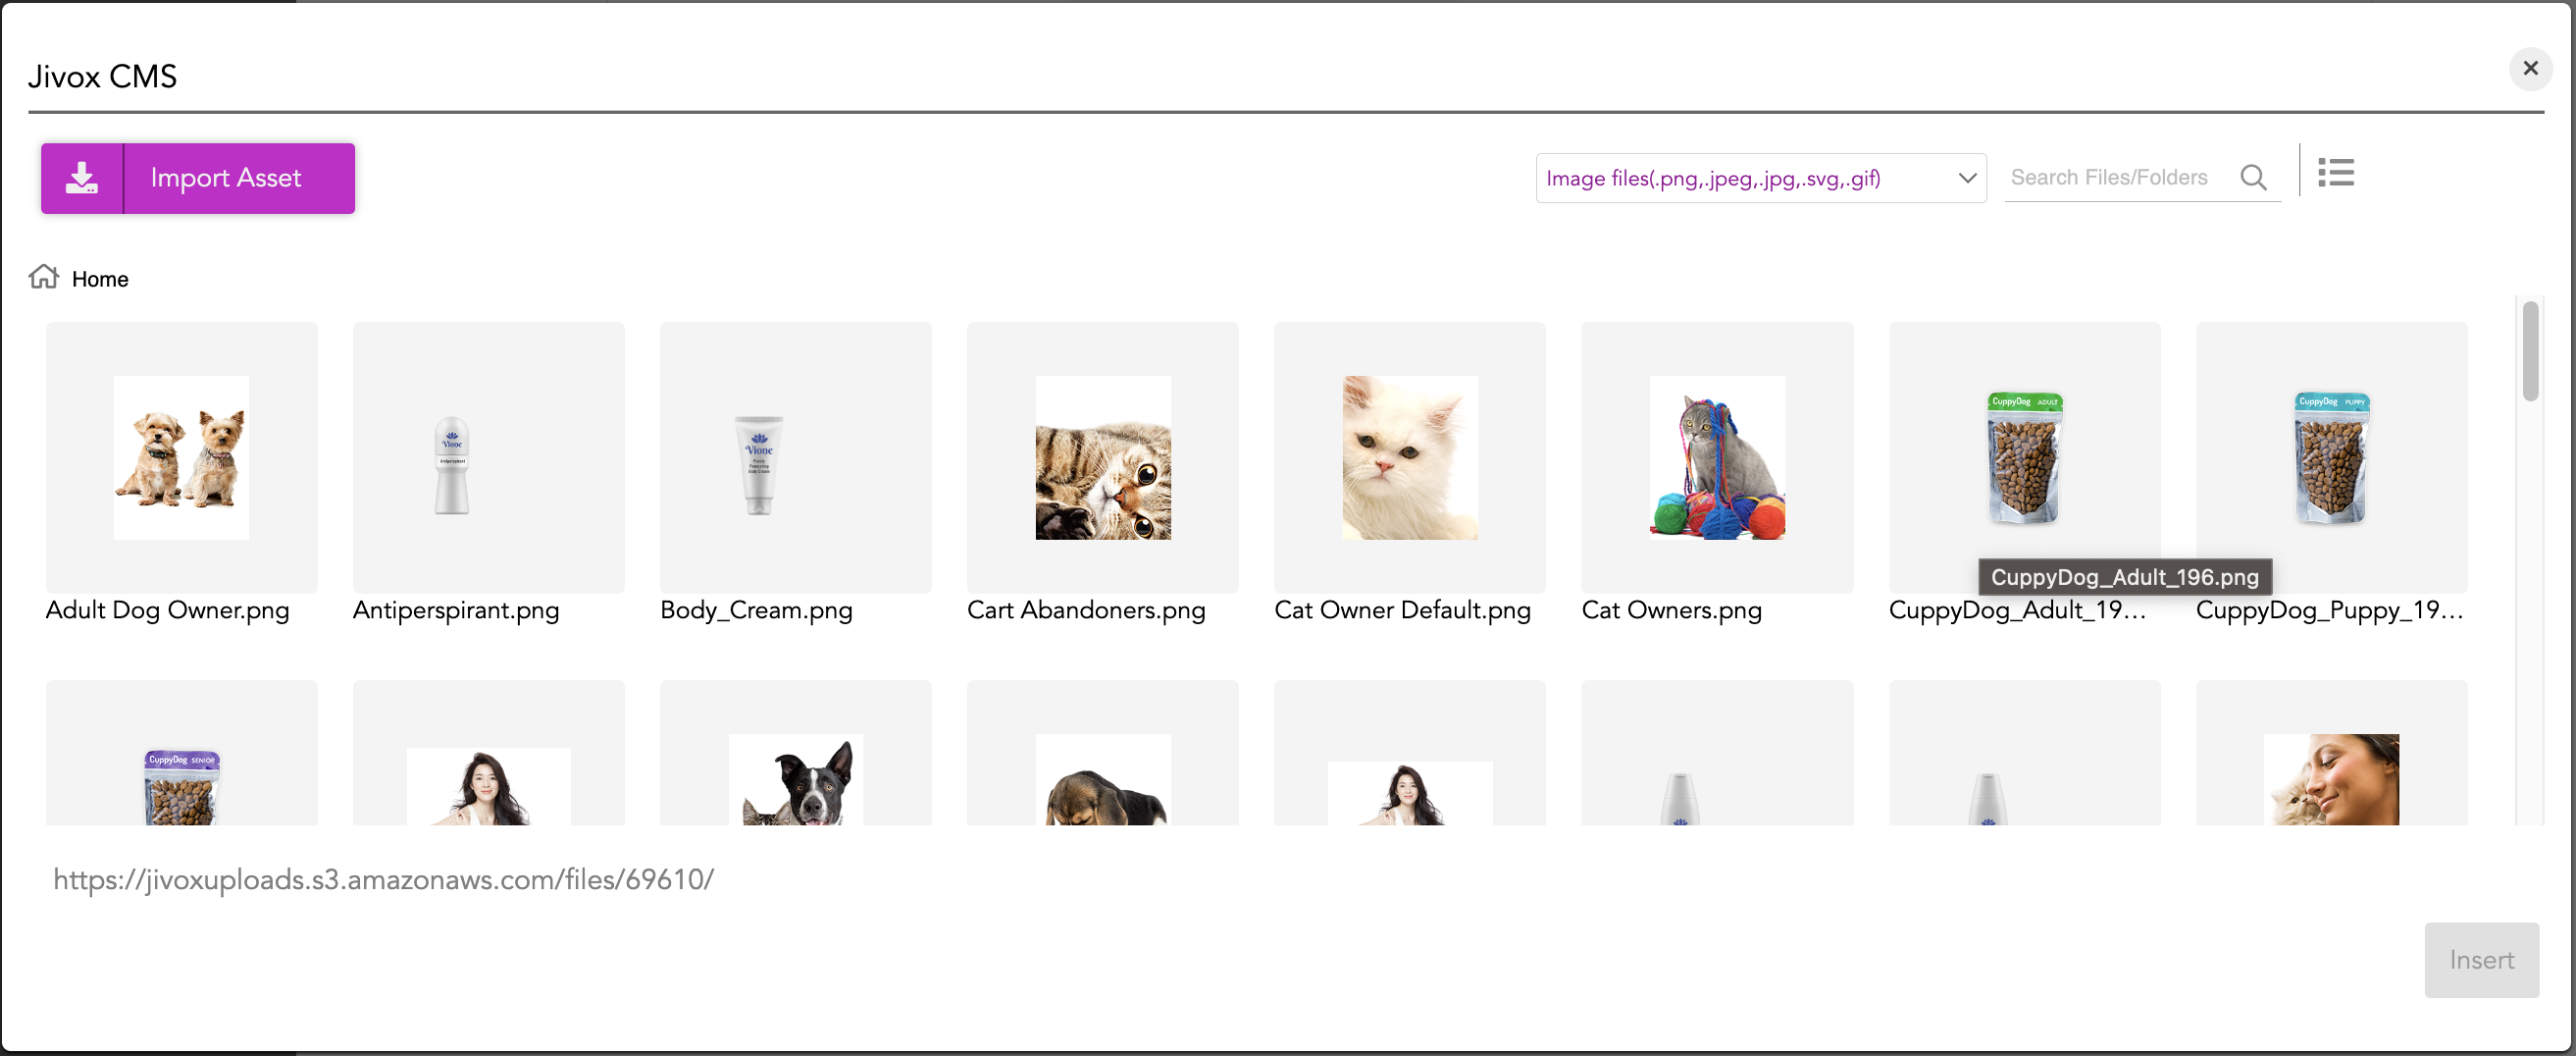
Click the three dots (highlighted in the image below) to update image assets using the Import from CMS window. You can edit text assets by directly entering text into each cell.
Once done, go ahead and save the Ad. Click Update IAB Banner Unit.
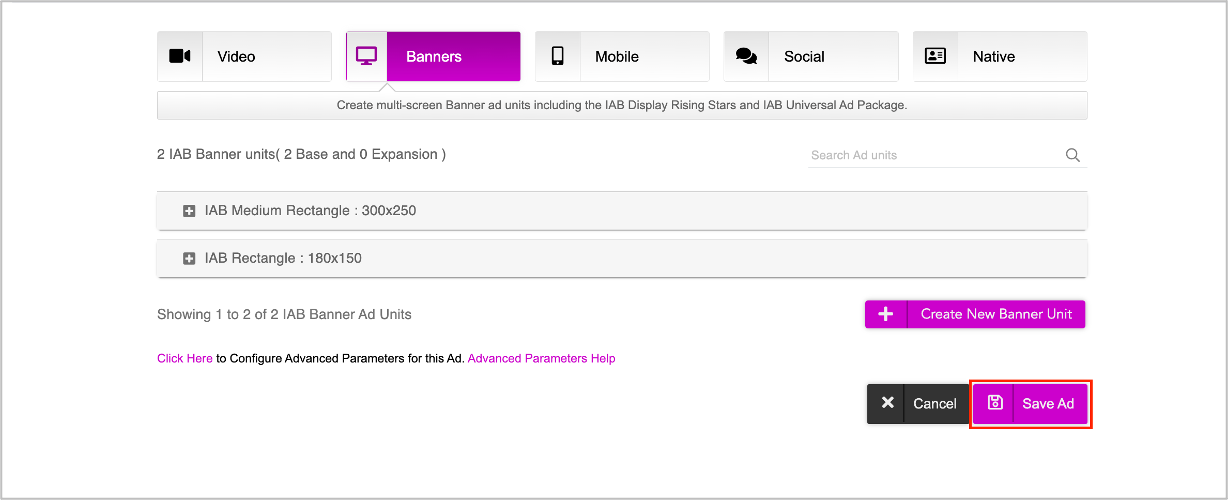
In the subsequent screen, click Save Ad.
The Ad will be saved and you will be redirected to the Ads and Campaigns dashboard.
Next Steps
This completes the first part of the setup! Next you must create a campaign and define the various triggers based on which the creative variations that you just created in the ad can be served to different audience groups.
Refer to the Creating a New Campaign section for details.