So far we have:
Created the Ecommerce Pixels
Setup the Campaign
Next, we must configure the recommendation engine.
Let's begin!
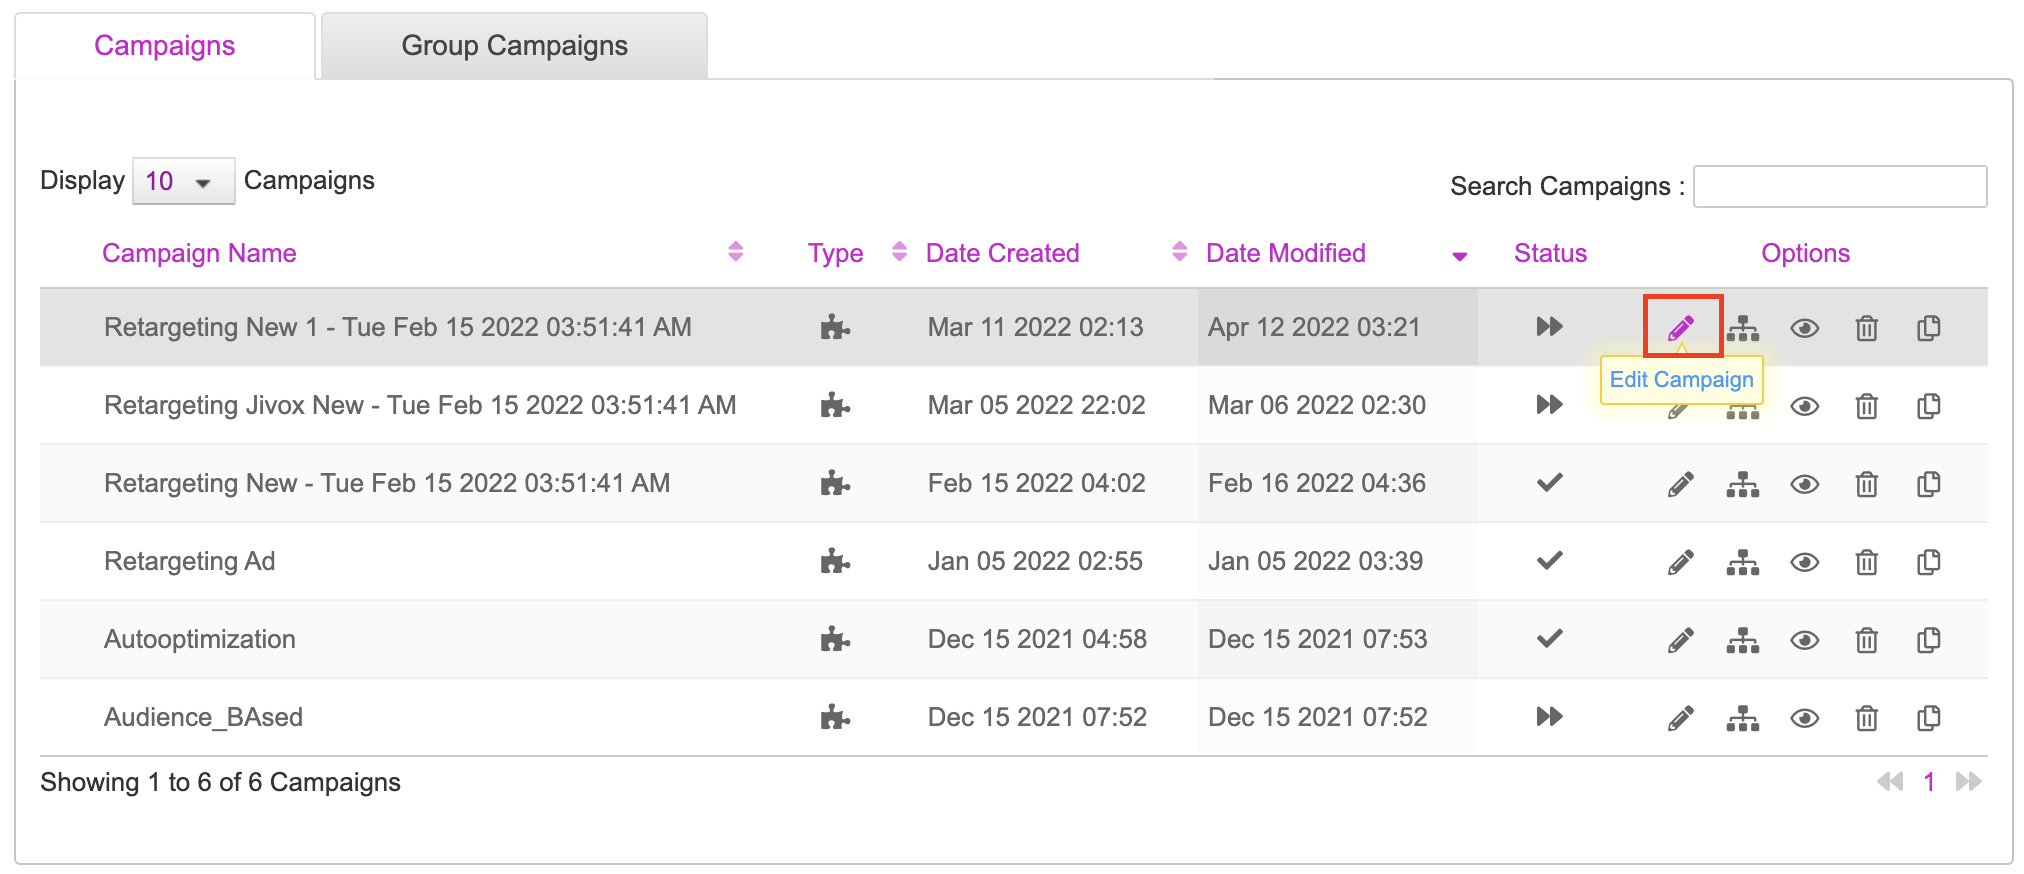
Navigate to the Campaigns page and click the Edit icon next to the campaign you just created.
The Edit Campaign page is displayed. Switch to the Optimization tab, select Recommendation Engine and click the Enable Recommendations button. The Recommendation Engine setup appears.
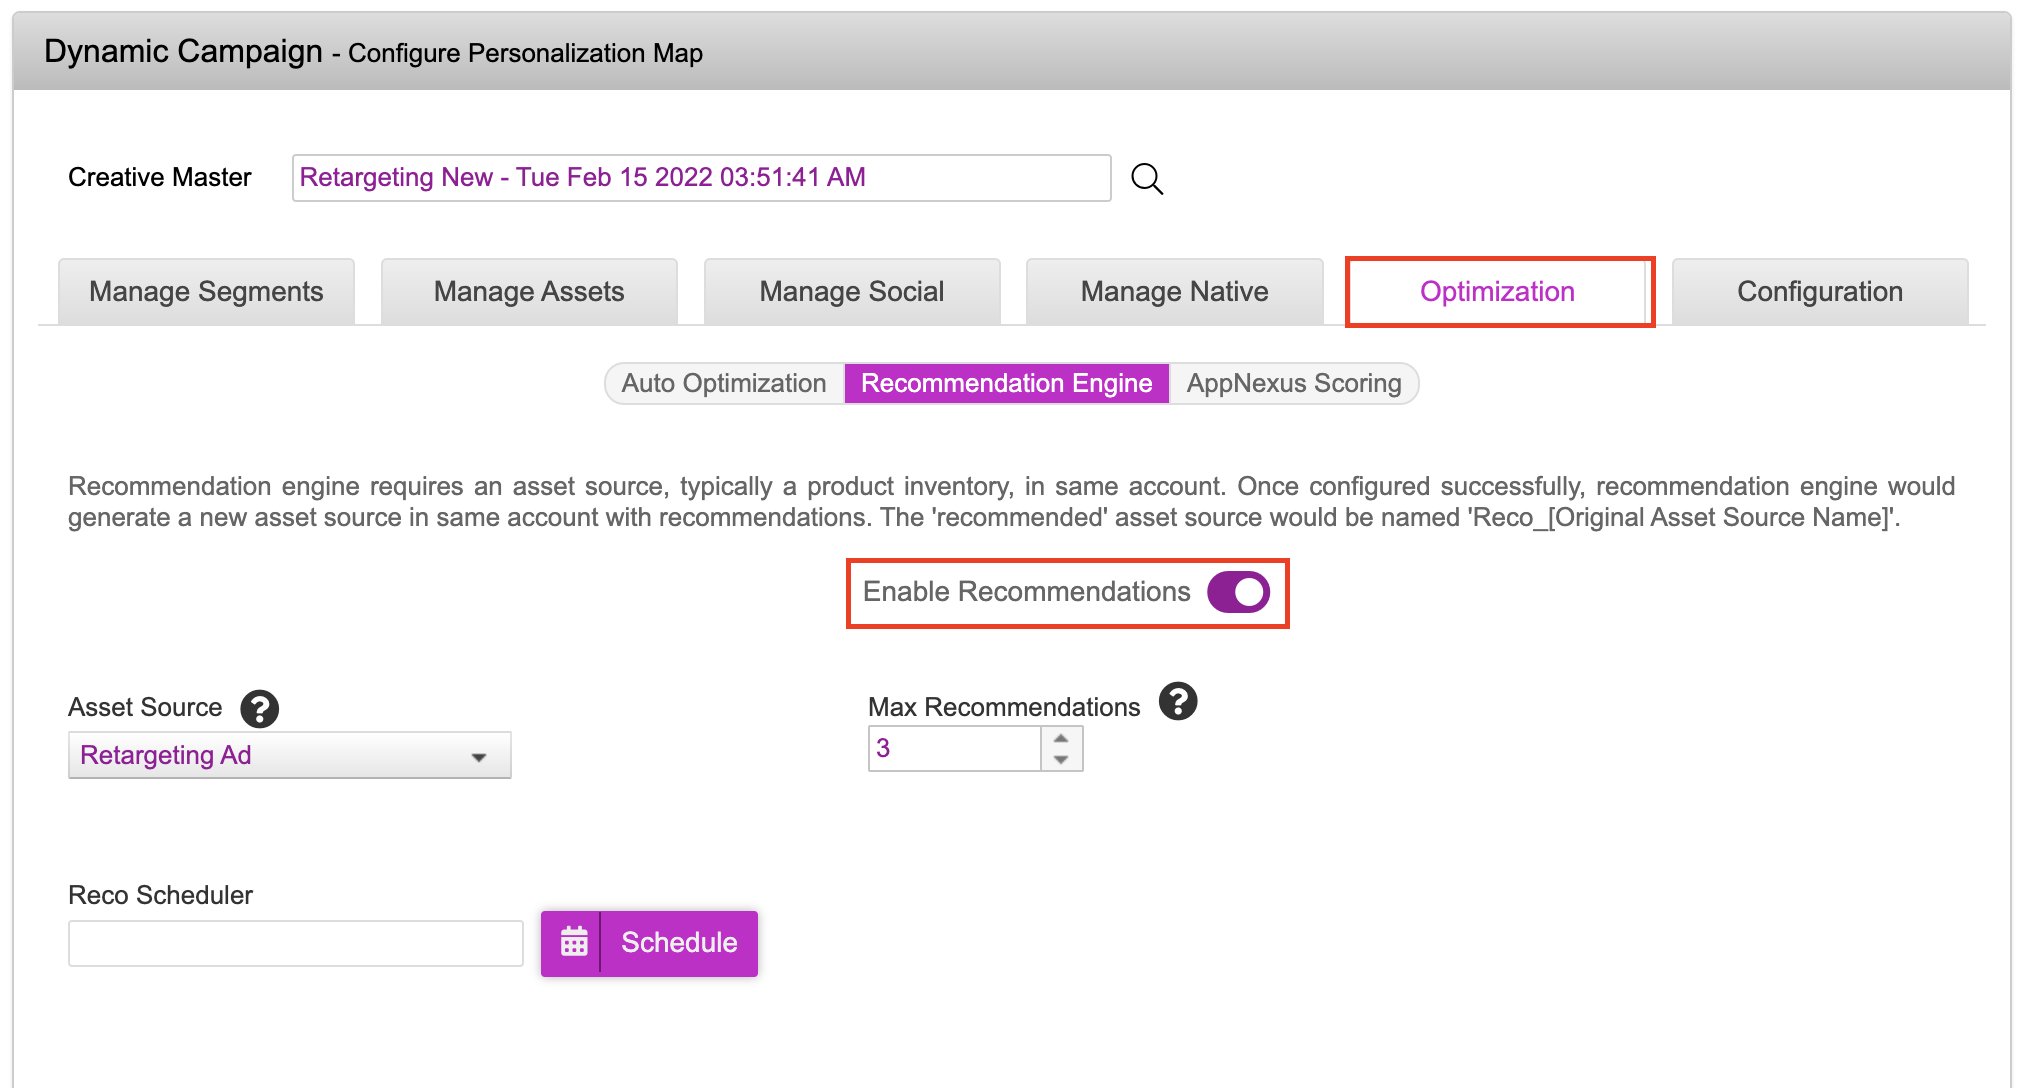
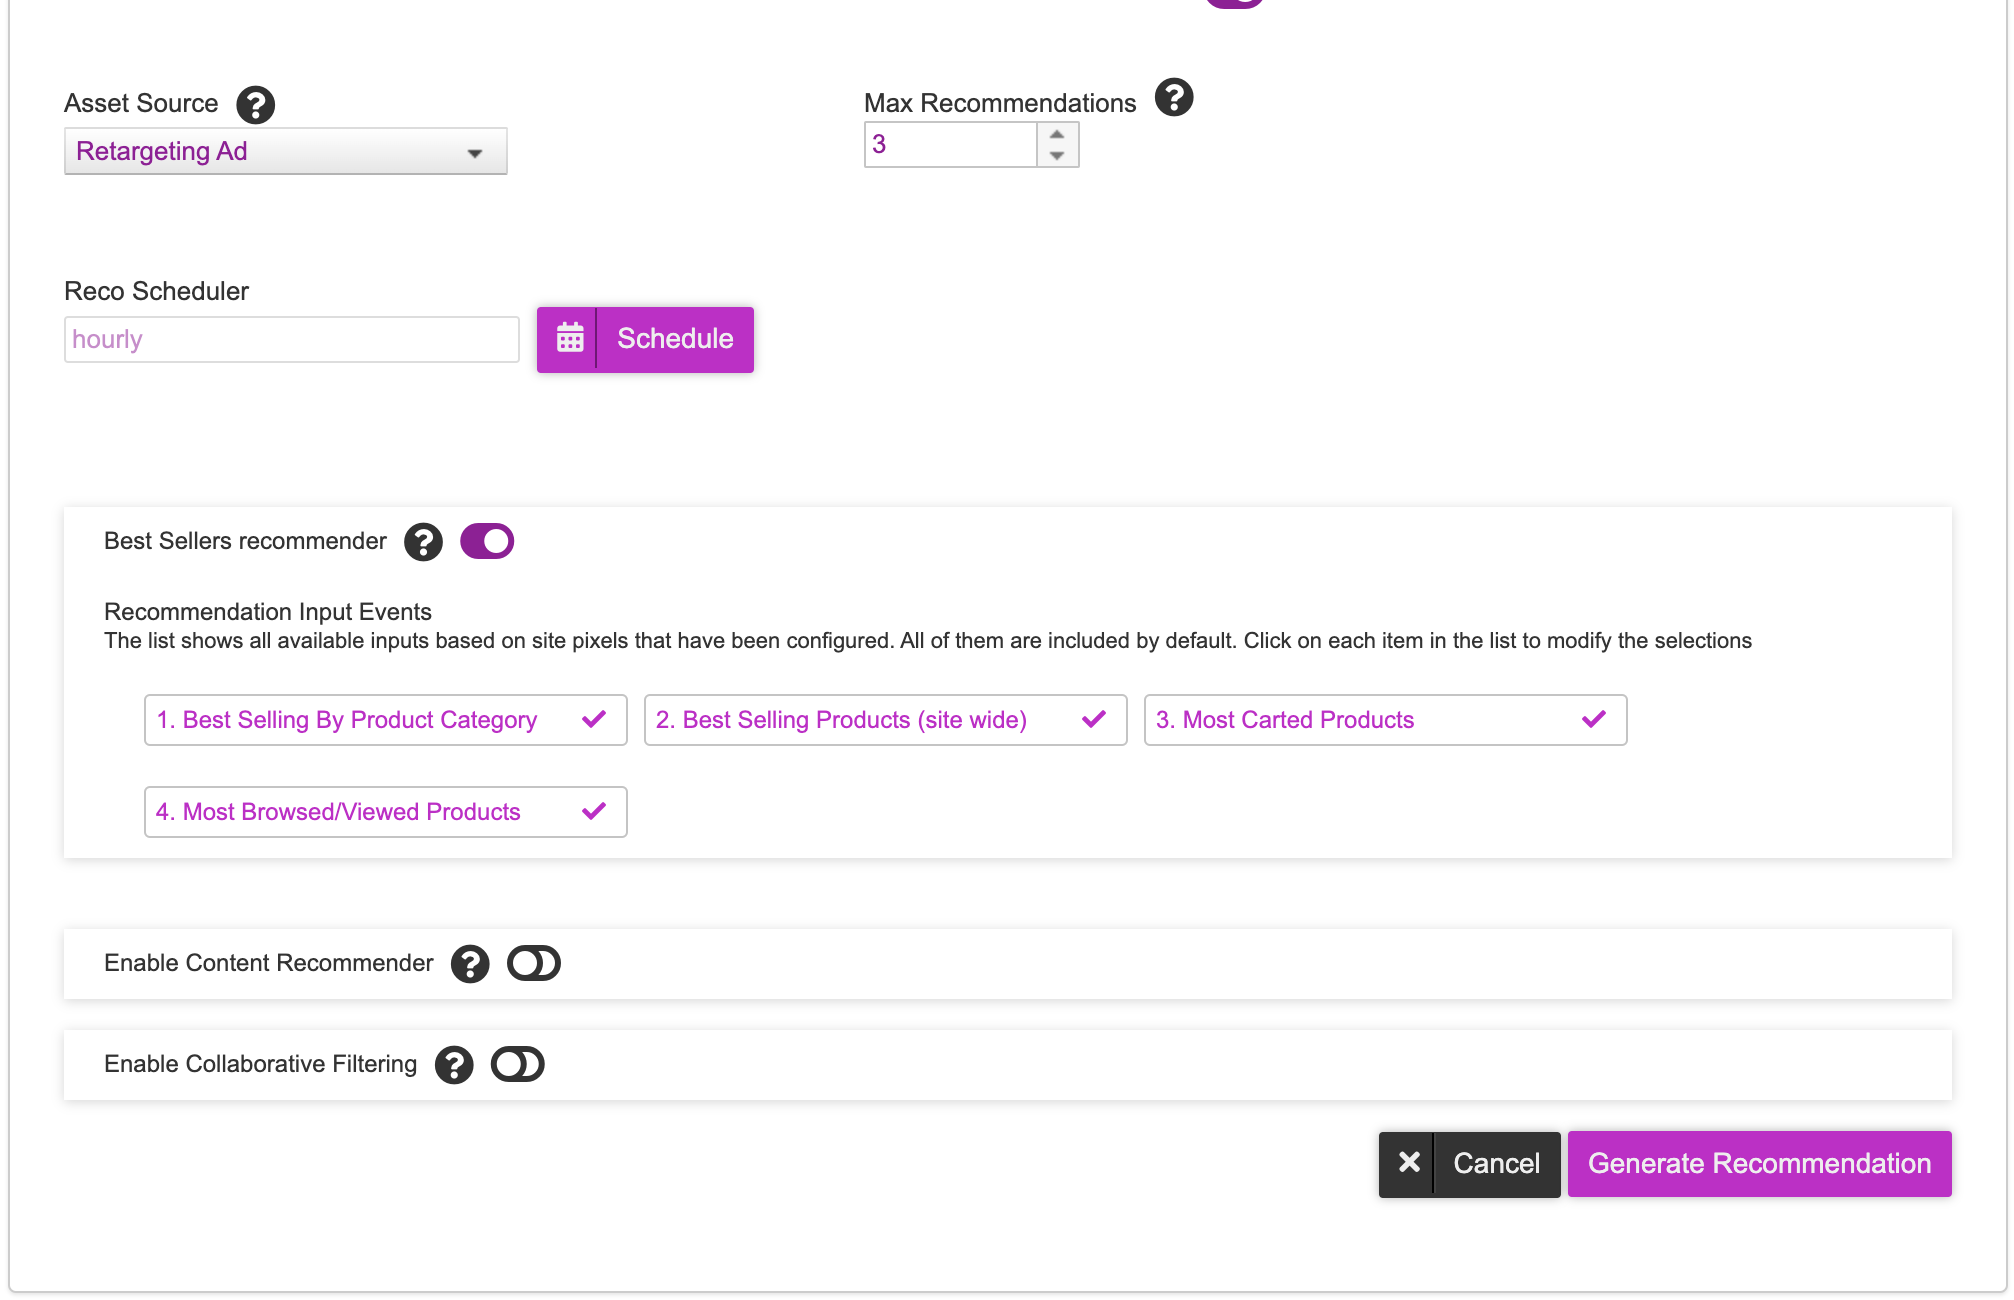
The asset source is selected automatically for the DCS campaign. You can also select the asset source you want to use to generate recommendations from the ‘Asset Source’ dropdown.
Select or type the maximum number of recommended products per user. If sufficient products don’t match configured criteria then the system will generate fewer recommendations than configured.
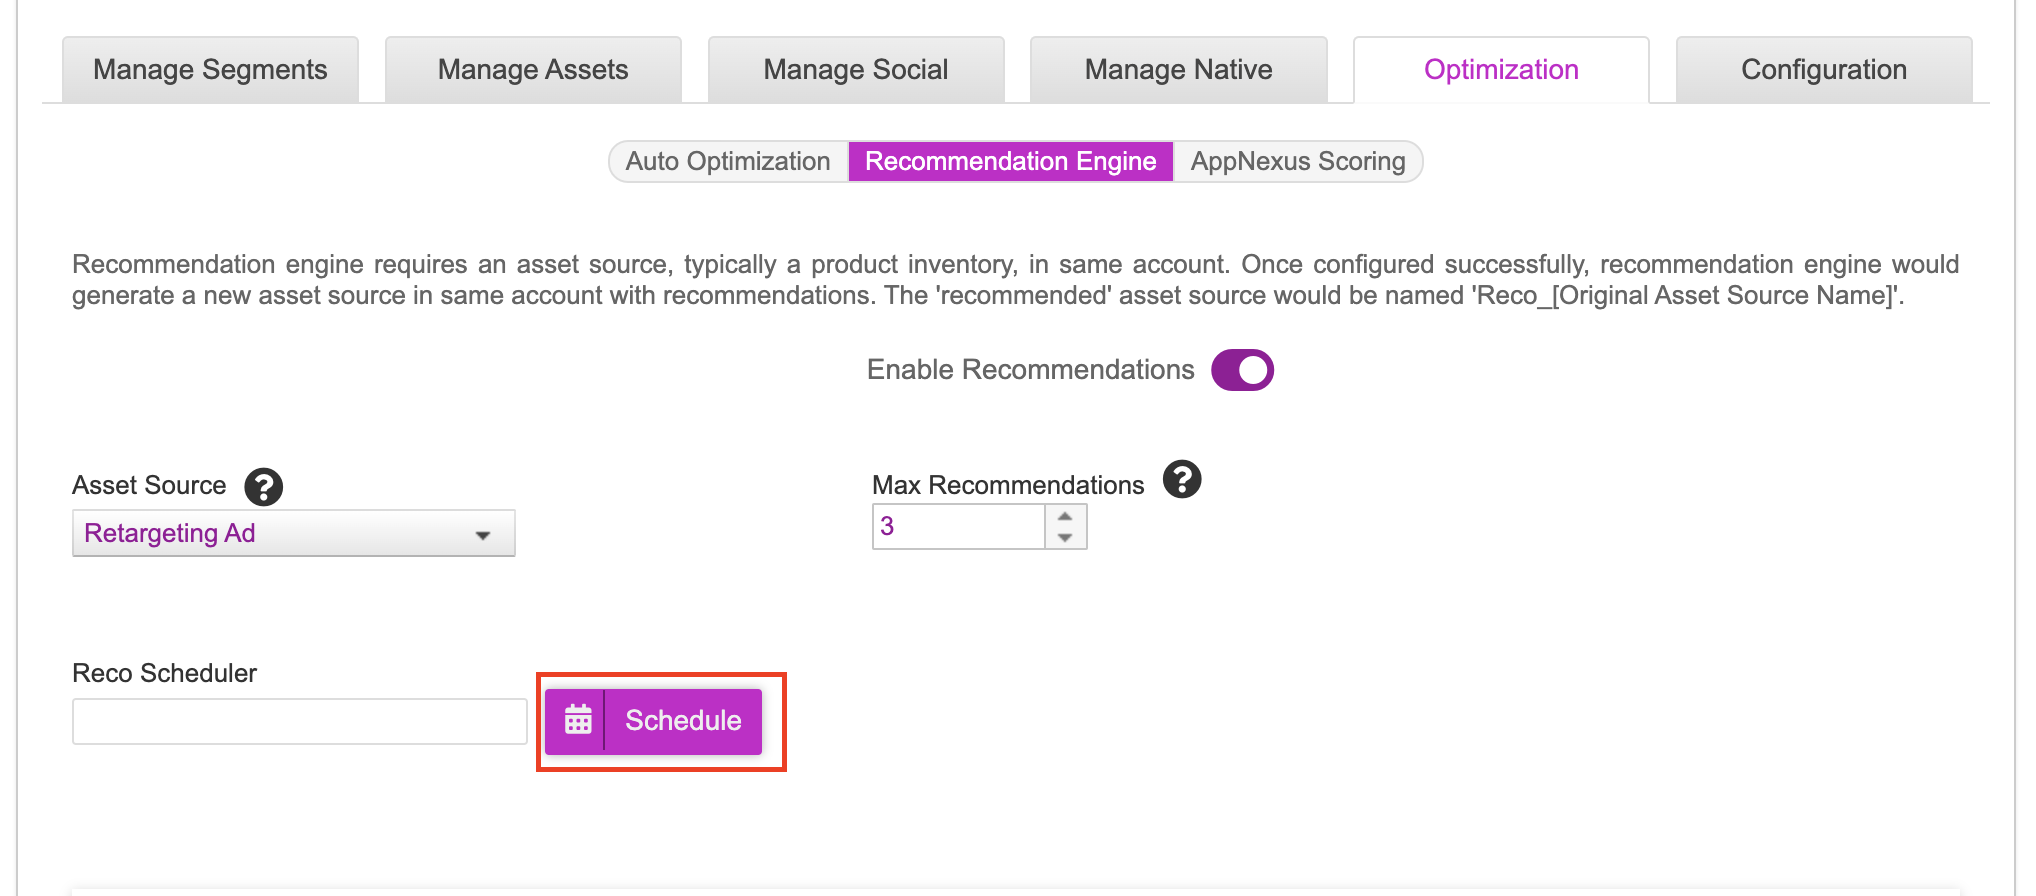
Setting Up the Scheduler
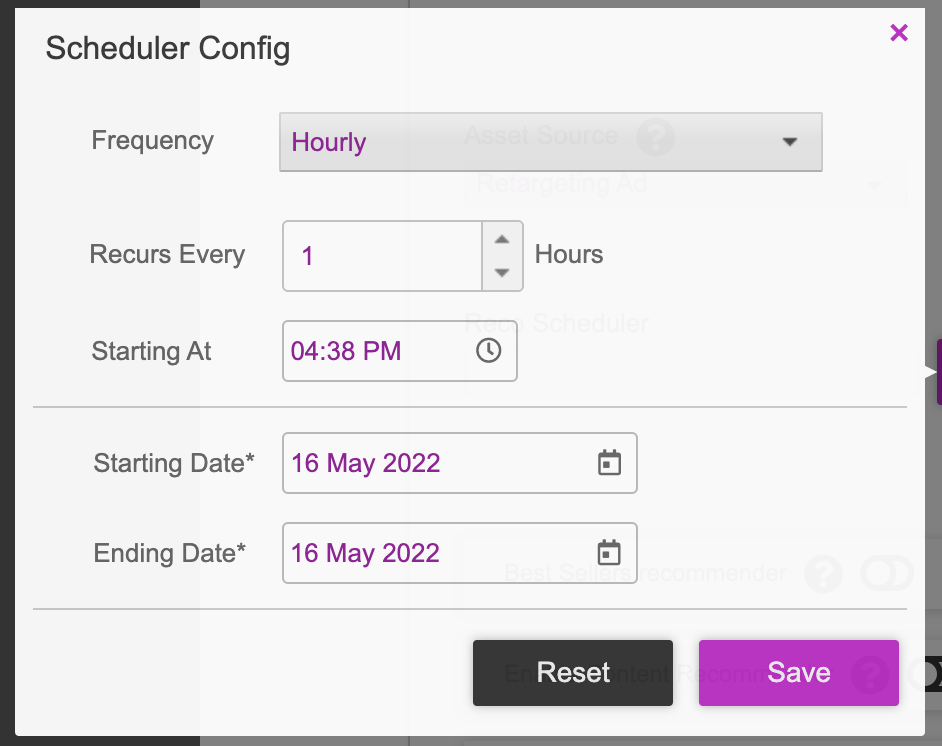
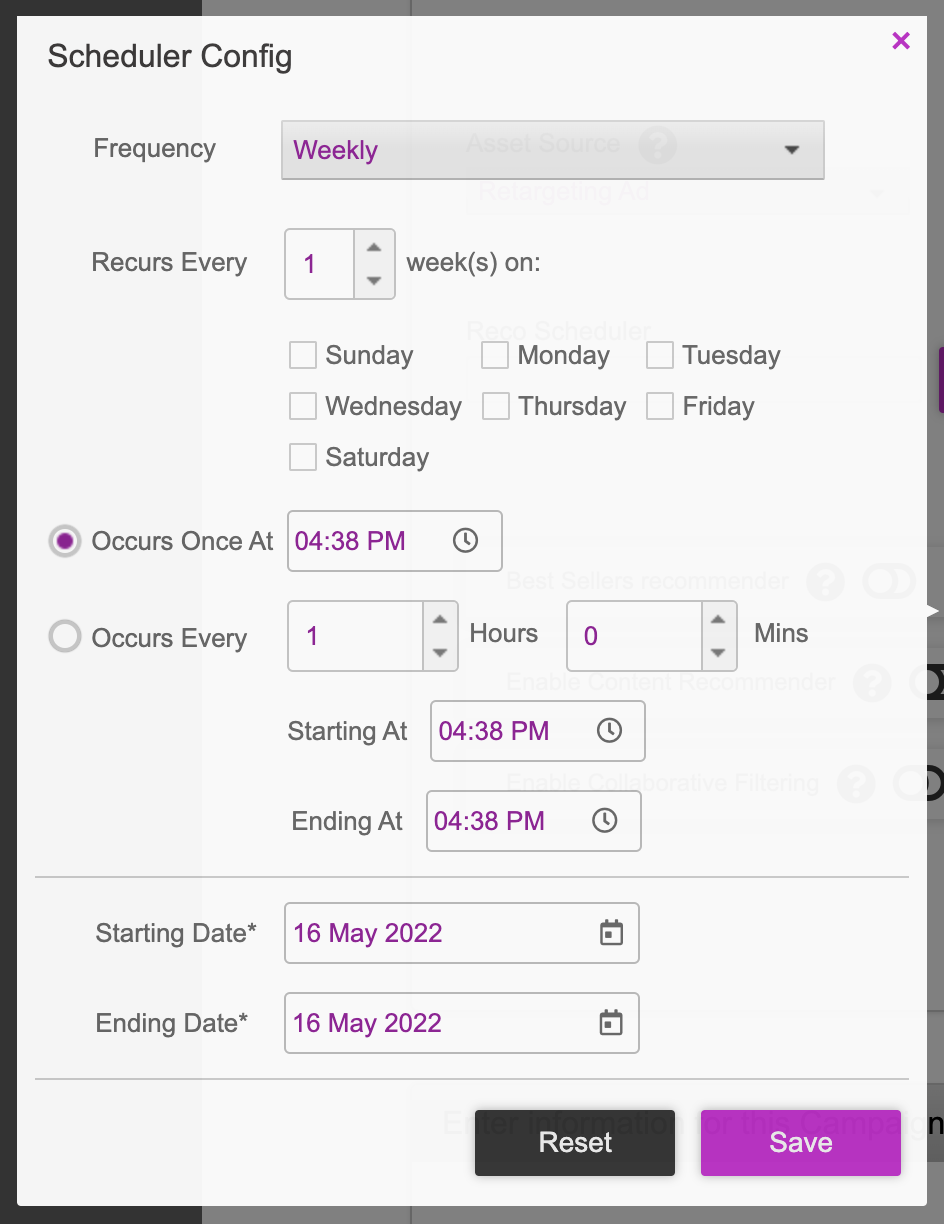
Click the ‘Schedule’ button to open the ‘Scheduler Config’ box.
Enter the values in the fields based on the Frequency-
Hourly
Daily

Weekly
The below table lists the Scheduler Config options.
Frequency | Description |
|---|---|
Hourly | The hourly scheduler allows the user to run the triggers after every “x” hours for any number of days based on the start and end day provided. Recurs Every - enter the frequency (number of hours) after which you want the time the scheduler to run. If you enter '2' then every 2 hours the scheduler will run. Starting At - enter the time at which you want to trigger the scheduler. The scheduler will start at the time mentioned. Starting Date - enter the date you want the scheduler to start Ending Date - enter the date you want the scheduler to end |
Daily | The daily scheduler allows users to run the job after every “x” days for a given start and end date. You have the option to run the scheduler for once a day or for more than once a day based on the 'x' hours given in Occurs Every hours option. Occurs Every (Days) - enter a number to run the scheduler for the number of days mentioned. If you enter '1' then the scheduler will run once in a day. Occurs Once At - enter the time to start and run the scheduler once every day. Occurs Every (Hours, Mins) - enter the frequency time to run the scheduler. If you enter 2 hrs and 15 mins, then for every 2 hours 15 minutes, the scheduler will run based on 'starting at' and 'ending at' time given Starting At - enter the time you want to trigger the scheduler. The scheduler will start at the time mentioned Ending At - enter the time you want to end the scheduler. The scheduler will end at the time mentioned Starting Date - enter the date you want the scheduler to start Ending Date - enter the date you want the scheduler to end |
Weekly | The weekly scheduler allows users to schedule the job every week or every “x” weeks. The users can select the weekdays on which the scheduler should run. The “occurs once” and “occurs every x hours” options indicate if the scheduler has to be run once or more than once on the selected weekdays respectively. Recurs Every week(s) - enter a week day to run the scheduler . If you select 'Sunday' 'Monday' then the scheduler will run every Sunday and Monday. Occurs Once At - enter the time to start and run the scheduler once on the selected weekday(s). Occurs Every (Hours, Mins) - enter the frequency to run the scheduler. If you enter 2 hrs and 15 mins, then after every 2 hours and 15 minutes, the scheduler will run based on the configured 'starting at' and 'ending at' time. Starting At - The scheduler will start at the time configured. Ending At - The scheduler will end at the time configured. Starting Date - enter the date you want the scheduler to start Ending Date - enter the date you want the scheduler to end |
After setting the scheduler, click the Save button.
Setting Up Best Seller Recommendation
Now, let's configure the best seller recommendation options.
To configure Best Seller recommendation, follow these steps:
Enable the 'Best Sellers recommender' button.
Once the toggle button is enabled, the list of Recommendation Input events appears. The list shows all available inputs based on site pixels that have been configured.
By default, all the input events are selected. Click on each item in the list to deselect the input event.
We recommend you to select all the input events, so that Jivox IQ can generate the most optimal set of recommendations.
You can enable either the Bestseller Recommender or the content and collaborative recommender at a time. If you try to enable all the three recommendation services simultaneously, an error message is displayed.
To configure content recommendation, follow the below steps:
Click the ‘Enable Content Recommender’ button. Once the toggle button is enabled, the Content Recommender setup appears.
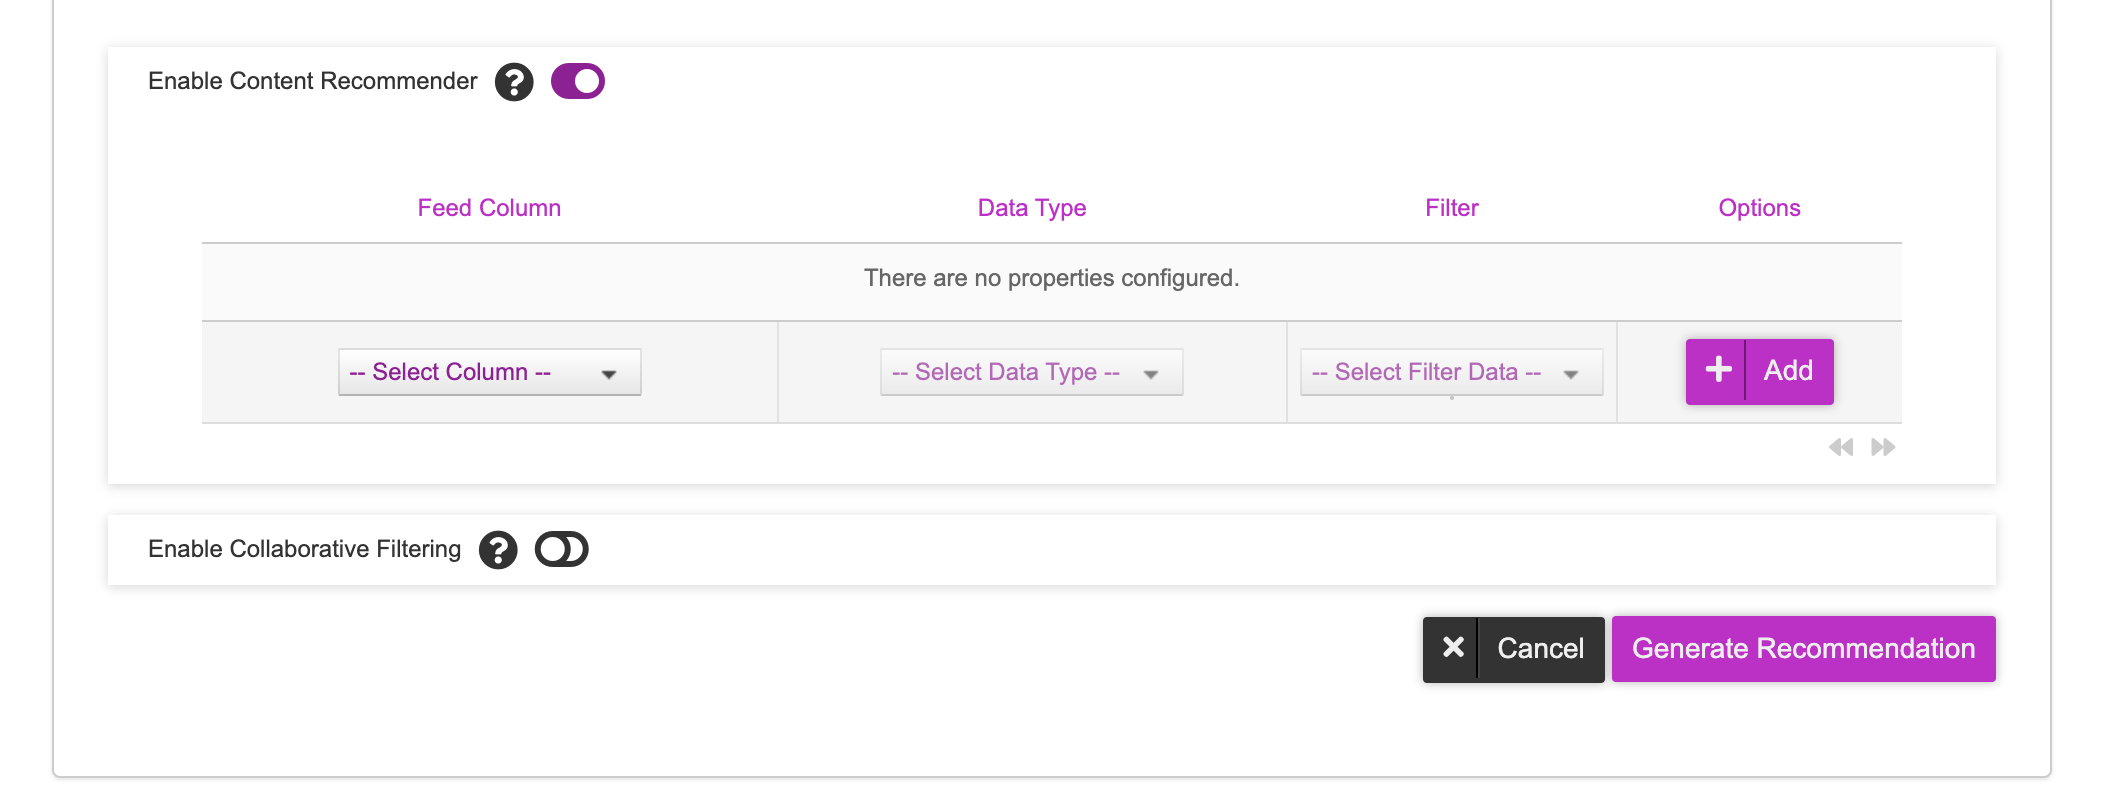
Select a column name as Feed Column. The Feed Column dropdown lists all the columns available in the asset source selected. Feed Column is a column in the selected asset source and contains text or numeric values. When the Feed Column value matches with the input data from the data pixels, relevant content from the selected asset source will be recommended.
Select Text or Numeric Range as Data Type, based on the recommendation strategy.
The options under Filter vary, depending up on the Data Type you have selected in the previous step, as described in the table below:
Data Type | Filter |
|---|---|
Text | Select one of the following filter options, to determine how the content in the Feed Column should be matched:
|
Numeric Range | Type or select the number in the Filter box, to define the numeric range. |
Click Add to add the content filter configuration. You can add multiple filter configurations to define explicit recommendations.
You can edit the existing filter configuration by clicking on the pencil icon.
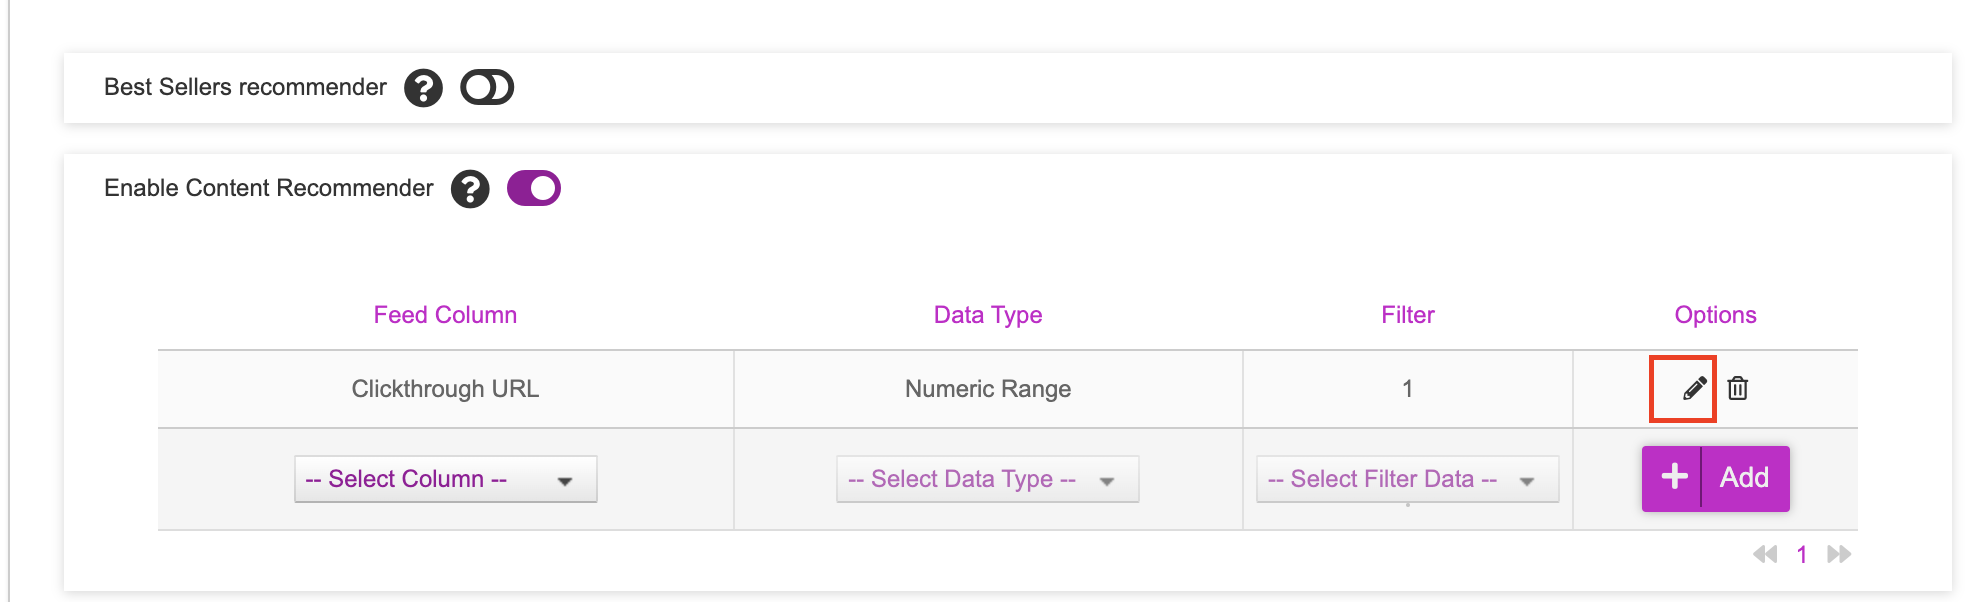
You can modify the details as required and click Update Configuration. To delete the filter configuration, click onto the bin icon, under the ‘Options’ column.
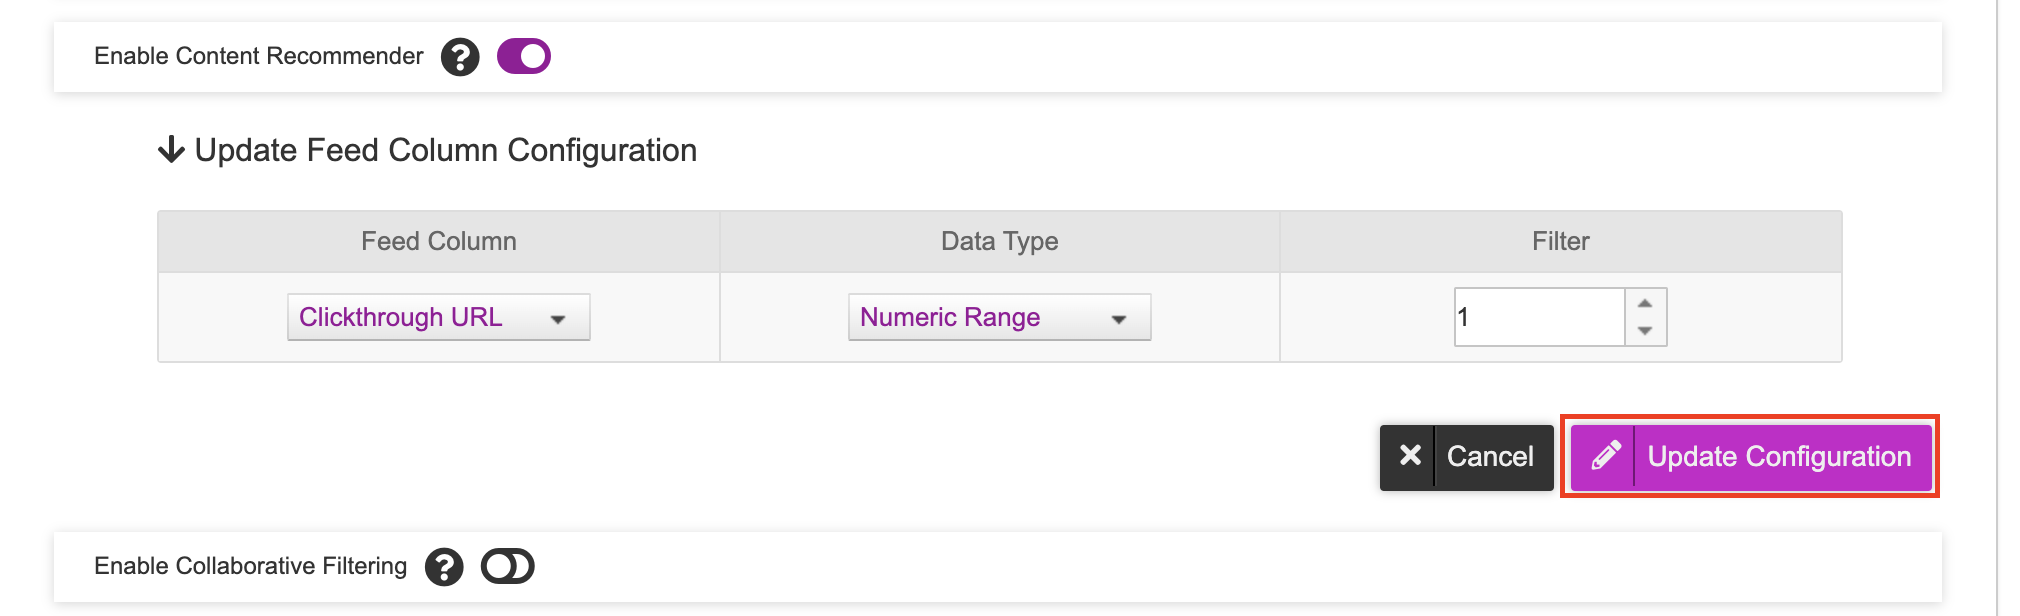
You can add only one content filter type for the selected Feed Column. If you try to add another filter configuration for the same Feed Column, an error message is displayed.
To configure Collaborative recommendation, follow the below steps:
Click on the ‘Enable Collaborative Recommender’ button. Once the toggle button is enabled, the Collaborative Recommender setup appears.
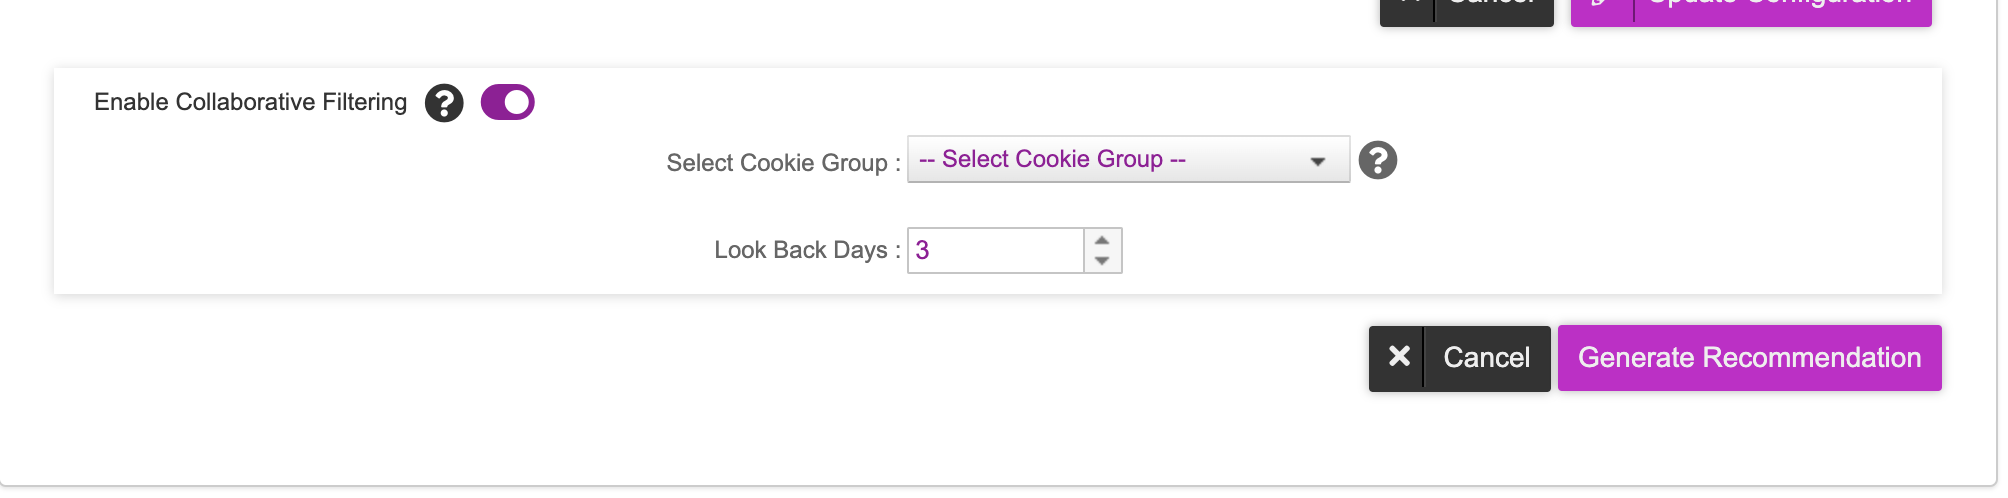
Select the cookie group from the dropdown list. This cookie group will capture the product Ids of the last N products on the advertiser's website, with which the user has interacted.
The product Ids captured in the cookie group must match the asset keys in the ‘Asset source’ selected above.
Configure the timeframe for which you want to track the user's activity. The maximum value you can define is 31 days.
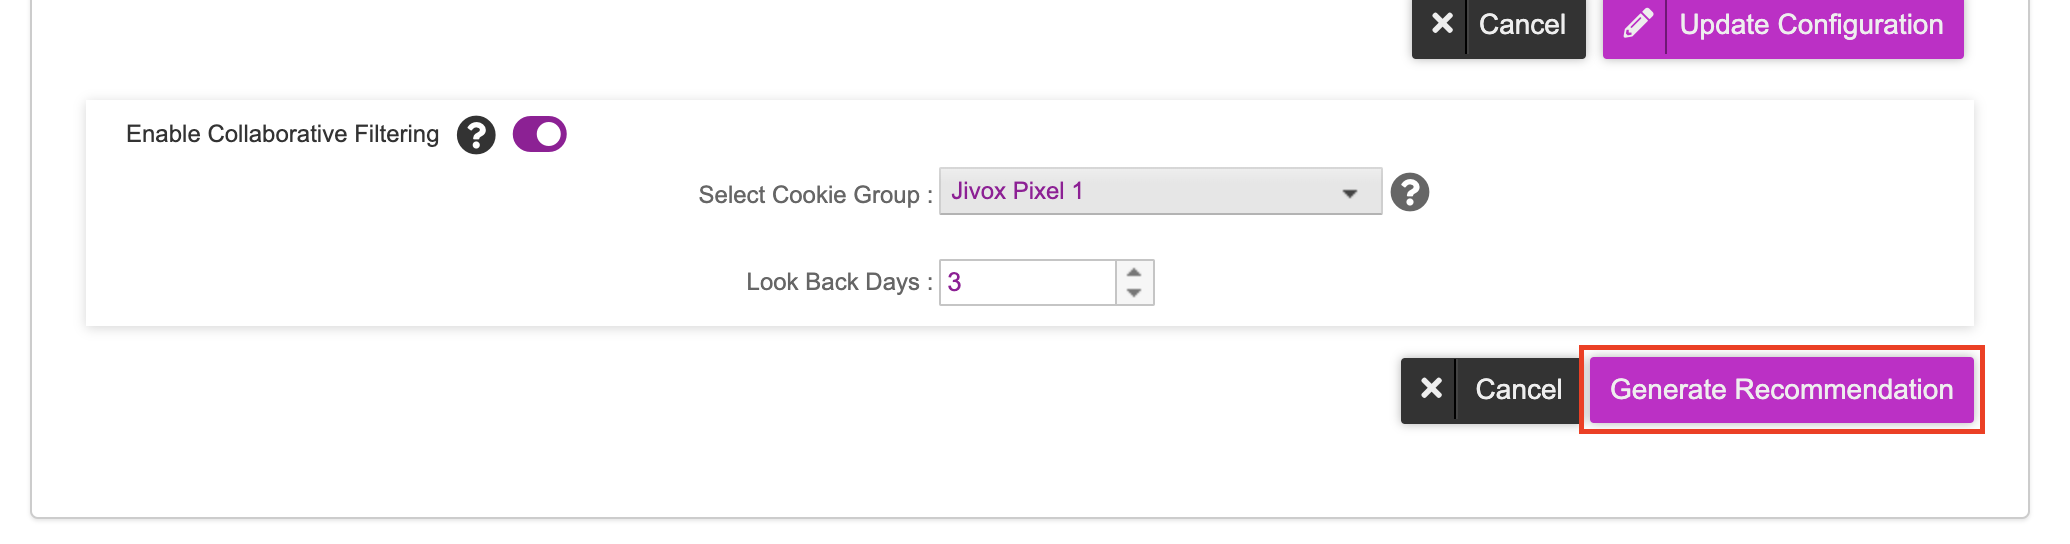
Once you have configured the recommendation engine, click the Generate Recommendation button to start the recommendation engine.
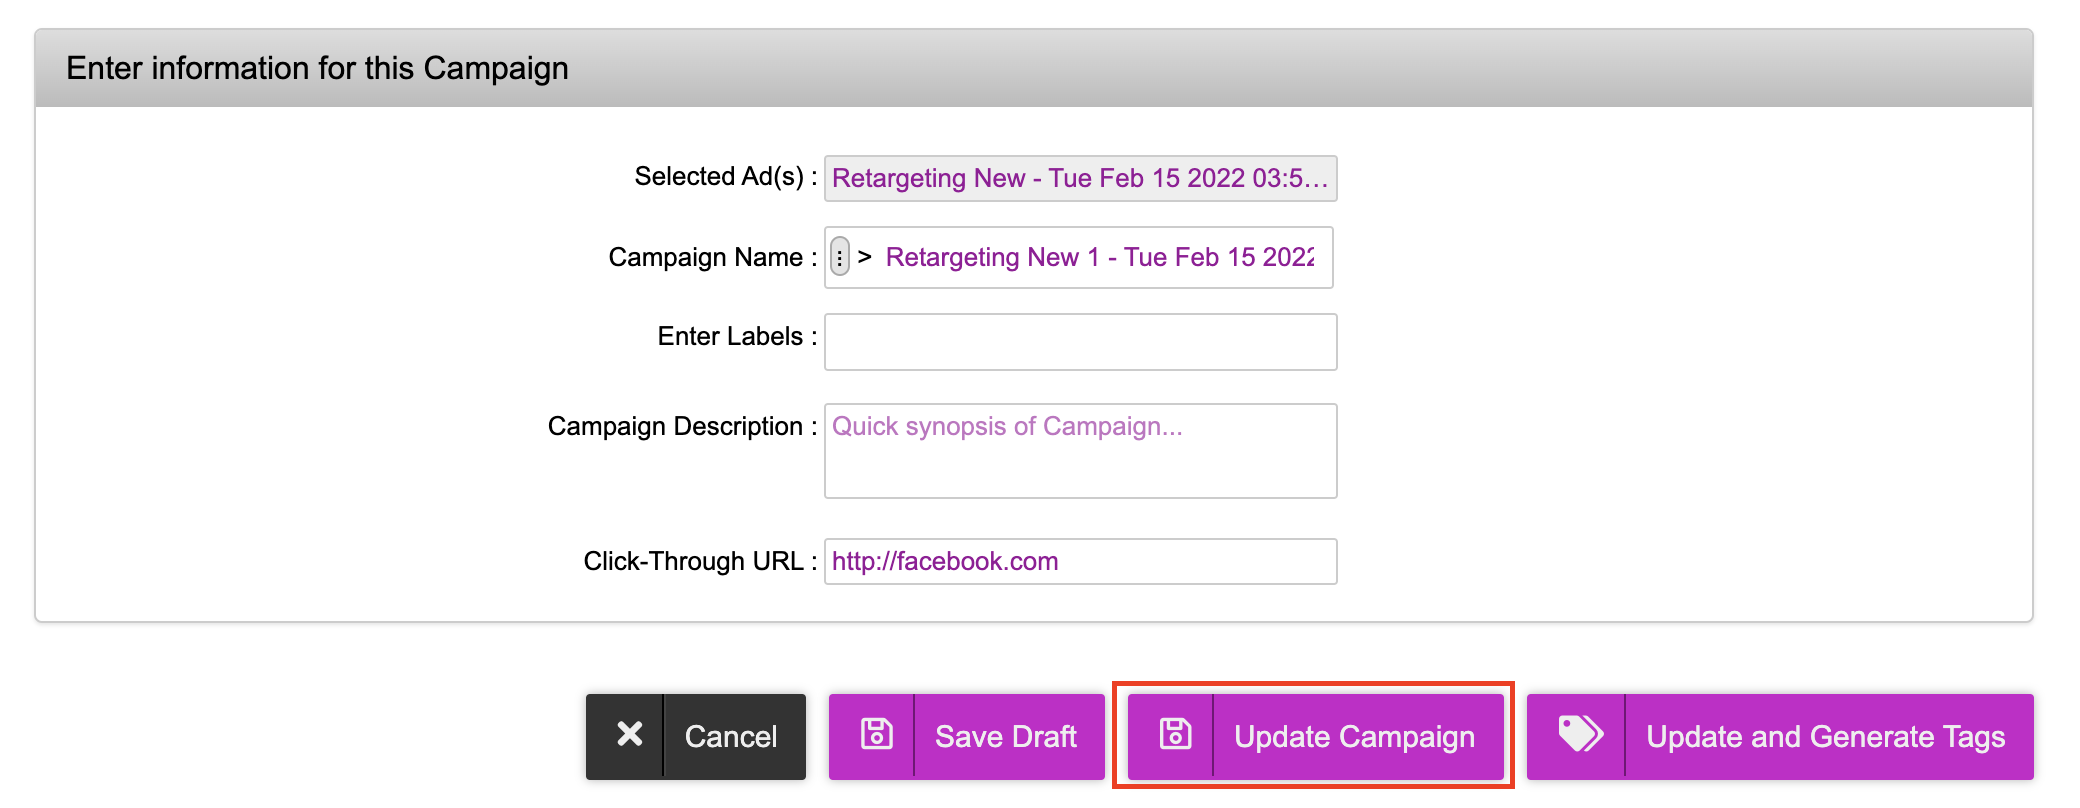
Now that the recommendation engine is setup, click the Update Campaign button to associate the recommendation configuration with the campaign.
Recommendation engine will generate a new asset source in the same account with same asset keys but recommended products as asset data. The 'recommended' asset source is named after source asset source as 'Reco_<Source Asset Source Name>'.
For the Jivox IQ to generate Bestseller recommendation, you should have pre-defined the e-commerce pixels under the same advertiser/ brand account. If you try to generate recommendations without any e-com pixels defined across the brand, an error message is displayed.
Next Steps
Here's what you must do next.
Generate the Creative Preview and send it for approvals if required.
If you want to generate multiple tags at once, use the Bulk Tag Generation feature.