In this part of the platform, you’ll be generating tags that will be trafficked to your chosen DSP. The following will be covered in this section:
- Uploading a media plan
- Selecting DSP Data Signals
- Uploading 3rd party pixels
- Generating Tags
An Ad tag (sometimes called a placement tag or creative tag) is a piece of HTML or Javascript code snippet that is implanted on the web page to get an ad from the ad server. This integrated code signifies the space where the ad will be displayed. The tag not only indicates the space but also key parameters including – the size of the ad, topic/sub-topic of the page requesting for an ad, basic page info, custom key values, and more.
Creating a Media Plan
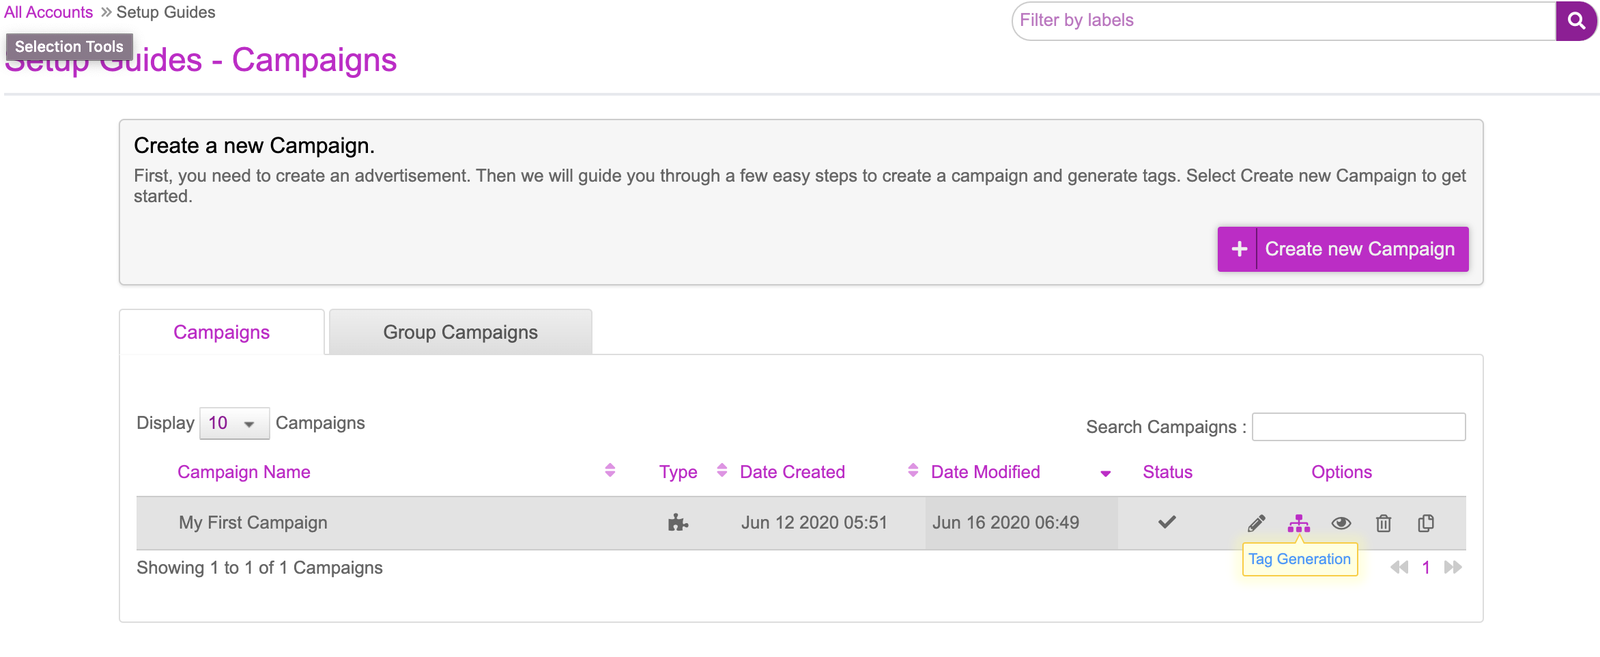
- From the Campaign page, click the Tag Generation icon. This will take you to the tag generation page.
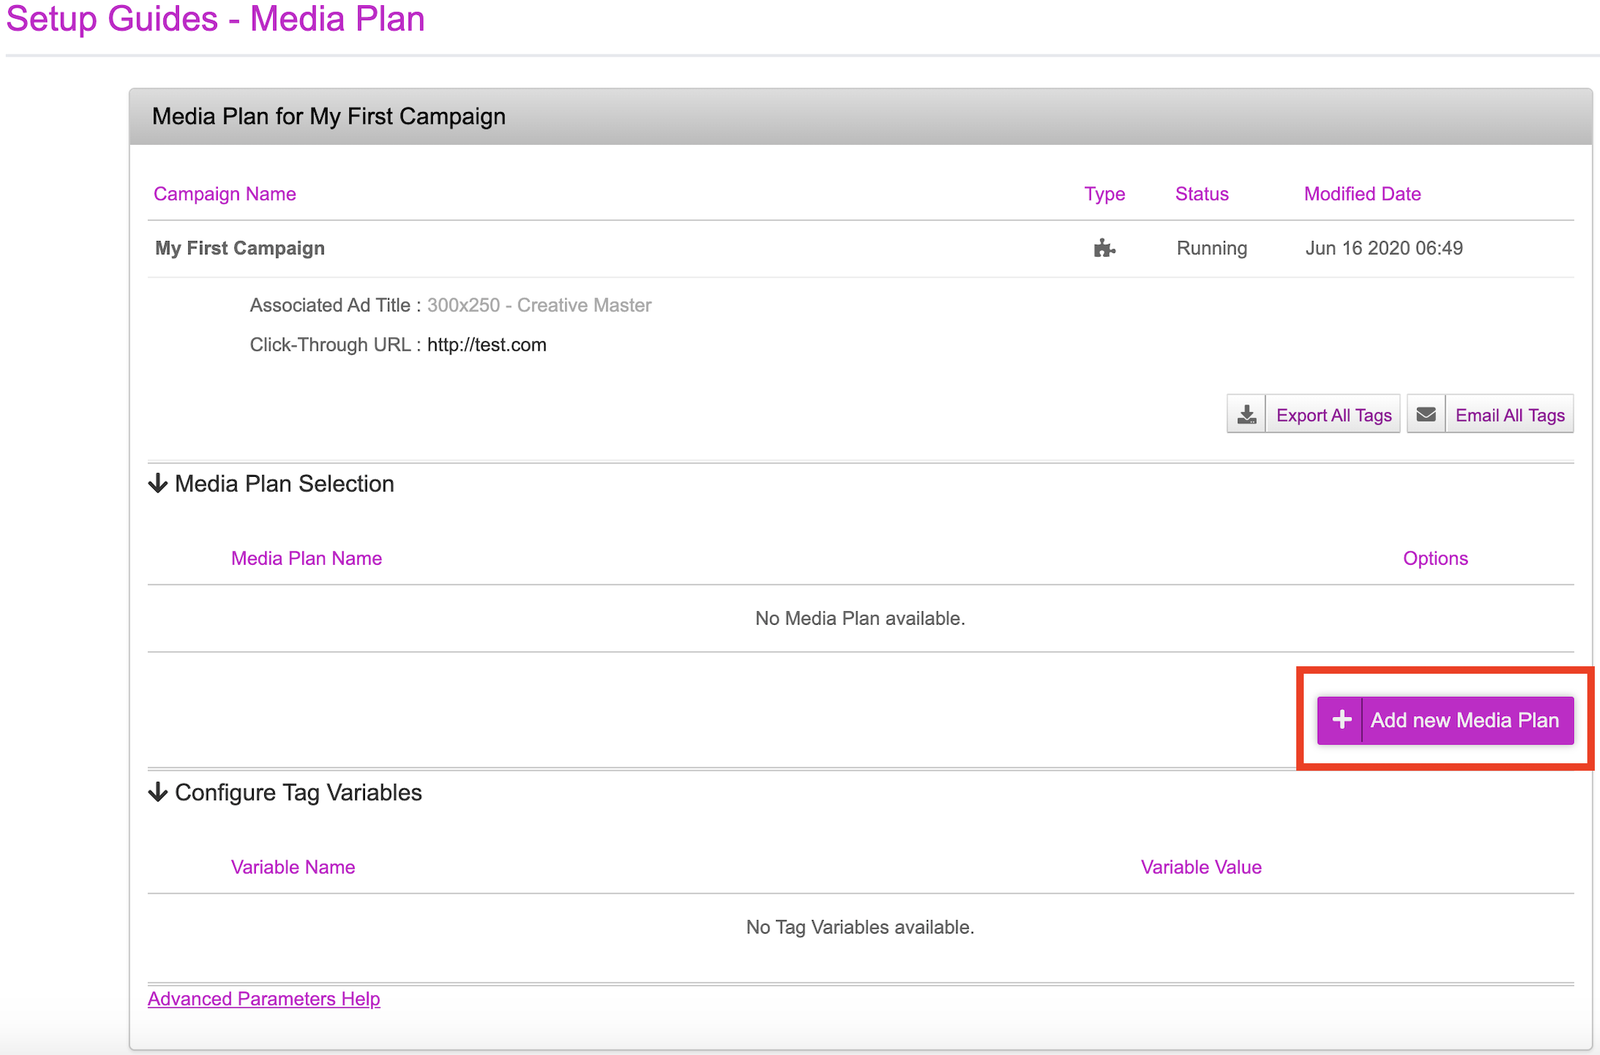
You will be presented with a new dashboard that will show the Media Plan section. First click then Add new Media Plan button.
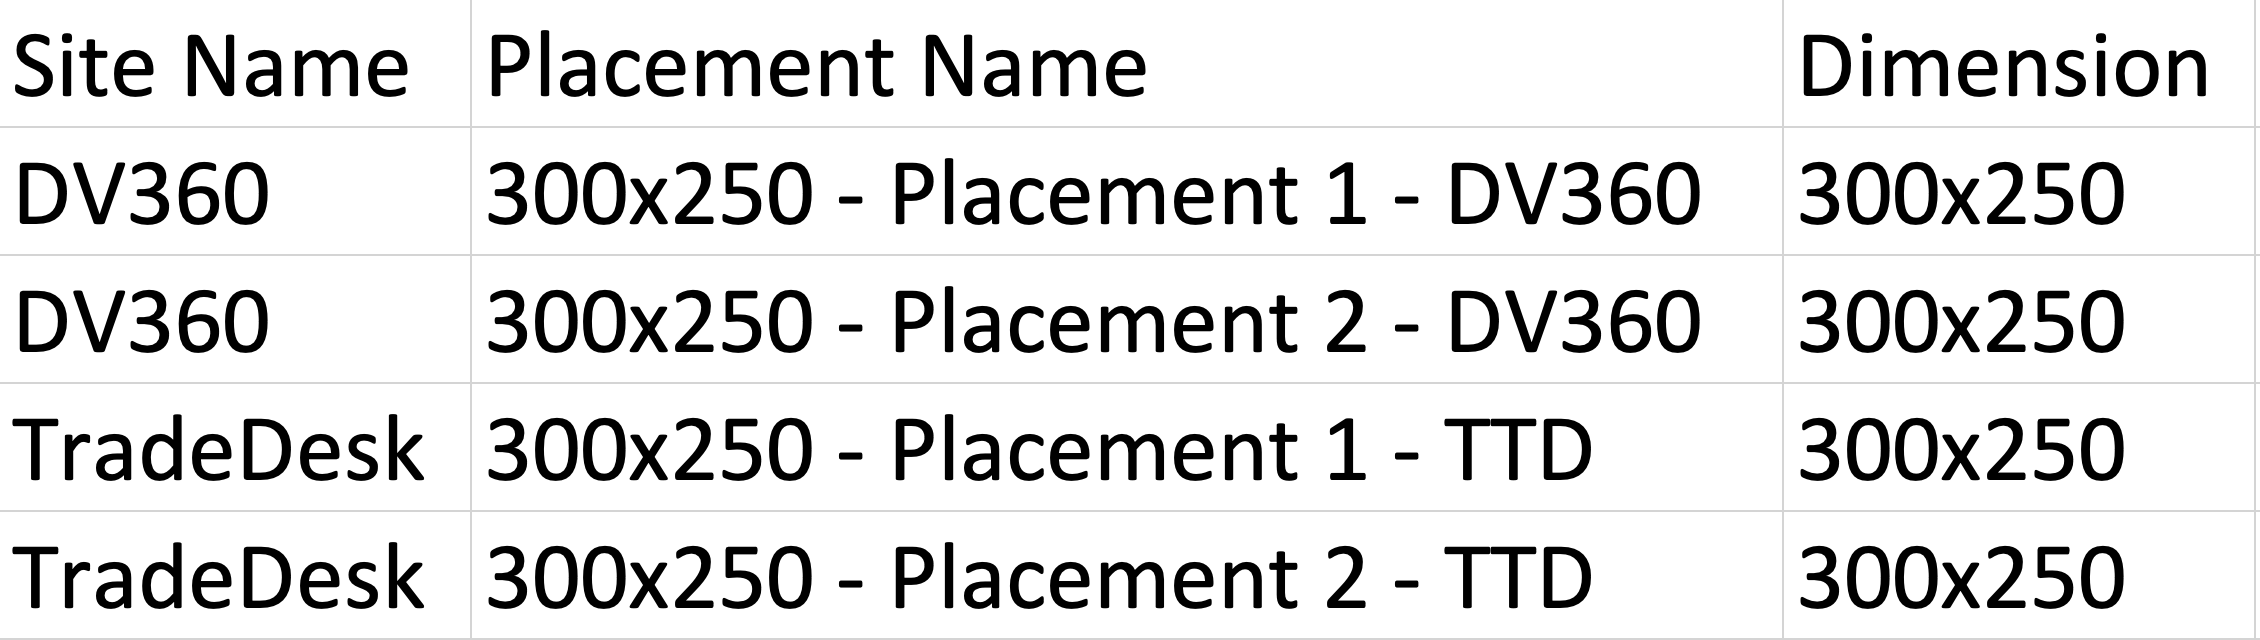
Open the Voxe Media Plan file. This is made up of three columns:
- Site Name: This will be the name of your chosen DSP or Ad Server
- Placement Name: This will be the names of the placements. Each placement will be the name of your tag
- Dimension: This needs to be the dimension of the creative (e.g. 300x250). For video, please input 768x432.
In the Voxe Media Plan file example, we’ve two DSP selected. Each DSP has two placements assigned to it. So there are a total of four placements (tag) that will be generated.
- Click onto the Import Media Plan button and select the Voxe Media Plan. Once uploaded, Site Name will be mapped to Site name and Placement name will be uploaded to Placement Name. Dimension will be mapped to Dimension. These are done automatically if the names match. If your media plan has a different name for Site Name, Placement Name & Dimension, make sure to map those accordingly on this part of the platform.
- Click onto ‘Ignore first row’ as this will exclude the first row values. At the very top, name your media plan and click onto ‘Create Media Plan’ at the bottom.
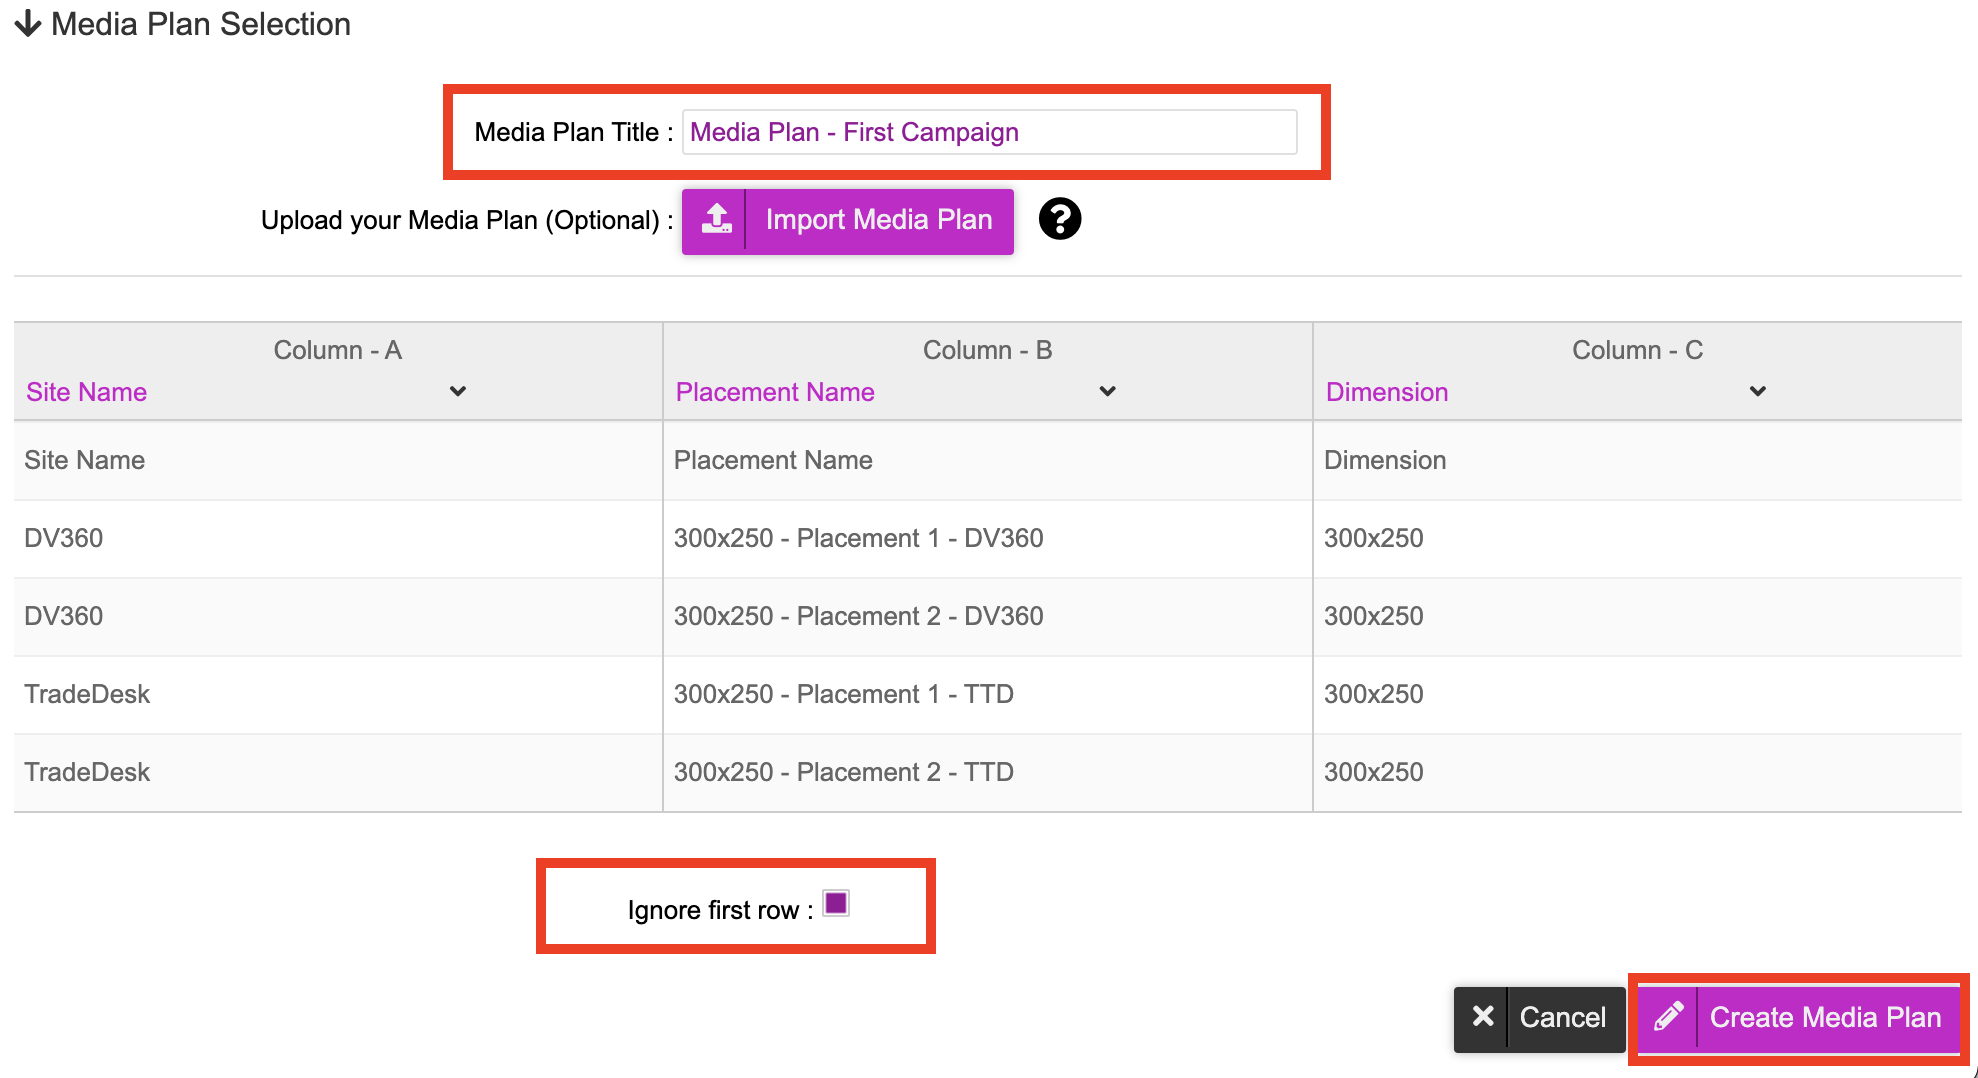
- Once the media plan has been created and uploaded, you can now see the media plan in the platform.

Optional - Tag Variables
If you have chosen any DSP data to be passed from the DSP, you can select the relevant Data Signals on the drop-down list. This option will only come up if ‘DSP data signal’ has been selected in the decision graph.
You will have the option to click onto the dropdown list and see various variables available. Whichever one is selected will be appended onto your tags. For example, if DCM - Creative ID was selected, when the tag is called, the variable will be populated with the creative ID in DCM.
