Jivox IQ allows you to use several contextual signals to create a campaign. Let's set up a campaign using Contextual Signals. Here, we'll create a campaign with the strategy described below.
A skincare brand wants to leverage Jivox capabilities to display personalized creatives for different product ranges to audiences based on the Day of Week__. The campaign would involve a dynamic product feed with different copy and product images.
Personalization Data Triggers used:
Time - Local Day of Week
Dynamic Assets of the Ad:
The ads would personalize the background image, copy and product image.
Ad Frames
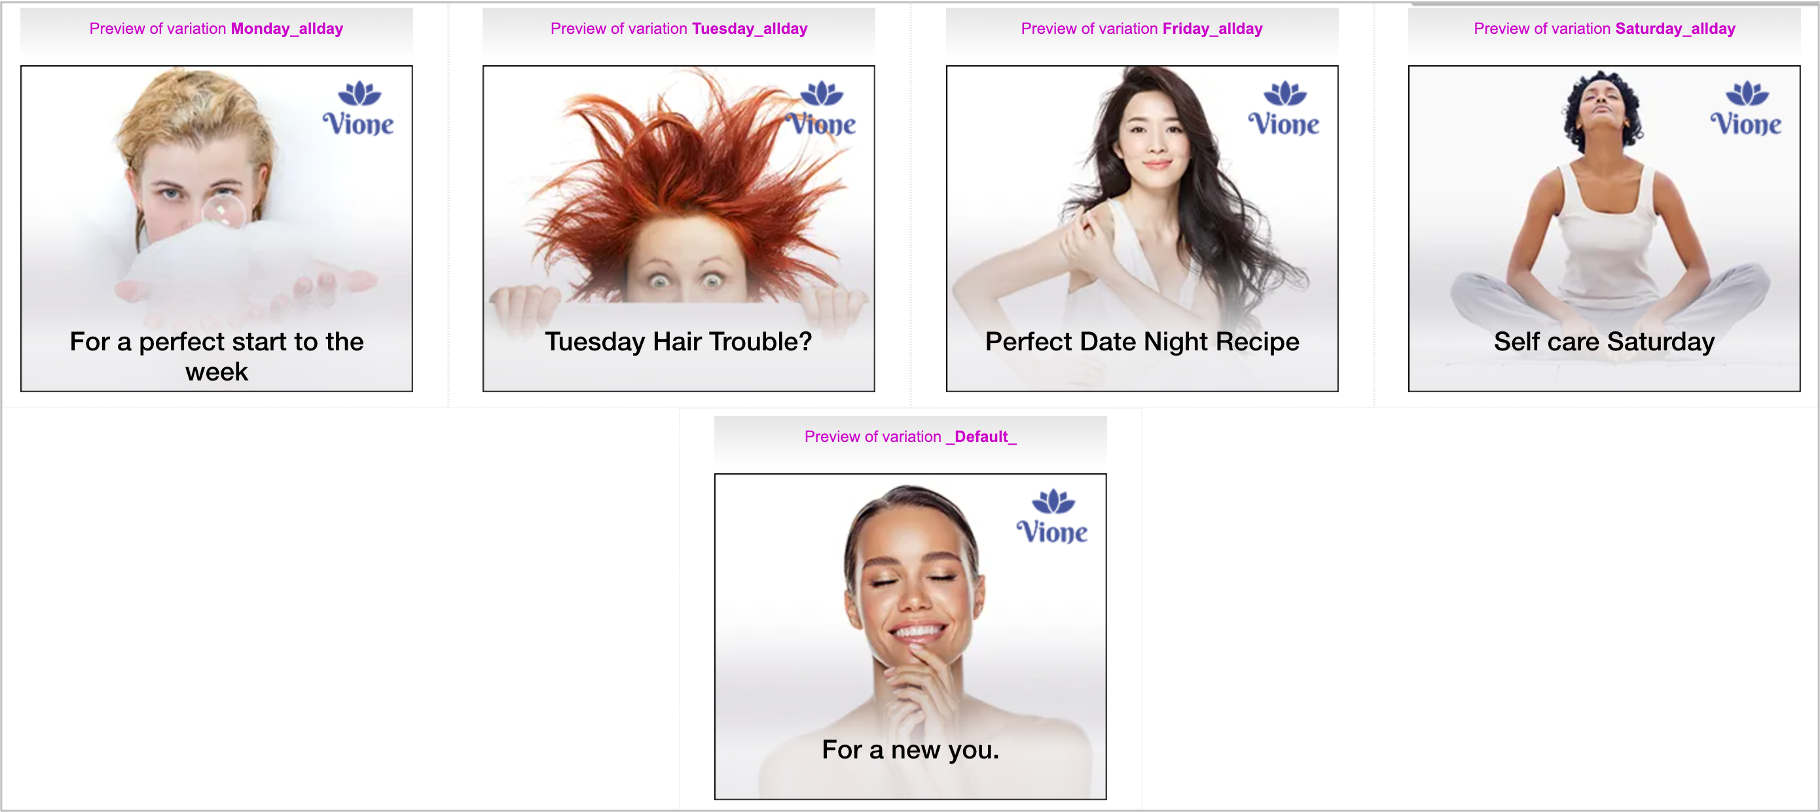
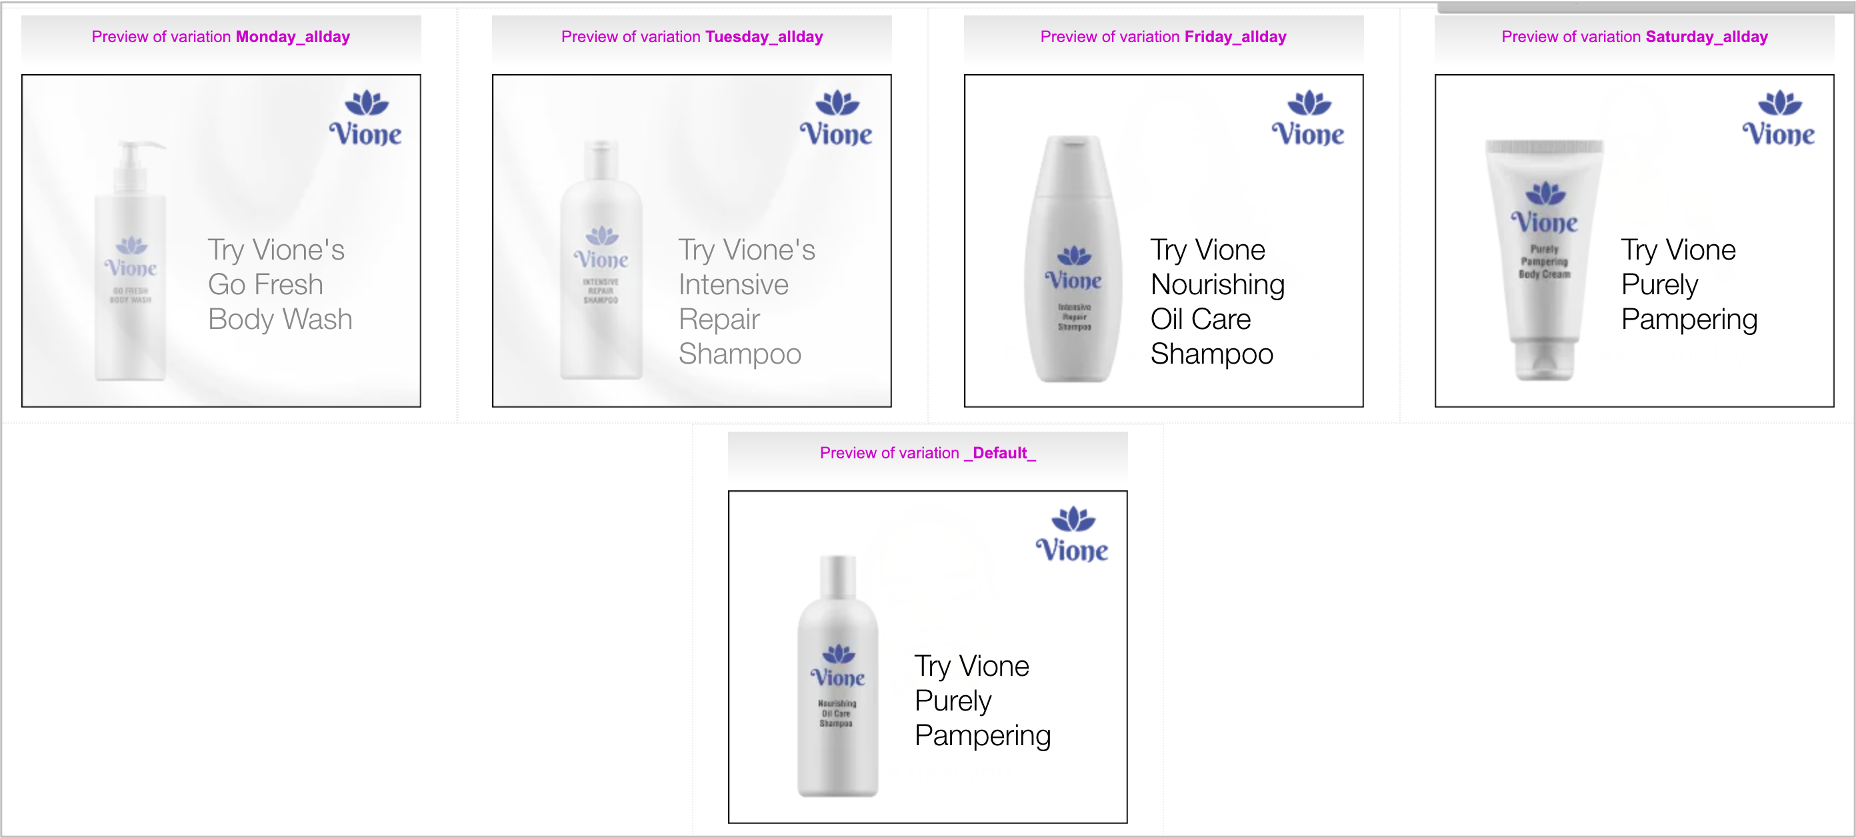
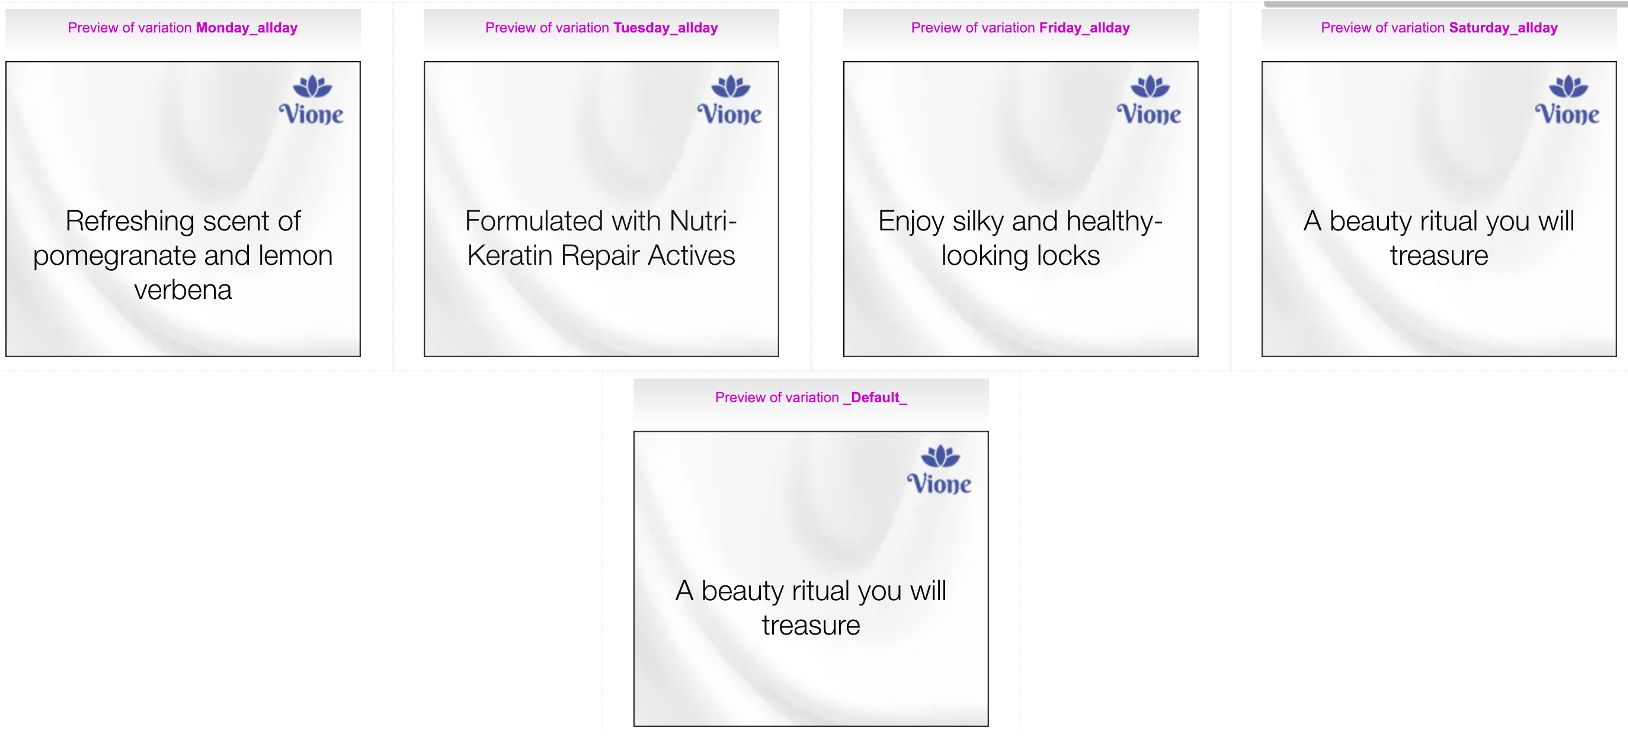
The Ad consists of four frames as shown in the image below. The background image, product image and copy text are personalized for each day of the week. The image below shows the frames in the default creative.

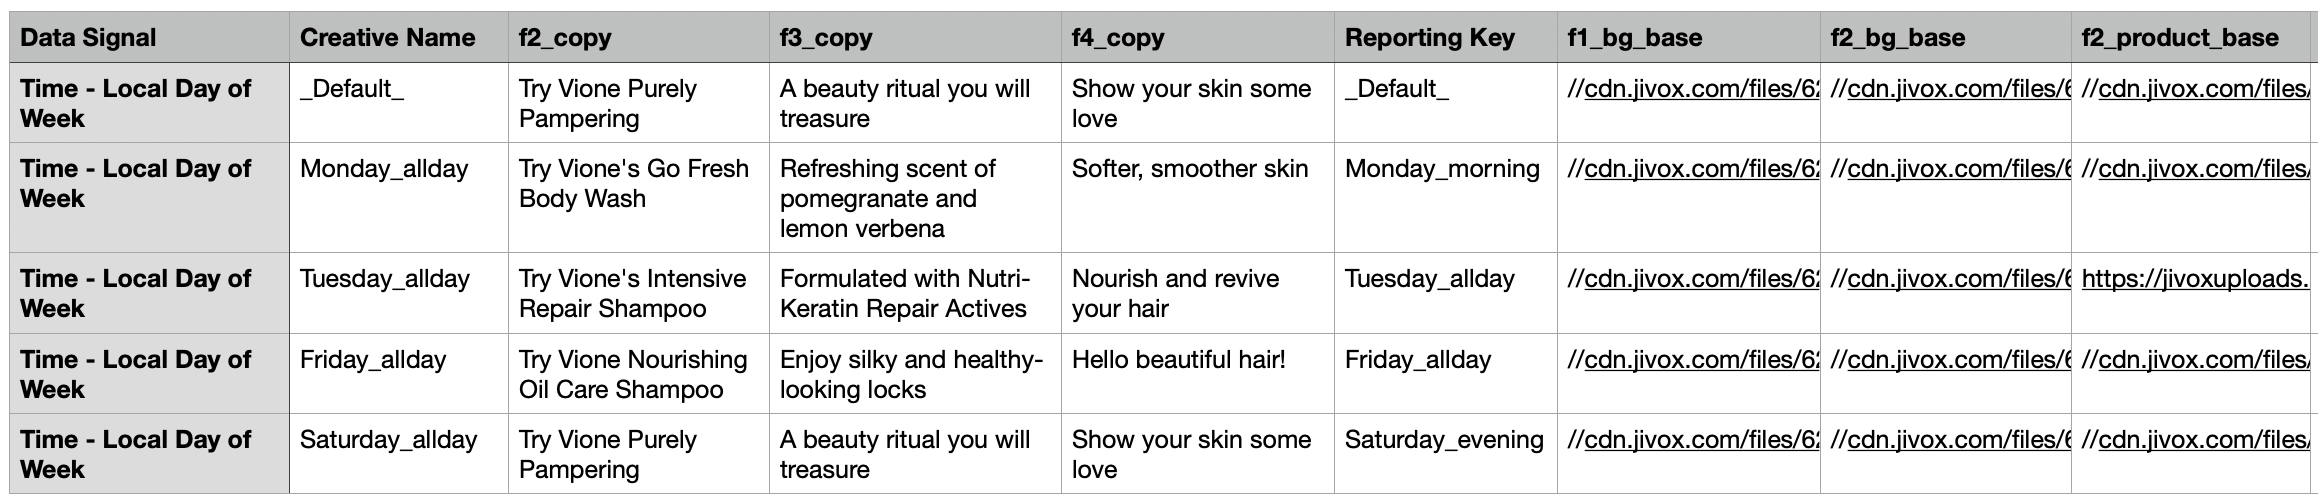
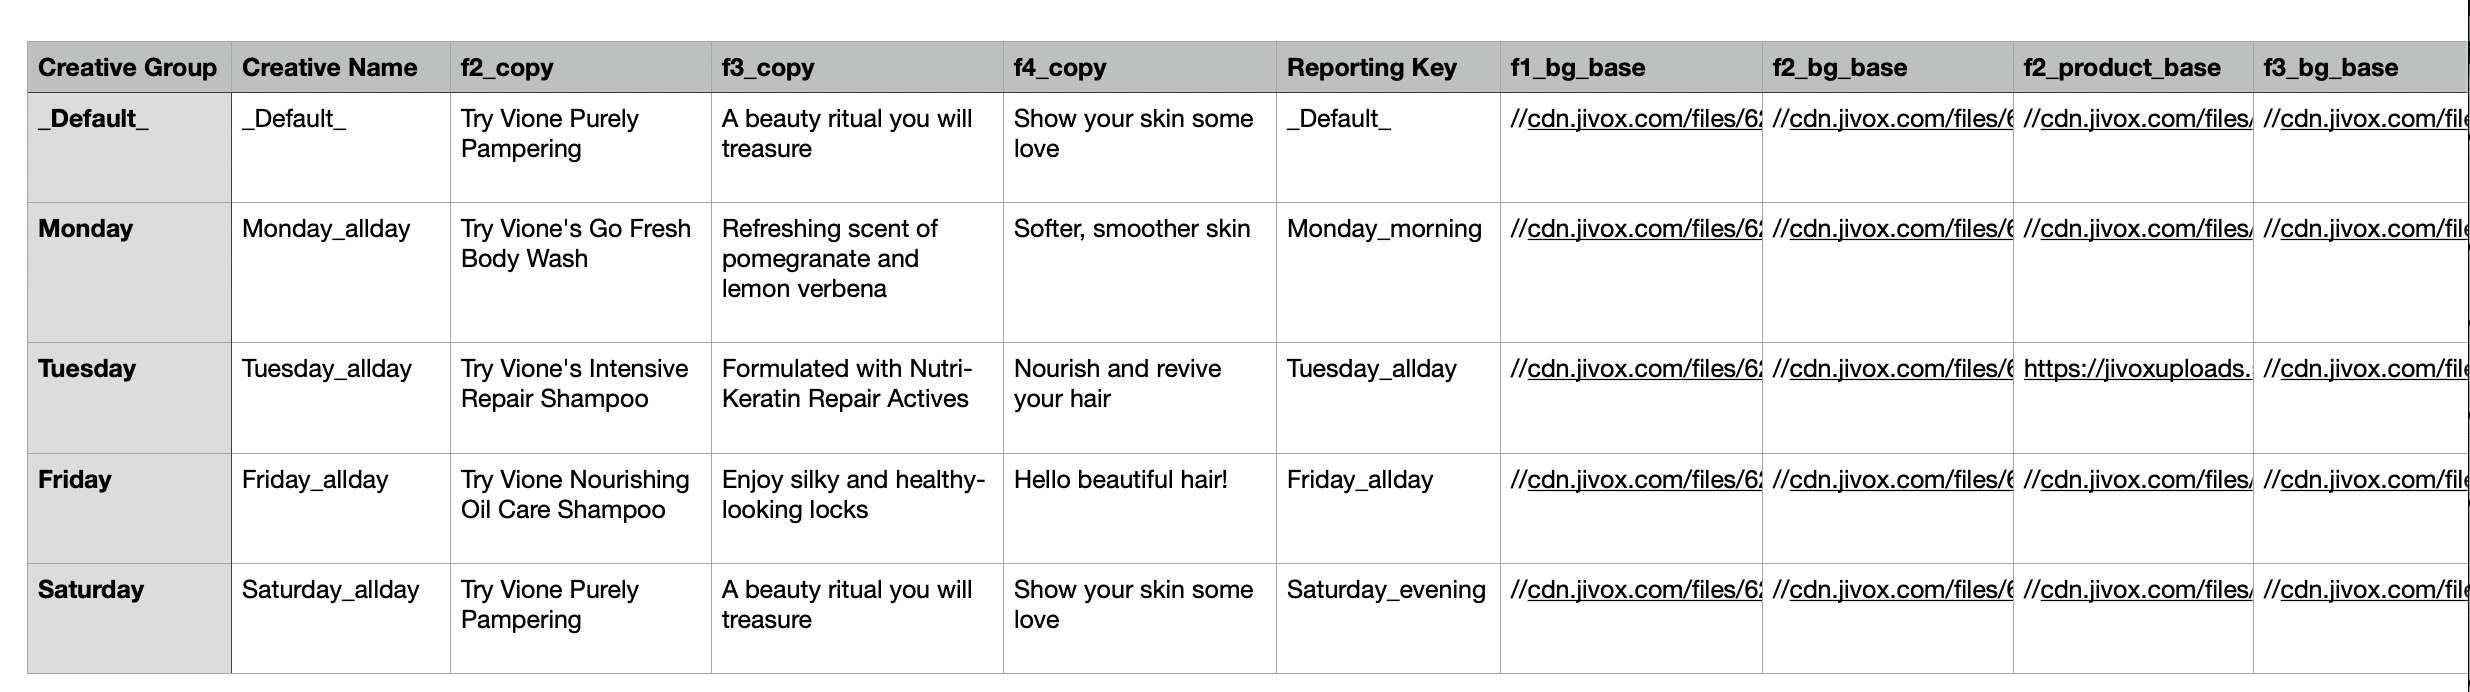
Below is the Mapping Document that defines the strategy for this campaign. As you can see, the Mapping Document specifies the Background Image, Copy, Product Image, Product Price and other assets against each Audience Segment.
Using the information in the Mapping Document and Jivox's Dynamic Canvas Studio, the different creative variations have already been generated. If you haven't done this yet, check out the Creating a Display Ad section.
For this campaign, here's what the Asset Source looks like. As you can see, the Creative Name in the Asset Source is exactly same as the Creative Name specified in the Mapping Document.
You can download the Asset Source from the Resources section below.
Since we are considering only one data trigger (Day of Week), we'll use a Decision Map for this campaign. Let's start!
On the Create Campaign page, select the ad for which you want to create the campaign in the Creative Masters field. You will see the Manage Segments tab.
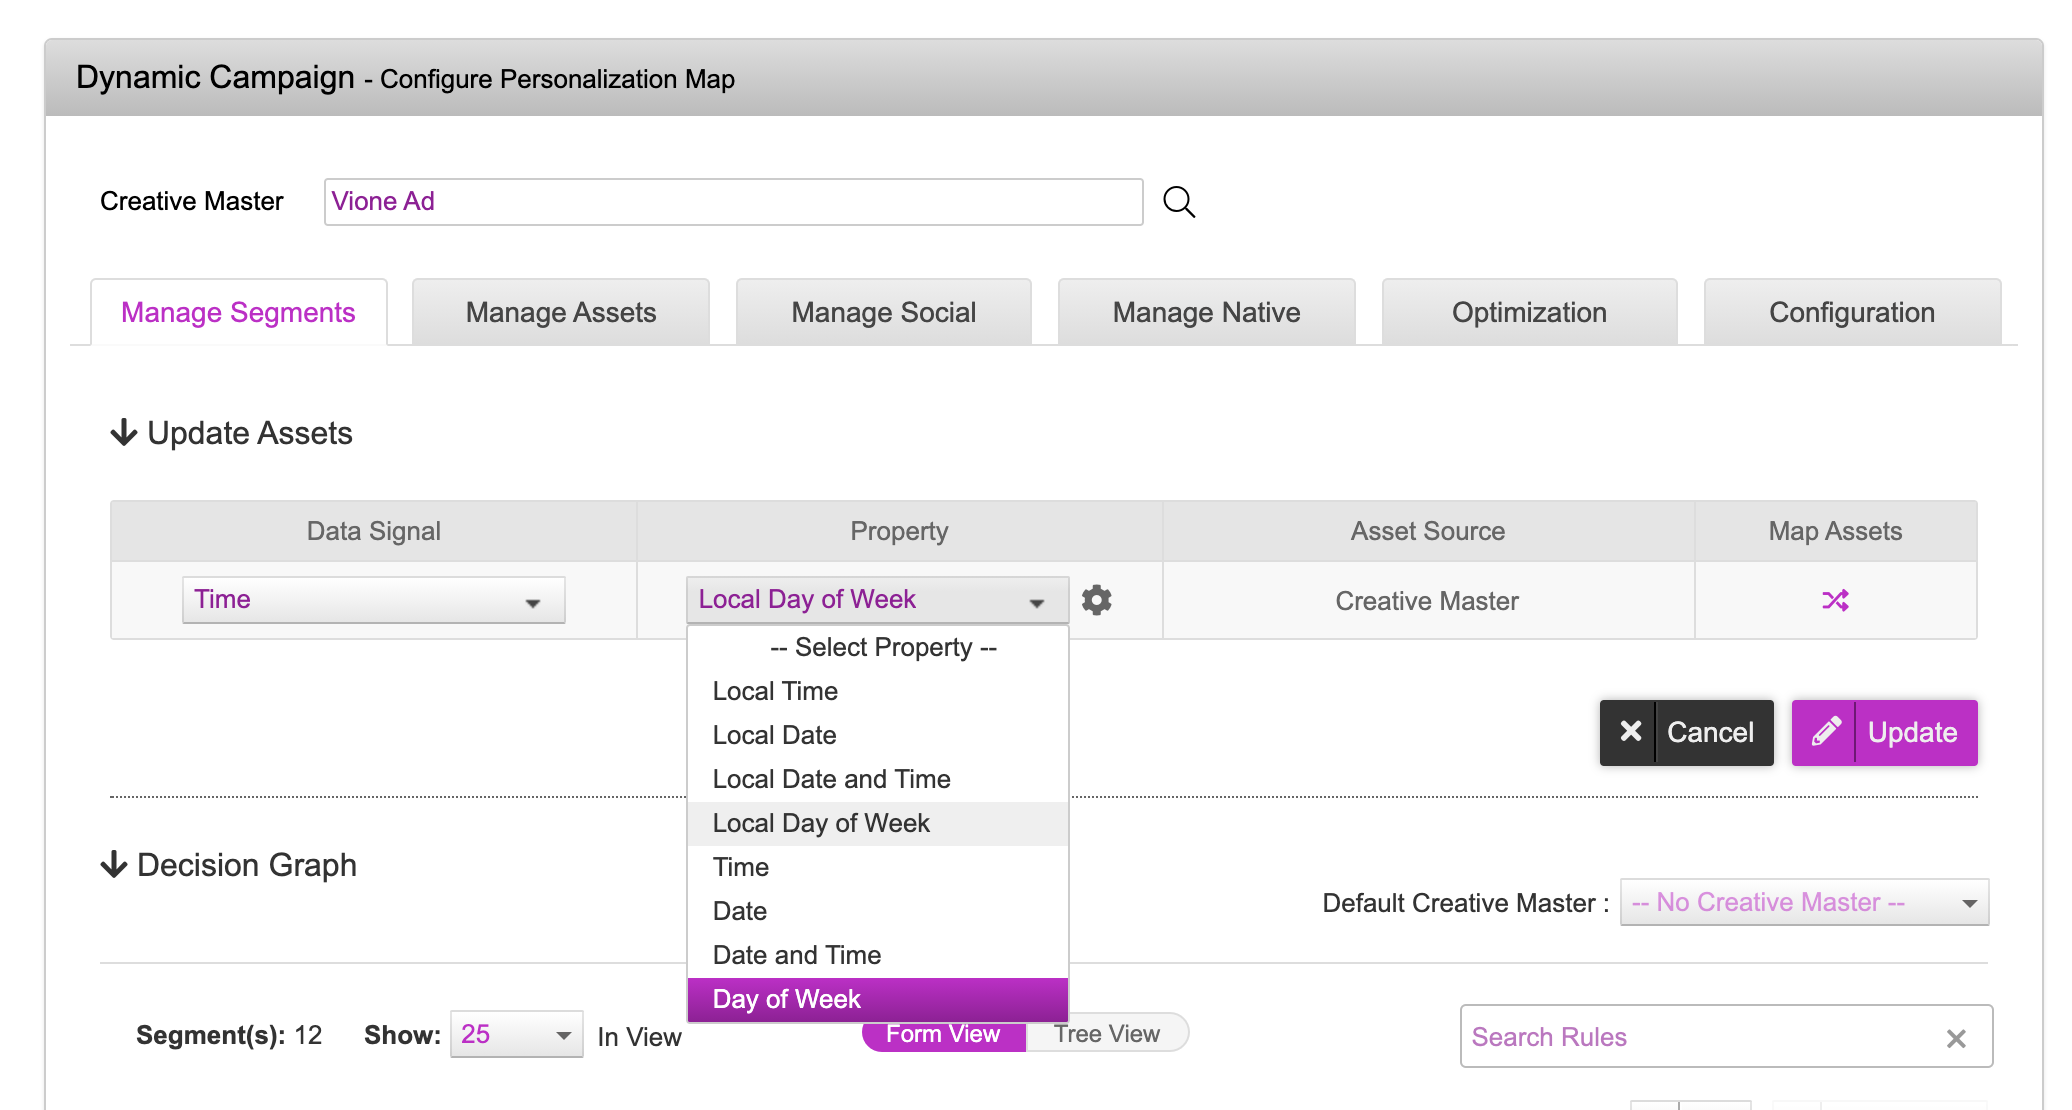
1- In the Update Assets section under Manage Segments, select Time from the Data Signal drop-down.
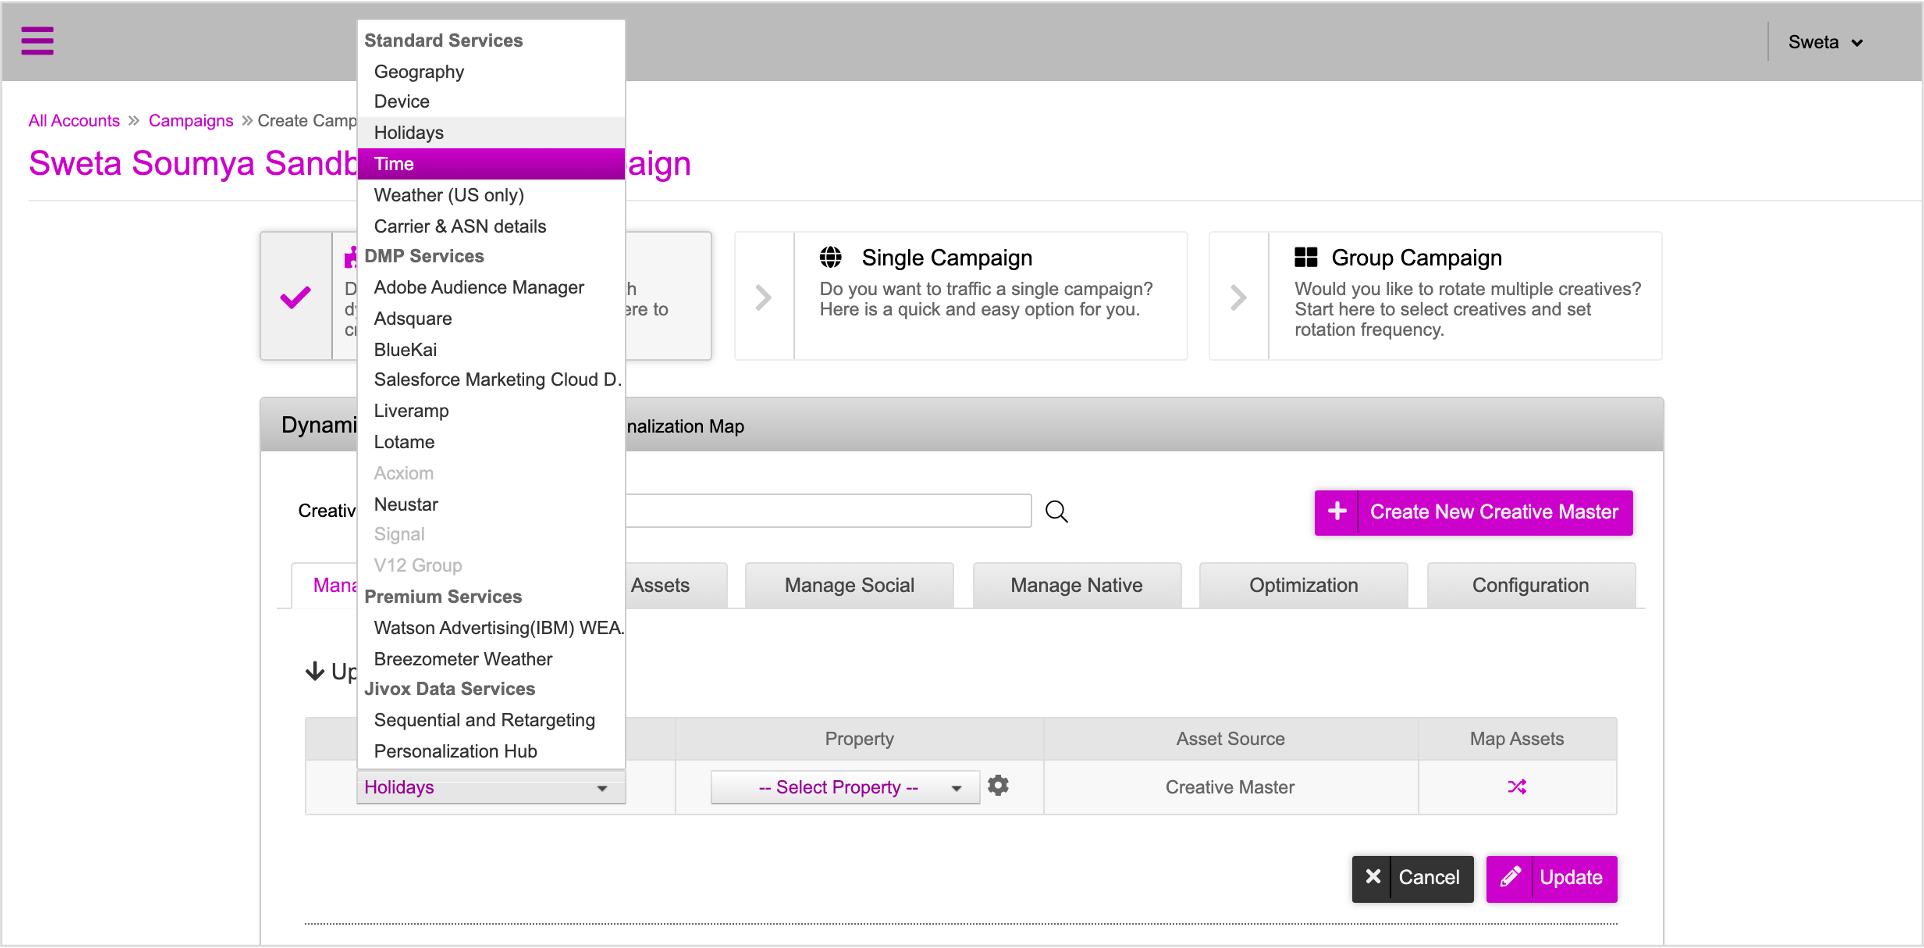
The Property field gets automatically updated with Local Time. You can select the required option from the drop-down.
2- Here, let's select Day of Week.
Next, let's view the asset mappings.
3- Click the icon in the Map Assets column to view the mappings.
Since we used DCS to create the Ad, the asset mapping process is completed in the ad section itself. You need not make any changes here.
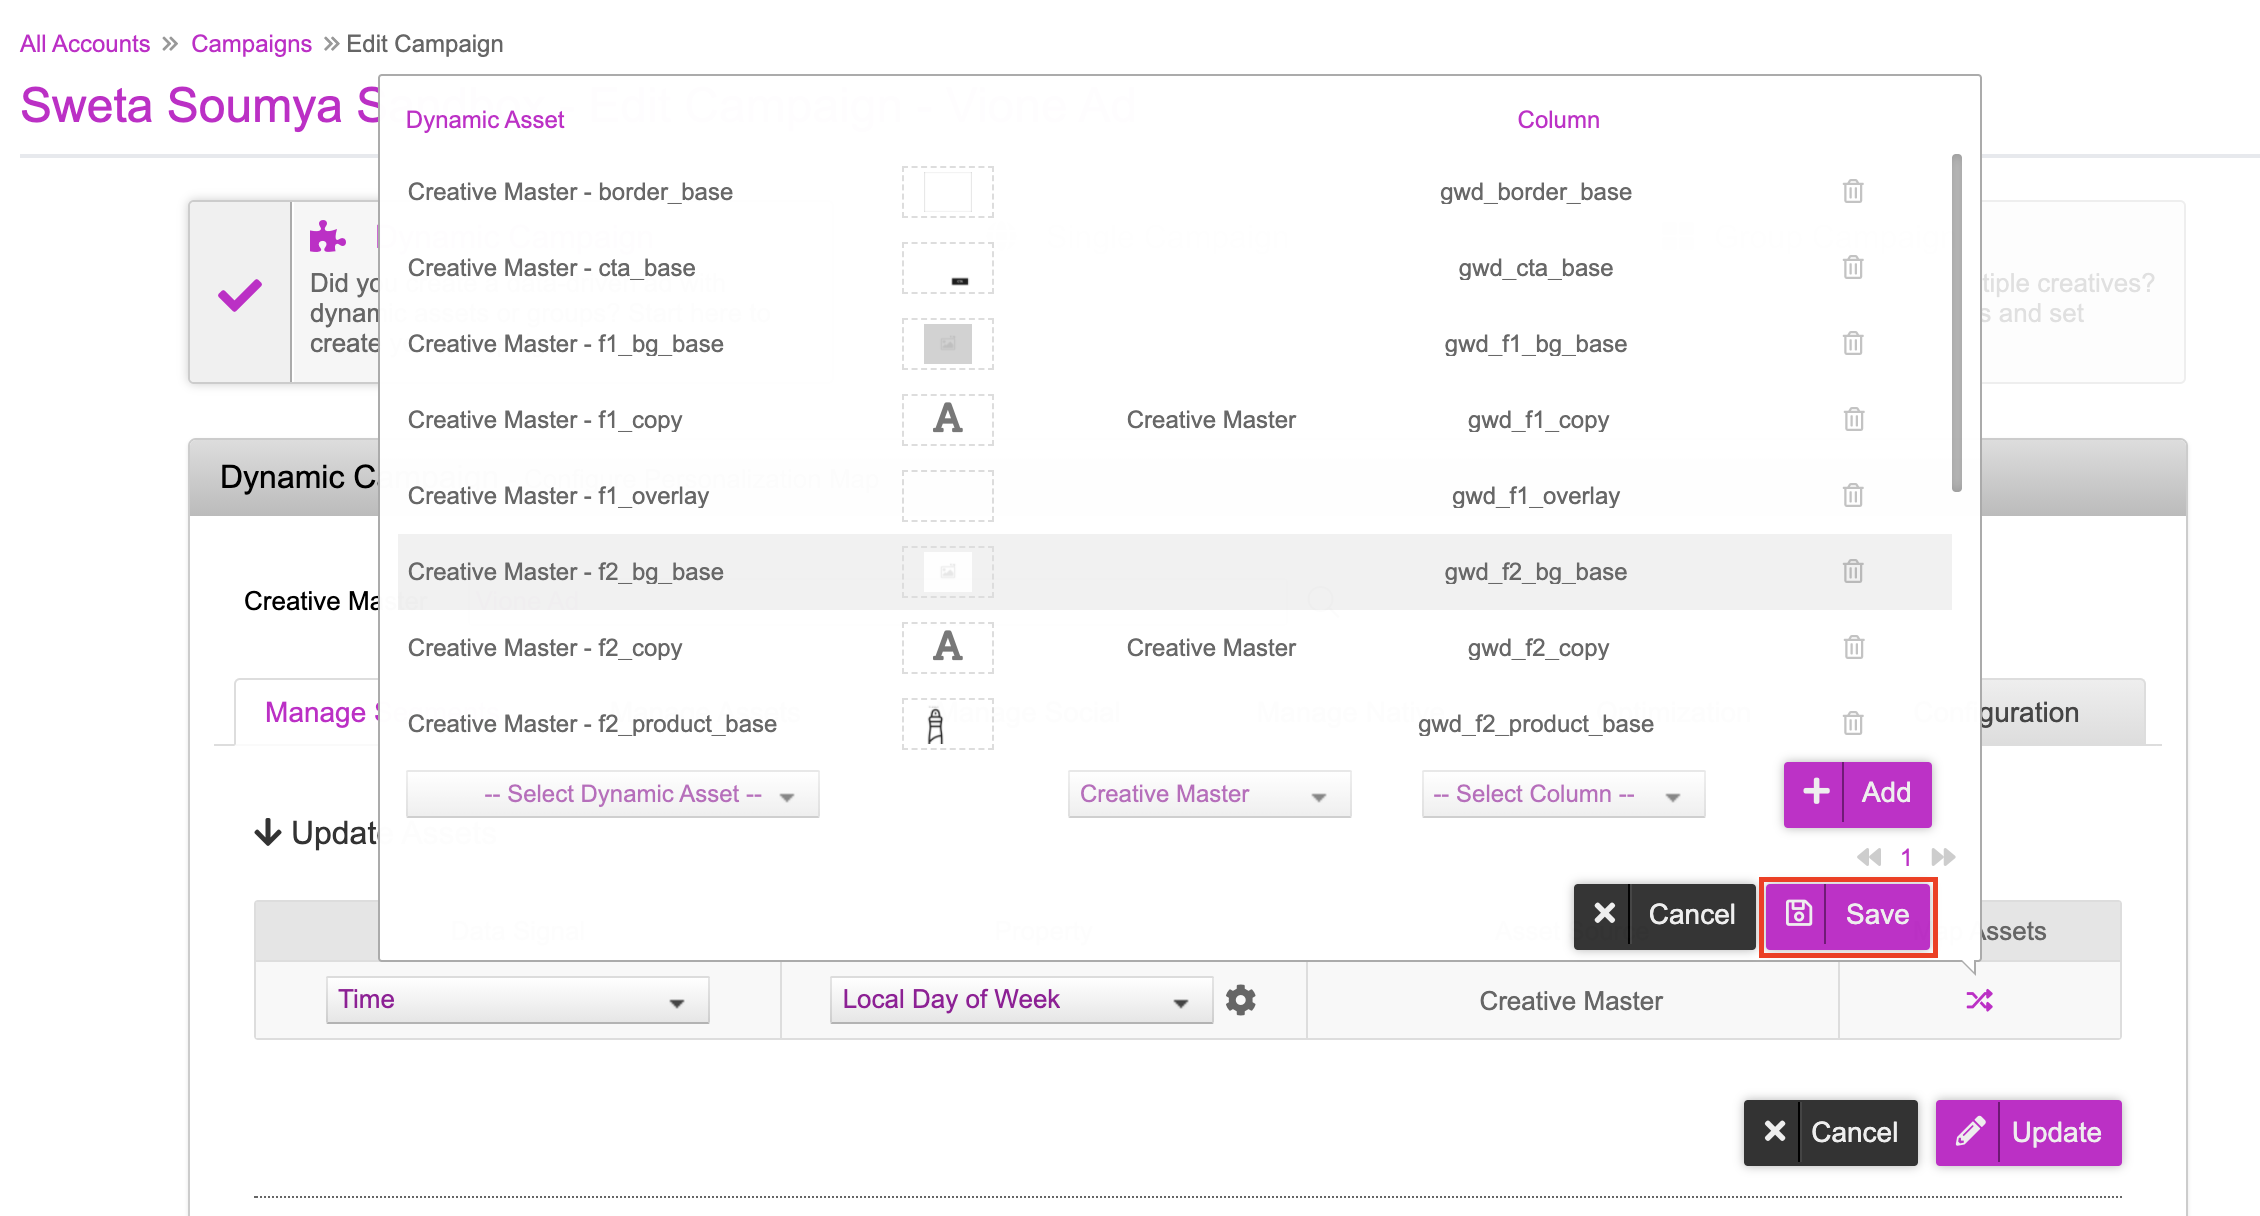
If you still want to map more dynamic assets, select the dynamic asset from the drop-down, select the creative master and the column to which you want to map the assets and then click Add. You can add or delete mappings if required. Once you're done, click Save.
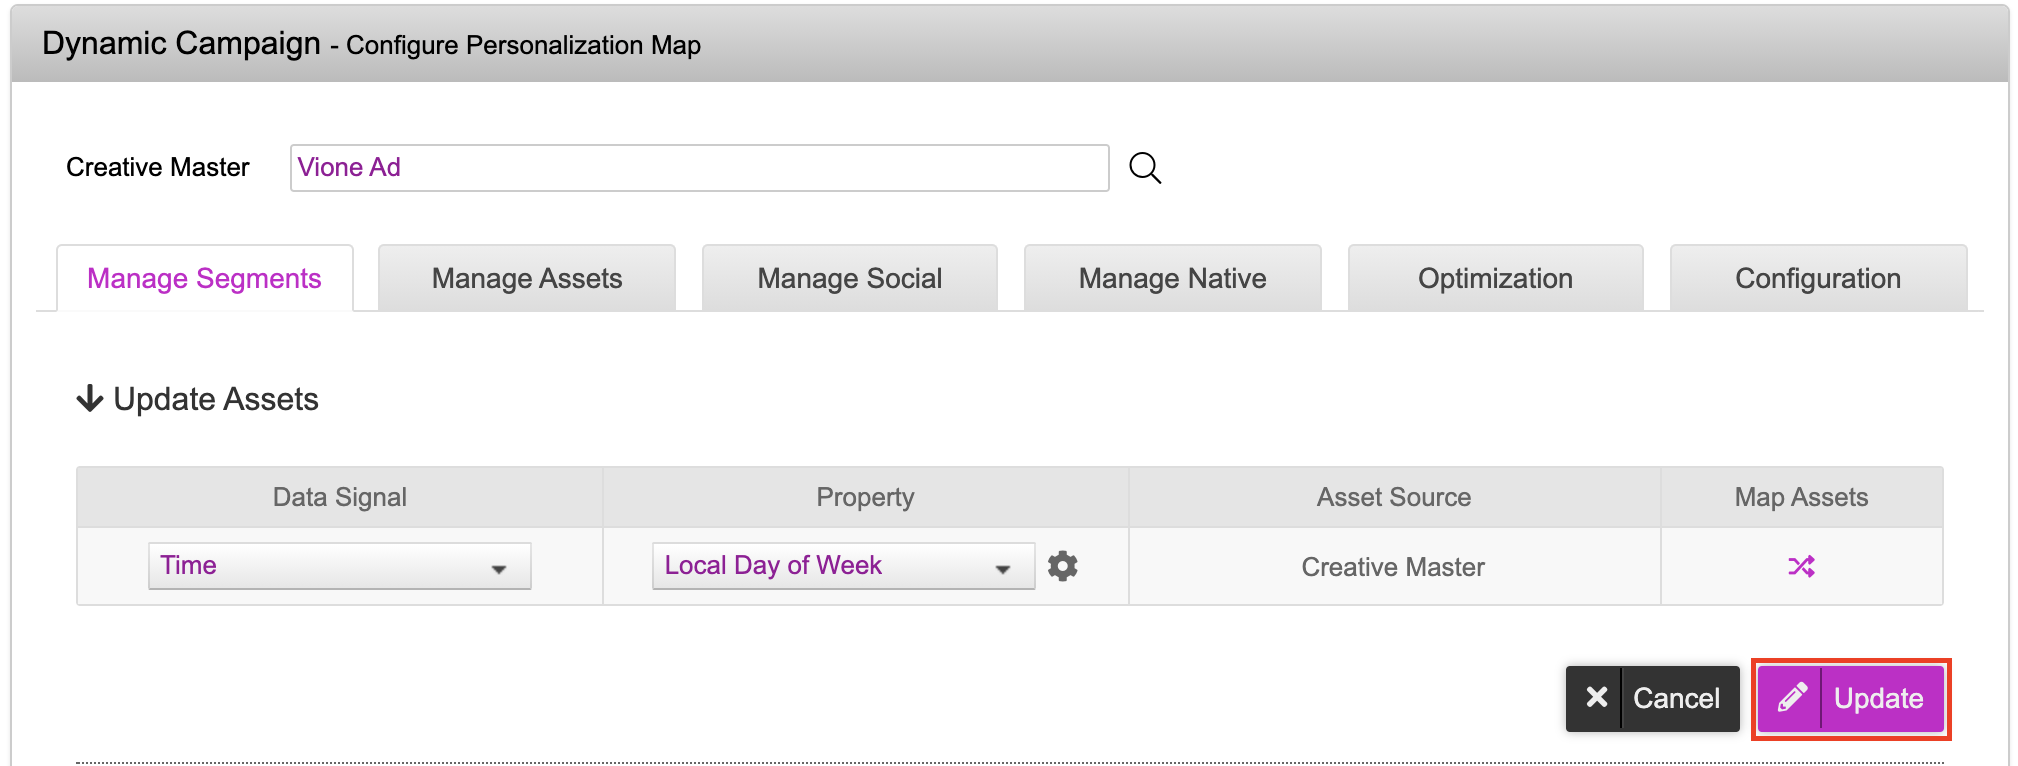
4- Click Update. The asset source and data signal mapping process is now complete and the Decision Map is configured.

You can add additional data signals into the decision map using other asset sources if required. To do this, click the Add button.
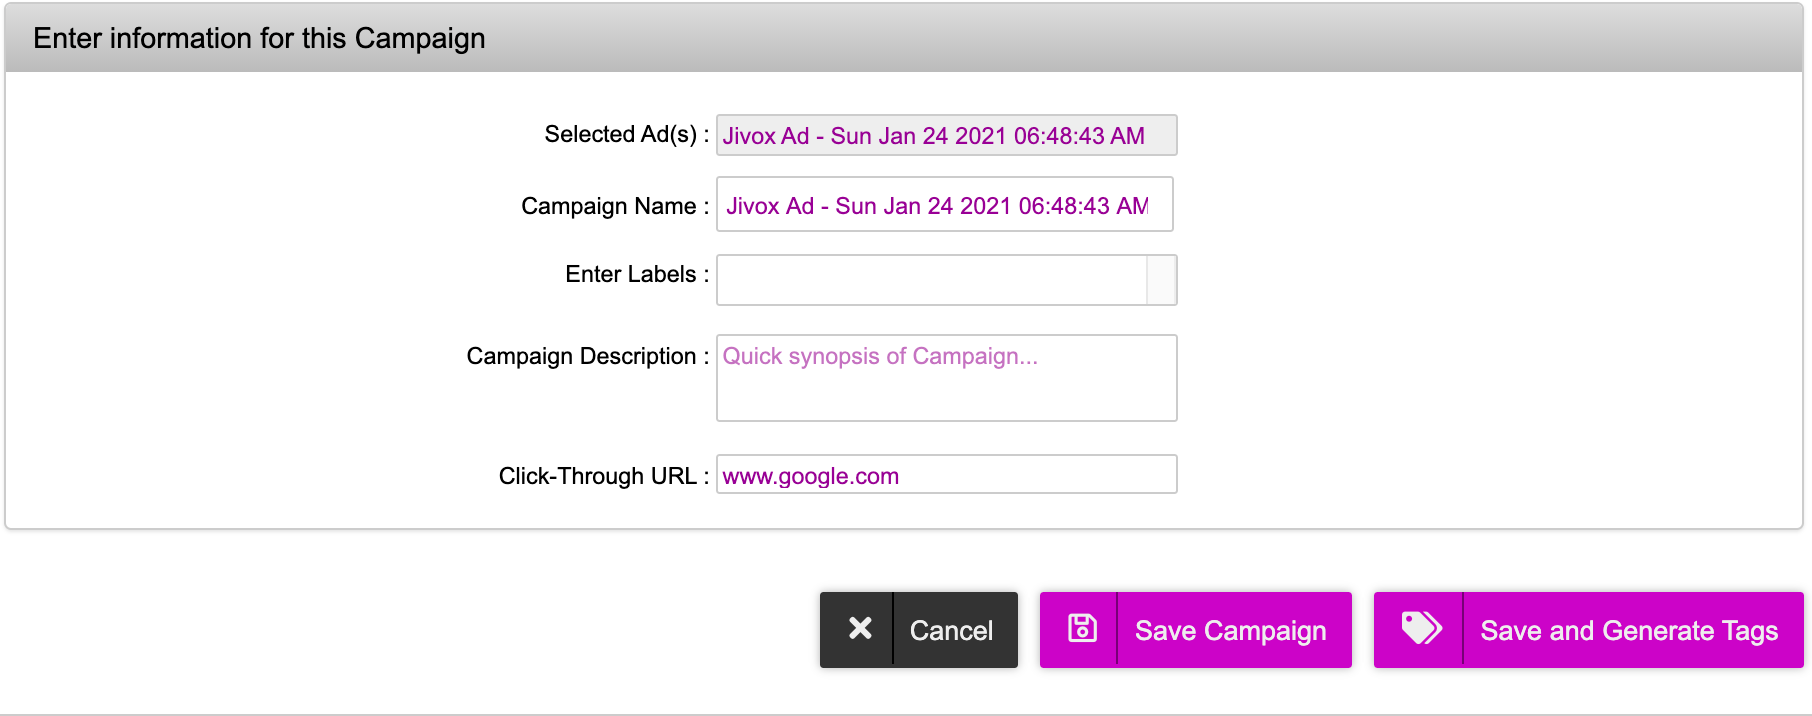
5- Next scroll down to the bottom of the page and enter a name for your campaign. In the Click-Through URL field, enter the required URL and then click Save Campaign.
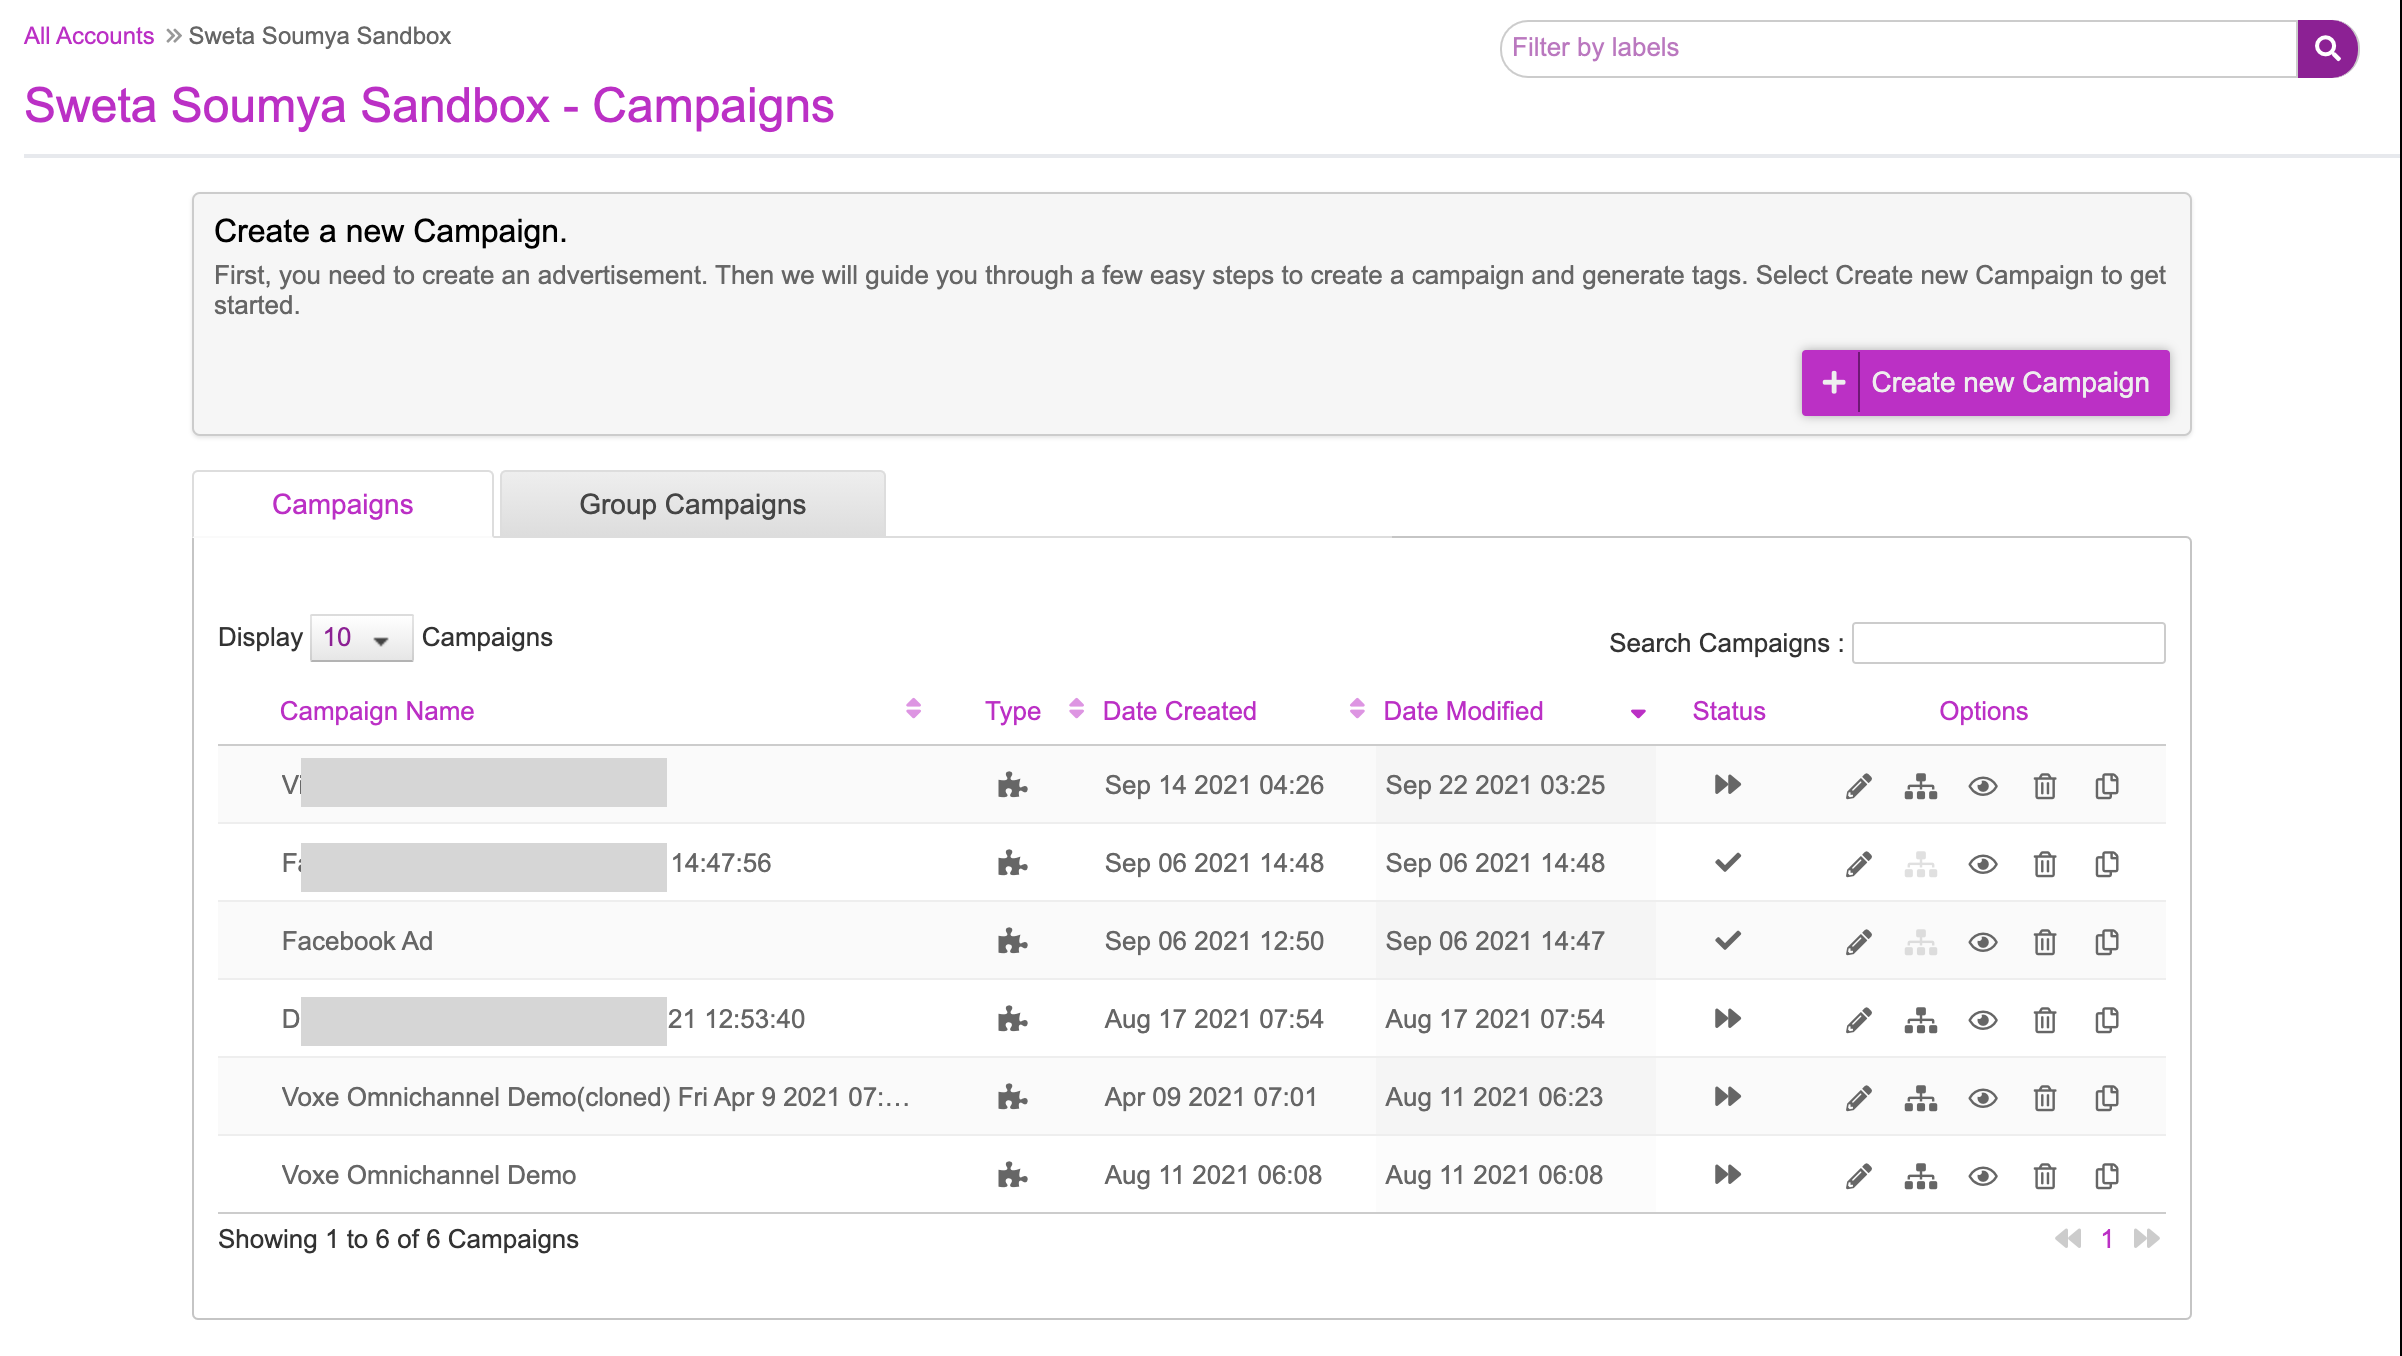
Now the campaign gets saved and you will be redirected to the Campaigns page.
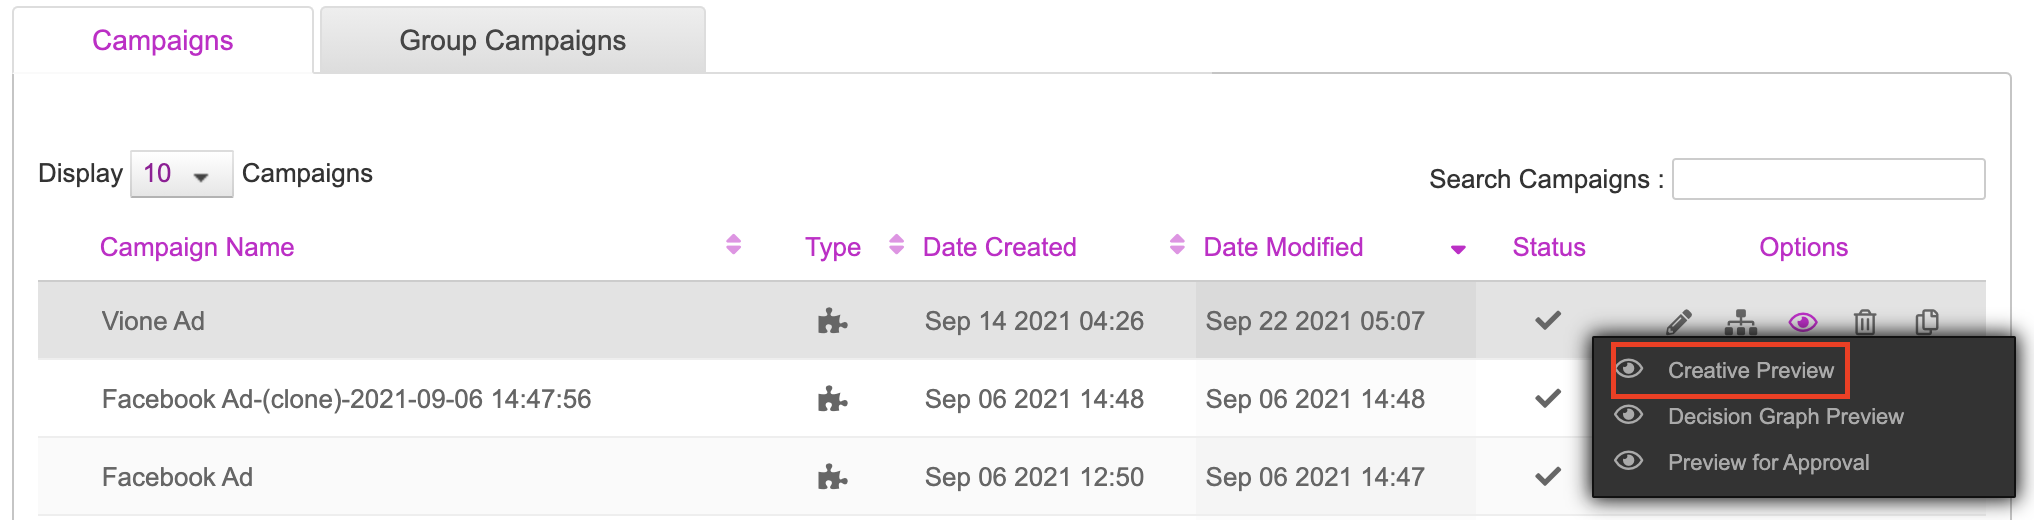
Creative Preview
Now let's go ahead and check the Creative Preview. This can be done by clicking the ‘eye’ icon and selecting Creative Preview.
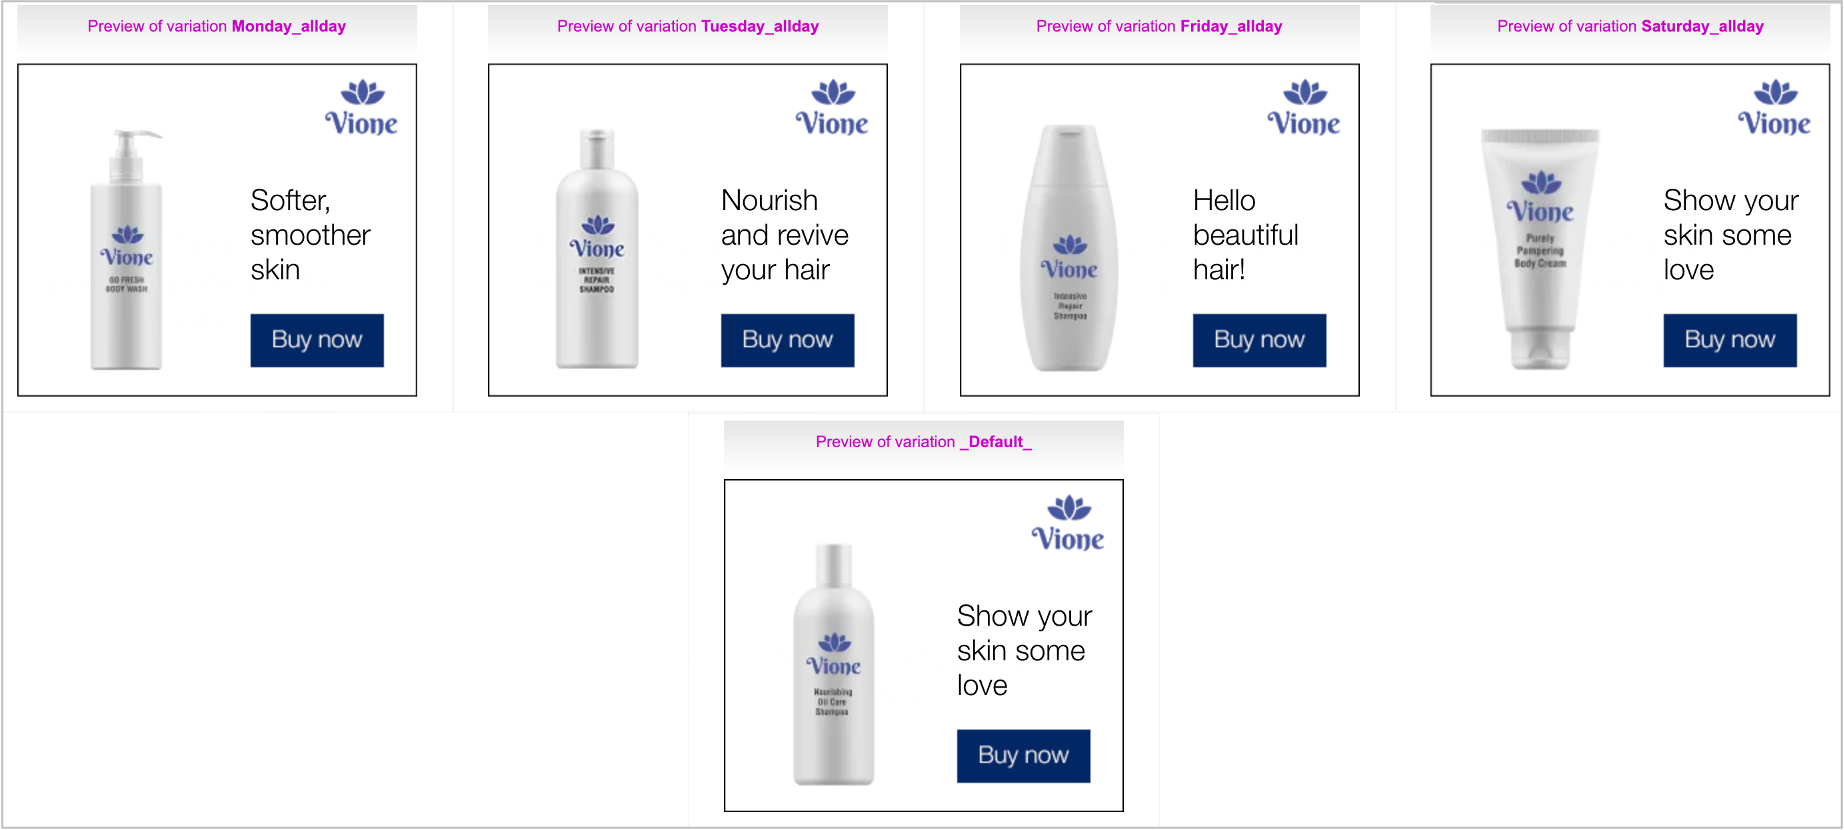
Here's the creative preview of the campaign we just created.
Frame 1
Frame 2
Frame 3
Frame 4
Resources
| Item | Description |
|---|---|
| Creative Master | This is a 300x250 Creative Master |
| Assets | These are the image assets to go along with it |
| Asset Source | This is the complete Asset Source to be imported |
| Mapping Document | This is the Mapping Document used in this campaign |
Next Steps
Here's what you must do next.
- Generate the Creative Preview and send it for approvals if required.
- Generate Tags
- Third Party Trackers
- Configuring Publisher and Placement
If you want to generate multiple tags at once, use the Bulk Tag Generation feature.