Now let’s scroll down to the Decision Graph section and begin the setup.
We will be creating multiple segments for the various products and strategies that we have in our asset source.
First you must specify the priority based on which the creative variations will be served. You will see two options:
Cascade - If you select this, the system will evaluate the segments from top to bottom and serve the variations that exactly match the specified conditions.
Rotate - If you select this, the system will evaluate all the segments, identify the segments that match the conditions and then rotate and serve all eligible variations with equal weightage or as specified in the Weightage column in the Asset Source.
We will leave the Rotate option selected here.

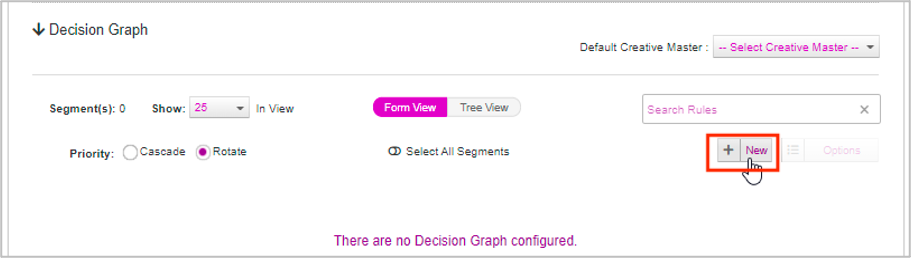
Adding Segments in Decision Graph
Next, let’s add the segments. Follow these steps:
1- Click the New button, to add a segment. You can set up rules to combine the data triggers if you are using more than one data trigger to make decisions.
2- Provide a name for the segment. The name of the segment should be the value in the Rotational group/asset group or asset key column in the asset source, that is mapped to the data signal in the Decision Map setup.
There are two cases in which this logic is applied i.e the priority is given to the segment name over feed based decisioning.
When the asset source, that is mapped to the data signal in the Decision Map setup, is different from the asset source used in the feed based decisioning configuration.
When multiple triggers are defined in a rule setup with the trigger condition as ‘All of these match’ and each trigger is matched with the feed based decisioning that is associated with a different asset source.
If you are using the same asset source in the decision mapping and the FBD configuration, then you can give any name to the segment. The priority is given to FBD value over the segment name.
3- From the drop-down list in the segment, select the creative master(s) that should be rendered for the rules in the segment.
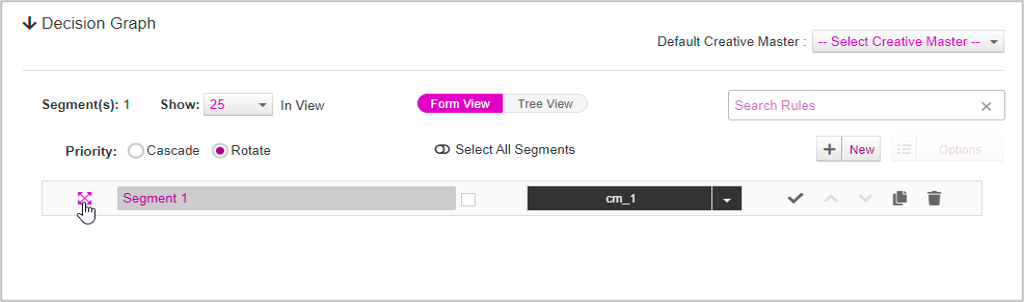
4- Click the icon to the left of the segment name, to open the rule setup window.
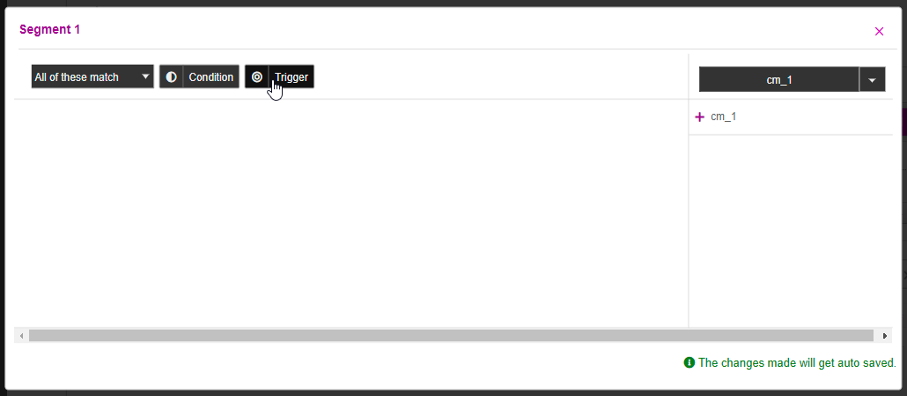
5- In the first field, select the options from the drop down values in the field:
All of these match- All the triggers must be satisfied
Any of these match- Only one of the triggers must be satisfied
None of these match- None of the triggers are satisfied
6- Click the Trigger button to set the Condition and Trigger for each segment. Select the trigger/service from the first dropdown and the desired property from the second dropdown.
7- In the Condition field, select one of the following:
Is contained in - It resolves the rows from the asset source corresponding to the matching values present in the input coming from the LHS of the rule i.e the data trigger contains the specified value as one of the strings.
Contains any of - It resolves the rows from the asset source corresponding to all the matching values present in the input coming from the LHS of the rule.
FBD is enabled only for Is Contained In and Contains Any Of operators.
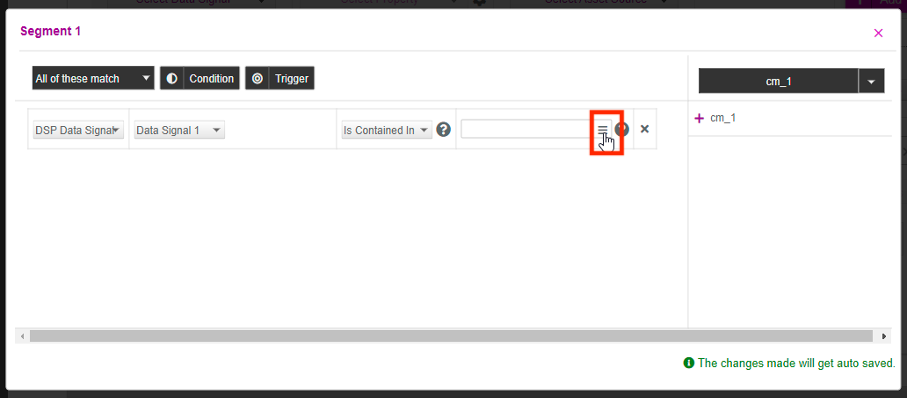
8- Click the hamburger icon as highlighted in the image above.
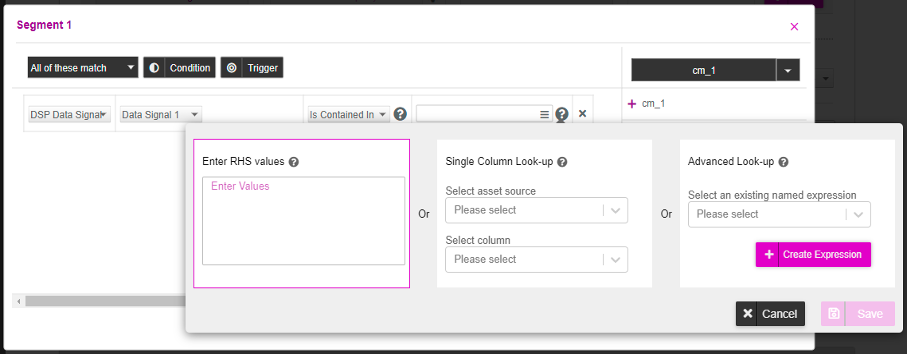
The new pop-up window displays the following options:
Enter RHS values: Here you would enter the Right-hand-side values. Use this option if you have one or more than one value you would like to match.
Single Column Look-up: Use this option if you want to look up the column values for a single asset source and column name.
Advanced Look-up: Use this option if you want the platform to perform an advanced look-up in asset source based on certain conditions, for the incoming Left-hand-side (LHS) values from the data signal.
Next, let's see how we can use the three different options.
Using Enter RHS Value Option
This is treated as a regular (non-smart) value and the existing workflow is followed, as below:
1- Enter the regular string/numeric Right-hand-side value(s) you want to match with the left-hand-side value coming from the trigger of the rule.
2- Click the Save button.
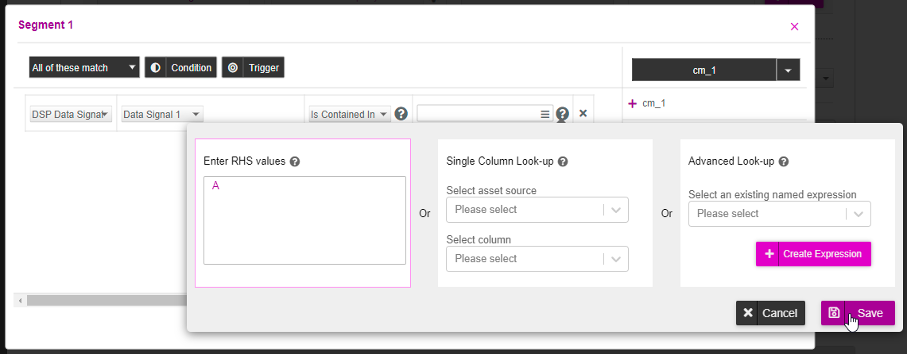
The entered value will appear in the rule setup window, as shown in the image below.

Using Single Column Look-up Option
To set up a new FBD value, follow the below steps:
1- In the Select Asset Source field, select the asset source from the list of asset sources added in your account.

2- Select the column name which is present in the selected asset source and then click Save.
The selected values will appear in the rule setup window, as shown in the image below.

The platform will look-up for the incoming left-hand-side (LHS) values from the data signal, for a selected asset source and column. If there is one or more than one match for the LHS value, the trigger is true. If there are zero matches, the trigger is false.
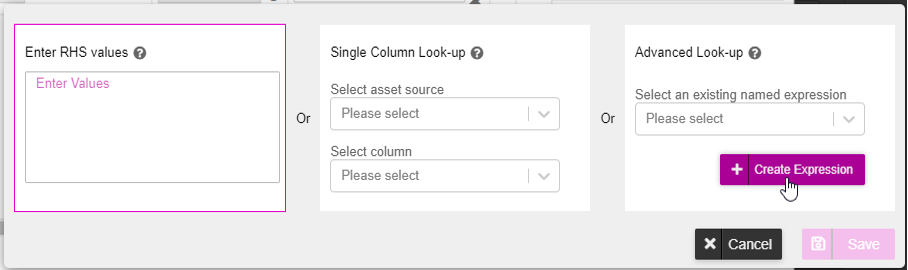
Using Advanced Look-up Option
For setting up new Feed Based Decisioning (FBD) values in the Advanced Look-up section, follow these steps:
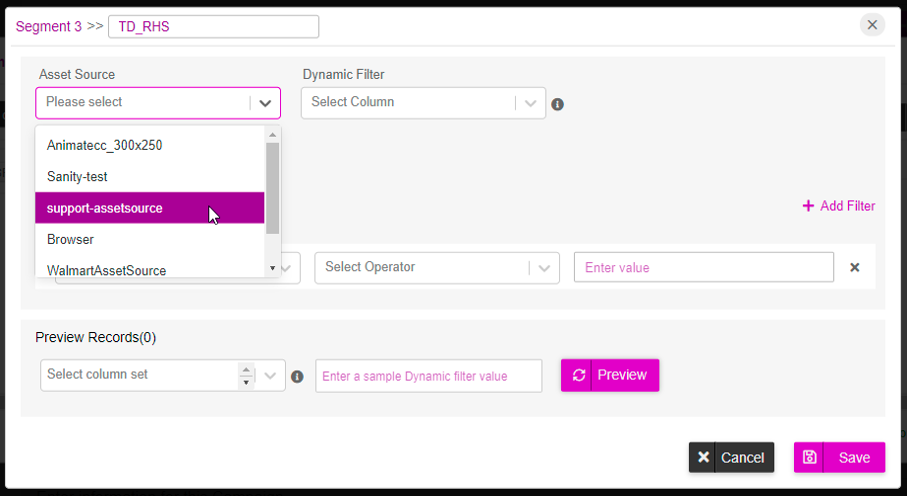
1- Click Create Expression. The FBD configuration window appears.
The FBD configuration window appears.
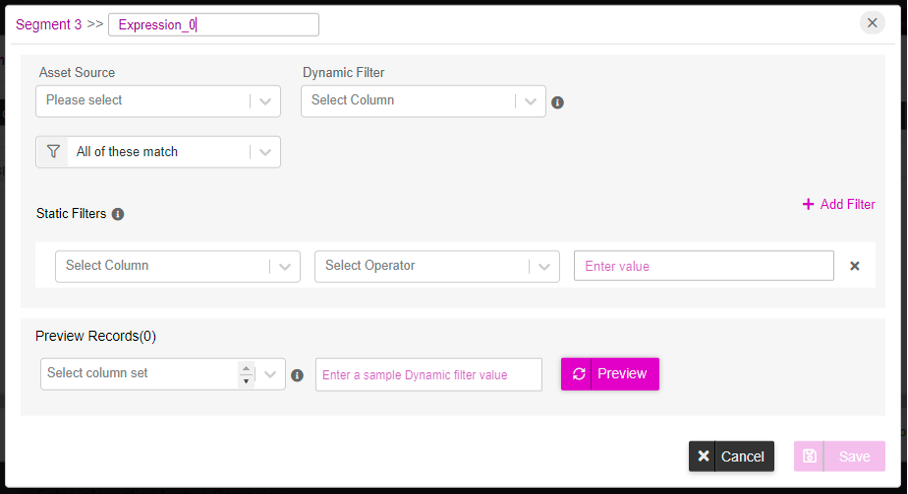
2- Enter a unique name in the field next to the segment name, to identify the expression. By default, the Segment name is set to “Expression_ <Number>”. <Number> is a serial number that starts from ‘0’ and increases every time a new FBD configuration is saved.
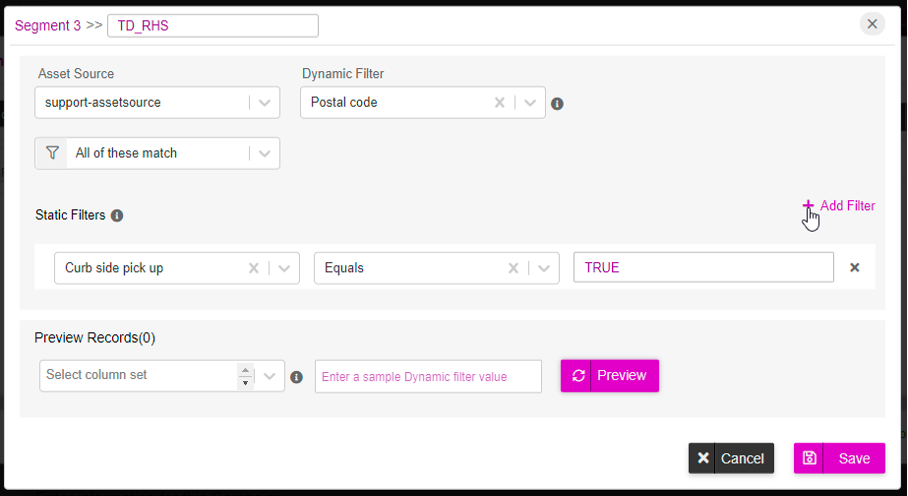
3- The Asset Source drop-down lists all the asset sources that are added in your account. Select the asset source which has the column value that needs to be matched with the incoming value from the left-hand-side of the expression.
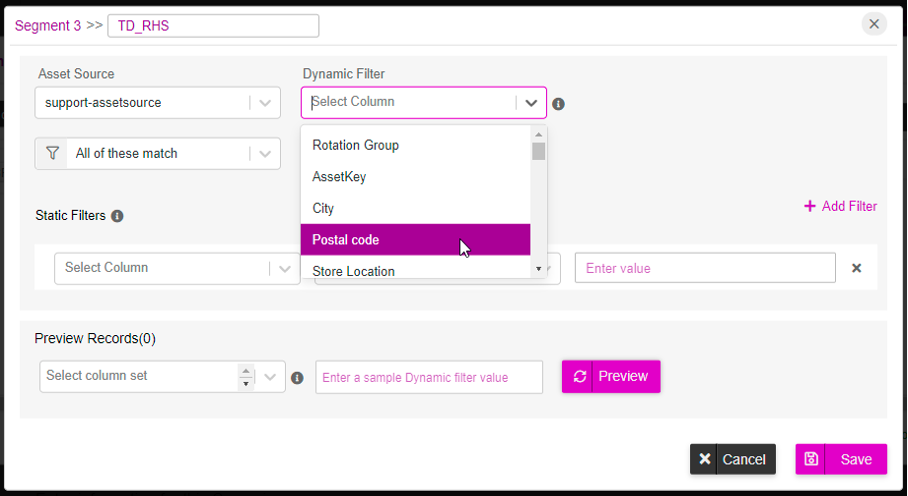
4- The Dynamic Filter is a column name in the selected asset source that matches with the LHS value coming from the trigger of the rule. The Dynamic Filter drop-down lists all the columns which are available in the selected asset source. Select or enter the column name as the Dynamic Filter. You can select only one column here.
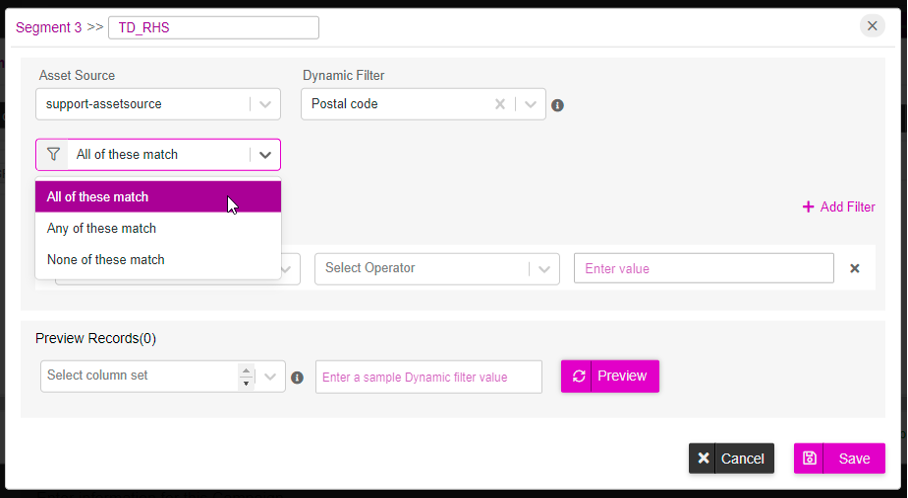
5- Select any one filter condition, from the drop-down values in the field, based on your requirement :
All of these match - All the triggers must be satisfied
Any of these match- Only one of the triggers must be satisfied
None of these match- None of the triggers are satisfied
6- Static filter allows you to filter the rows from the selected asset source, based on the conditions you specify.
List of supported operators that are allowed for creating the Static filters within the Advanced expression are listed in the Operator Glossary page.
To set up the static filters, do the following:
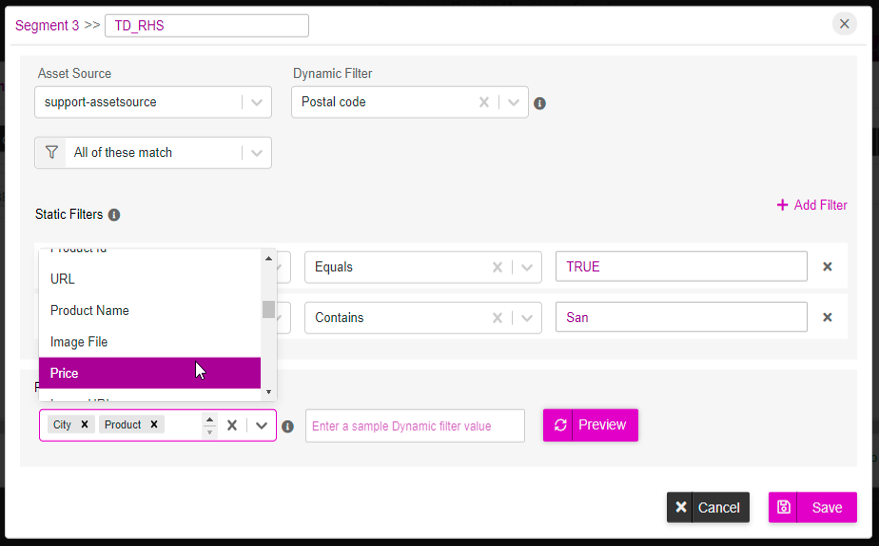
● From the first dropdown, select the column name.
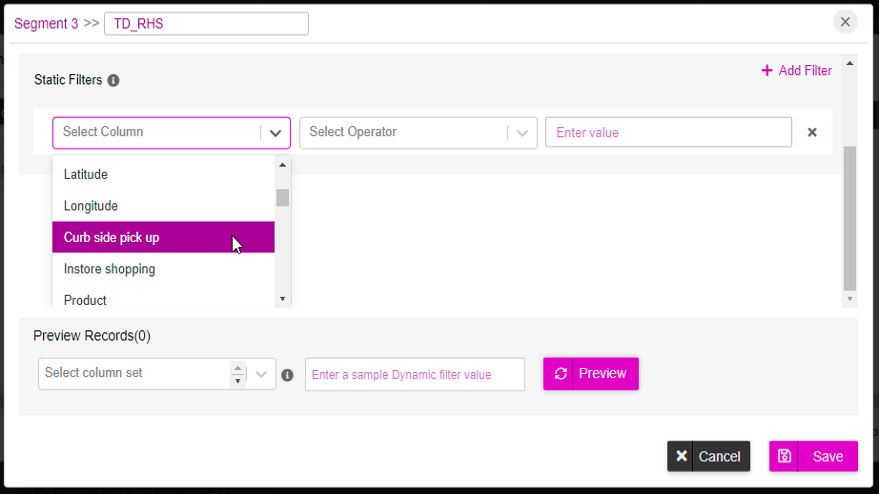
● From the second dropdown, select the conditional operator.
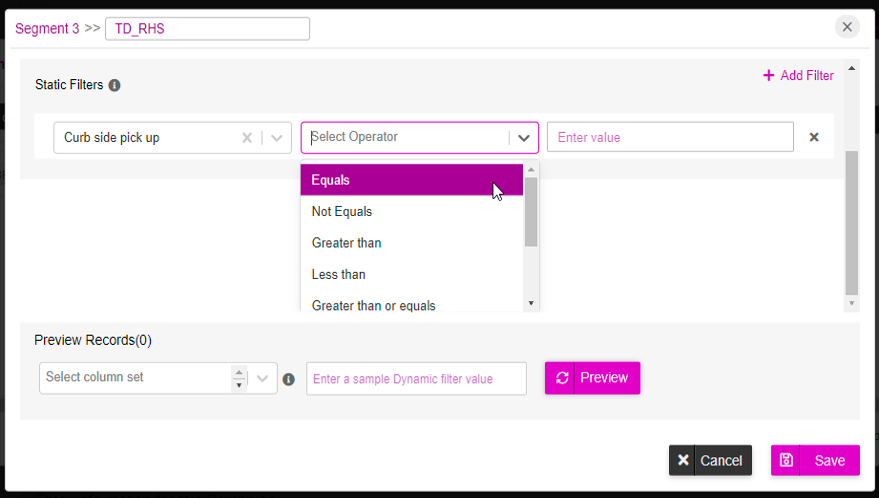
● Enter the column value, which is available in the row you want to filter.
7- You can also add and set up additional rules or filters by clicking ‘+ Add Filter’. Click the ‘X’ icon to delete the filter.
Select the column names that you want to view in the final preview of the resolved/filtered data set.
Enter a sample Dynamic filter value i.e any value from the column selected as Dynamic filter.
8- Click the ‘Preview’ button.
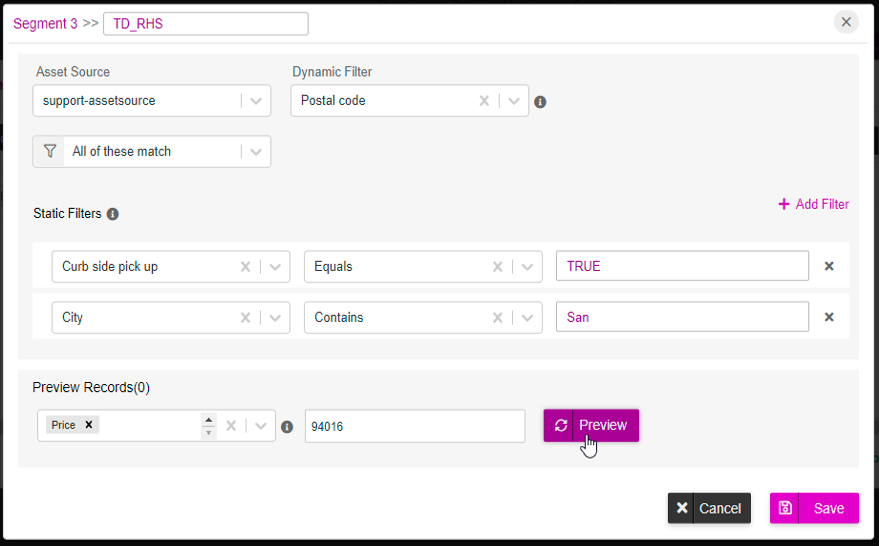
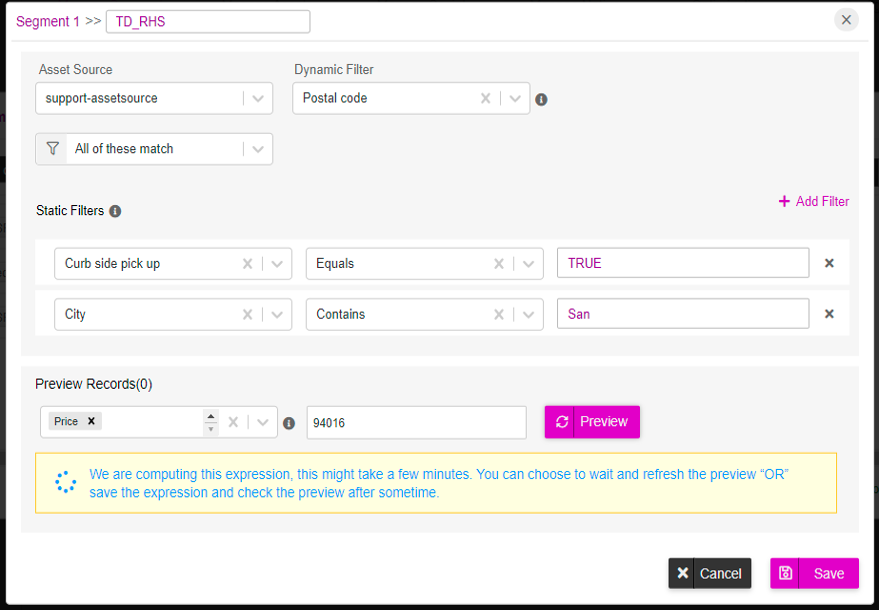
For the entered sample dynamic filter value and the defined static filter condition, the preview will show the row values for all the column names selected as the column set.
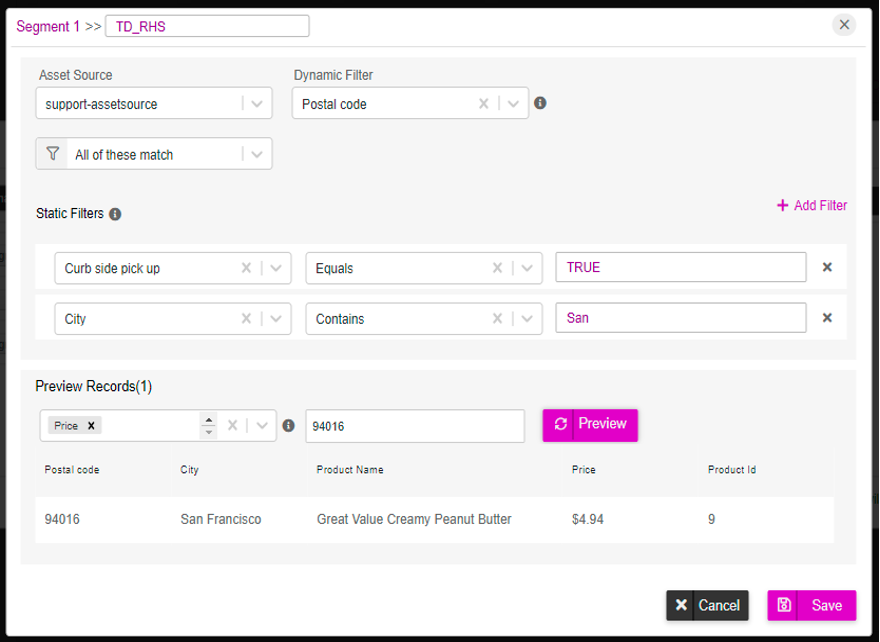
You can sort the preview records in each column by clicking on the column name.
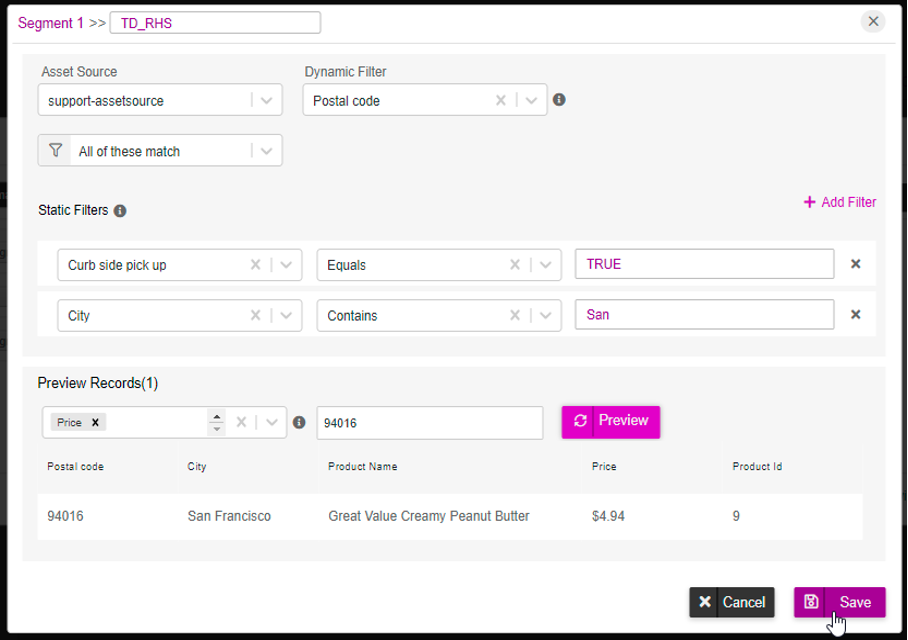
9- Click the Save button to save the configured FBD values.
10- You can clear the FBD configuration by clicking the Cancel button.
You can also update an existing FBD configuration.