So far we have:
- Uploaded the Creative Master
- Created the Asset Source and saved the Ad
This section details the steps to generate creative variations using the Asset Carousel. Here's what we will cover:
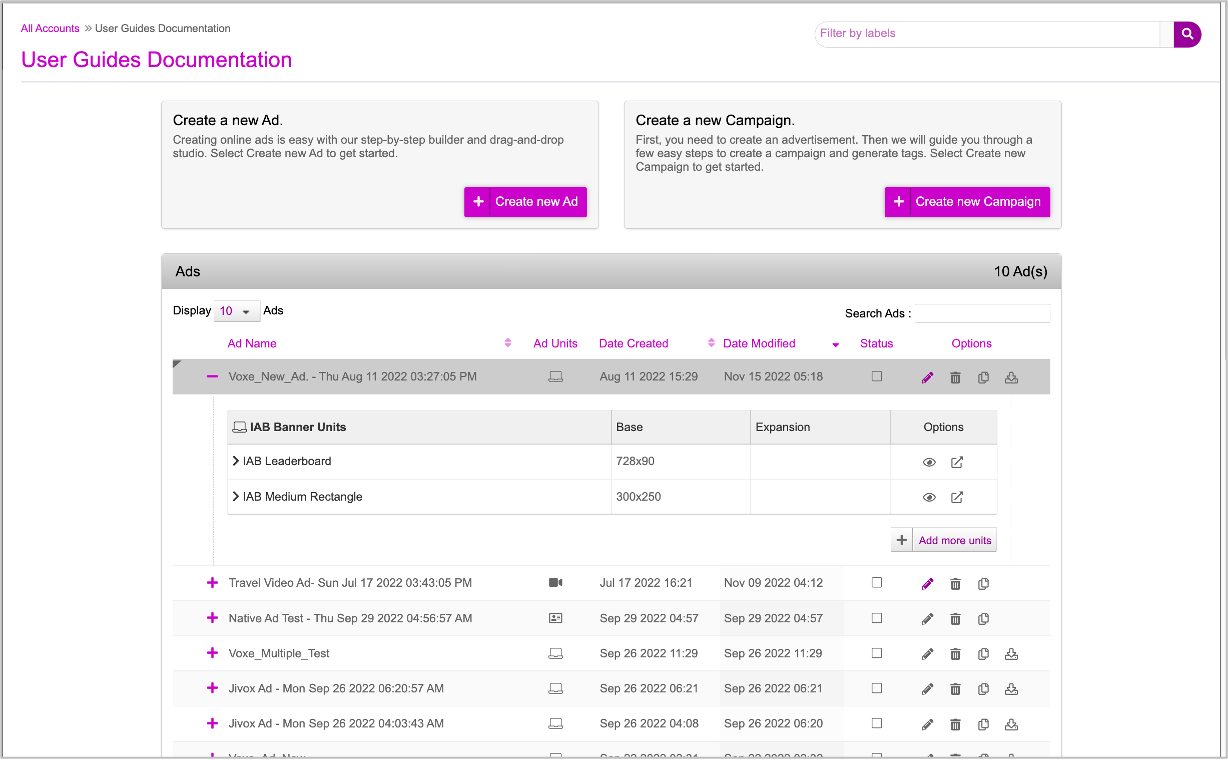
On the Edit page, you will see all the Ad units of different sizes. You can expand each Ad Unit to view all the creative masters added to each Ad unit.
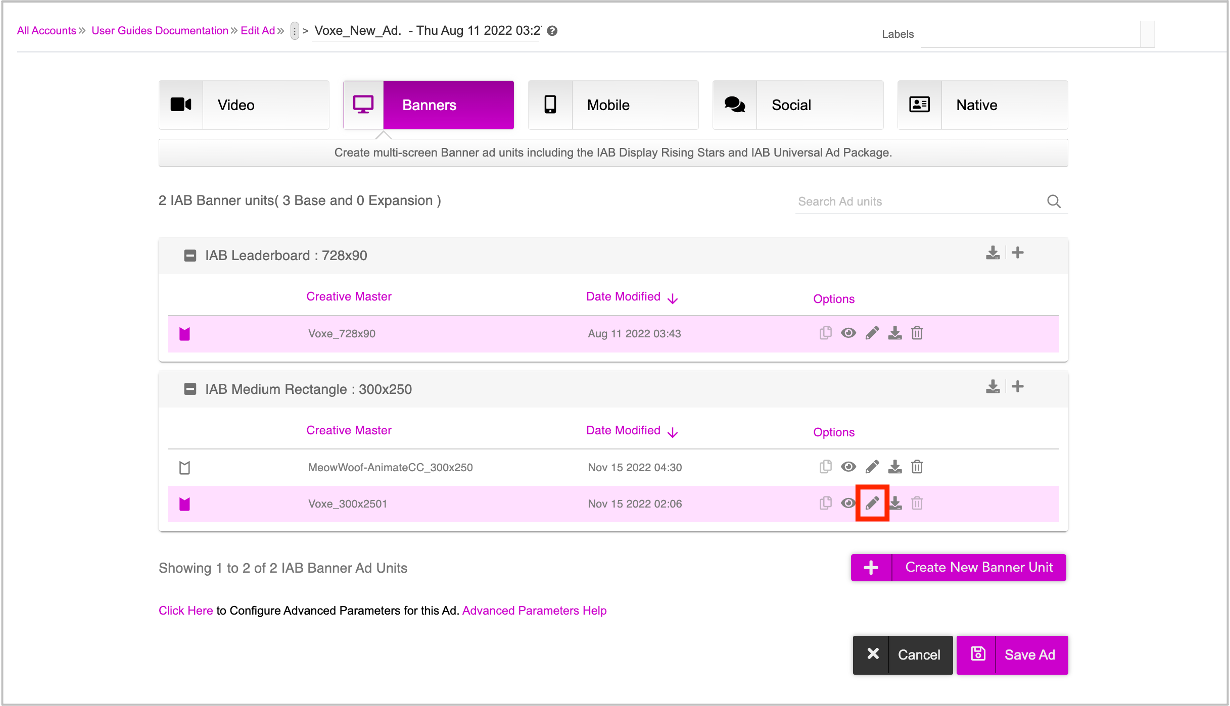
Click the pencil icon (highlighted in the image above) next to the creative master that you want to edit. You will be redirected to the DCS UI.
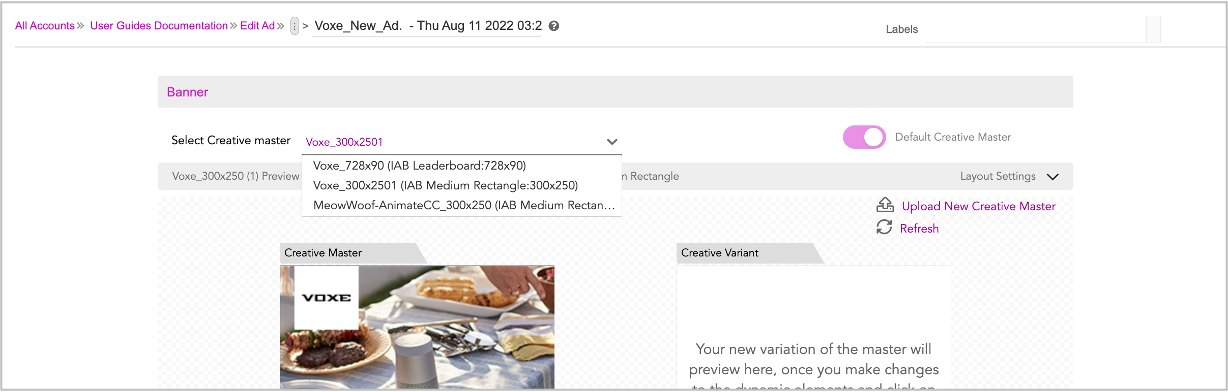
You can use the Select Creative Master drop-down to switch to another creative master and work on it.
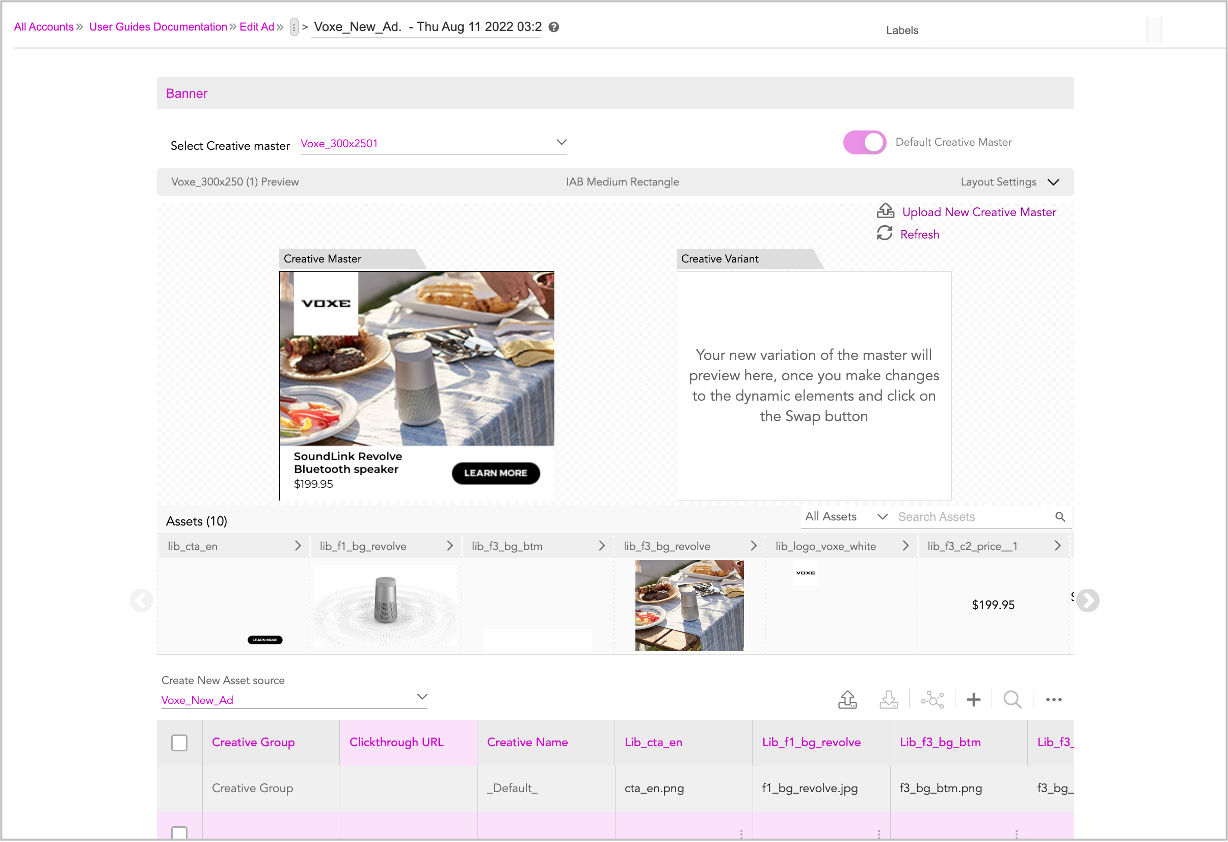
The Creative Master that you select here, will be displayed in the DCS window, with all the dynamic assets.
The DCS UI allows you to generate new creative variations using the Asset Carousel:
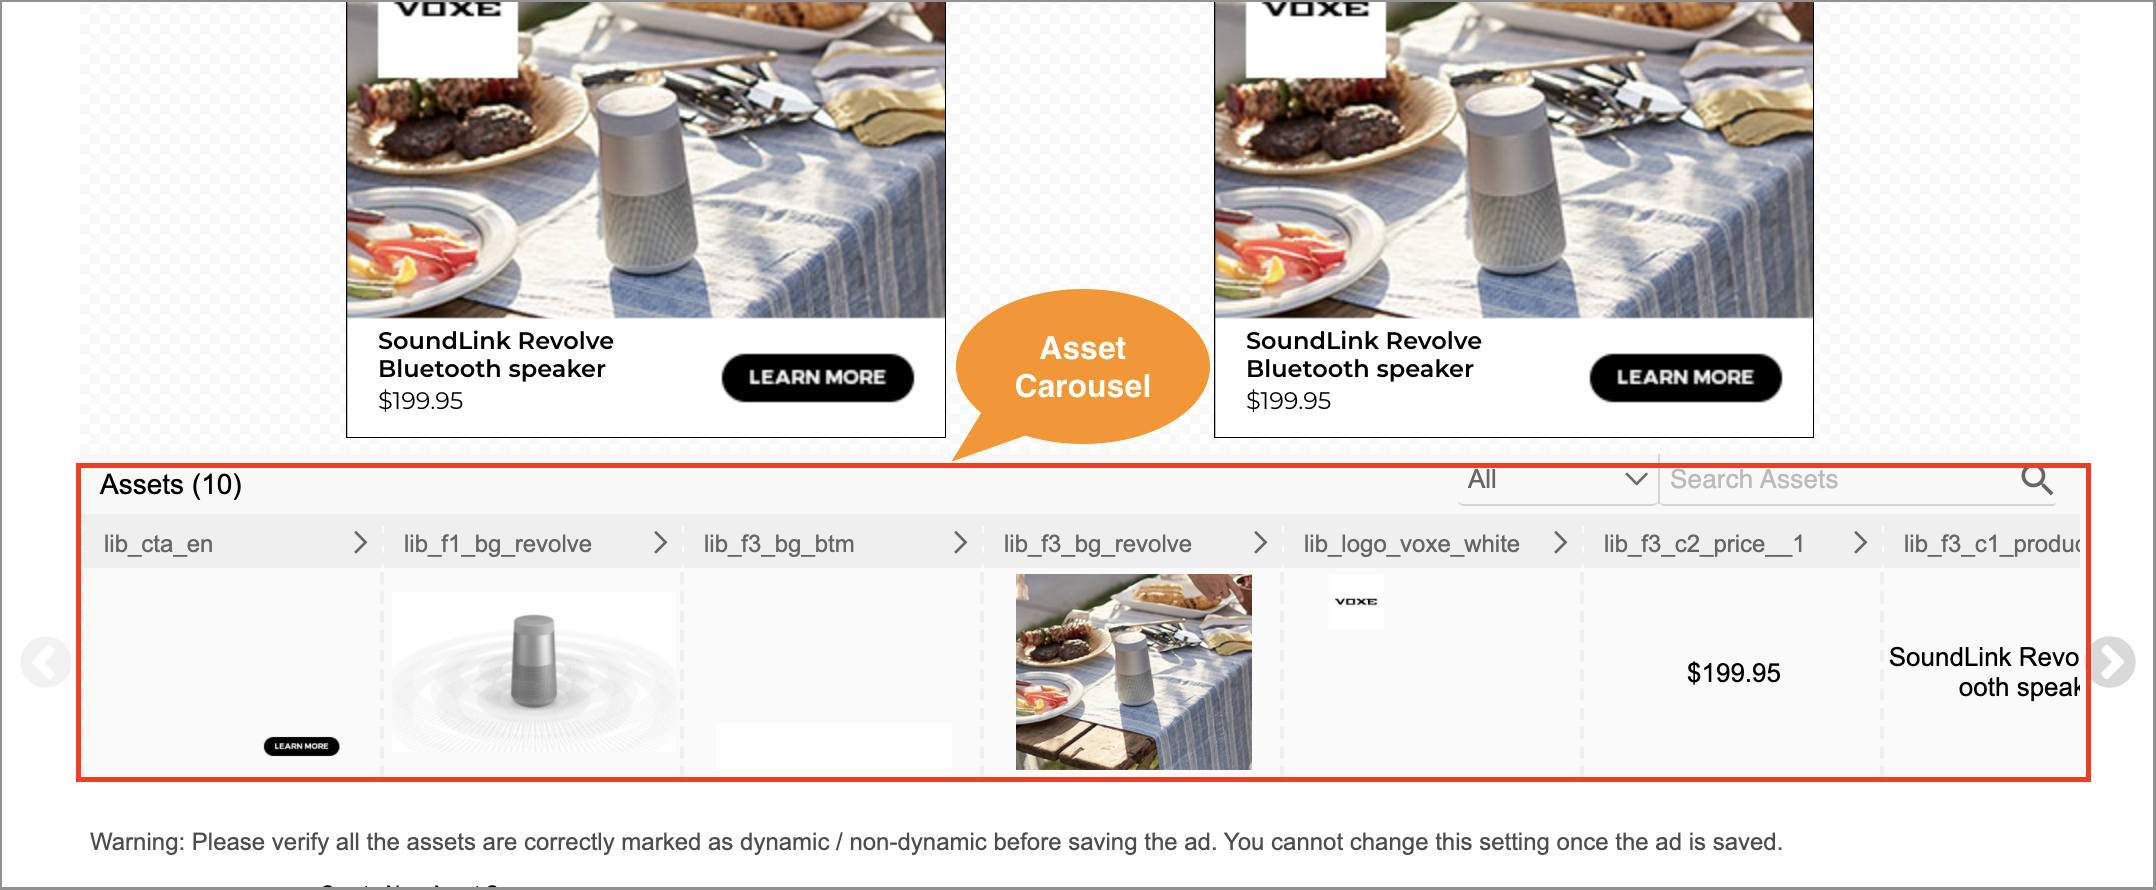
The Asset Carousel displays all the Creative Assets that are pulled from the creative master when using Adobe Animate or Google Web Design.
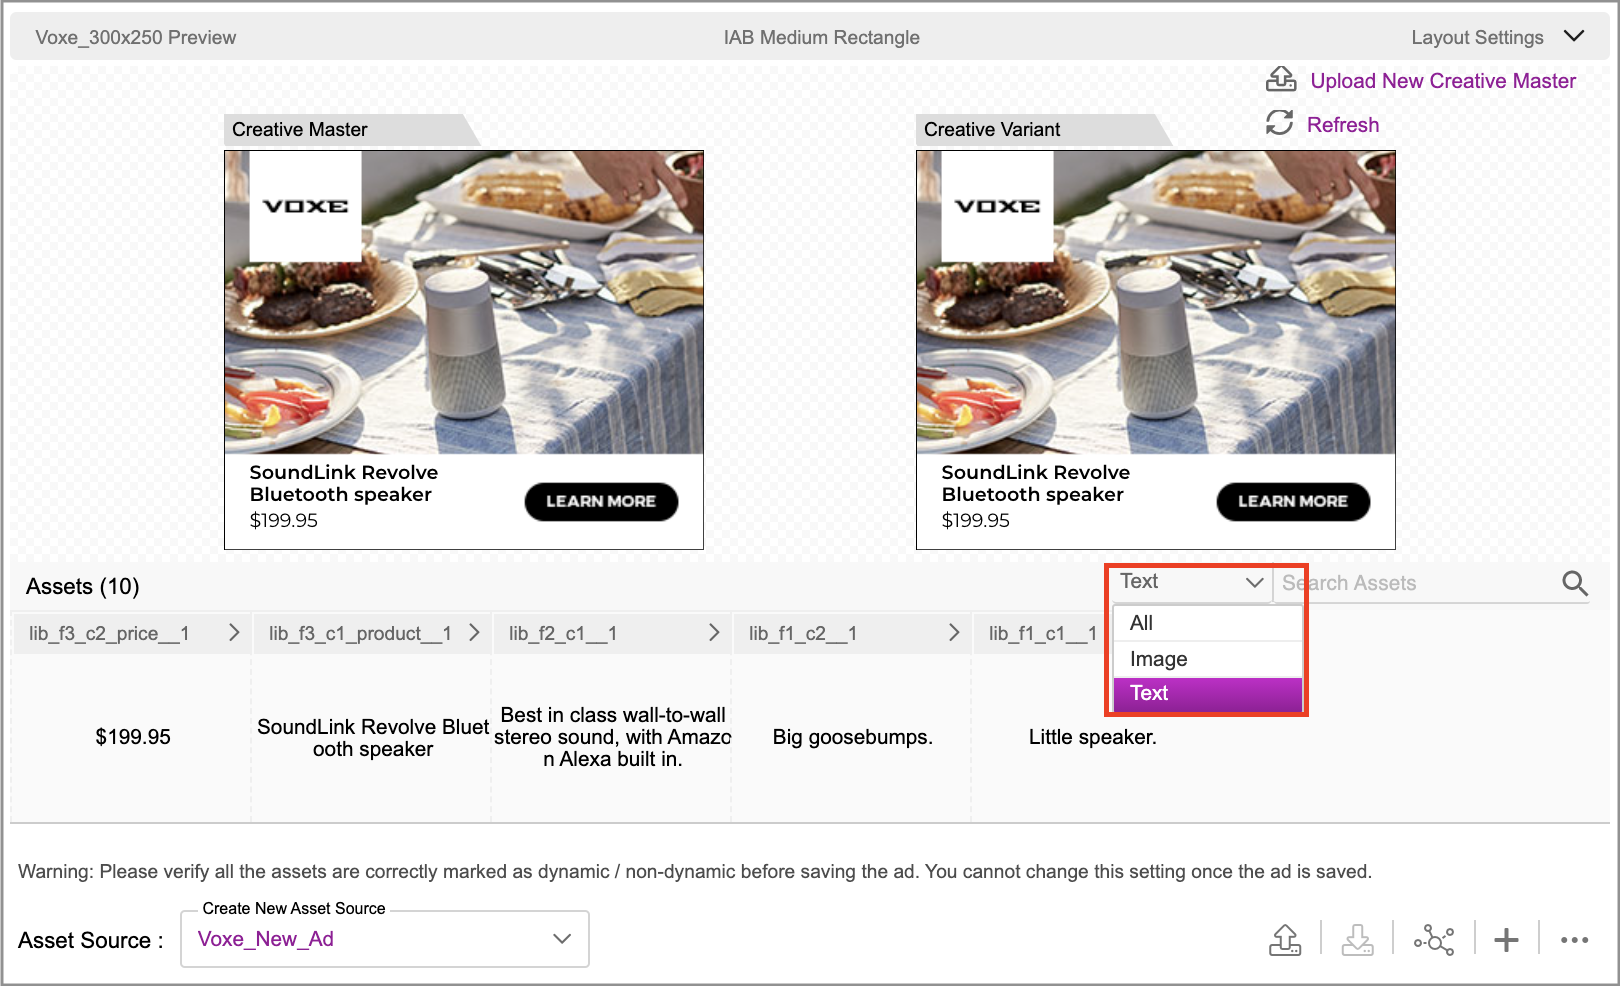
You can filter your creative assets by selecting one of the following options:
- Image - Filter by image assets such as backgrounds, products, call to actions.
- Text - Filter by any text assets such as product names, prices etc.
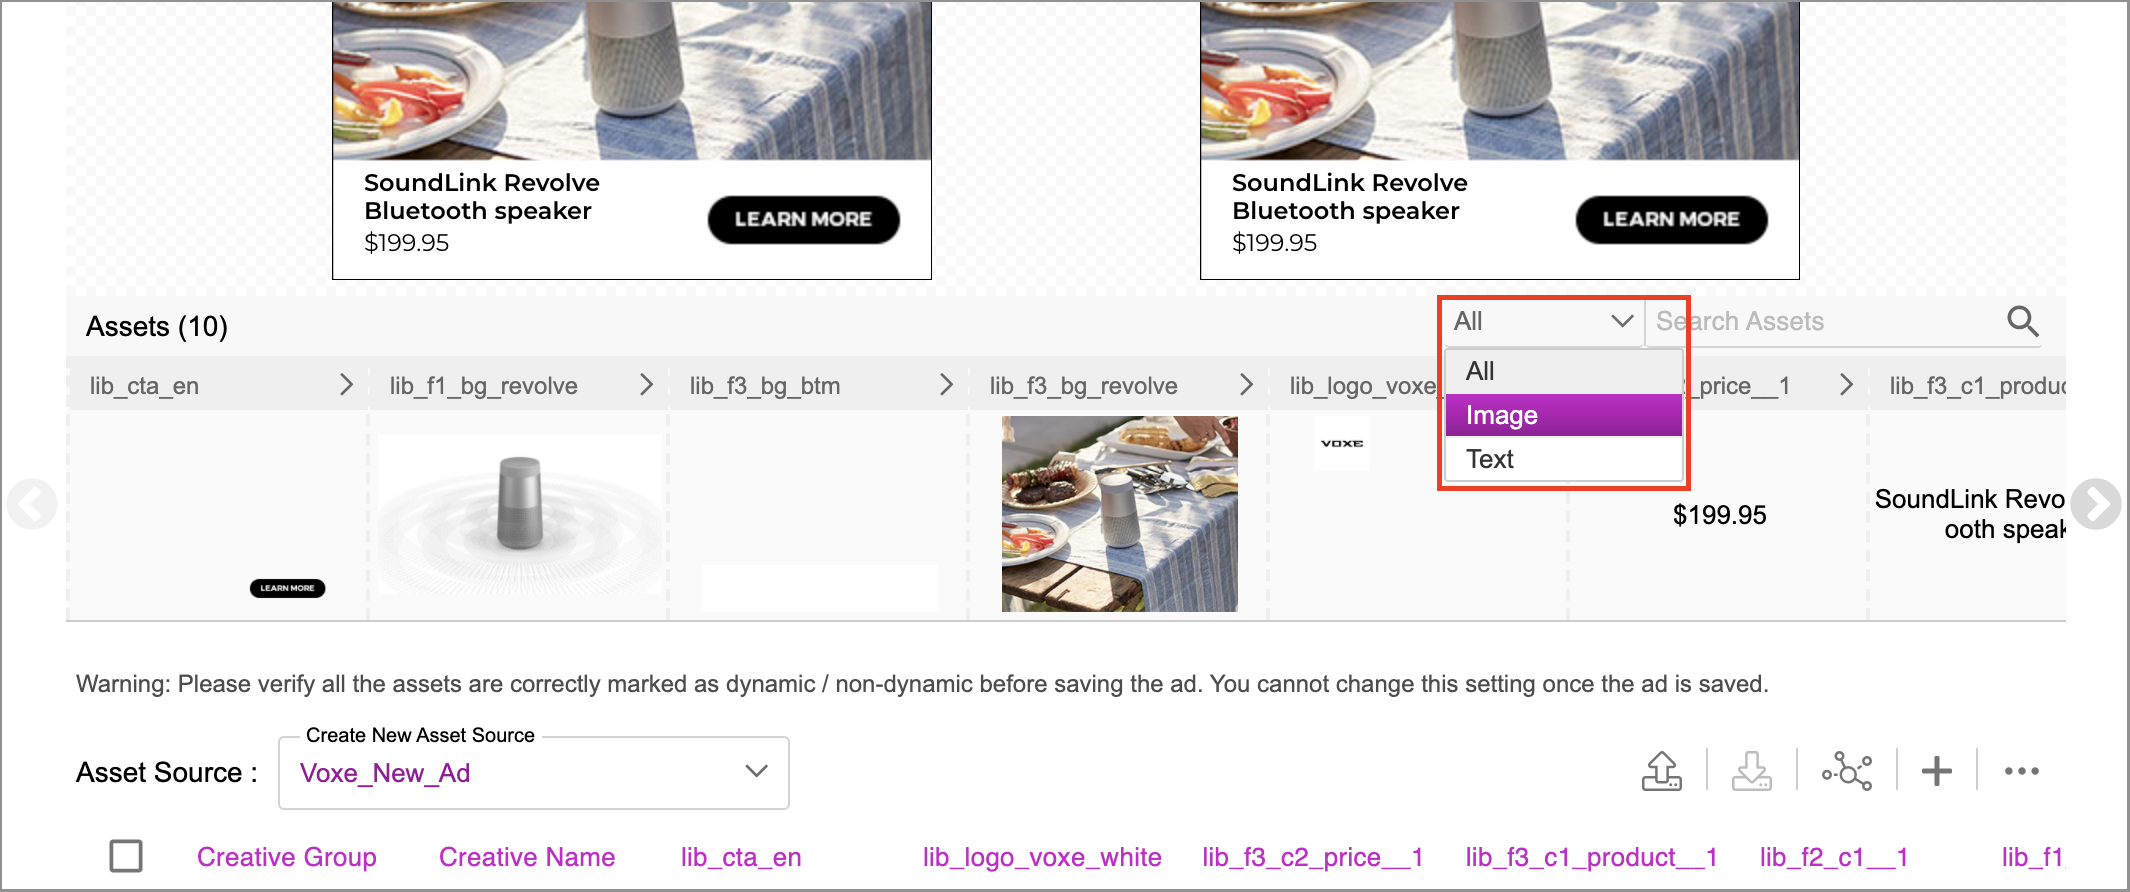
You can filter assets by selecting the asset type or search individual assets by their name on the search bar. Alternatively, you can use the arrows on both sides of the carousel to navigate and select the required asset.
Updating Image Assets
Let’s start with updating the image assets. Follow these steps:
- Select All on the drop-down list and then select Image. Only image assets will be filtered and displayed in the Asset Carousel.
Select the image asset that you want to change in the Asset Carousel. Here, we are selecting the image of the speaker on the Asset Carousel (labelled ‘lib_f1_bg_ revolve’ highlighted in the image below).
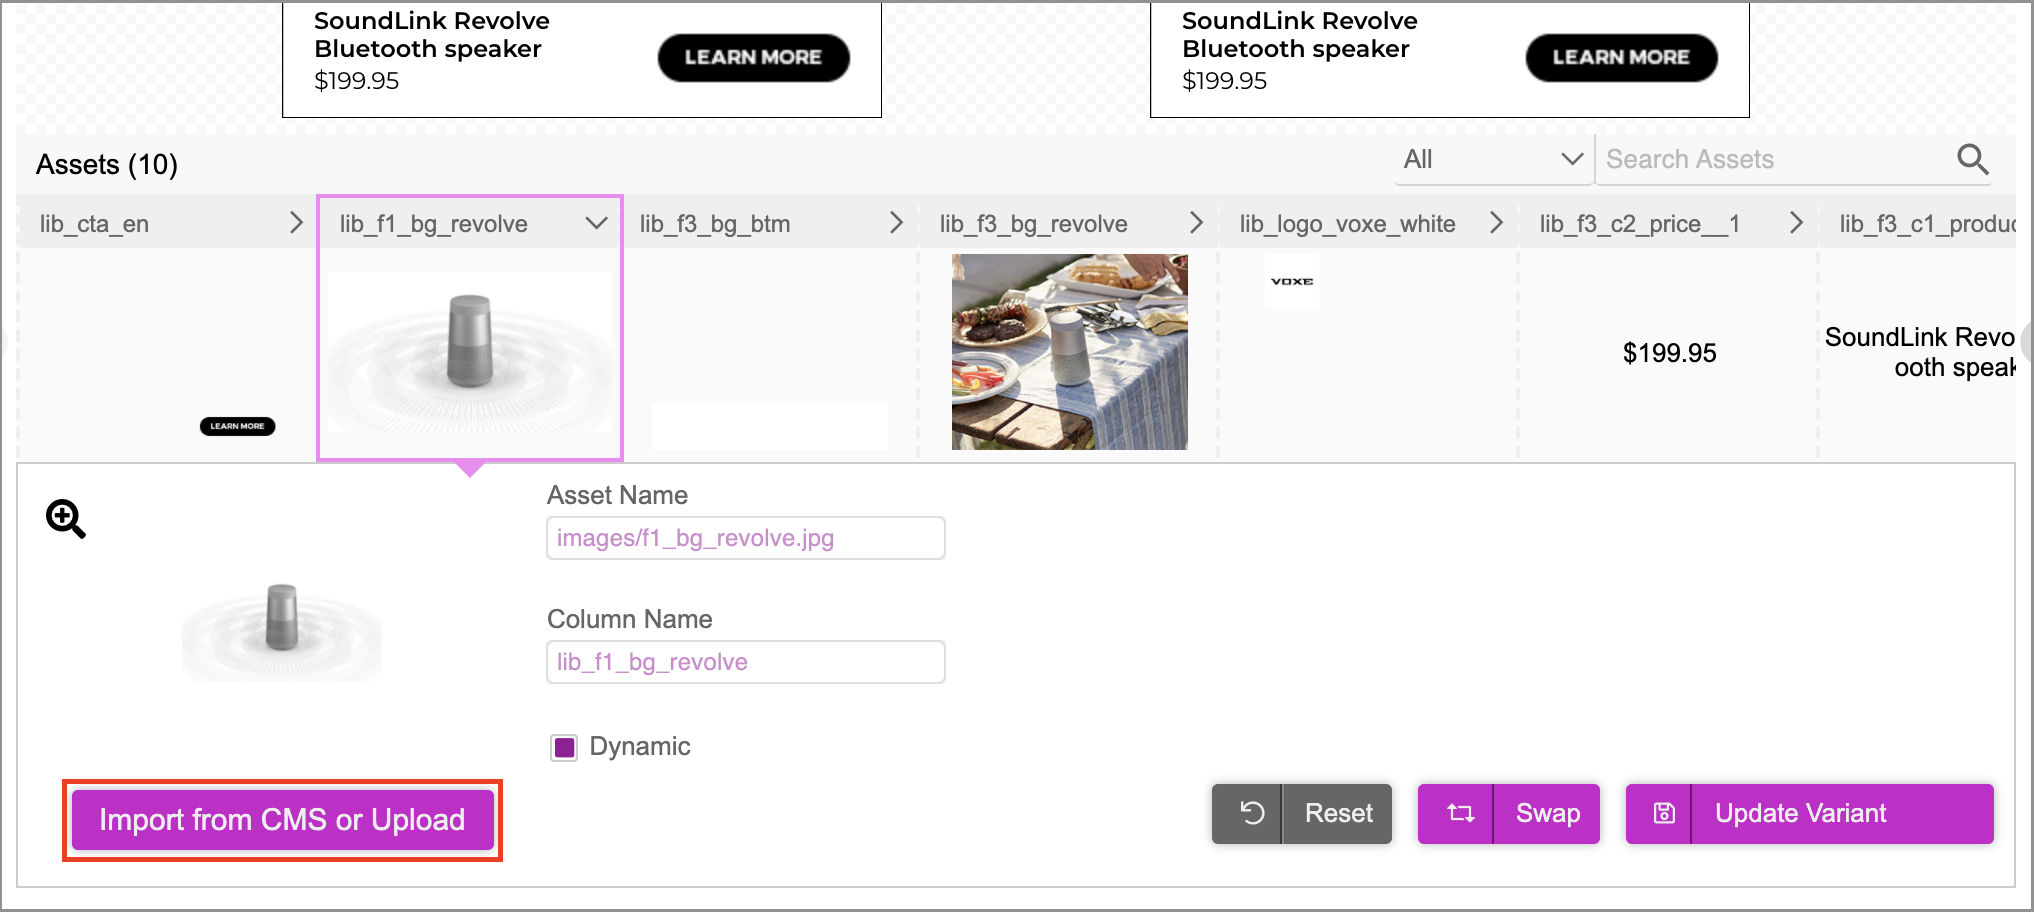
On selecting an asset the section expands to reveal the following:
| Field Name | Description |
|---|---|
| Asset Name | The name of the asset as defined in the Adobe Animate or Google Web Designer Creative Master |
| Column Name | The name of the column for the Asset in the Asset Source |
| Dynamic Checkbox | This is marked by default and allows for this asset to be dynamically swapped |
| Import from CMS or Upload | You can either import an image asset from Jivox CMS or upload an image asset |
| Swap | This allows you to preview changes in the Creative Variant next to the creative master |
| Save/Update Creative Variant | This allows you to save your new creative variant. This does not replace the master but rather creates a new variant based on the changes to the asset. Use this option once all images/texts for your new variant have been configured. This will then save it as a new row in the Asset Source below. |
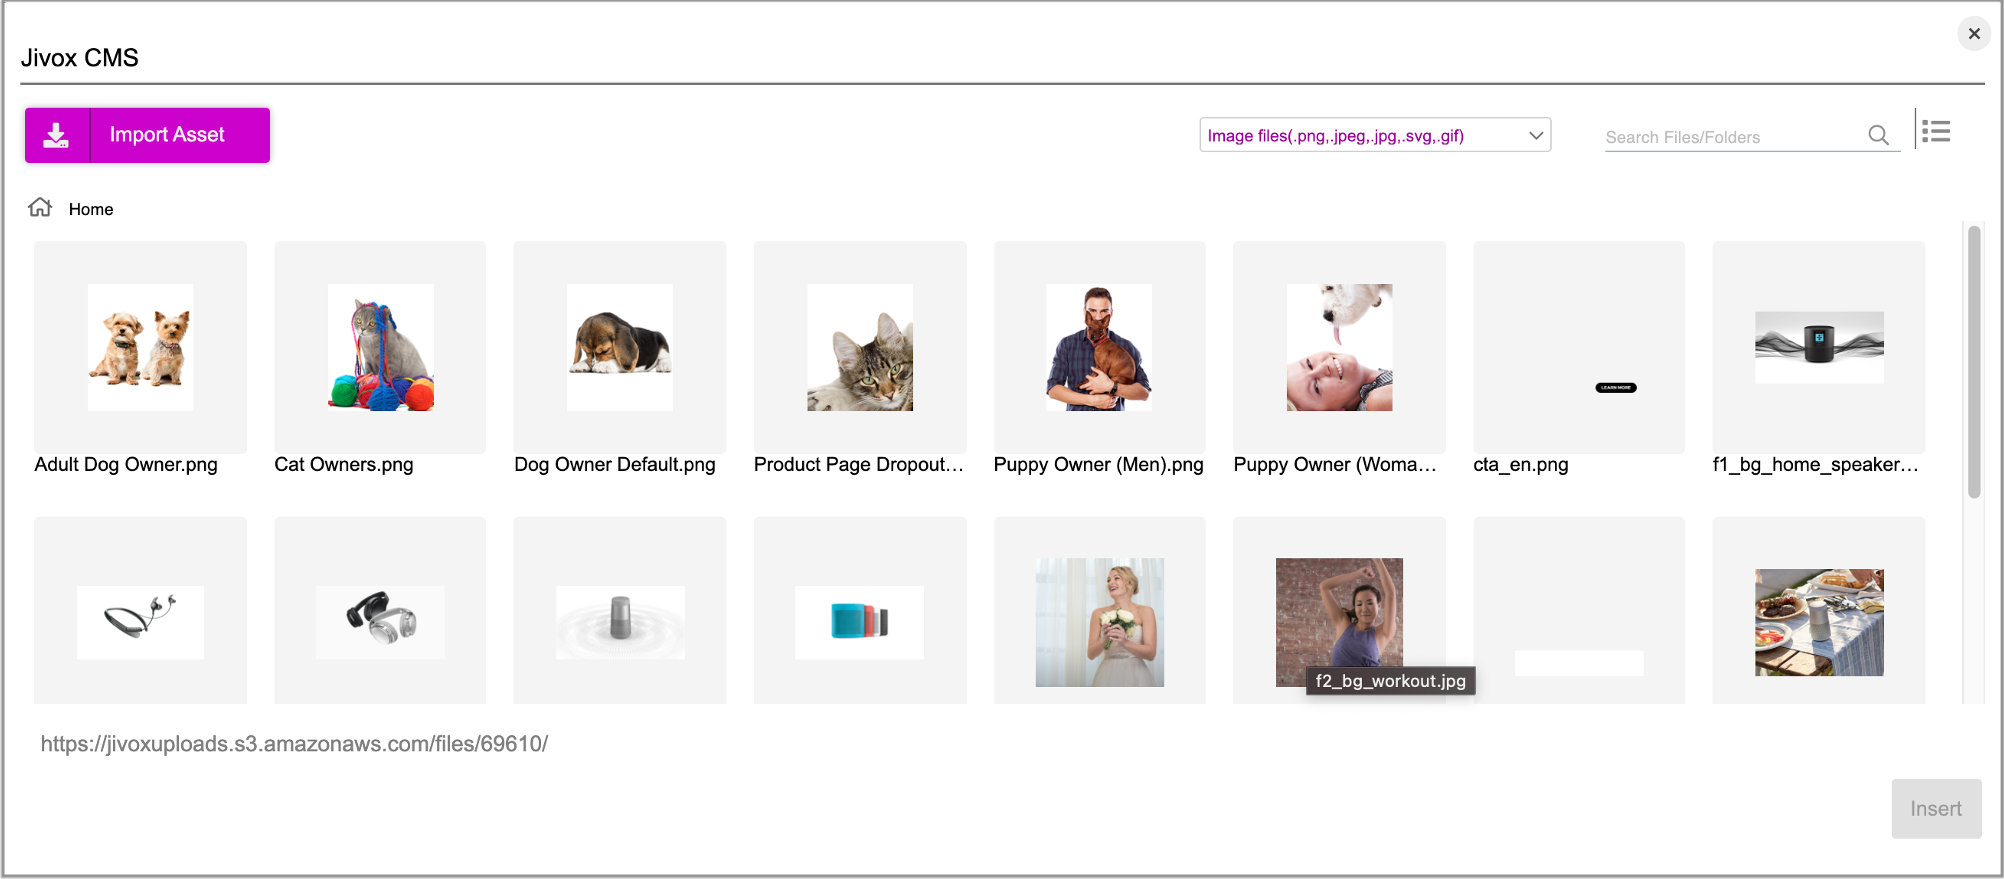
- Click Import from CMS or Upload. If you haven't already imported the assets, click Import Asset. This will allow you to import the Creative Assets from your computer to the Jivox CMS. Select the file ‘f1_bg_home_speaker_500.jpg’ and click Insert.
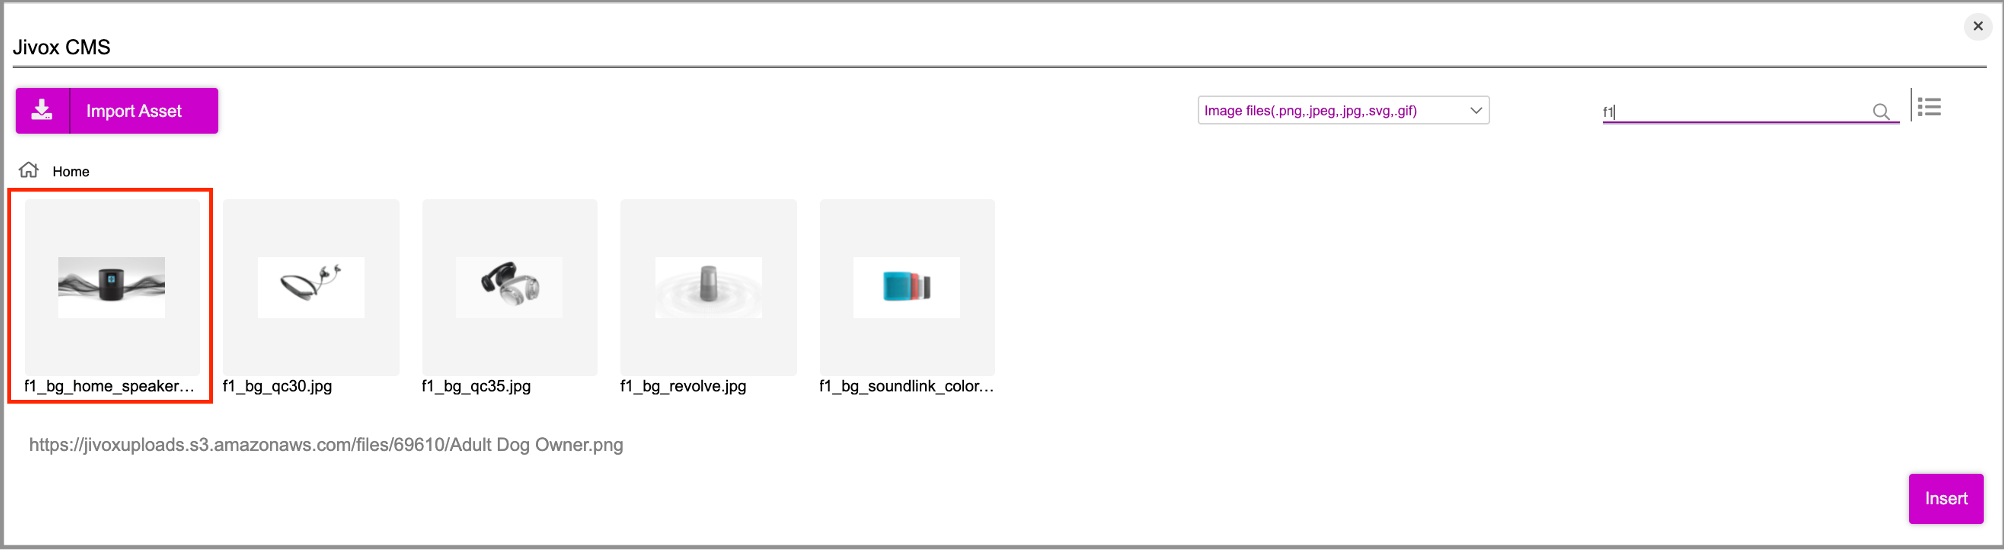
This will upload a new product image.
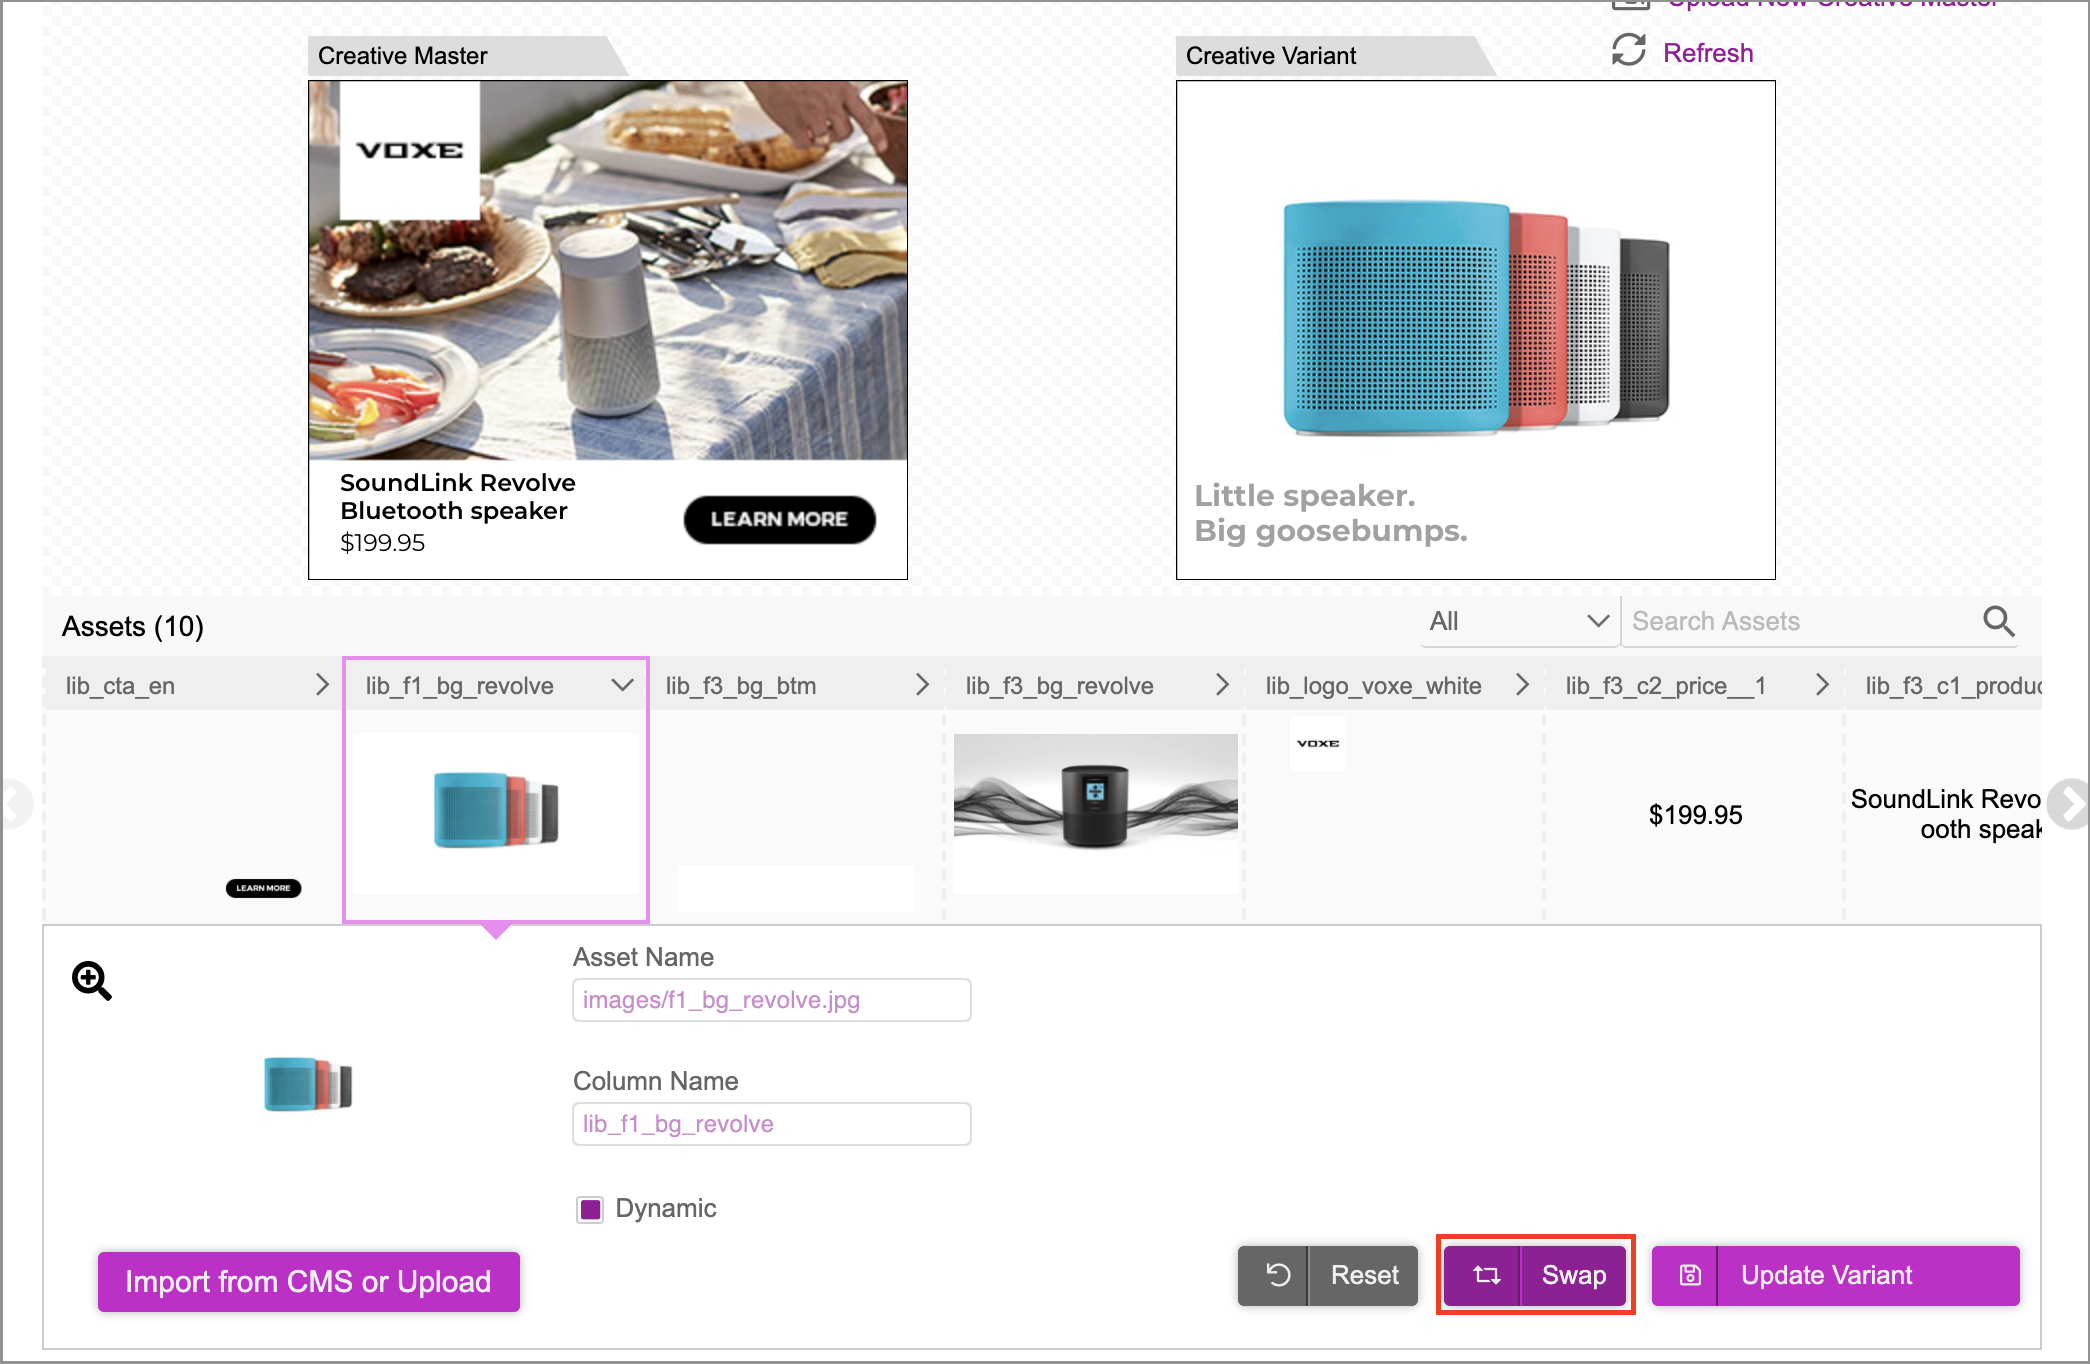
- Click Swap to observe the changes in Creative Variant Preview. Repeat the process for any other image assets that you need to be dynamic.
Updating Text Assets
Once you are done changing the Image Assets, click the filter on the Asset Carousel and select Text on the drop-down menu. This will now filter the assets so that only the text assets appear.
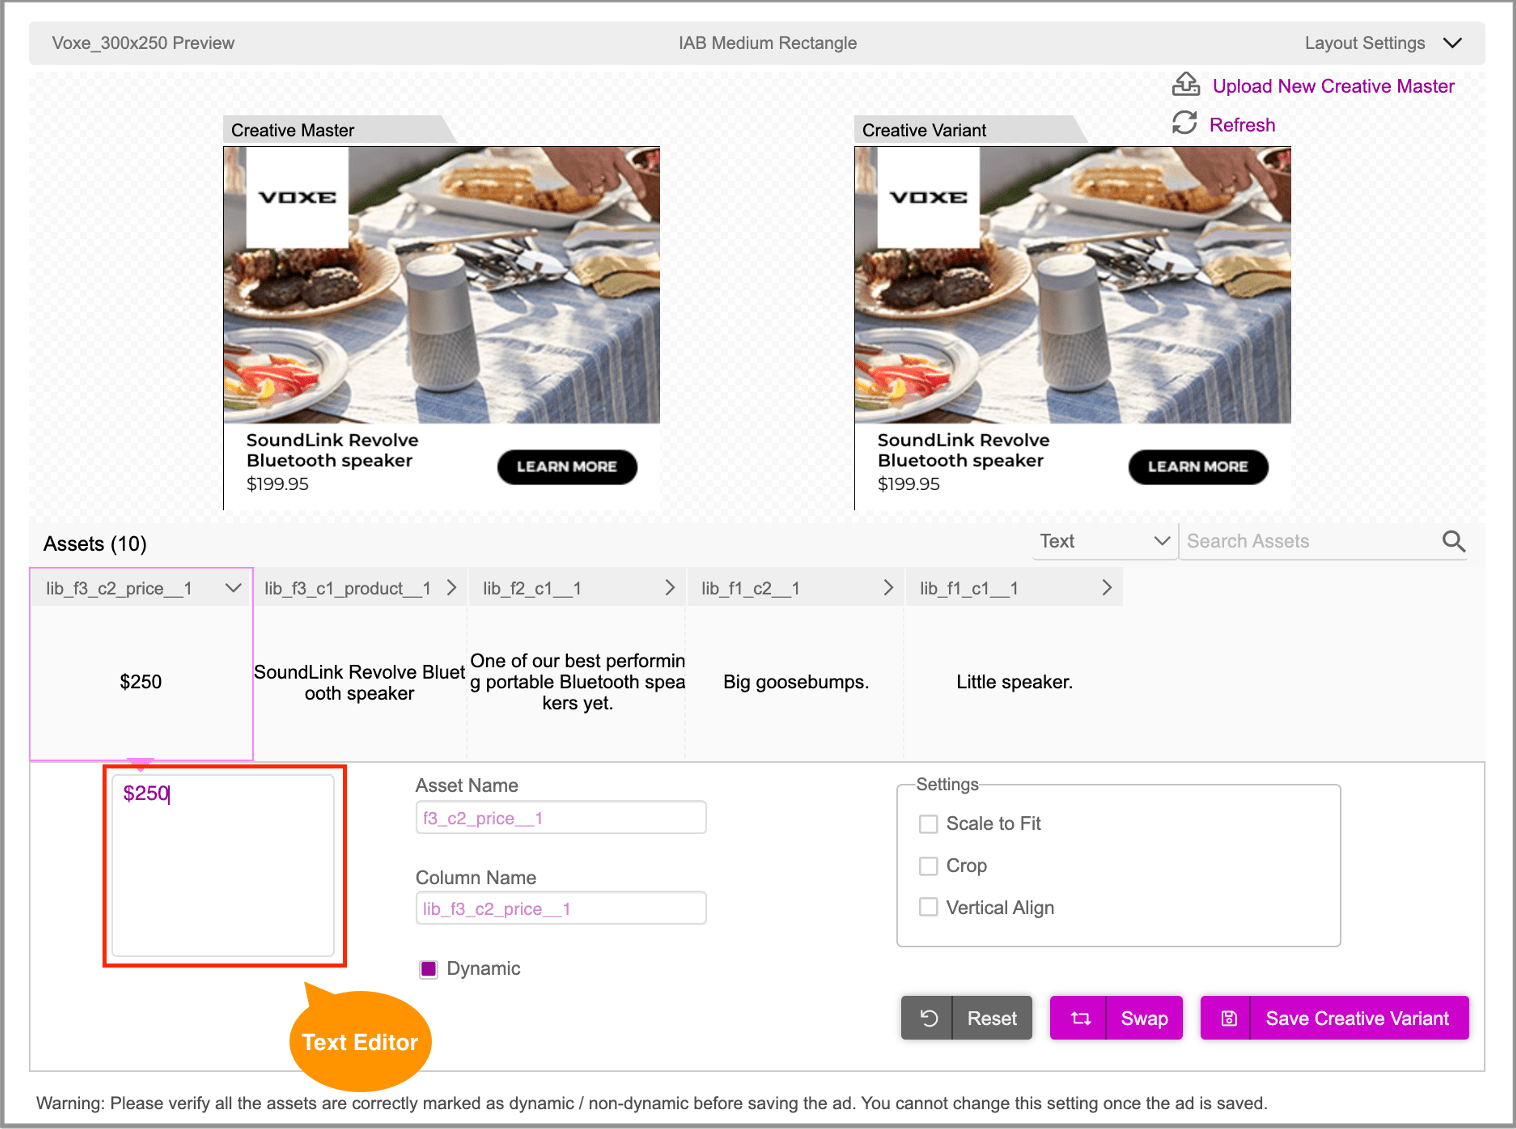
Now that the assets are filtered by text, lets click the text asset that contains the $199.95 price so that it expands. On the expanded panel, you will see options similar to those for image assets along with the following:
| Component | Description |
|---|---|
| Text Editor | This is a text box that allows you to edit the text |
| Scale to Fit | This will adjust the text size to fit the parameters within the ad component |
| Crop | This will crop the text to adjust it within the ad |
| Vertical Align | This will adjust the alignment of the text to fit the ad component |
Update $199.95 to a price of your choice in the text editor. Here we are changing it to $250.
Saving the Creative Variant
Once done, click Save Creative Variant.
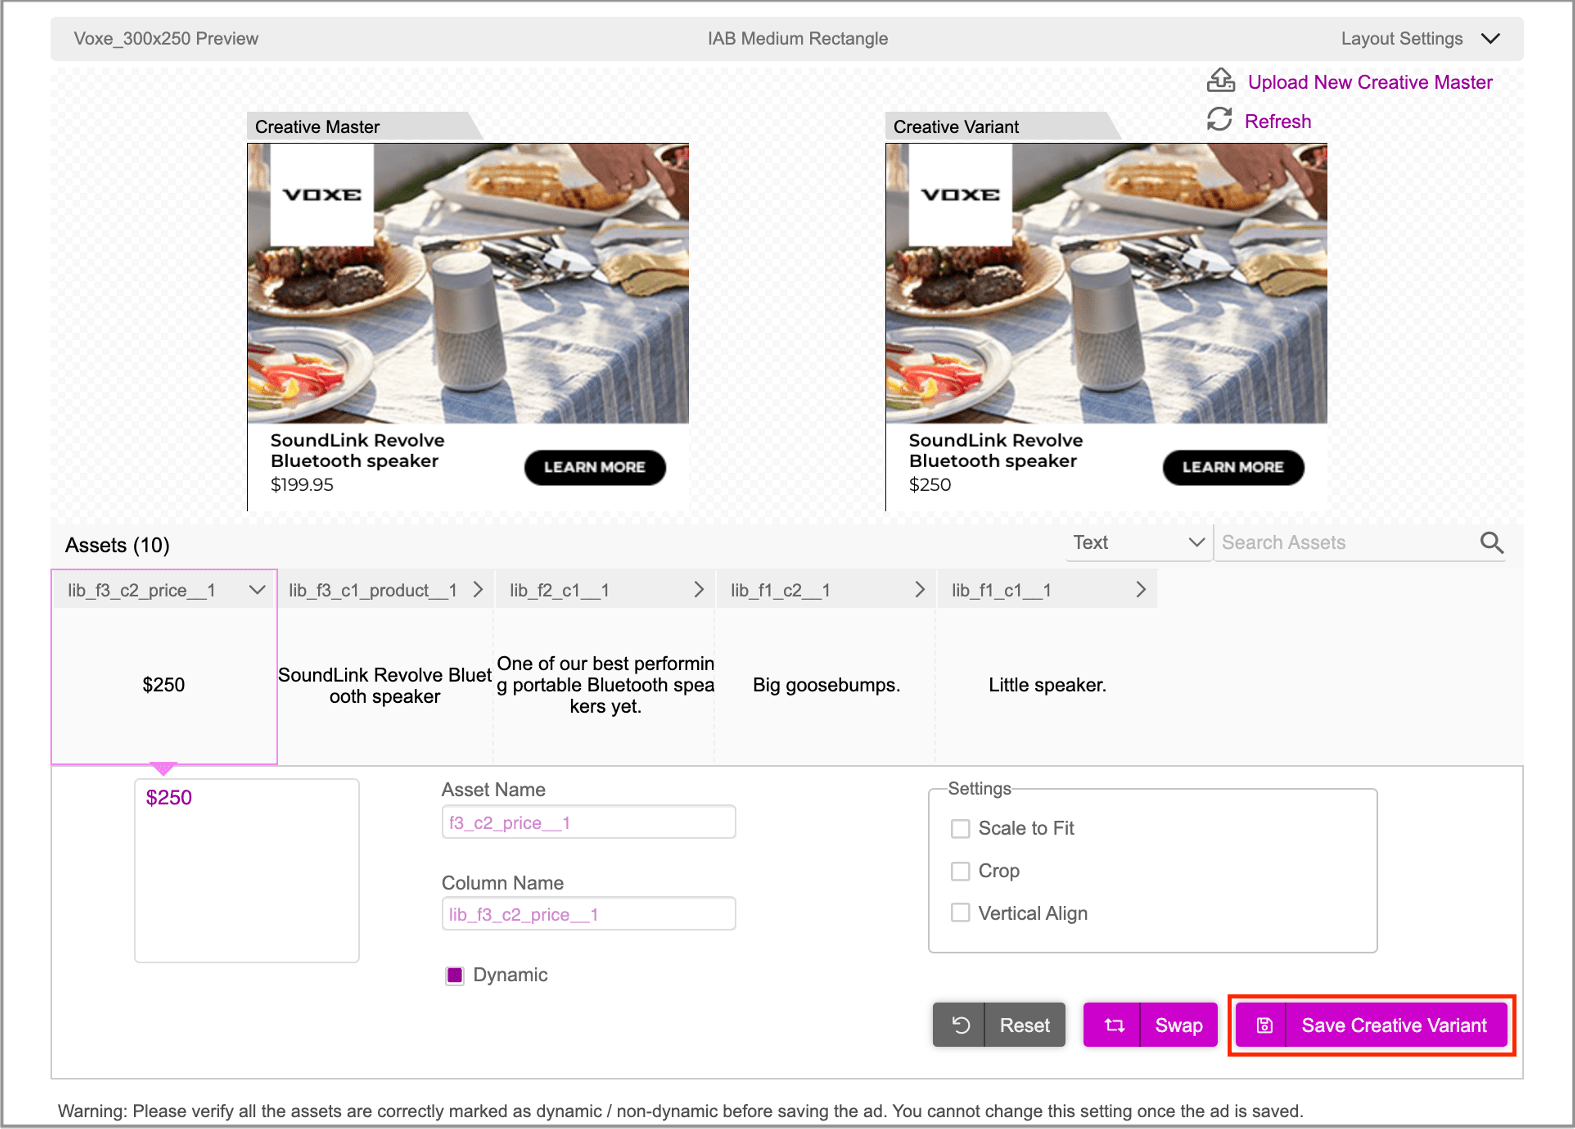
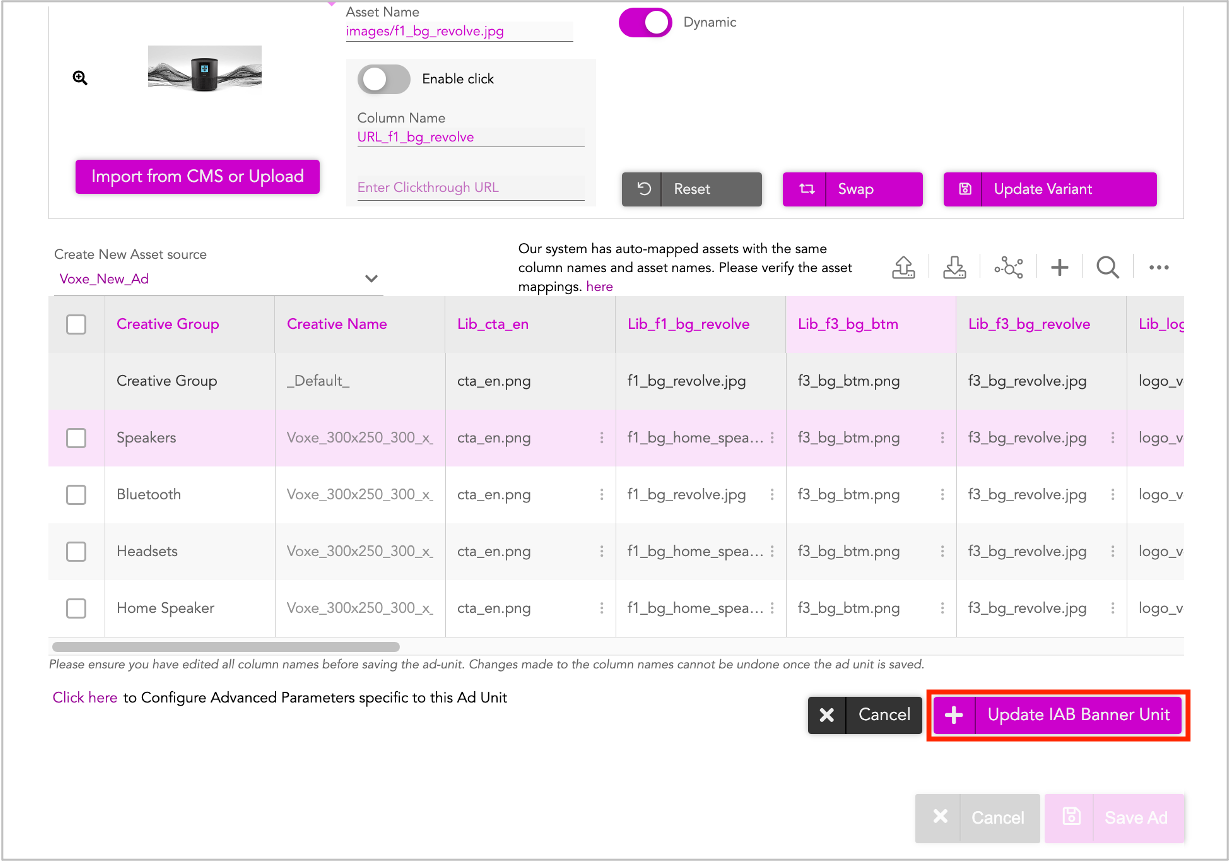
This will add a new row in the Asset Source below with the new Creative Variant that uses the new image and text copy.

You can repeat the process of changing the images & text assets to produce additional creative variations as per your requirement. As mentioned before, you can use this approach to create new creative variations when you have a finite number of creative variations.
You can also upload an asset source created outside of Jivox to automatically generate creative variations. This approach is covered in the next section.
Using the Interactive Asset Source
Once you've saved the creative variations, if you want to make any further changes you can use the Interactive Asset Source.
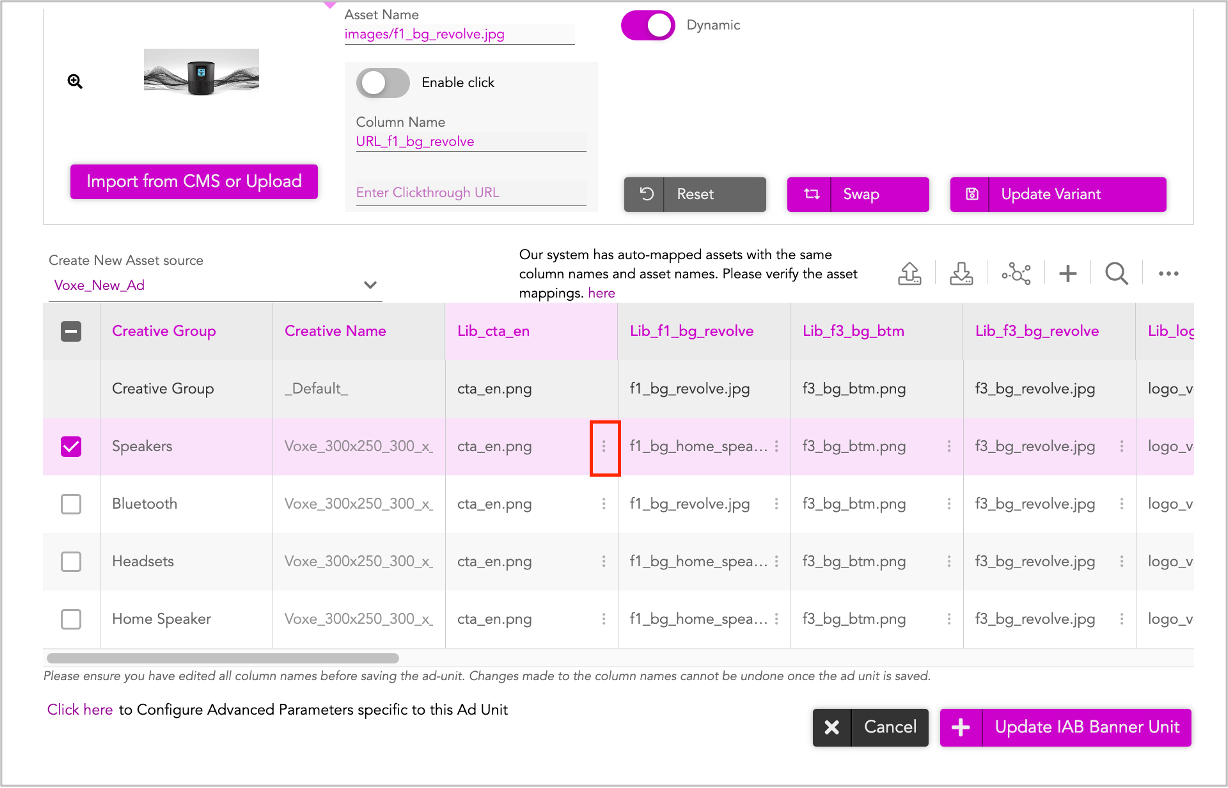
- For Text cells, click the cell and directly enter the changes that you want to make.
- For Image cells, click the vertical ellipsis and then click Insert from Jivox CMS.
You will see the Jivox CMS window where you will now be able to either select an existing image asset from the Jivox CMS or upload directly from your computer.
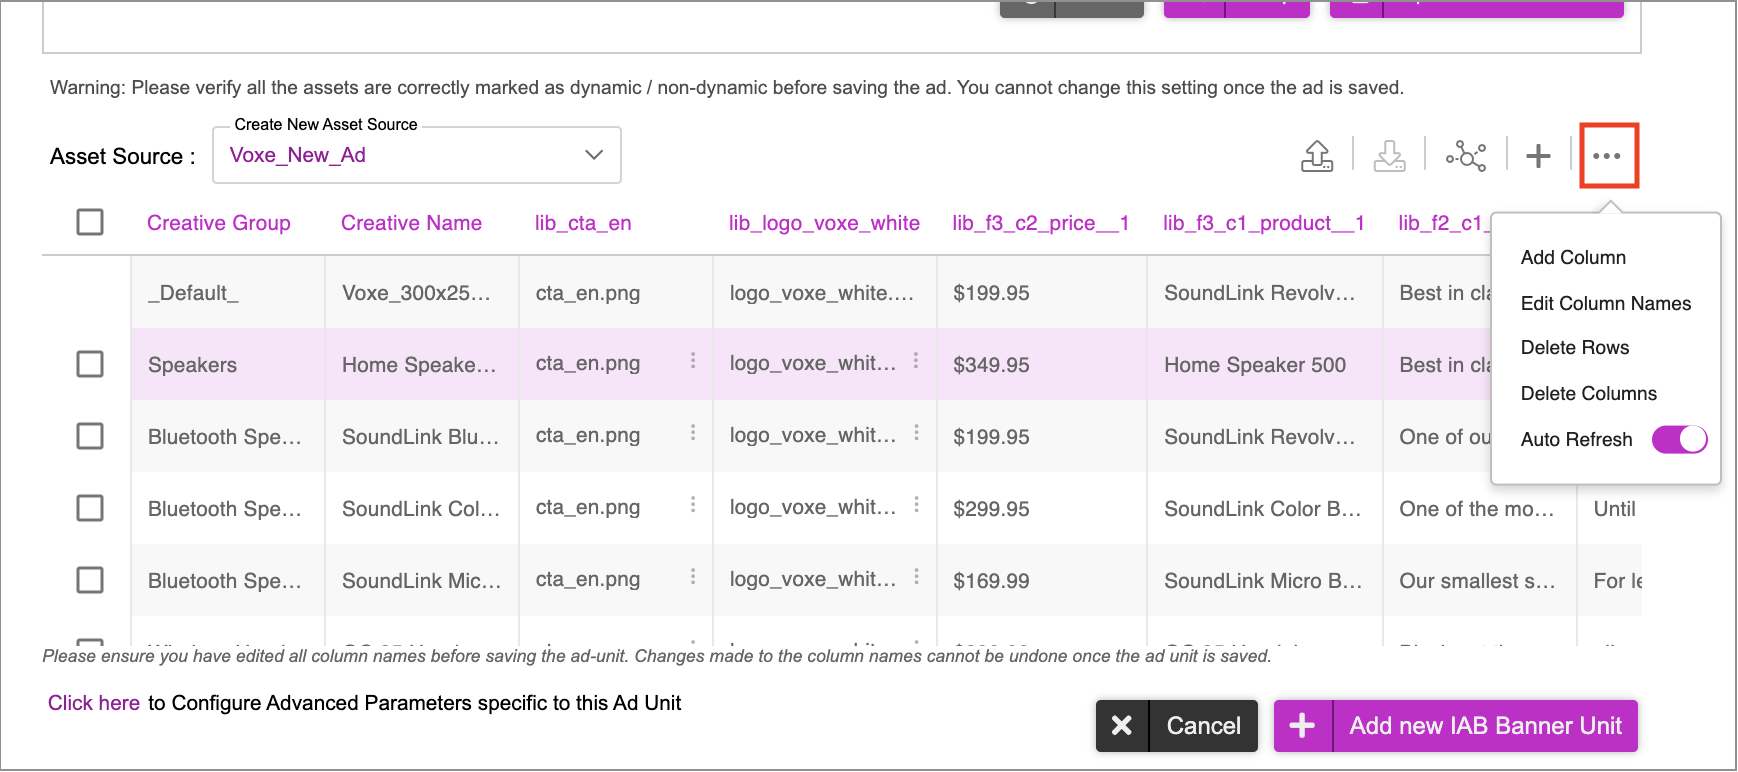
With the Interactive Asset Source, you also have the options to add/remove columns & rows by clicking the More options icon (ellipsis). This can be beneficial if you want to modify the Asset Source further.
Once done, go ahead and save the Ad. Click Update IAB Banner Unit.
In the subsequent screen, click Save Ad.
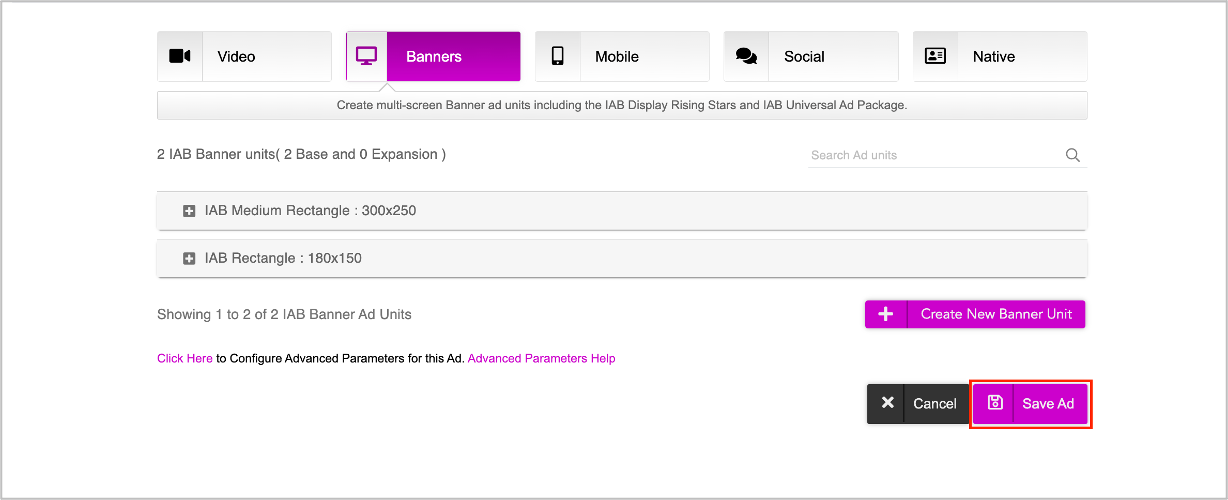
The Ad will be saved and you will be redirected to the Ads and Campaigns dashboard.
Next Steps
Next you must create a campaign and define the various triggers based on which the creative variations that you just created in the ad can be served to different audience groups. Refer to the Creating a New Campaign section for details.