This section details the steps to generate a creative variation by uploading an asset source file created outside of Jivox platform. The Jivox platform allows you to download an Asset Source Template that includes the column headers named as per the Creative Master. To ensure that the Asset Source file has the correct column headers, we recommend that you download the template from the platform.
- Downloading the Asset Source Template
- Uploading Asset Source File
- Using the Interactive Asset Source
Downloading the Asset Source Template
You can download the asset source template and then fill the columns separately outside the platform. The Download Asset Source option is available only when you save the ad.
Next, follow these steps:
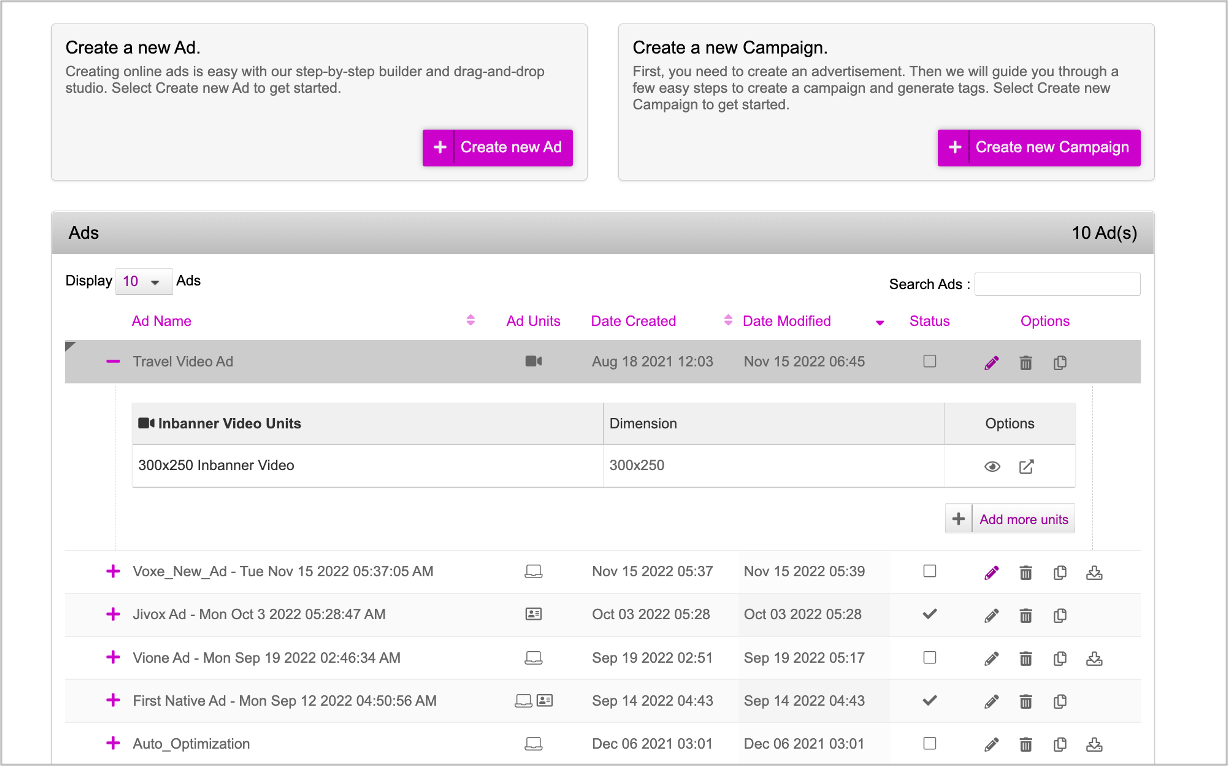
- On the Ads and Campaigns dashboard, click the pencil icon to edit your ad.
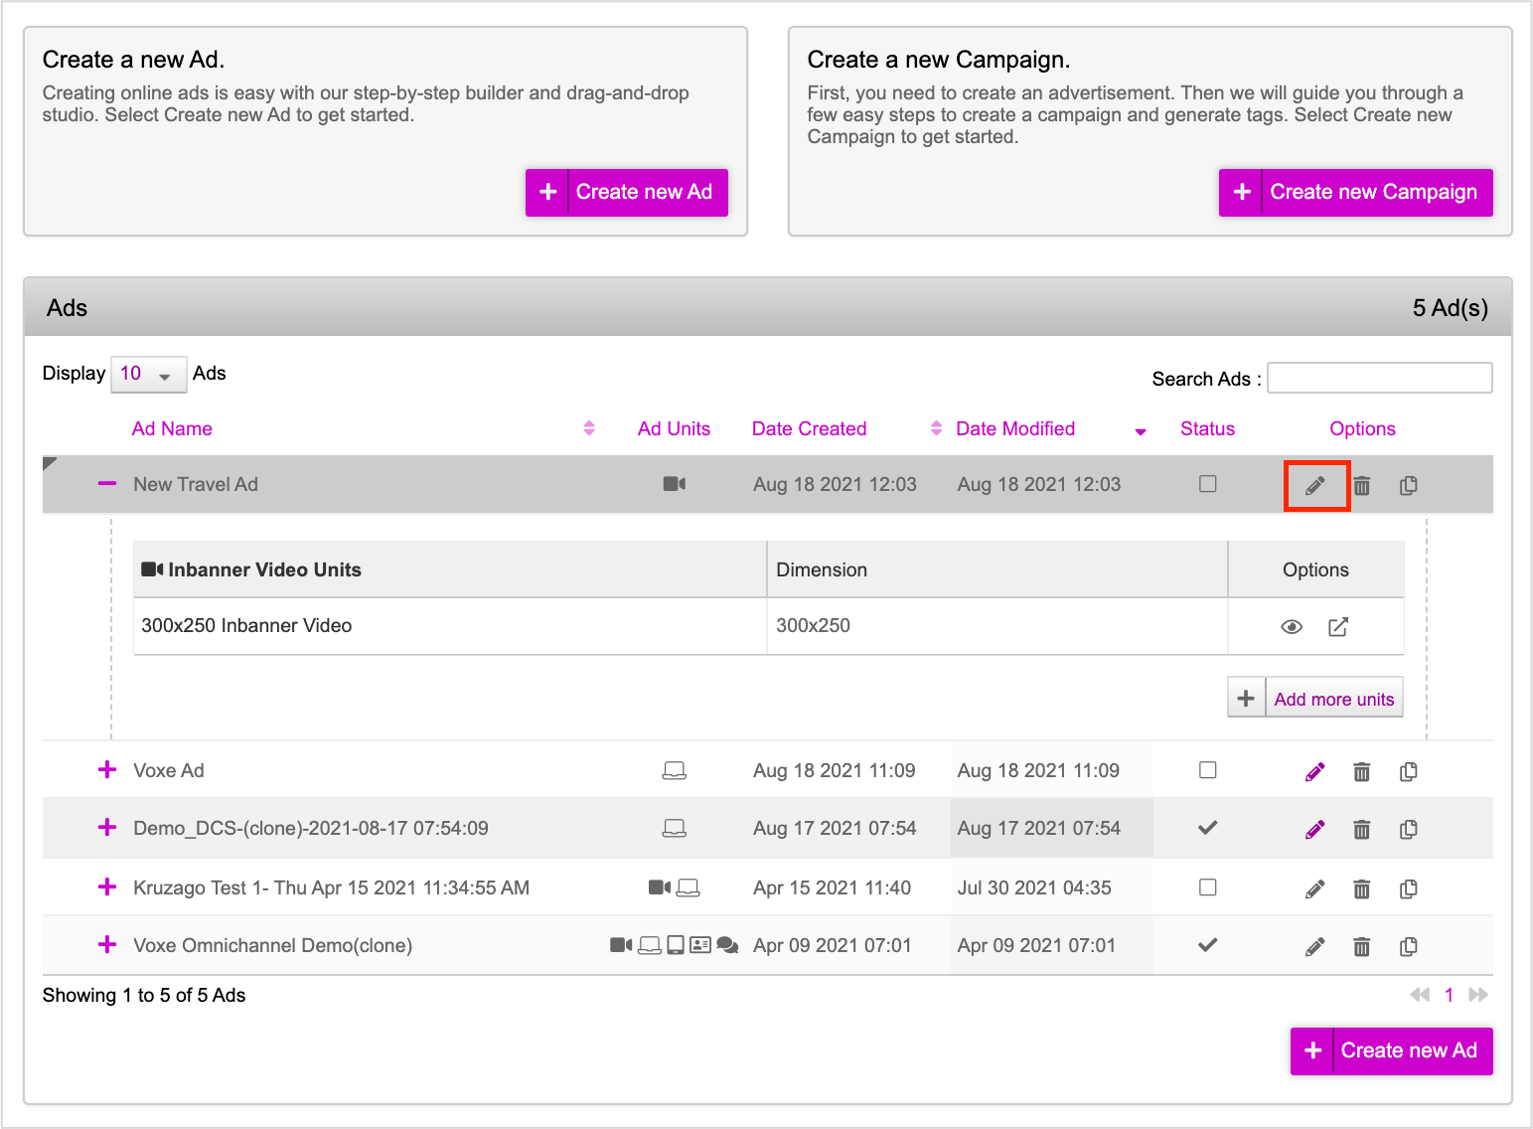
Your ad is displayed in the subsequent screen. Click the Edit Video Ad (pencil) icon under the Options column.
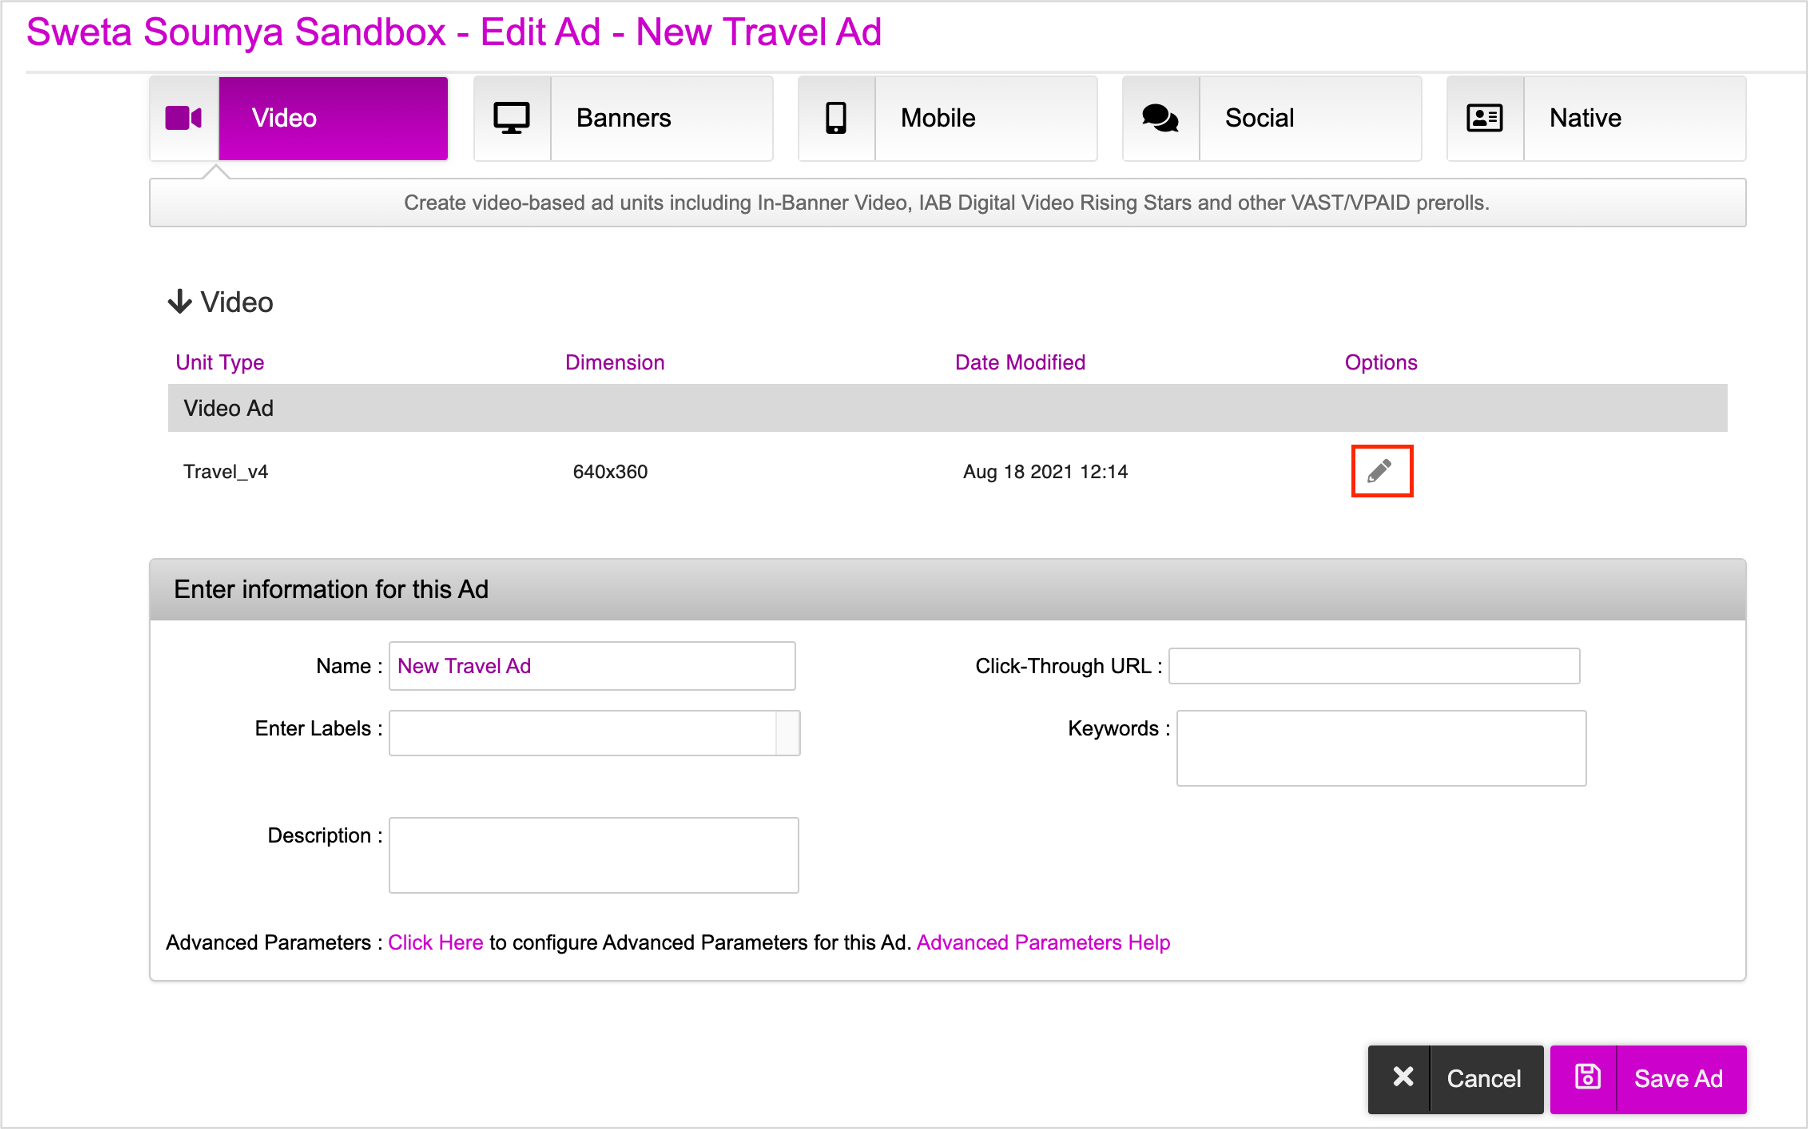
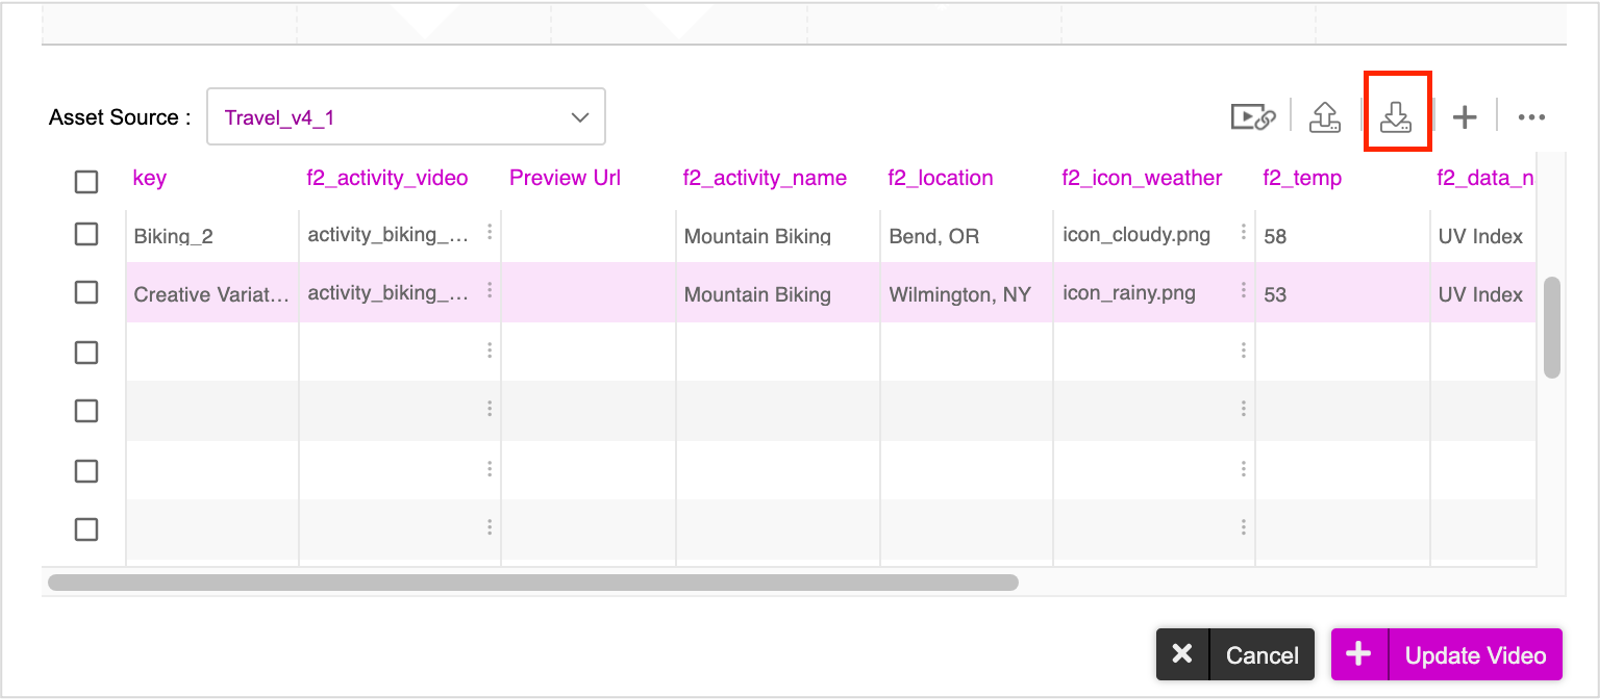
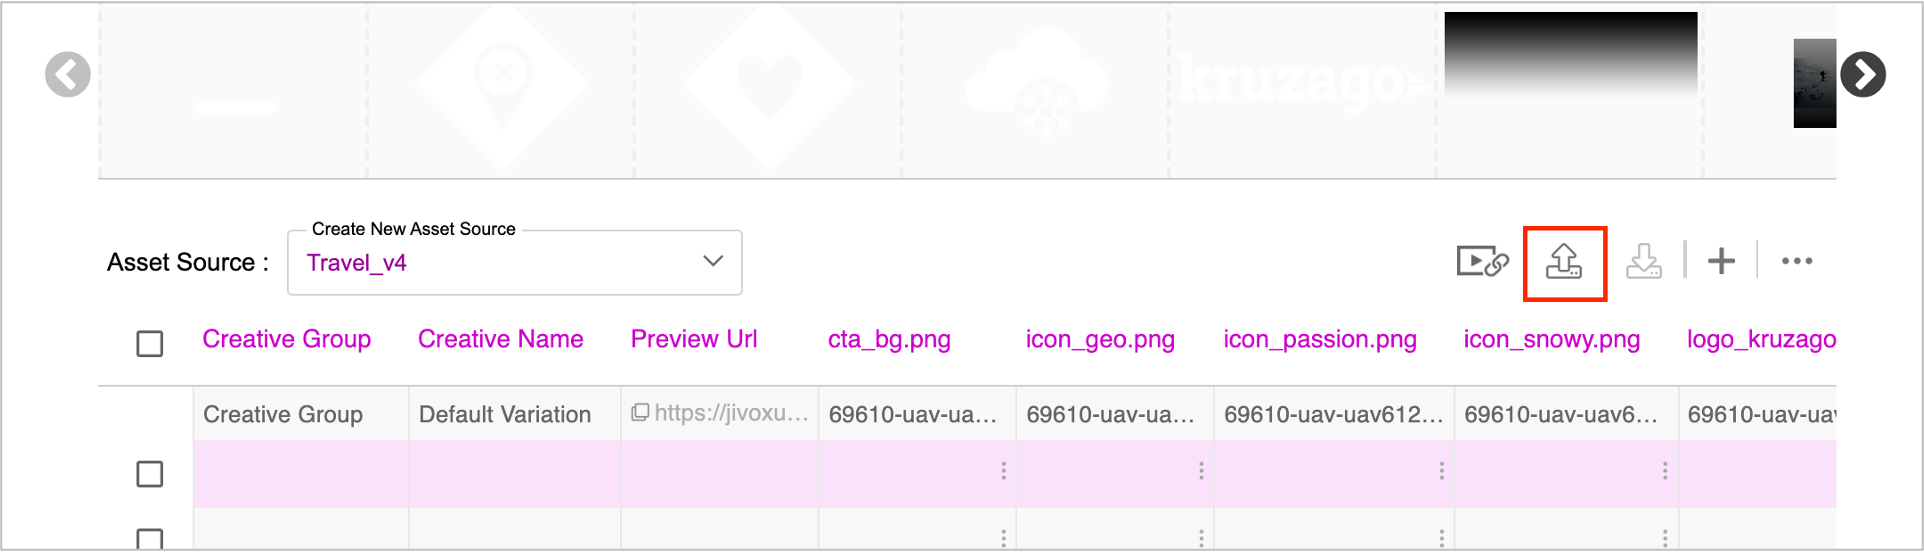
Your Ad is now displayed with the download asset source option enabled. You can click the Download Asset Source icon to download the asset source template. The asset source template is downloaded in .zip format in your computer.
Open the downloaded file. It contains all the column names as well as the Default row.
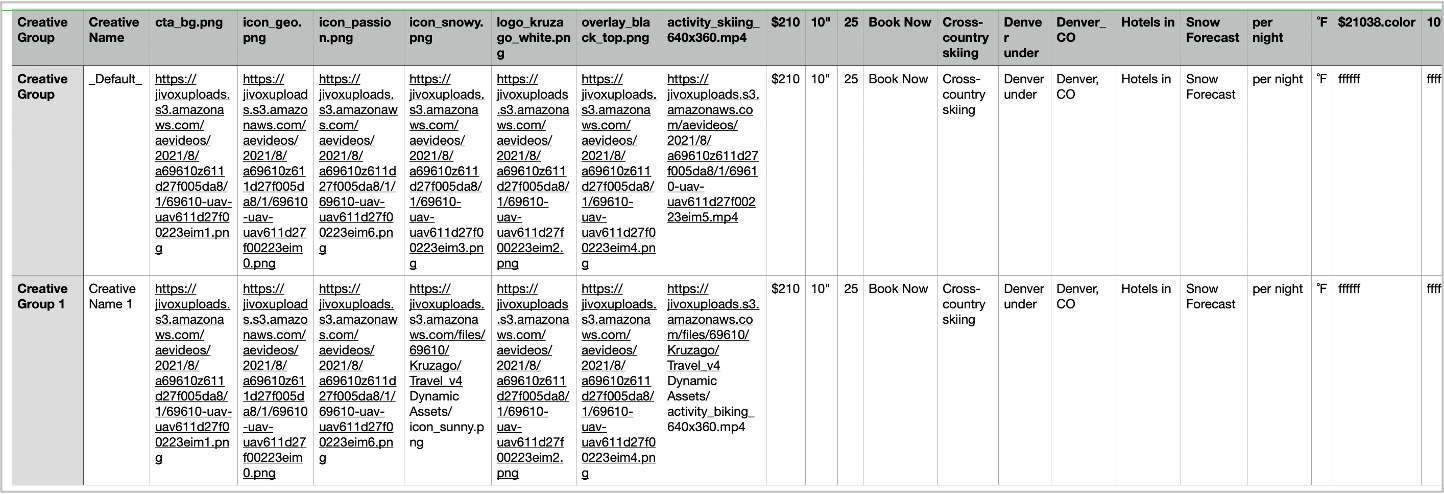
Fill the data for the asset source across all rows and columns. You can enter data for any number of rows.
The best way to get the CDN links for your image and video assets is to upload them onto the Jivox platform in the Asset Library tab and then download CDN links using the download option. in order to do this, navigate to the Create Campaign page and then in the Dynamic Campaign section, go to Manage Assets > Asset Library.
For detailed steps to upload your assets and download the CDN links, refer to the Asset Library section.
Once you are done, save the file.
Uploading Asset Source File
Now, you must upload the asset source file by following these steps:
1- Click the Upload Asset Source icon highlighted below. On the Upload window, you can either drag and drop or browse and select the required file from your computer.
For this session, you can either use the file that you created after downloading the template or this sample Asset Source.
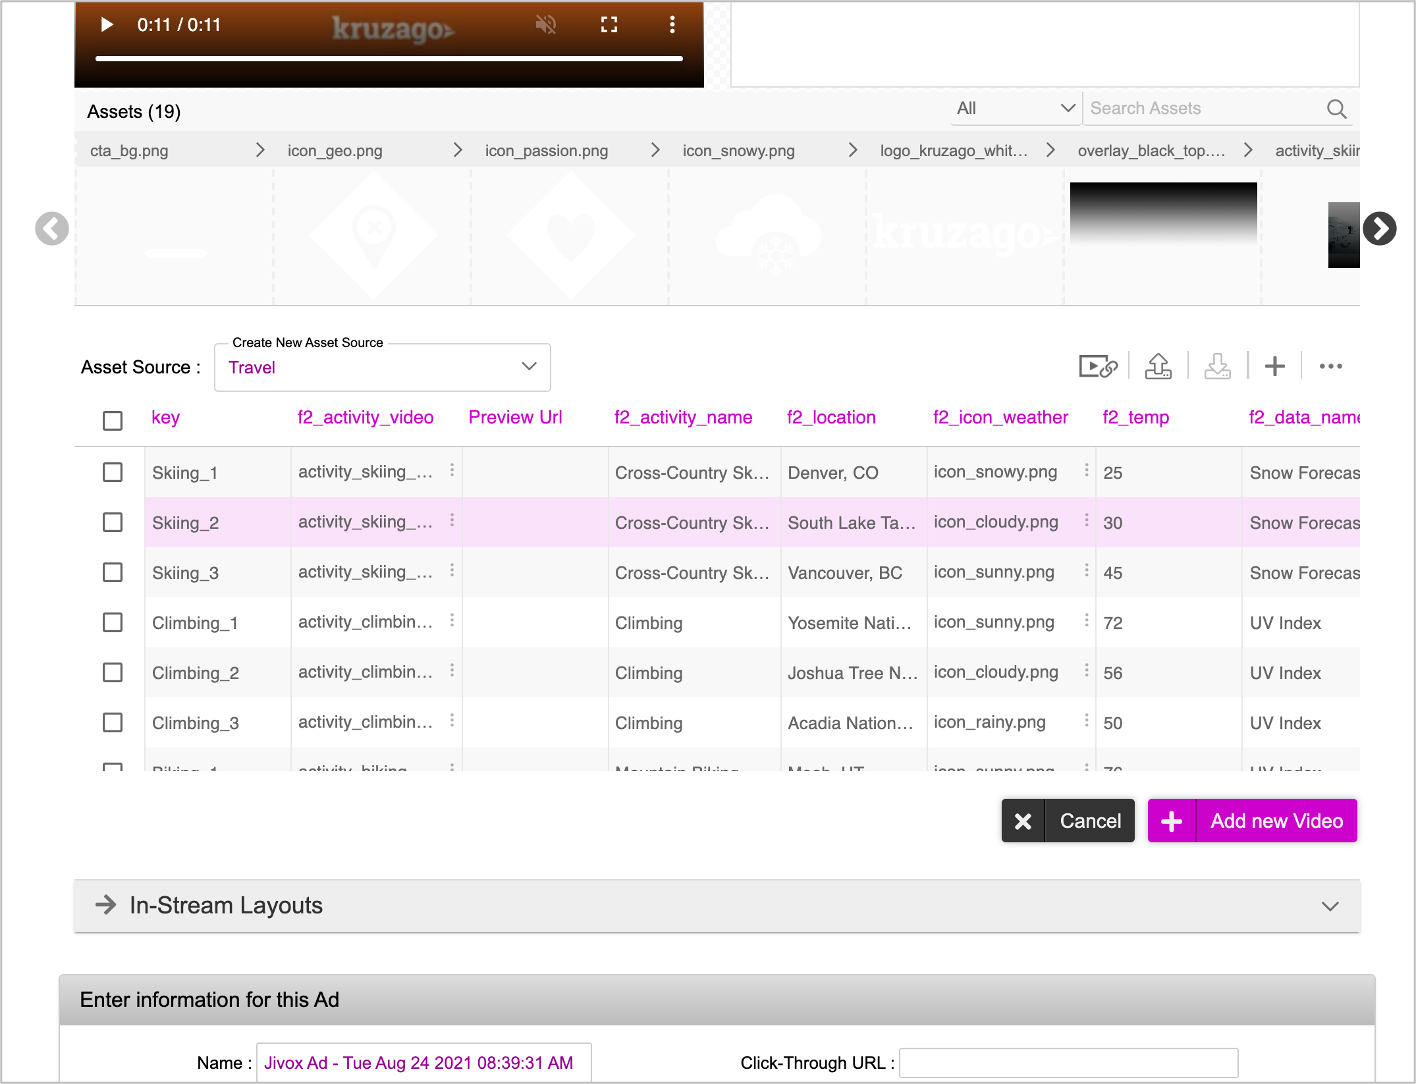
Once the Asset Source above has been uploaded, you can see it here. The maximum number of rows shown is 50 in the browser, however there is no limit on the number of rows used within the Asset Source.
When uploading the asset source, the platform validates that the column names in the uploaded file are the same, as they were at the time of download.
If the column names are different, the platform displays an error “Invalid Asset source uploaded. Kindly check all the columns in the asset source”.
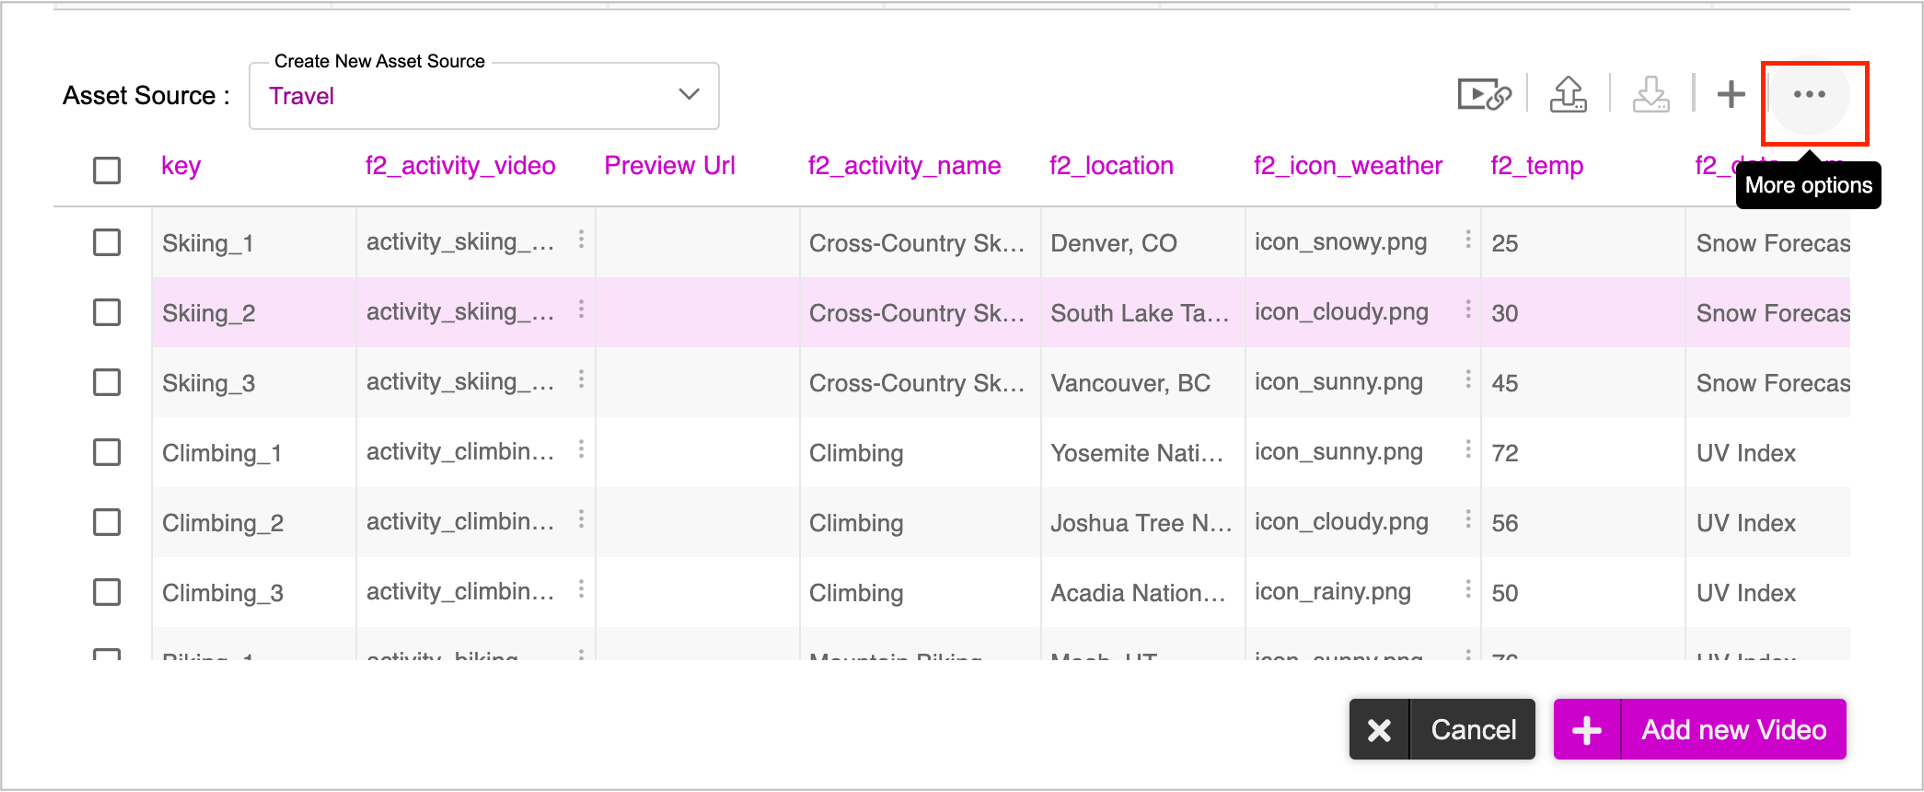
Using the Interactive Asset Source
You can also directly enter the required values for the assets in the Asset Source table to create variations.
- For text assets, select the row that has the required text assets and update each asset column details to create variations as required.
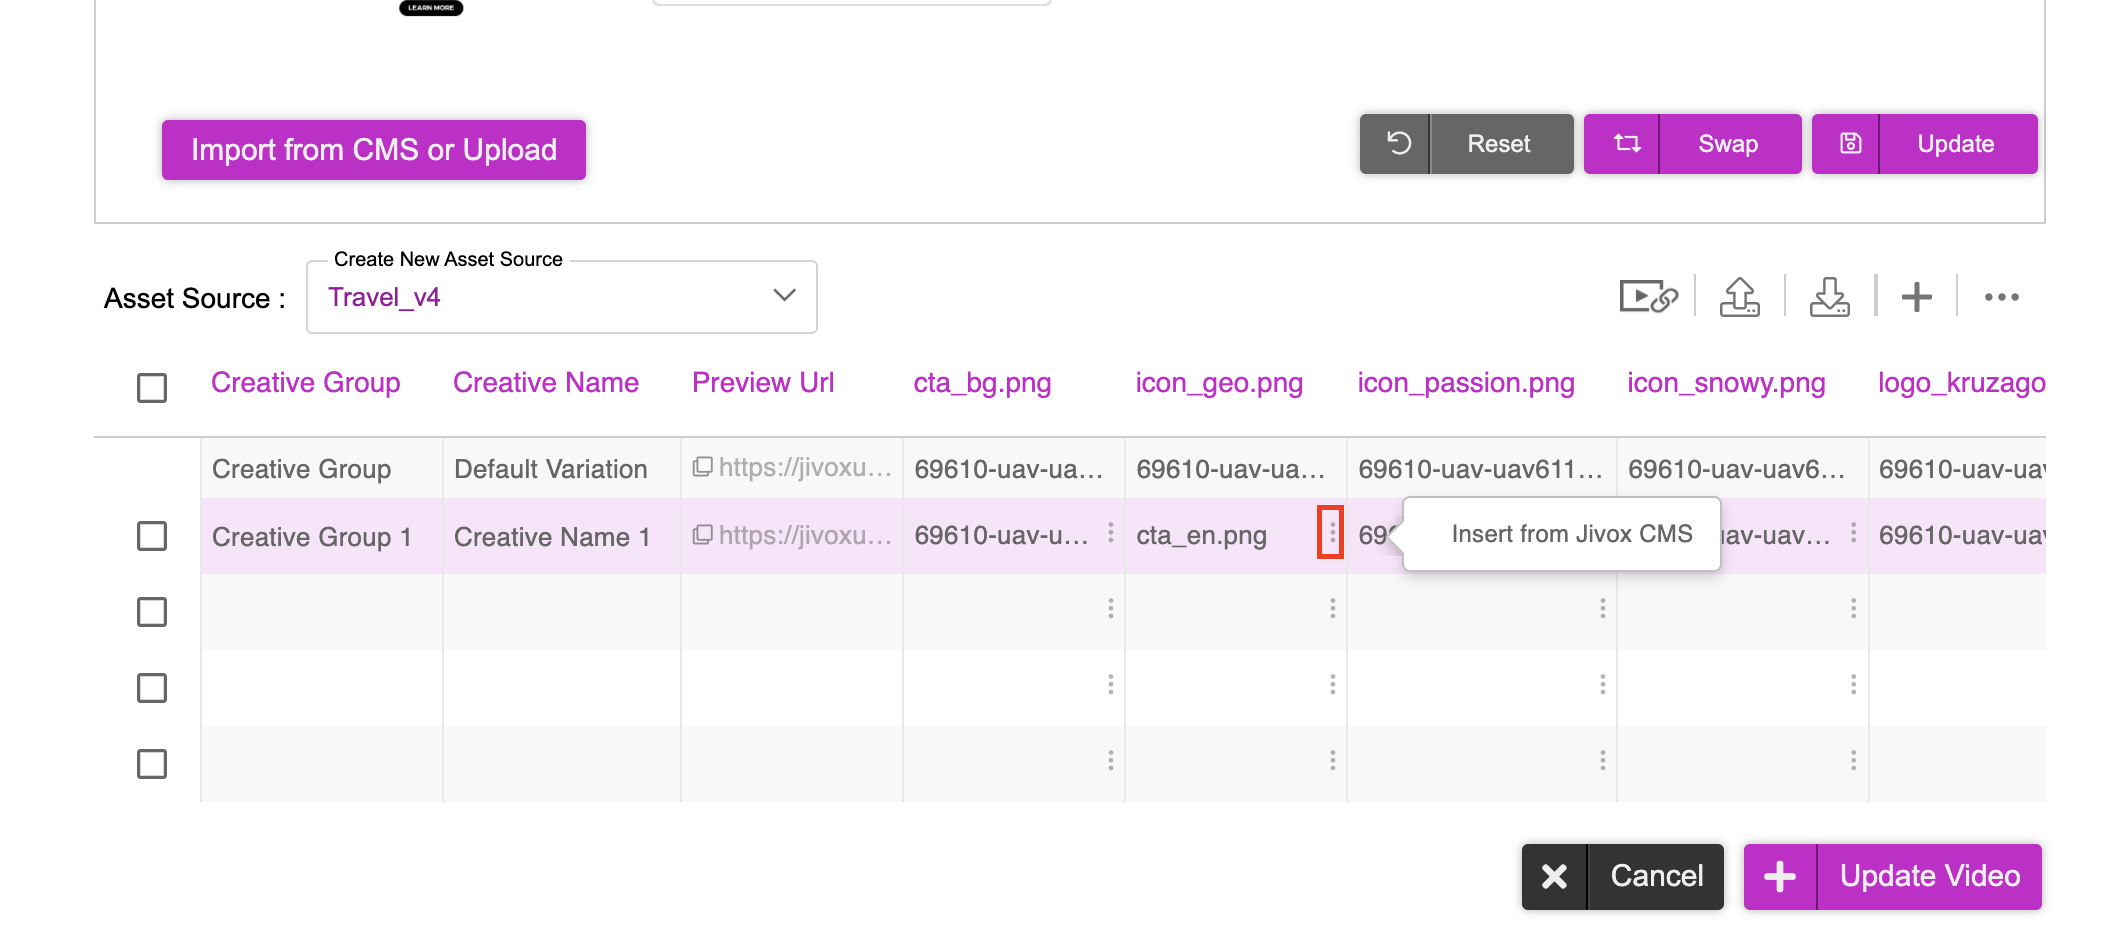
- For image and video assets, click the vertical ellipsis and then click Insert from Jivox CMS.
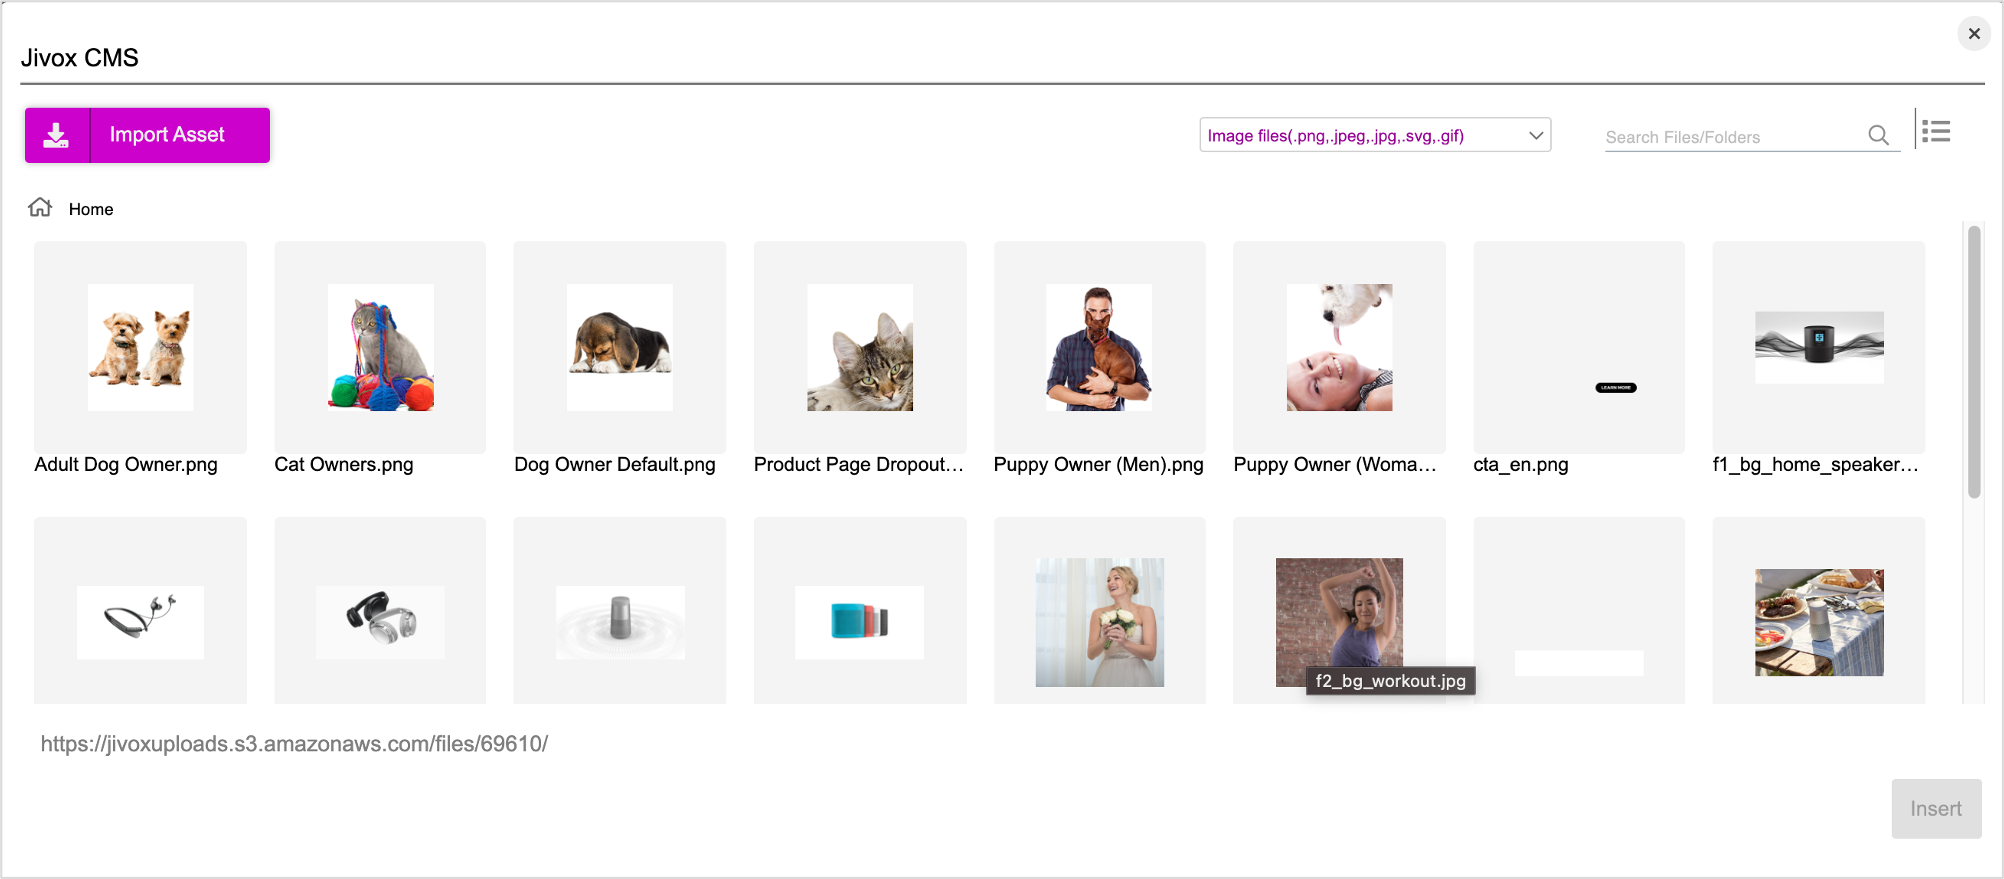
You will see the Jivox CMS window where you will now be able to either select an existing image asset from the Jivox CMS or upload directly from your computer.
With the Interactive Asset Source, you also have the options to add/remove columns & rows by clicking the More icon (ellipsis next to add rows button). This can be beneficial if you want to modify the Asset Source further.
The column names existing in an asset source cannot be deleted or modified. Once an ad unit is saved, you cannot edit the columns created earlier. New columns can be added to an existing asset source.
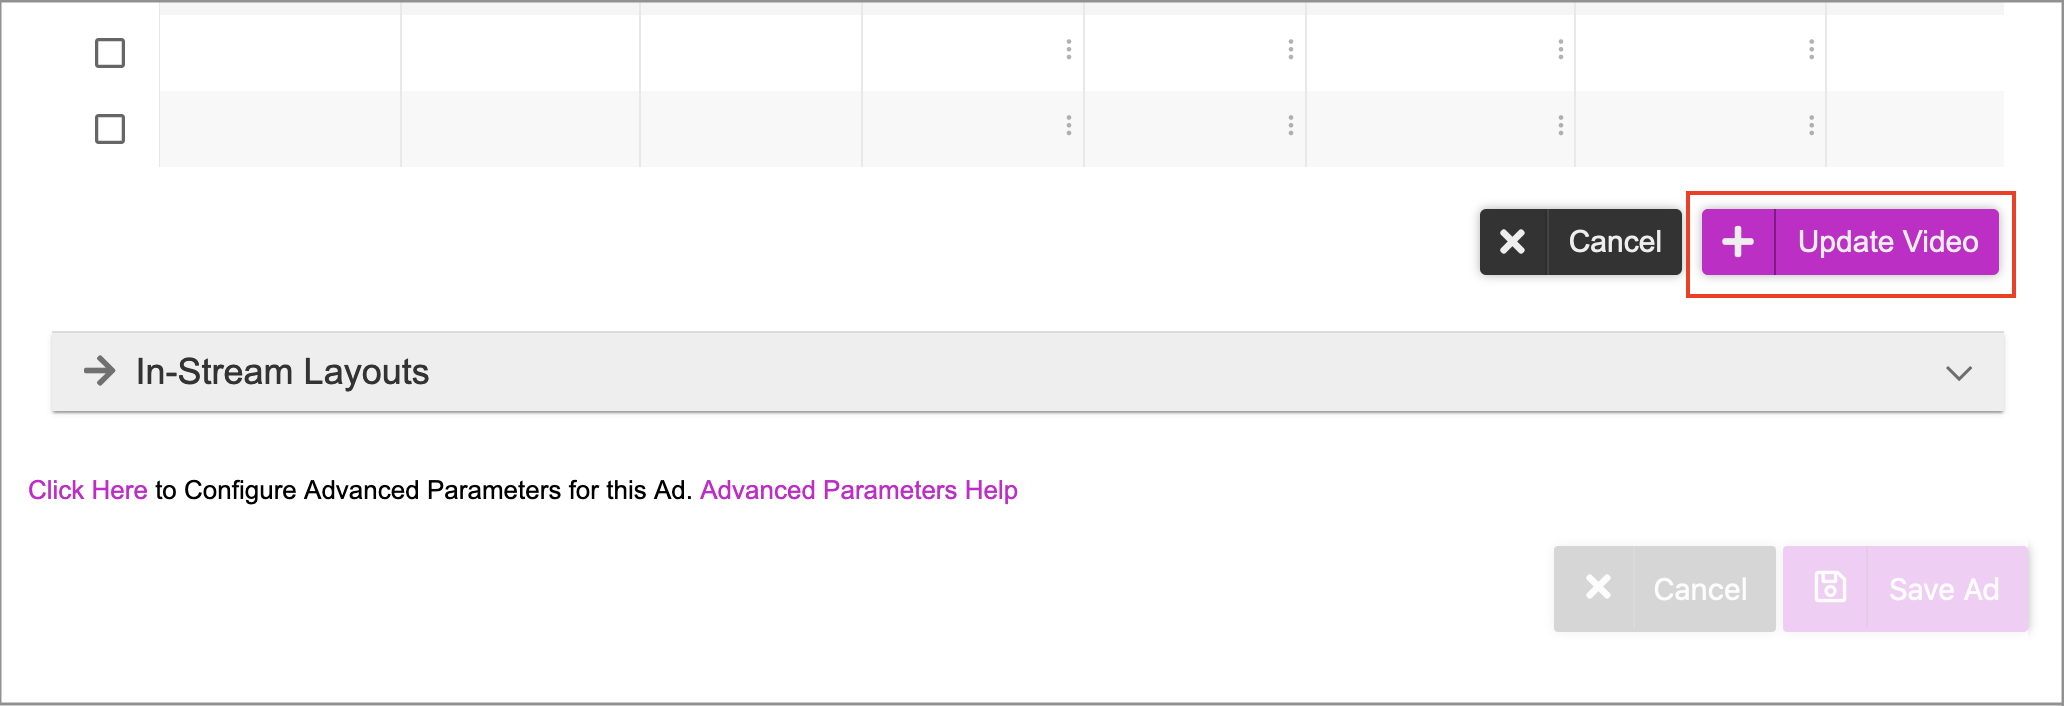
You can select each row and use the Generate Preview icon to preview and verify each creative variation.
For a VPAID Ad, you must now Specify Layout. For a VAST Ad, you can proceed with the steps below.
Next, we will save the ad. Click Update Video.
You will be redirected to the next screen where you can save the Ad. Click Save Ad.
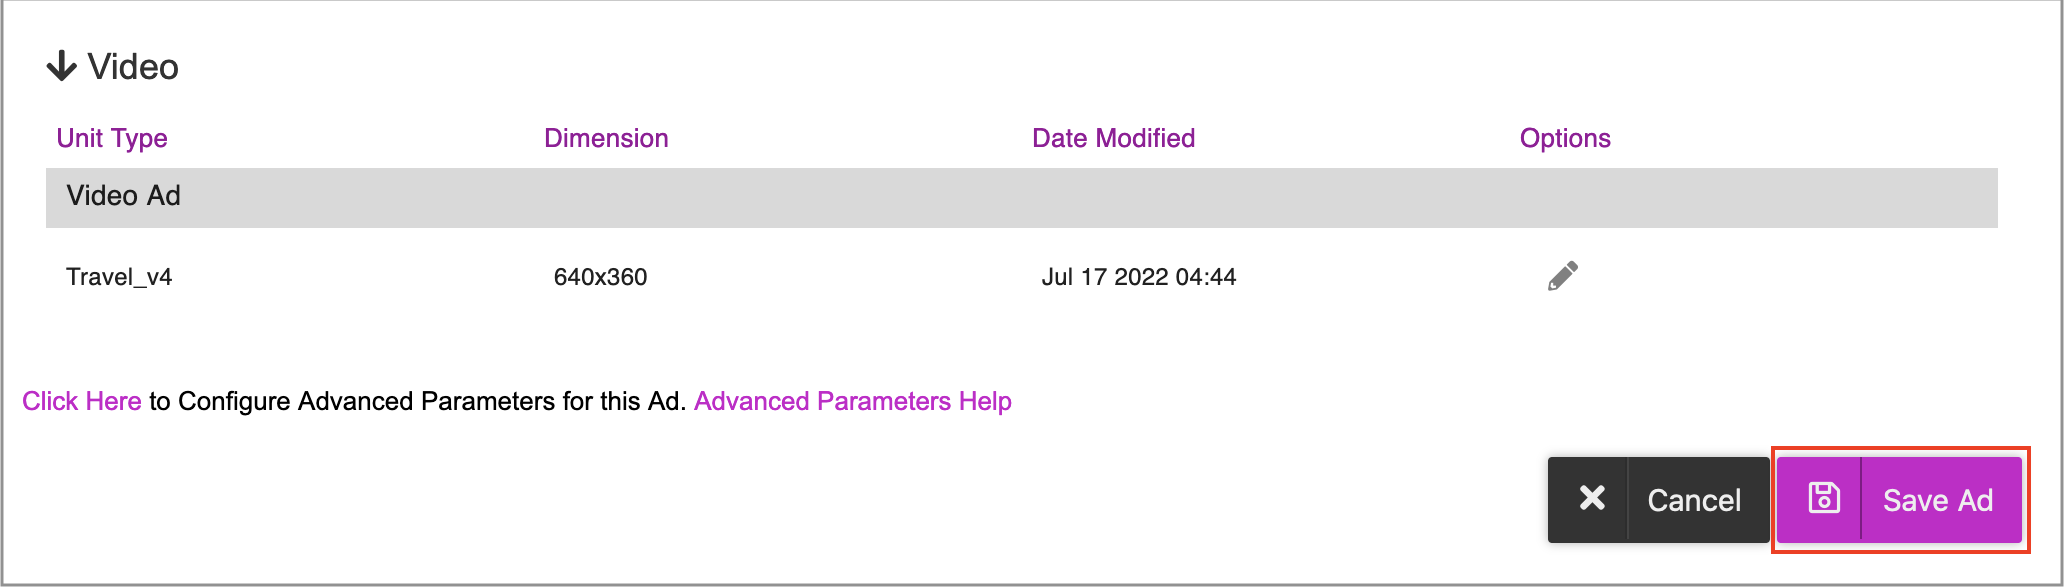
The Ad will be saved and you will be redirected to the Ads and Campaigns dashboard.
Next Steps
This completes the first part of the setup! Next you must create a campaign and define the various triggers based on which the creative variations that you just created in the ad can be served to different audience groups.
Refer to the Creating a New Campaign section for details.