So far we have:
- Uploaded the Creative Master
- Created the Asset Source
Now, in this section, we'll discuss the steps to generate new creative variations using the Asset Carousel. Here's what we will cover:
- Updating Video Assets
- Updating Image Assets
- Updating Text Assets
- Saving the Creative Variant
- Generating Preview
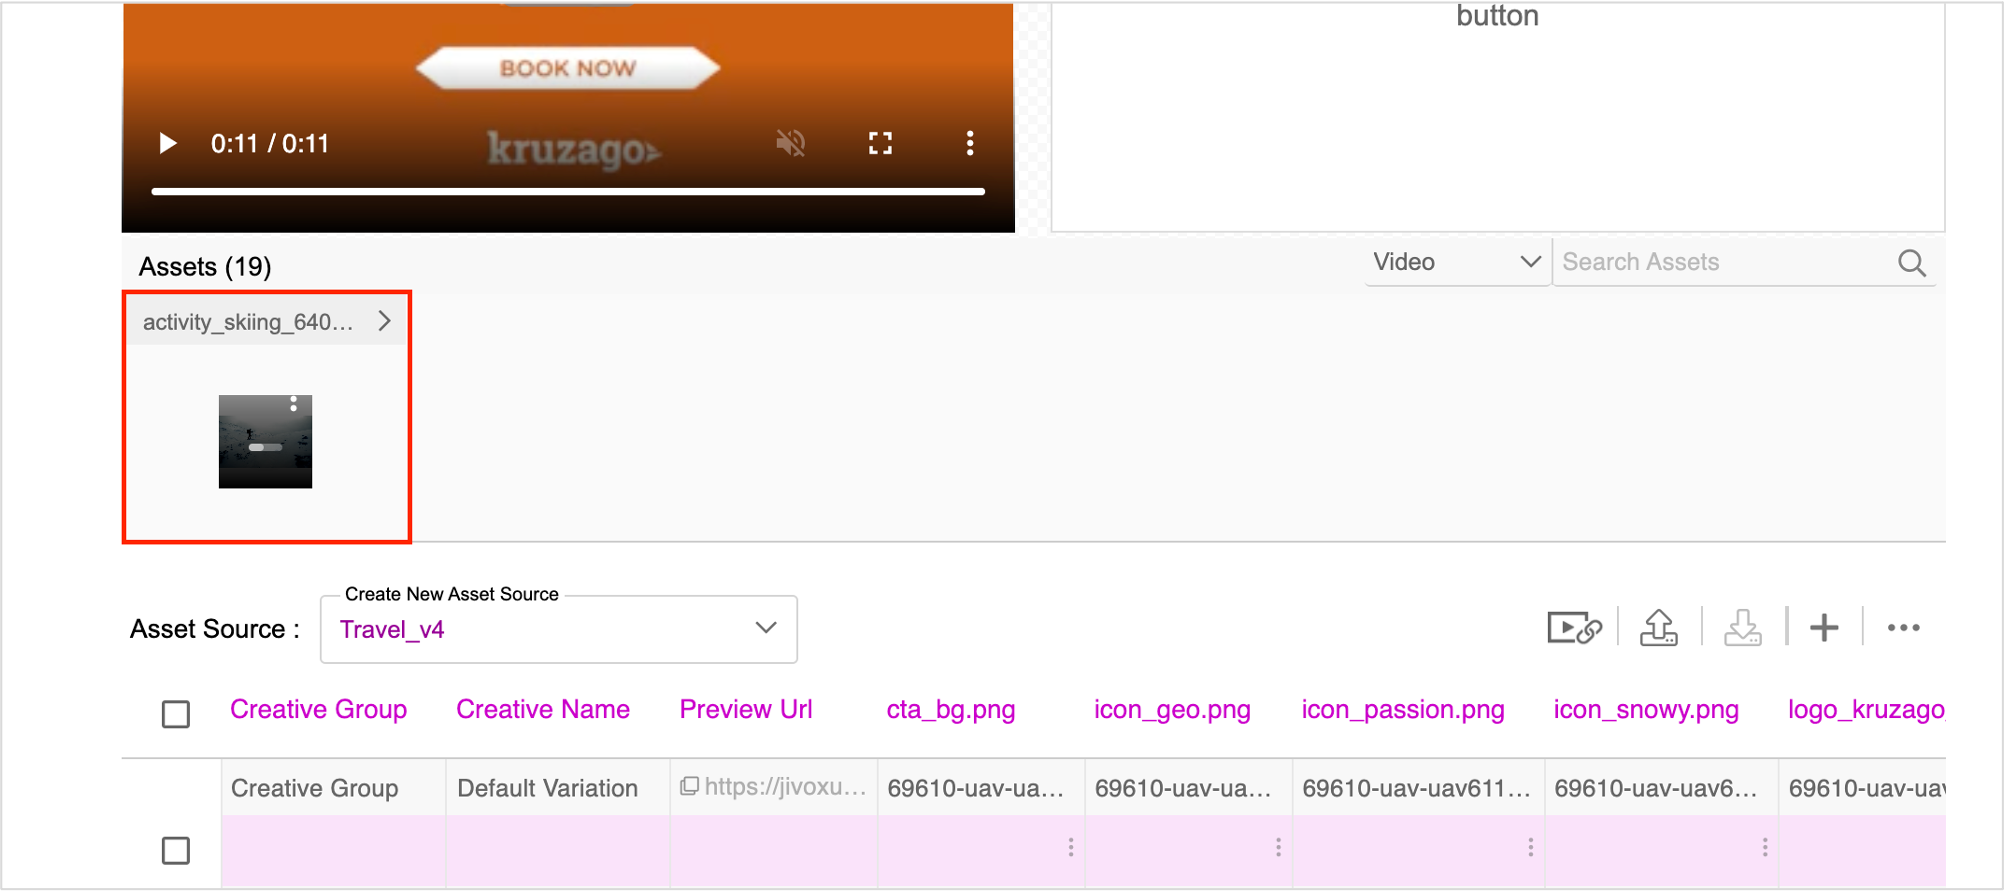
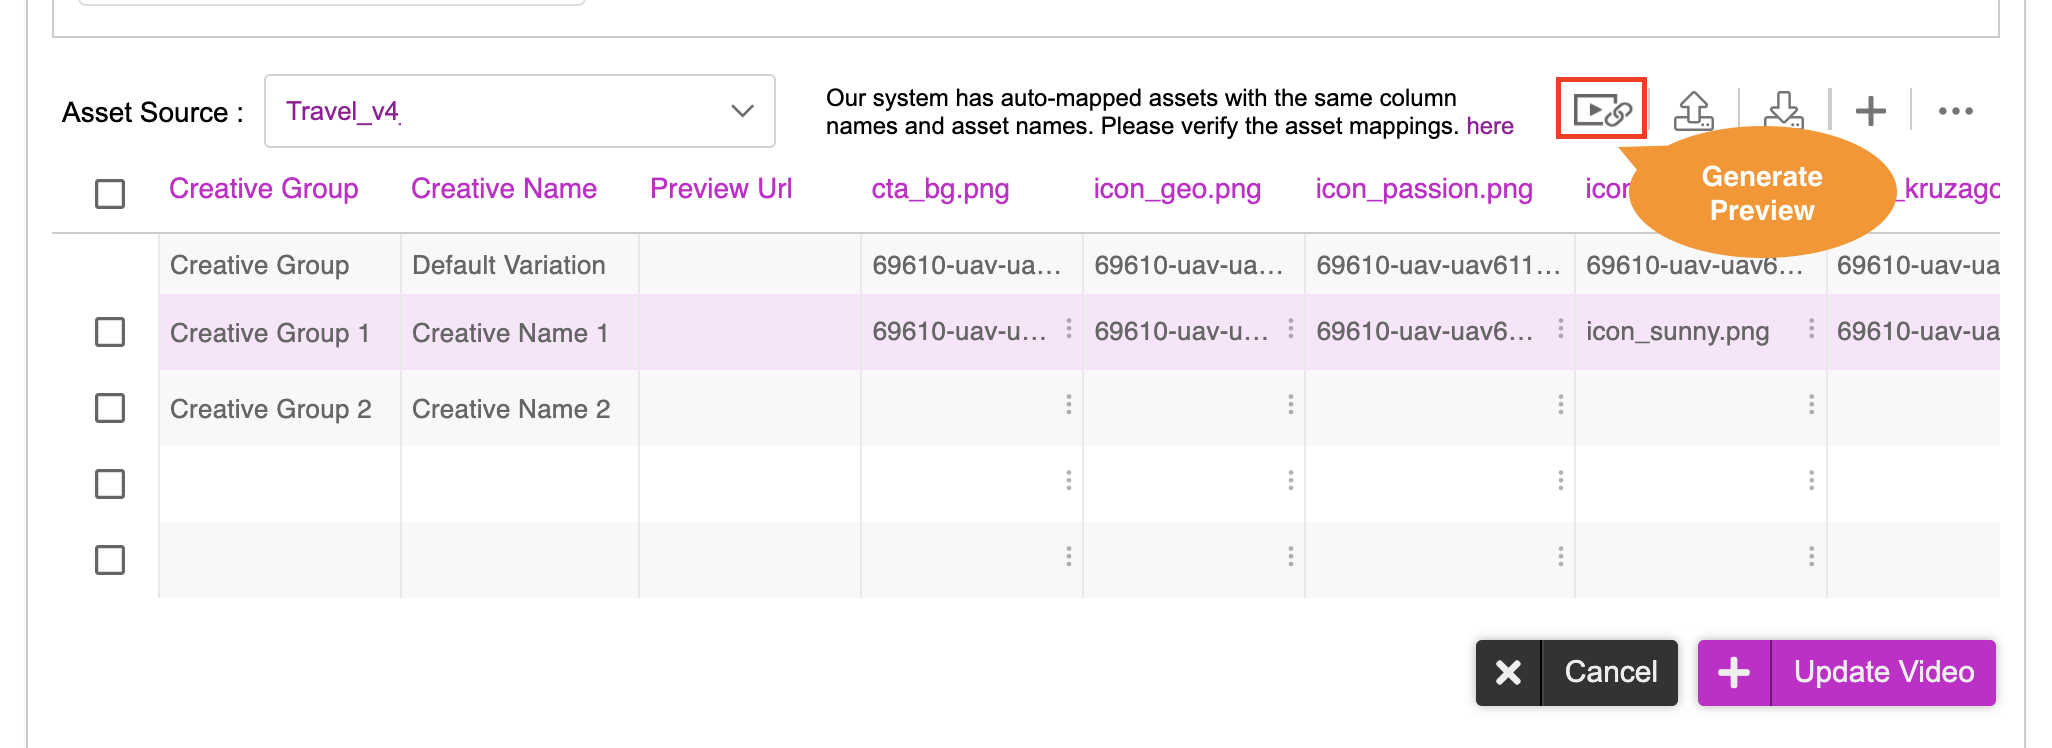
DCS allows you create variations in the Asset Carousel. The Asset Carousel displays all the dynamic assets. These assets are part of the creative master you uploaded.

Click the drop-down list under the Asset column and select the required option from the list. The following options are available:
- All - Displays all the components in the creative master
- Video - Displays all the video components in the creative master
- Image - Displays all the image components in the creative master
- Text – Displays all the text components in the creative master
You can filter assets by selecting the asset type or search individual assets by their name on the search bar. Alternatively, you can use the arrows to navigate the carousel and select the required asset.
Updating Video Assets
Let's start with updating the video assets. Filter the video assets and select the one that you want to update on the Asset Carousel.
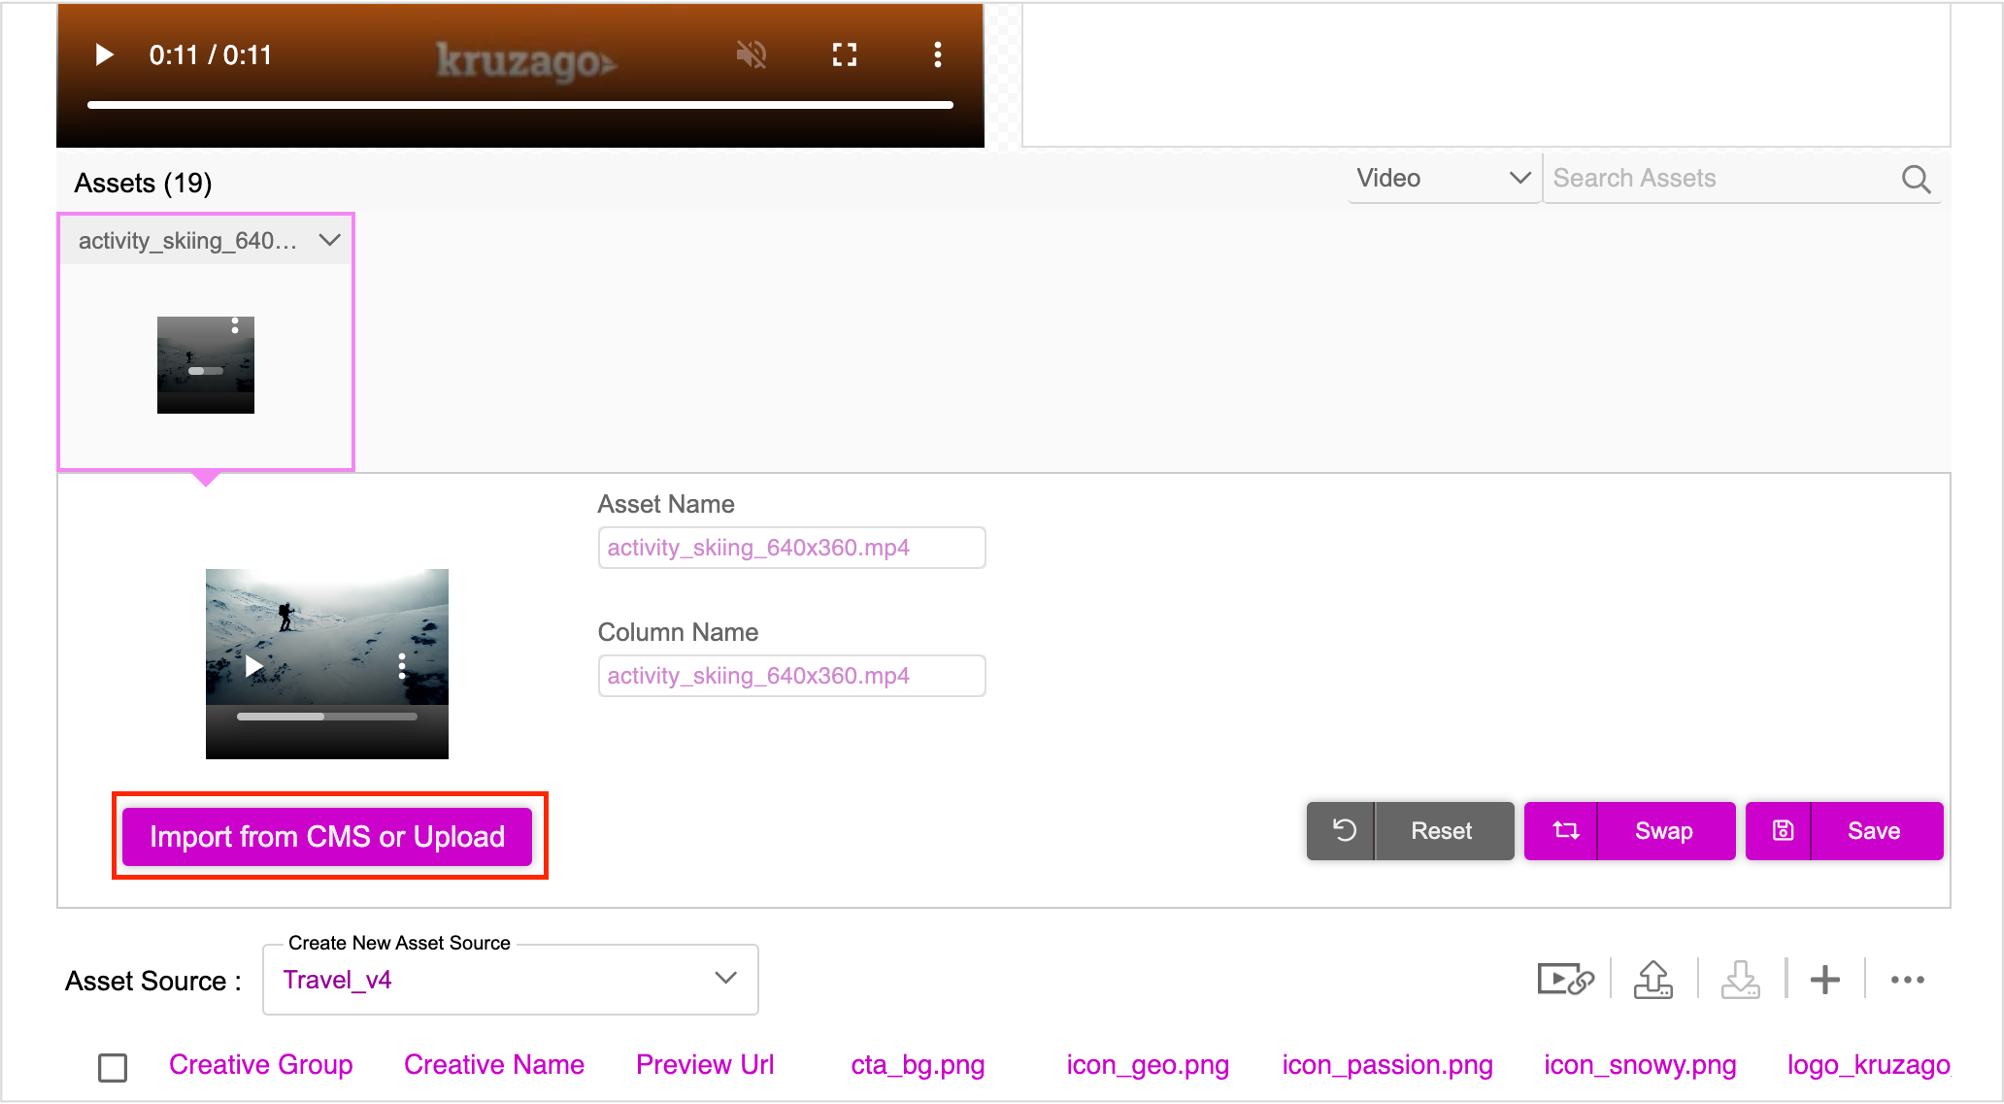
The section expands to display the following:
| Component | Description |
|---|---|
| Asset Name | The name of the asset |
| Column Name | The name of the column |
| Import from CMS or Upload | You can import the image assets from the existing CMS or upload an image asset for a new creative variant |
| Swap | This allows you to preview changes in the Creative Variant next to the creative master |
| Save | This allows you to save your new creative variant. This does not replace the master but rather creates a new variant based on the changes to the asset. Use this option once all images/texts for your new variant have been configured. This will then save it as a new row in the Asset Source table below. |
Select the activity_skiing_640x360.mp4 video asset file and click Import from CMS or Upload.
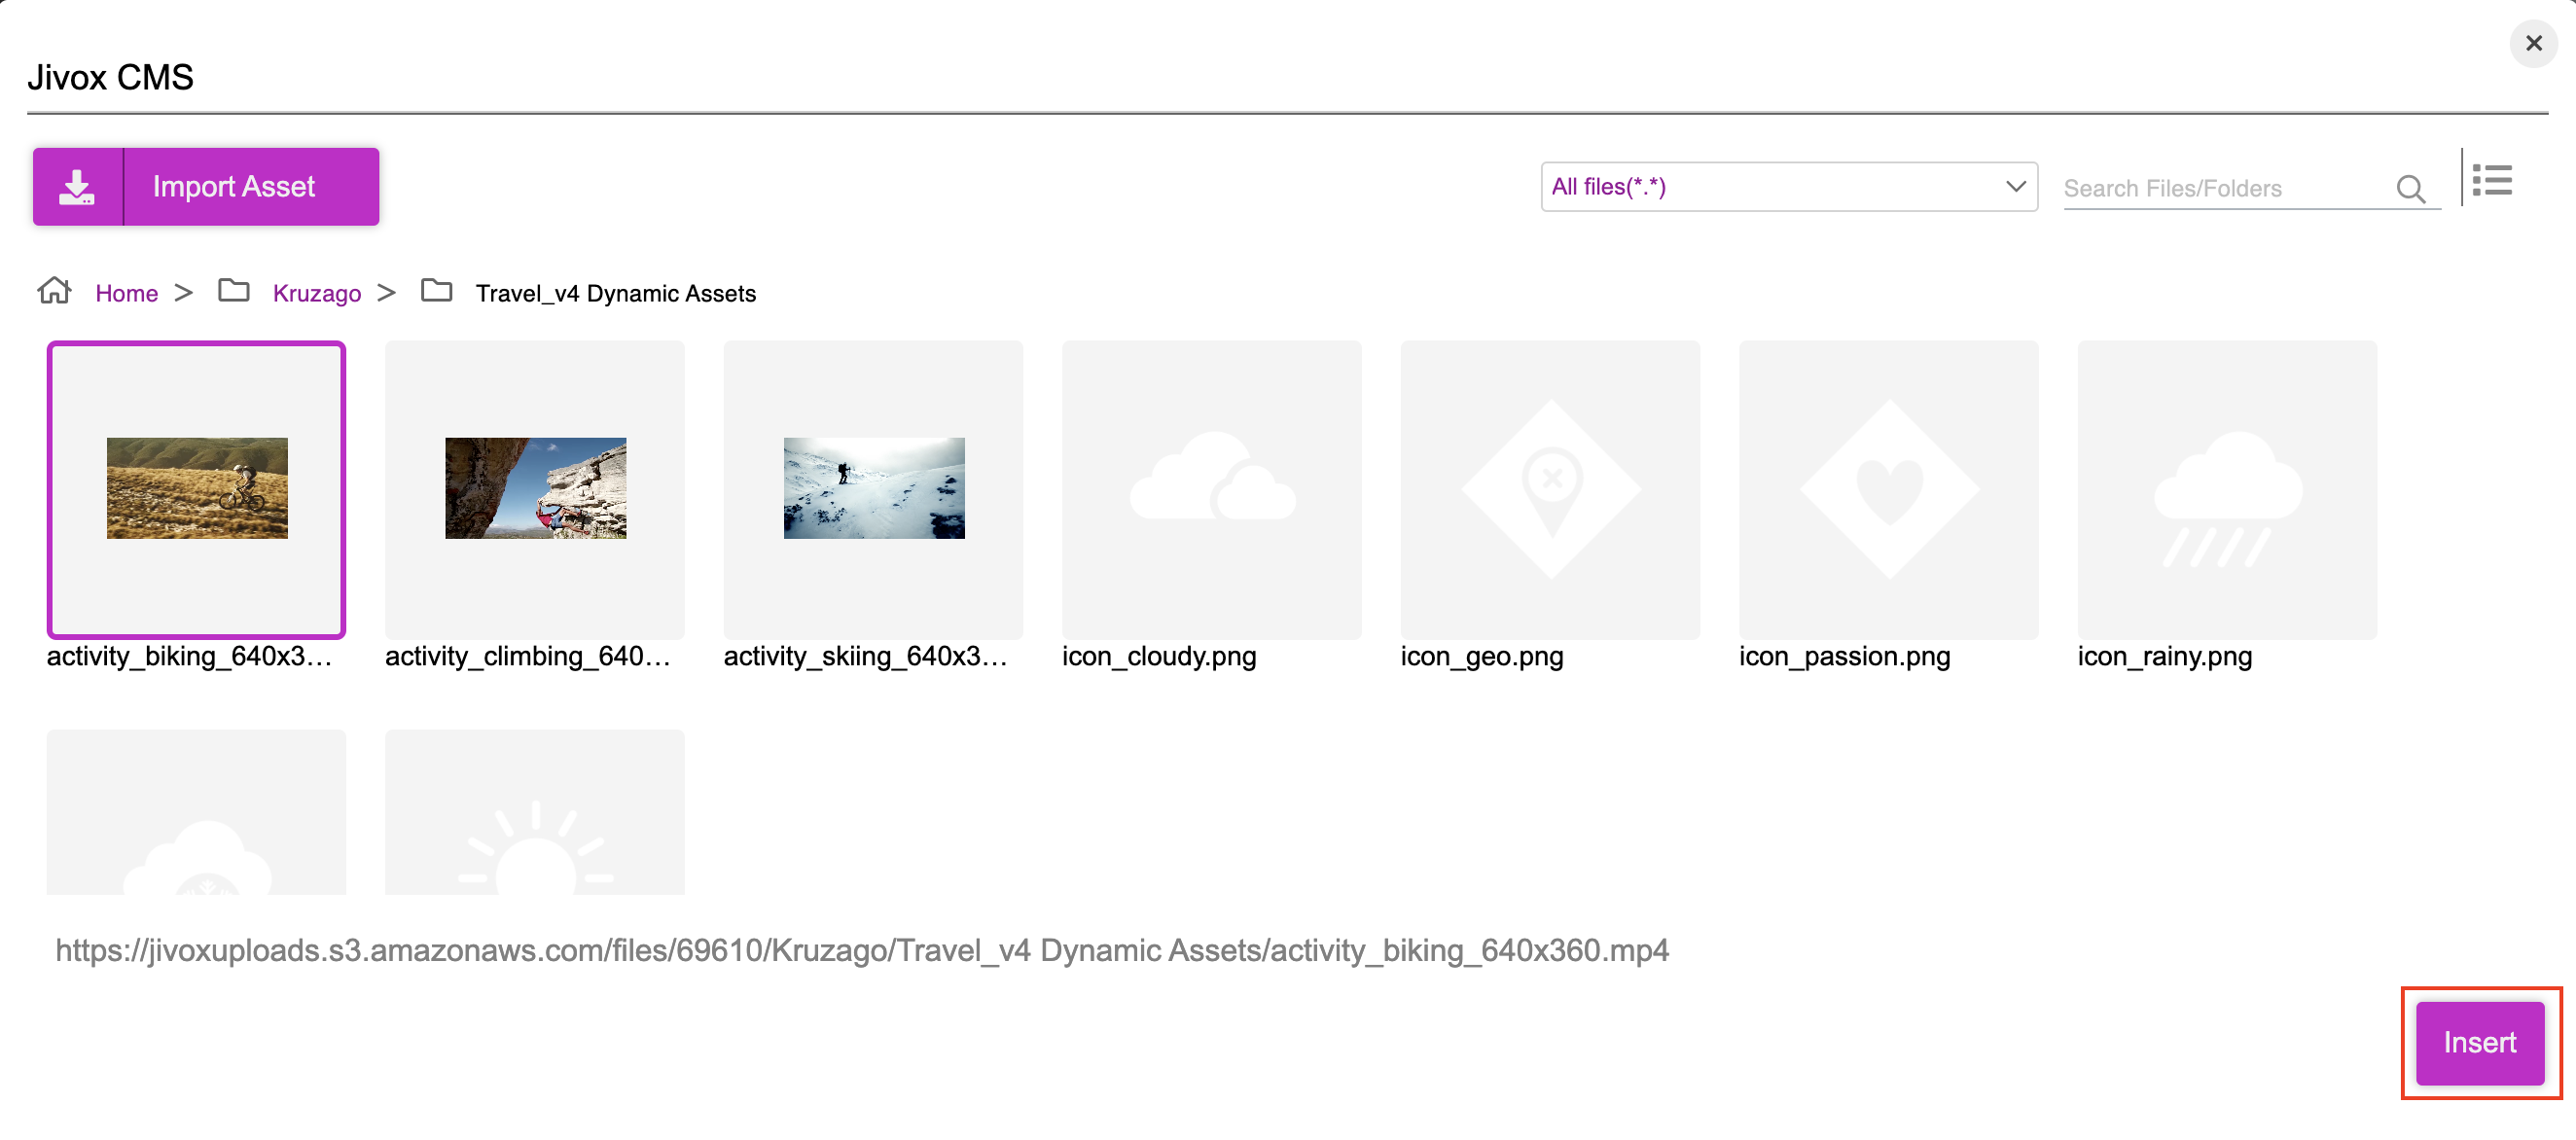
On the Jivox CMS window, click Import Asset to import the dynamic assets from your local computer. Select the video file activity_biking_640x360.mp4 and click Insert.
This will replace the existing video with the new video that you selected. Click Swap to preview the variation in the Creative Variant window. Repeat the process to change more video assets.
Updating Image Assets
Next, let's update the image assets. Filter and select the image that you want to change. For this example, select icon_snowy.png.
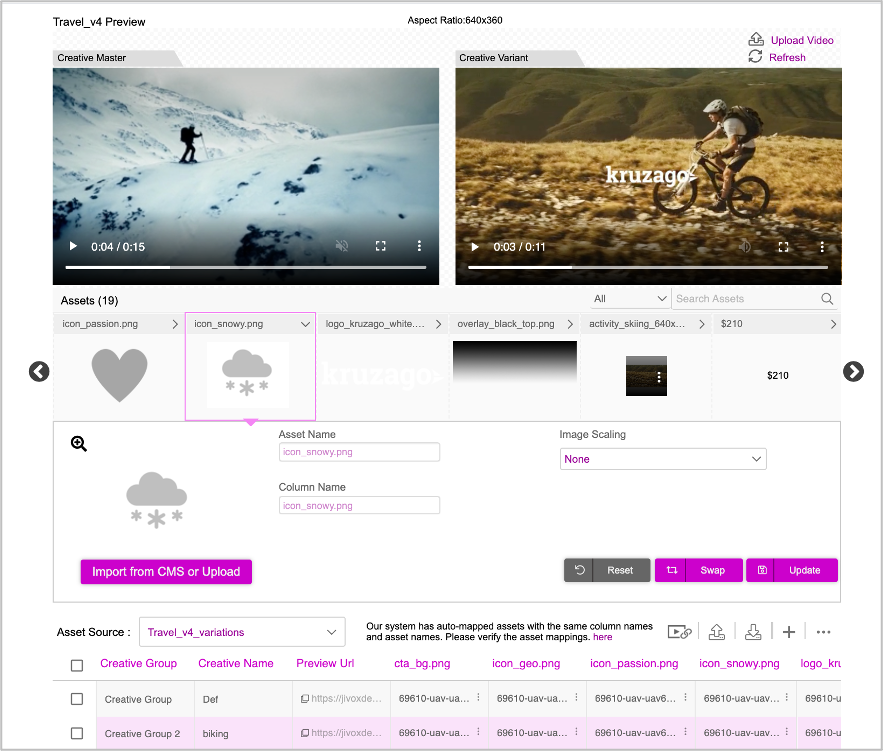
The section expands to reveal similar options as above. You can change the image scaling from the drop-down. Here, let's select the snowy icon.
Click Import from CMS or Upload.
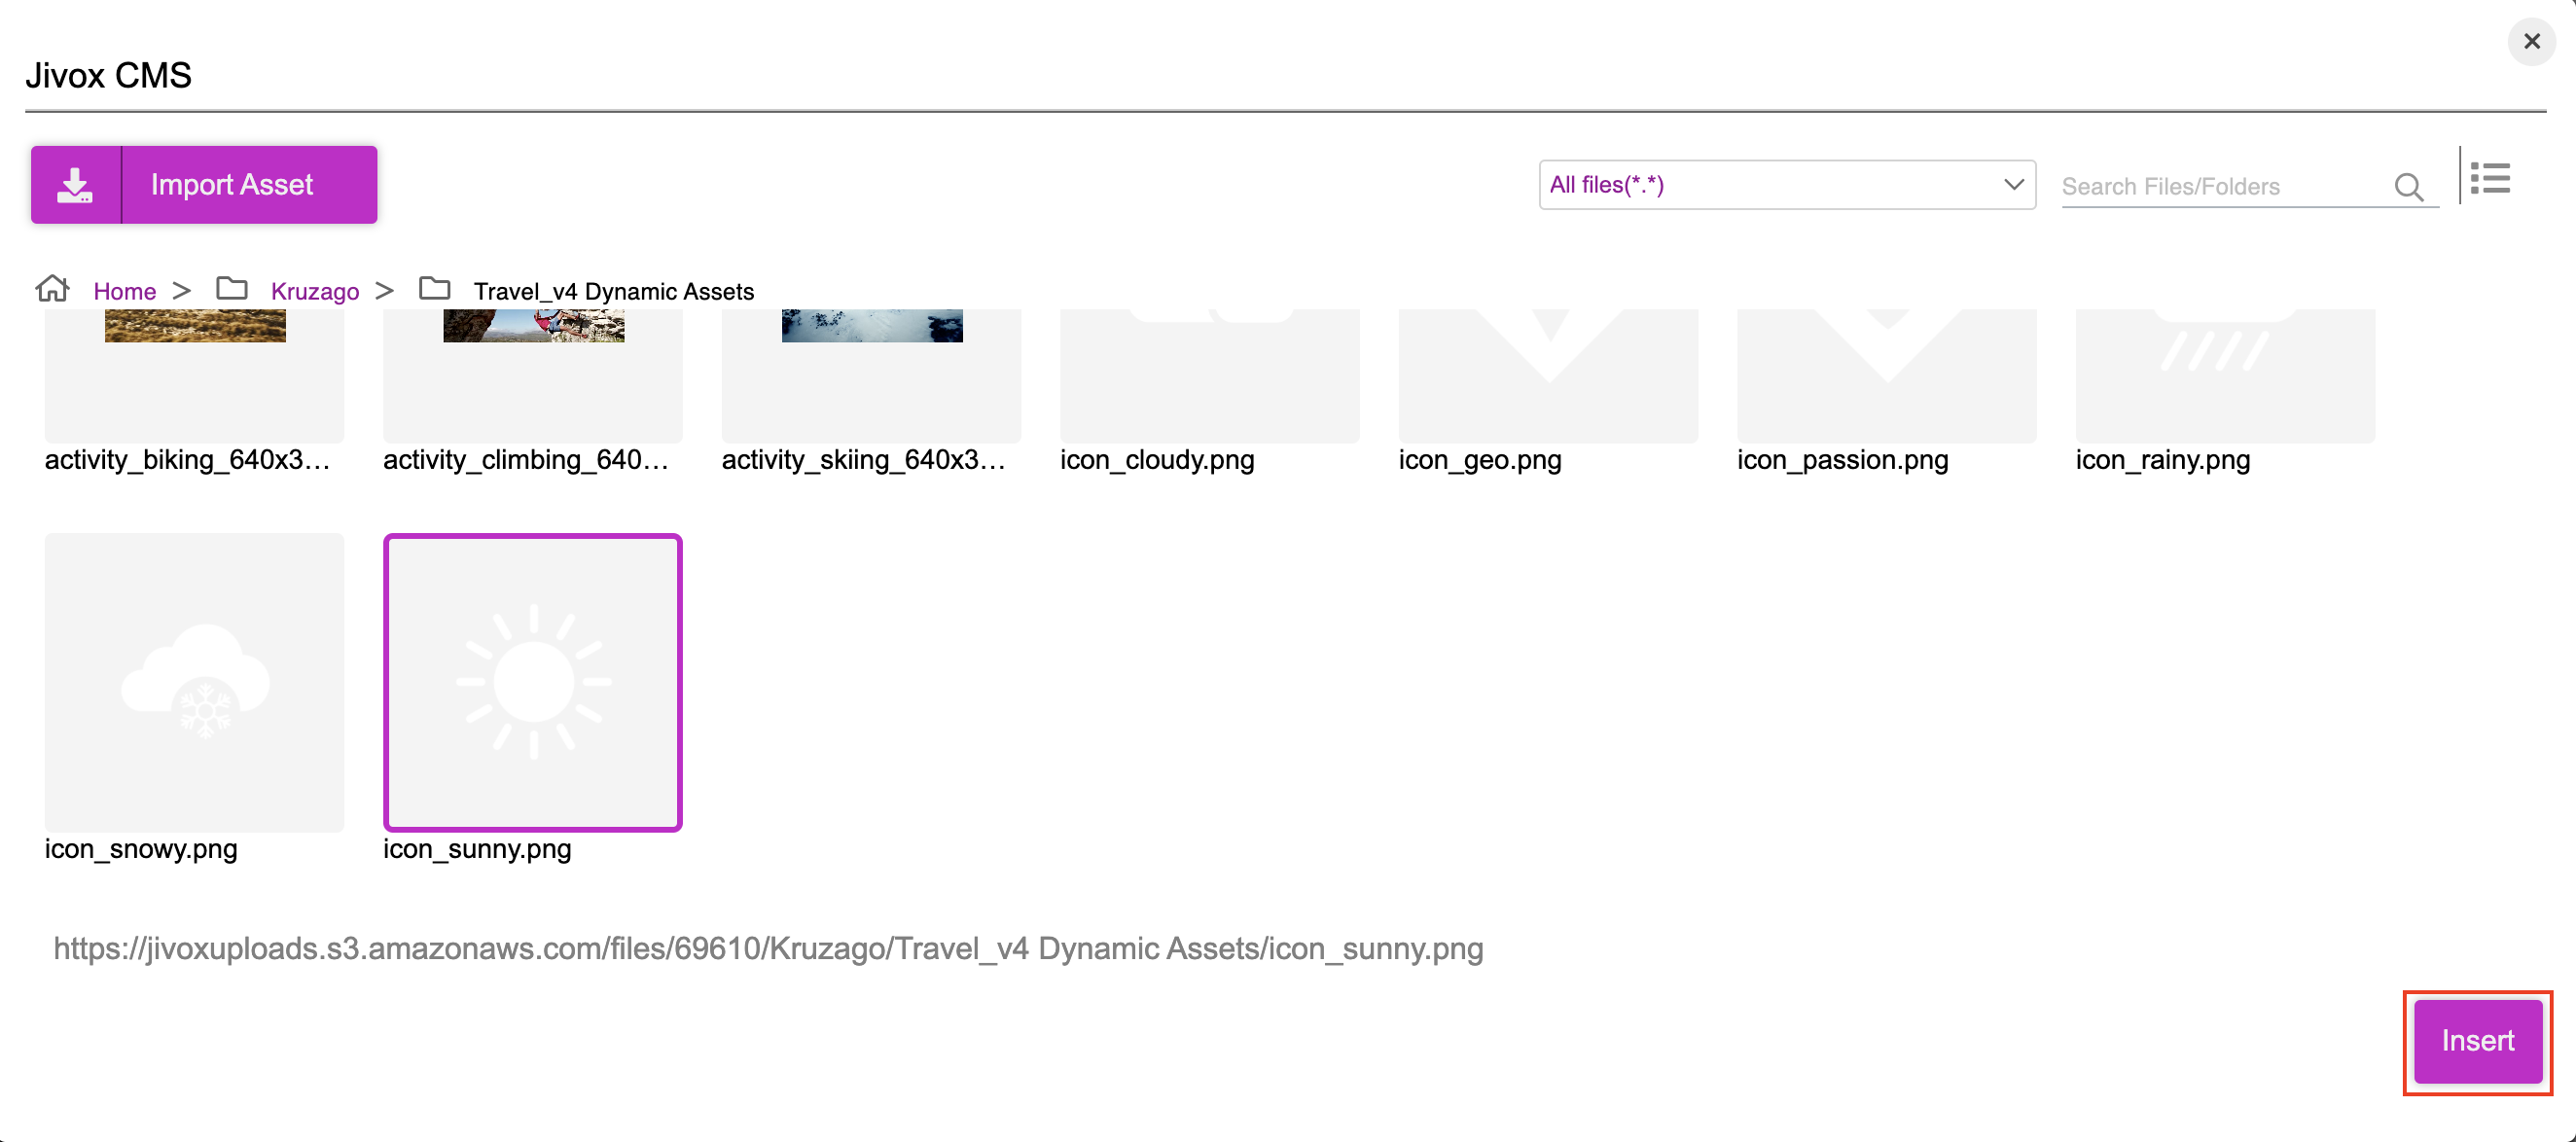
Select icon_sunny.png and click Insert. This will replace the previous image with the image that you selected. Click Swap to preview the Ad. Repeat the process to change more image assets.
Updating Text Assets
Now to update the text assets, select the text that you want to update. The section expands to display similar options as above along with the following:
- Text Editor: You can edit the text here.
- Color Asset: This allows you to change the color of the text. You can either select the color from the palette or type the hexadecimal value of the desired color in the Color field.
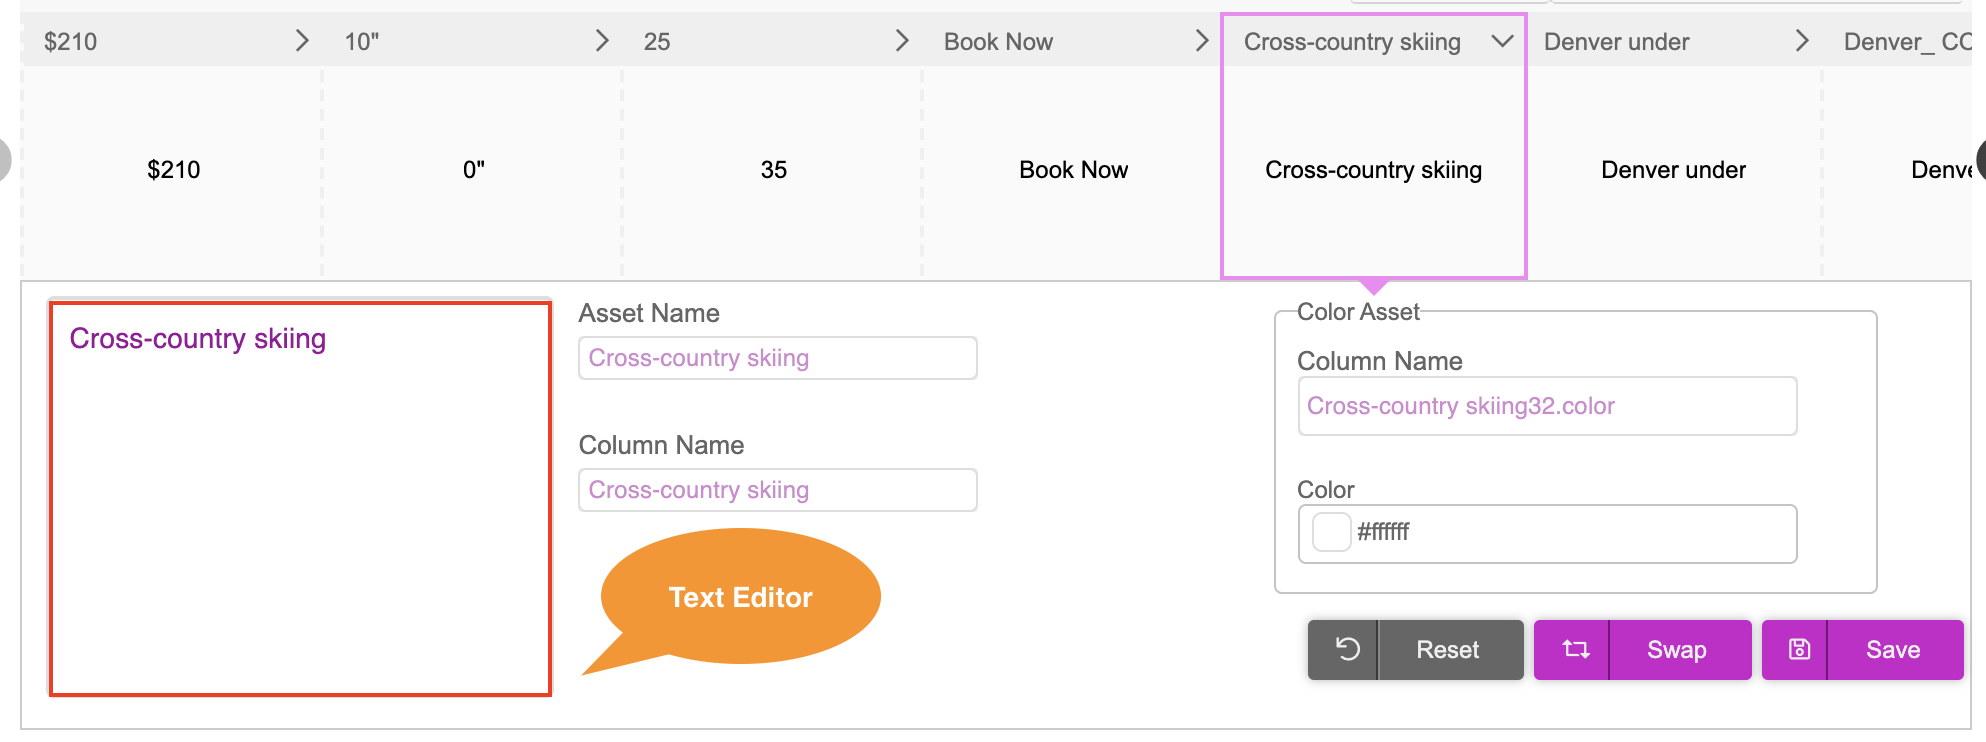
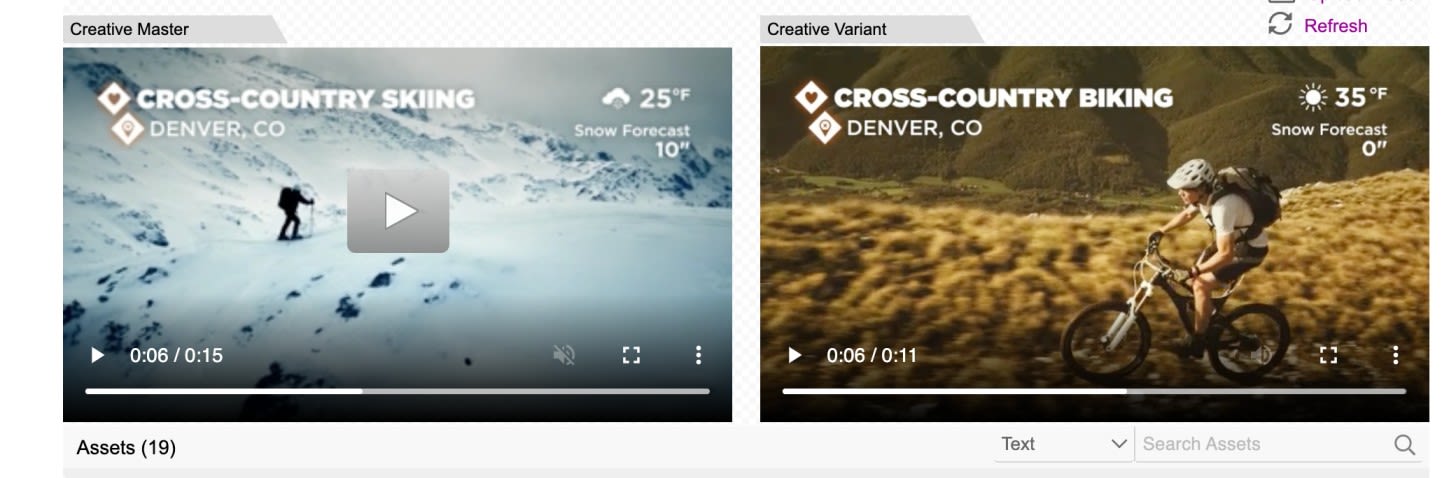
Let's select cross-country skiing. Since our video shows biking, let's enter cross-country biking in the text box.
You can change other text assets as required. In this case, let's change the temperature from 25 to 35. Click Swap to preview.
Repeat the process to change other text assets if required.
Saving the Creative Variant
Once you've made all the changes as required click Save.
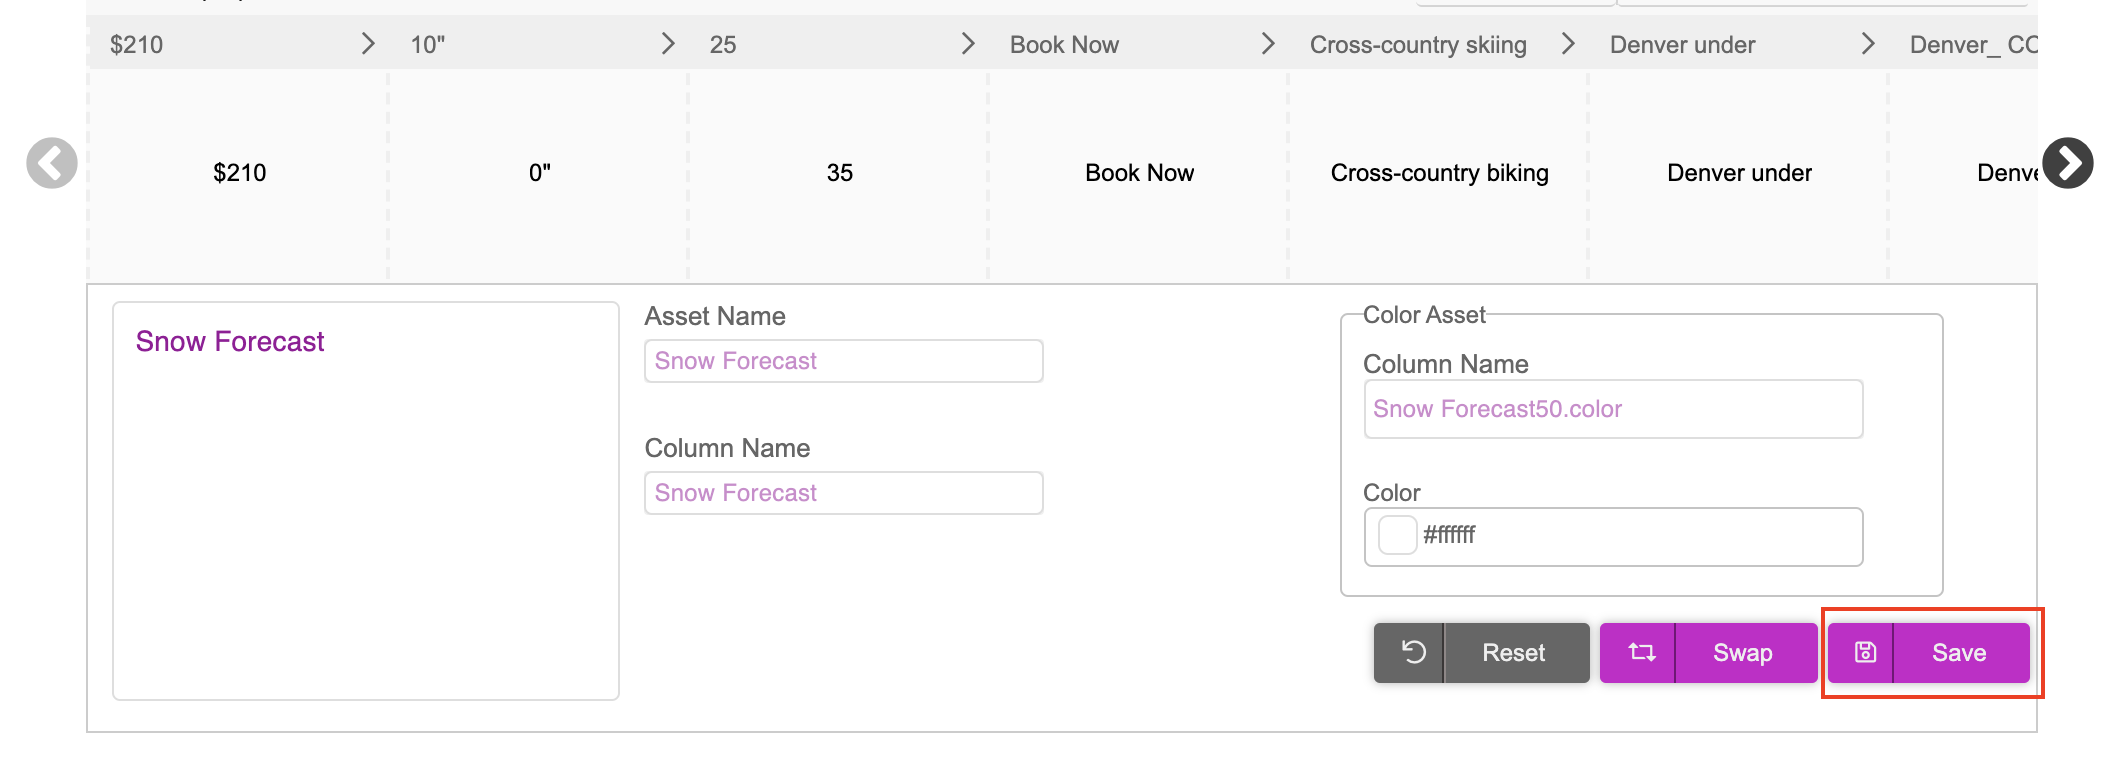
This will save the creative variation and a new row will be created in the Asset Source. The preview URL is automatically generated. Repeat the process to create more variations as required.
Generating the Preview
Once you are done making changes, select the creative variant and click the Generate Preview icon to preview the changes in the Creative Variant window.
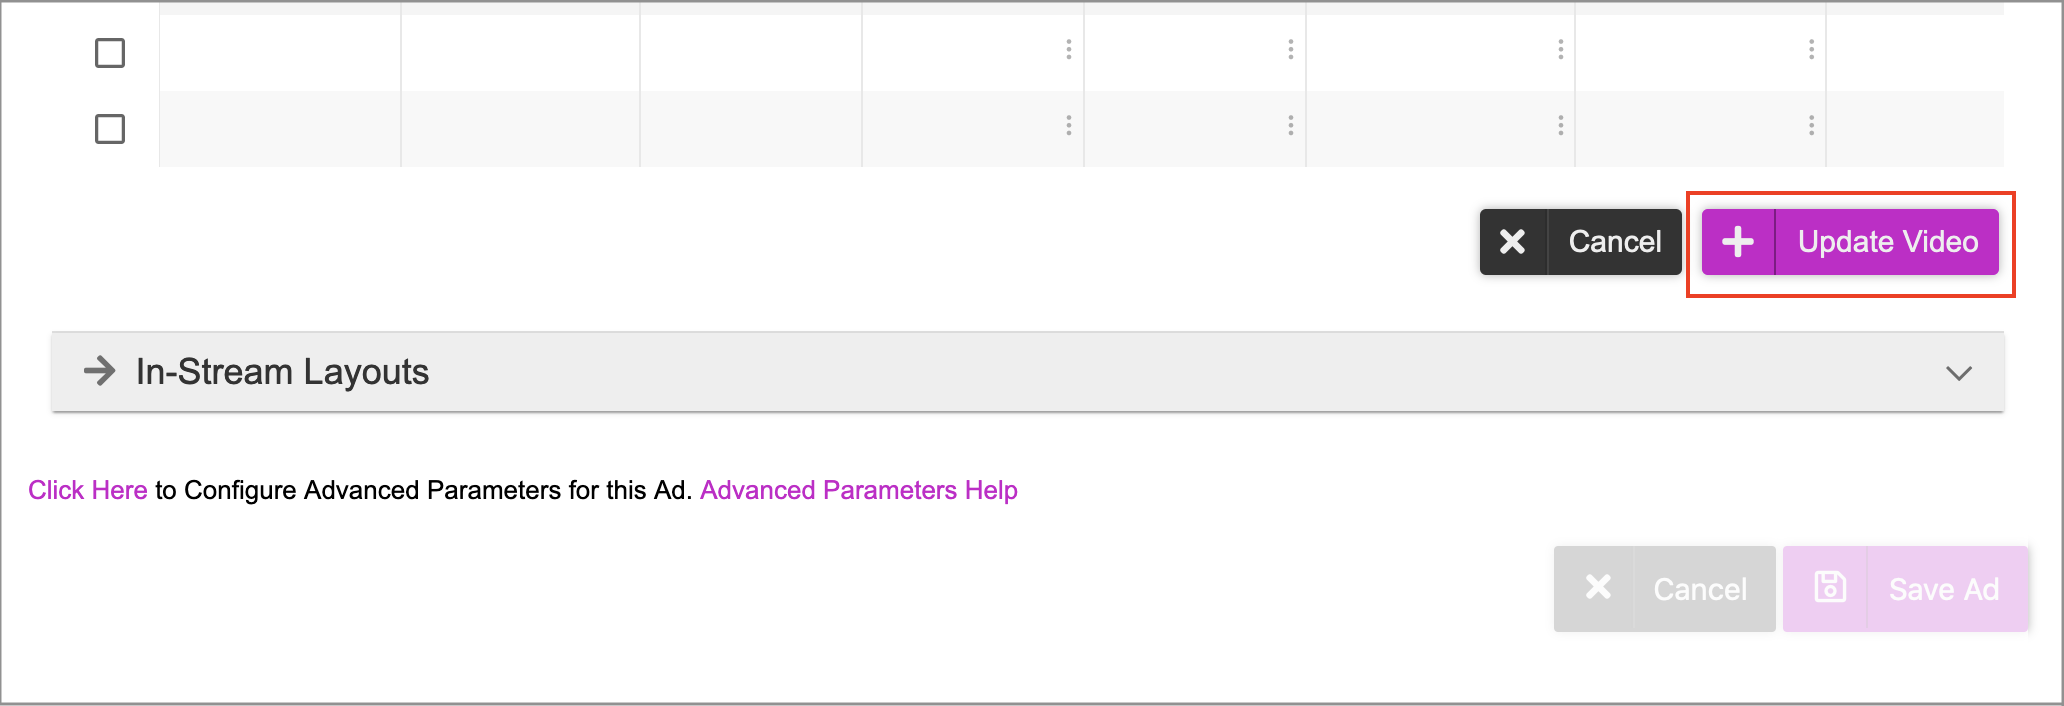
For a VPAID Ad, you must now Specify Layout. For a VAST Ad, you can proceed with the steps below.
Next, we will save the ad. Click Update Video.
You will be redirected to the next screen where you can save the Ad. Click Save Ad.
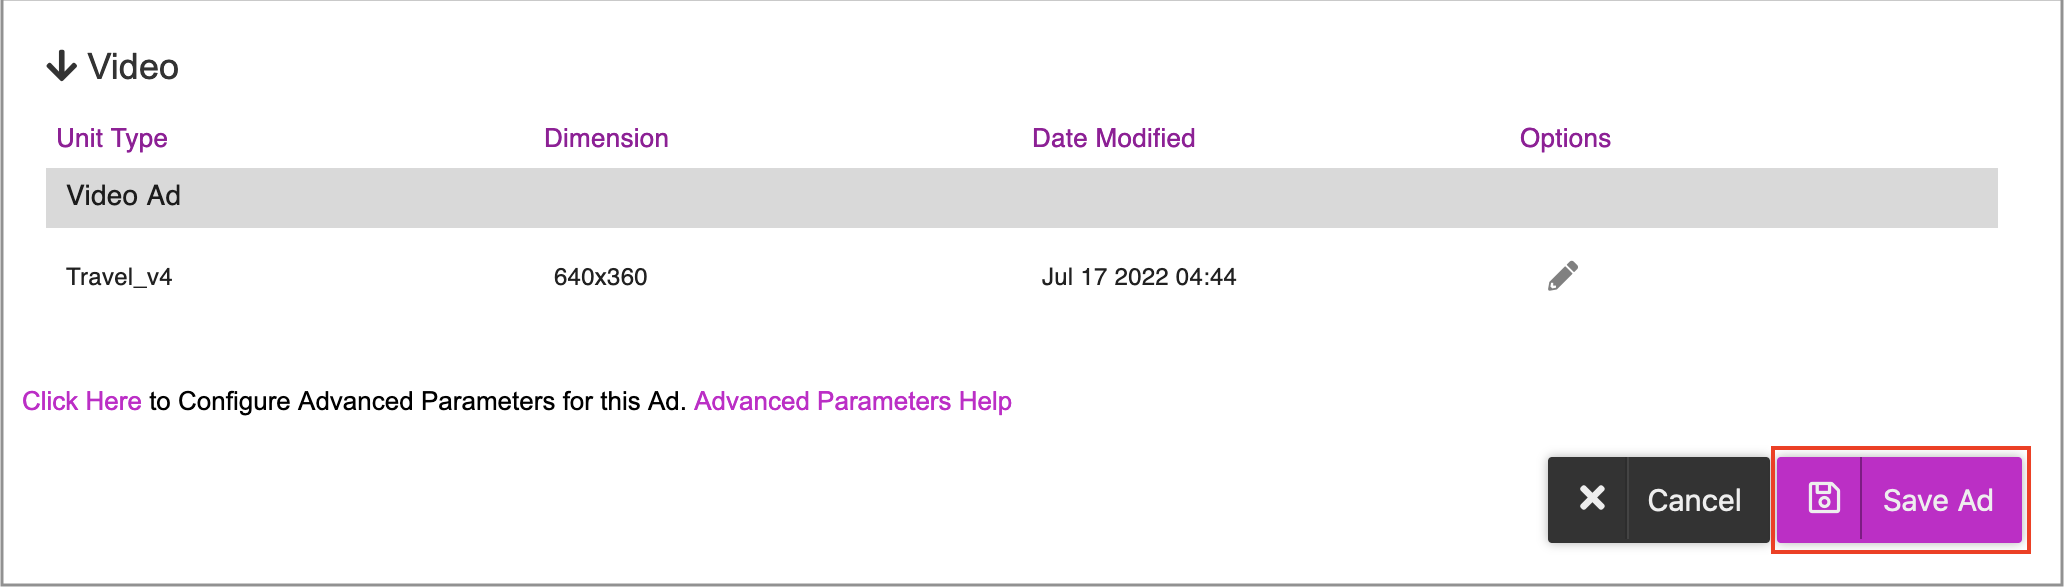
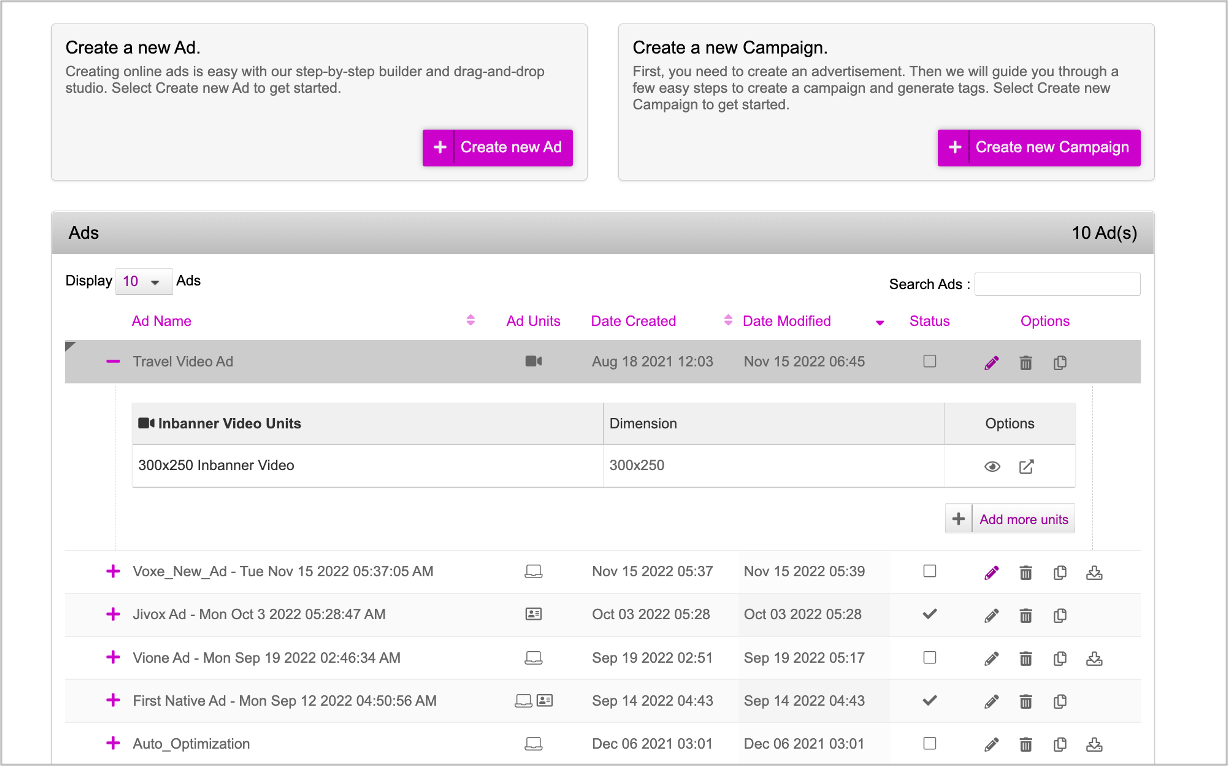
The Ad will be saved and you will be redirected to the Ads and Campaigns dashboard.
Next Steps
This completes the first part of the setup! Next you must create a campaign and define the various triggers based on which the creative variations that you just created in the ad can be served to different audience groups.
Refer to the Creating a New Campaign section for details.