In this section we will complete the campaign set up by creating a Decision Graph and save the campaign.
Let's go back to the Manage Segments tab.
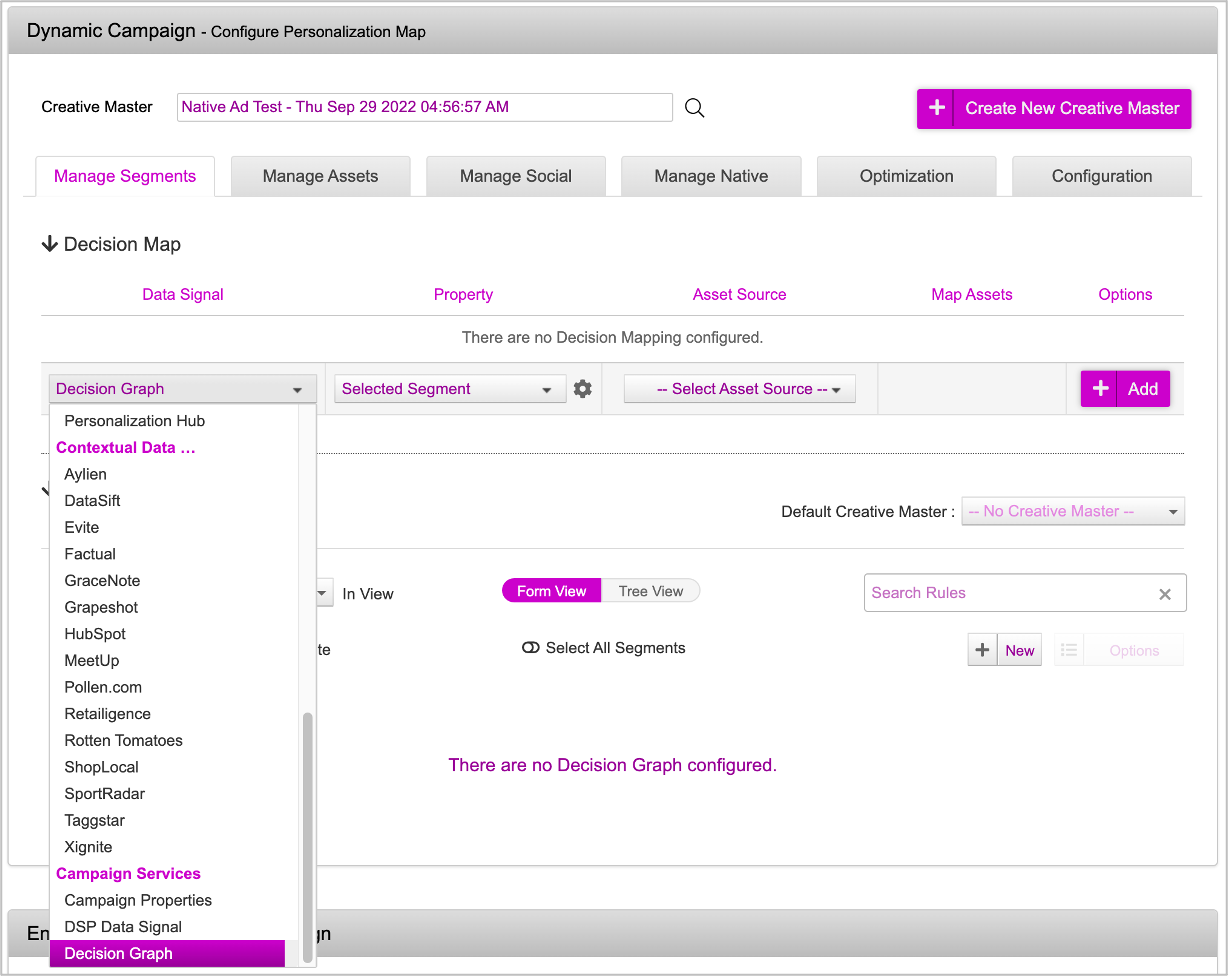
In the first section, select the following:
Select Decision Graph as the Data Signal
Keep the ‘Selected Segment’ property as is
Next, select the of the Asset Source you have uploaded earlier from the dropdown.
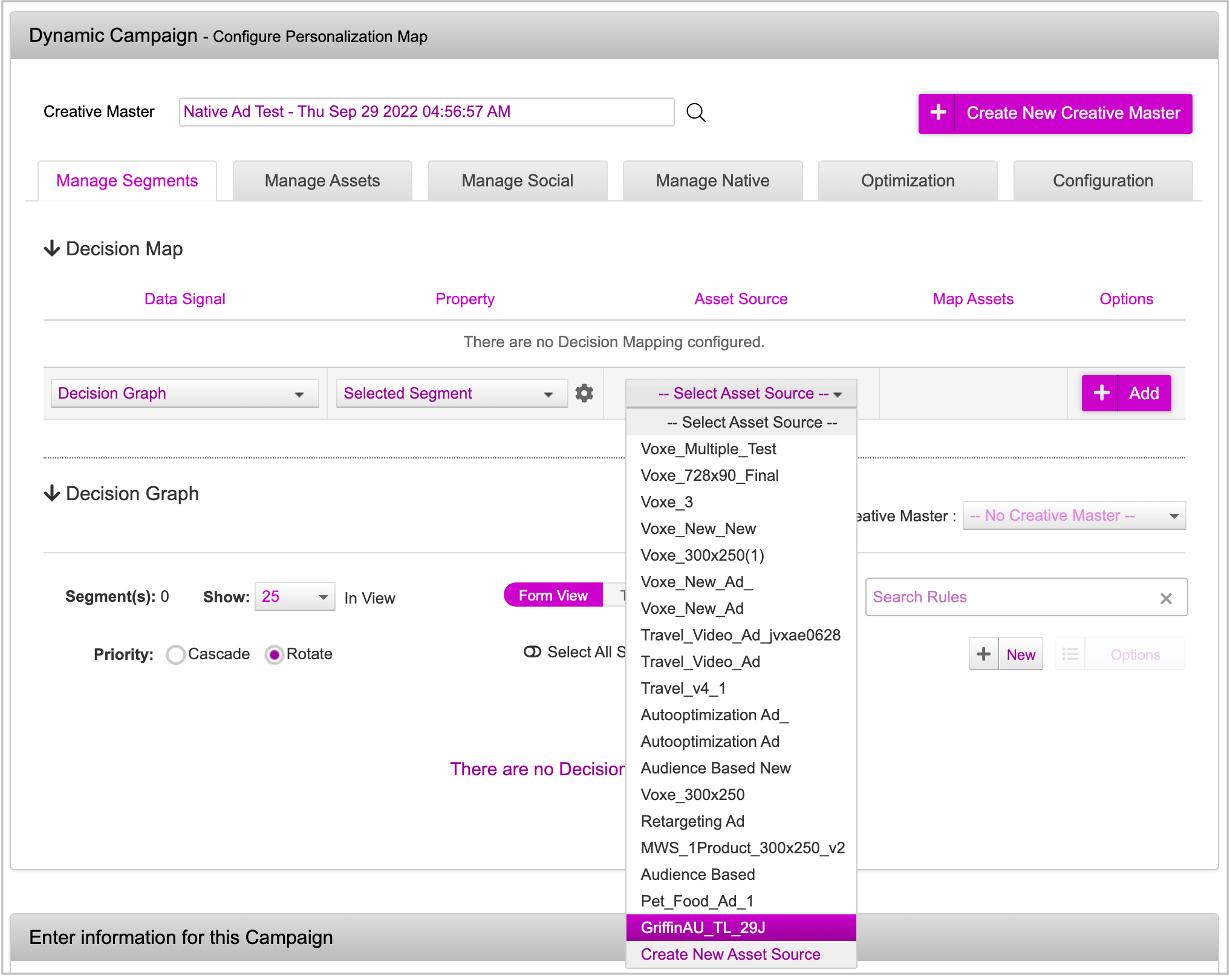
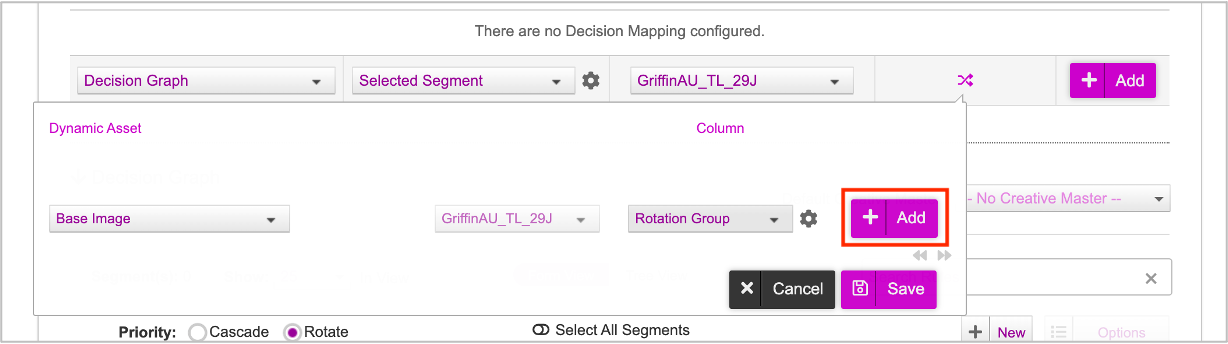
Once you select the Asset Source, you will see the Map Assets icon.

Next, click the Map Assets icon and map all the Dynamic Assets to the specific Column in the Asset Source one by one. To do so, first select the Dynamic Asset from the drop-down.
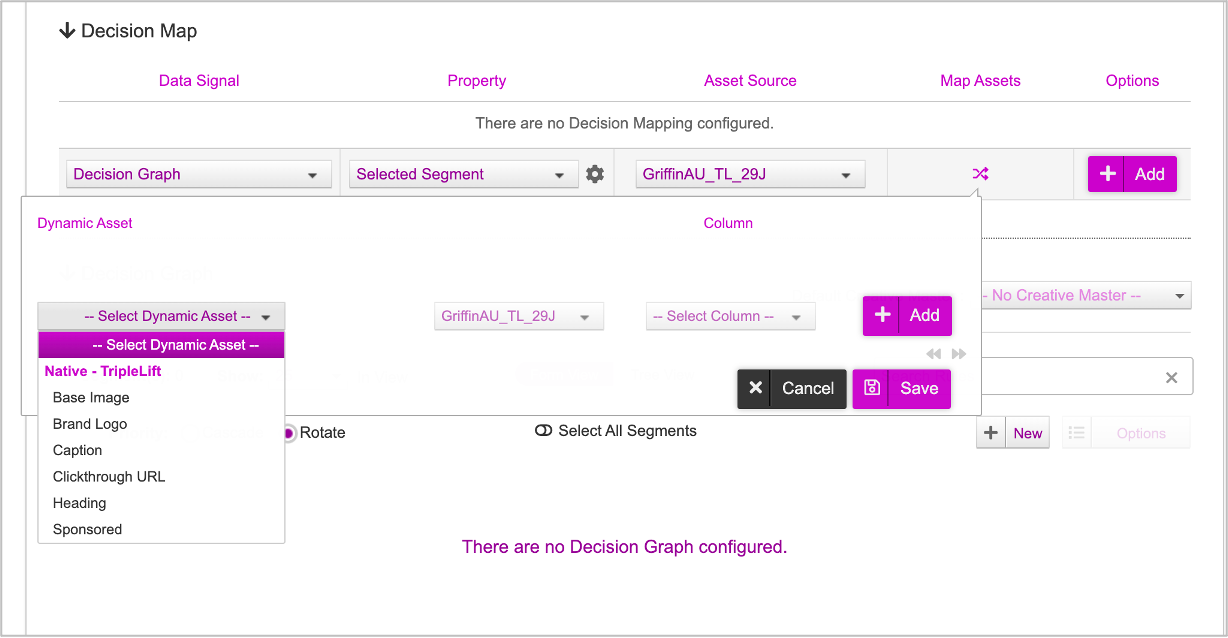
Now, select the corresponding Column from the drop-down.
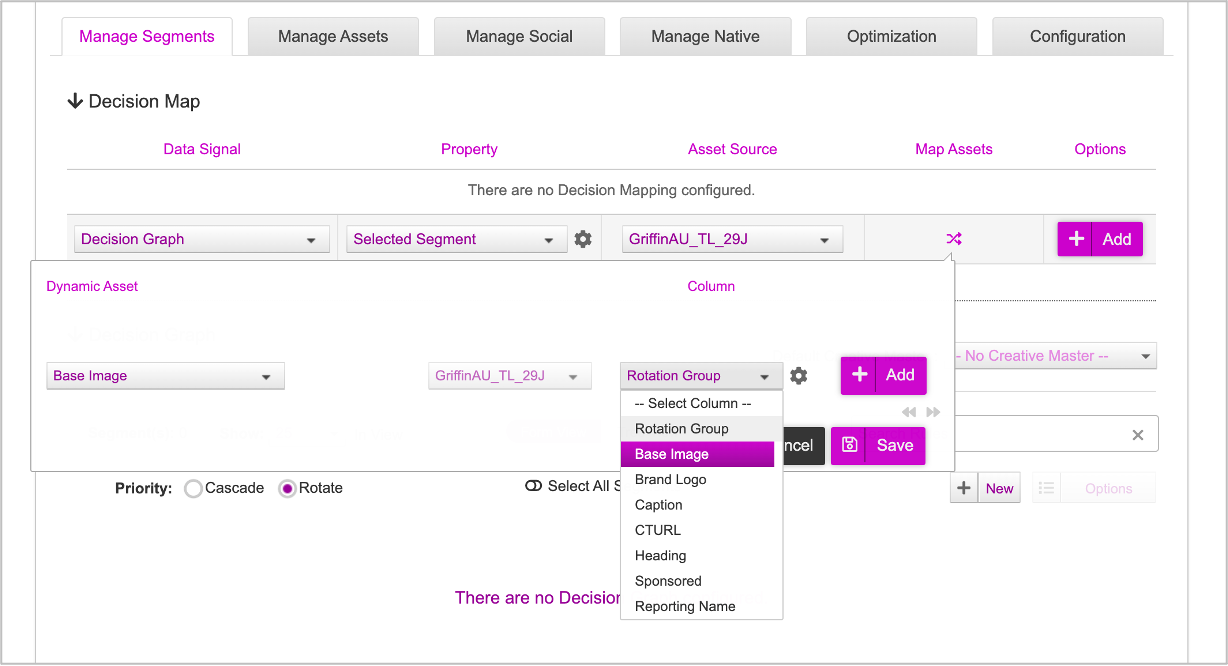
Next, Click Add.
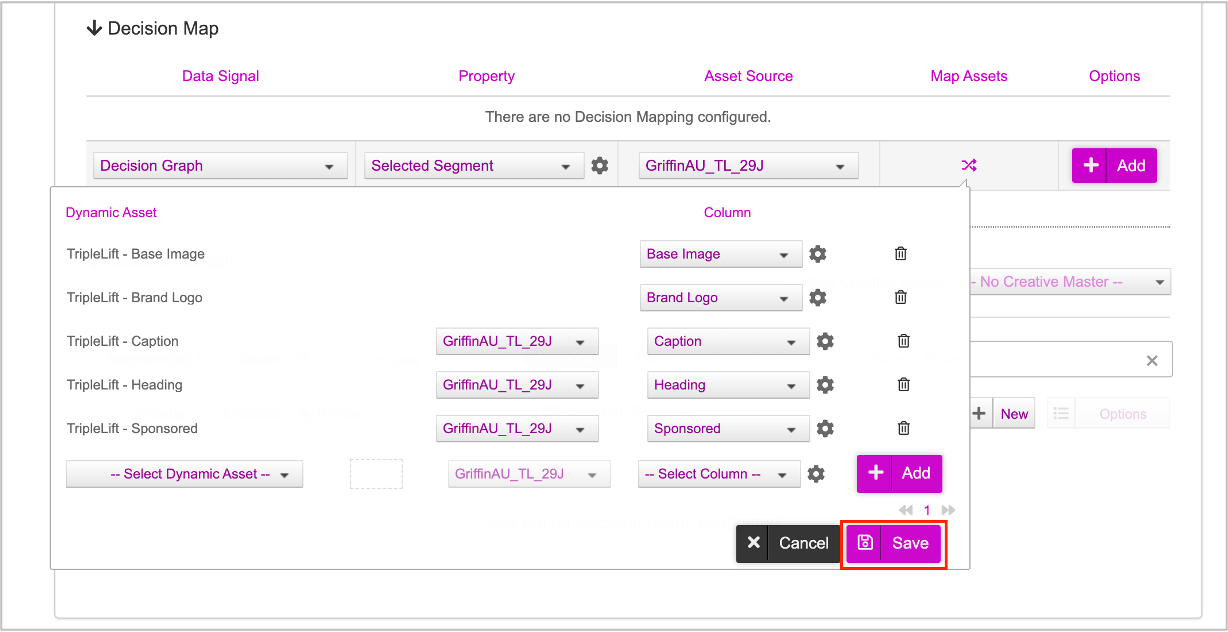
Repeat the process to map all the Dynamic Assets to the respective columns. Once you are done, click Save.
Once all the assets are mapped to the respective columns, go ahead and click Add.
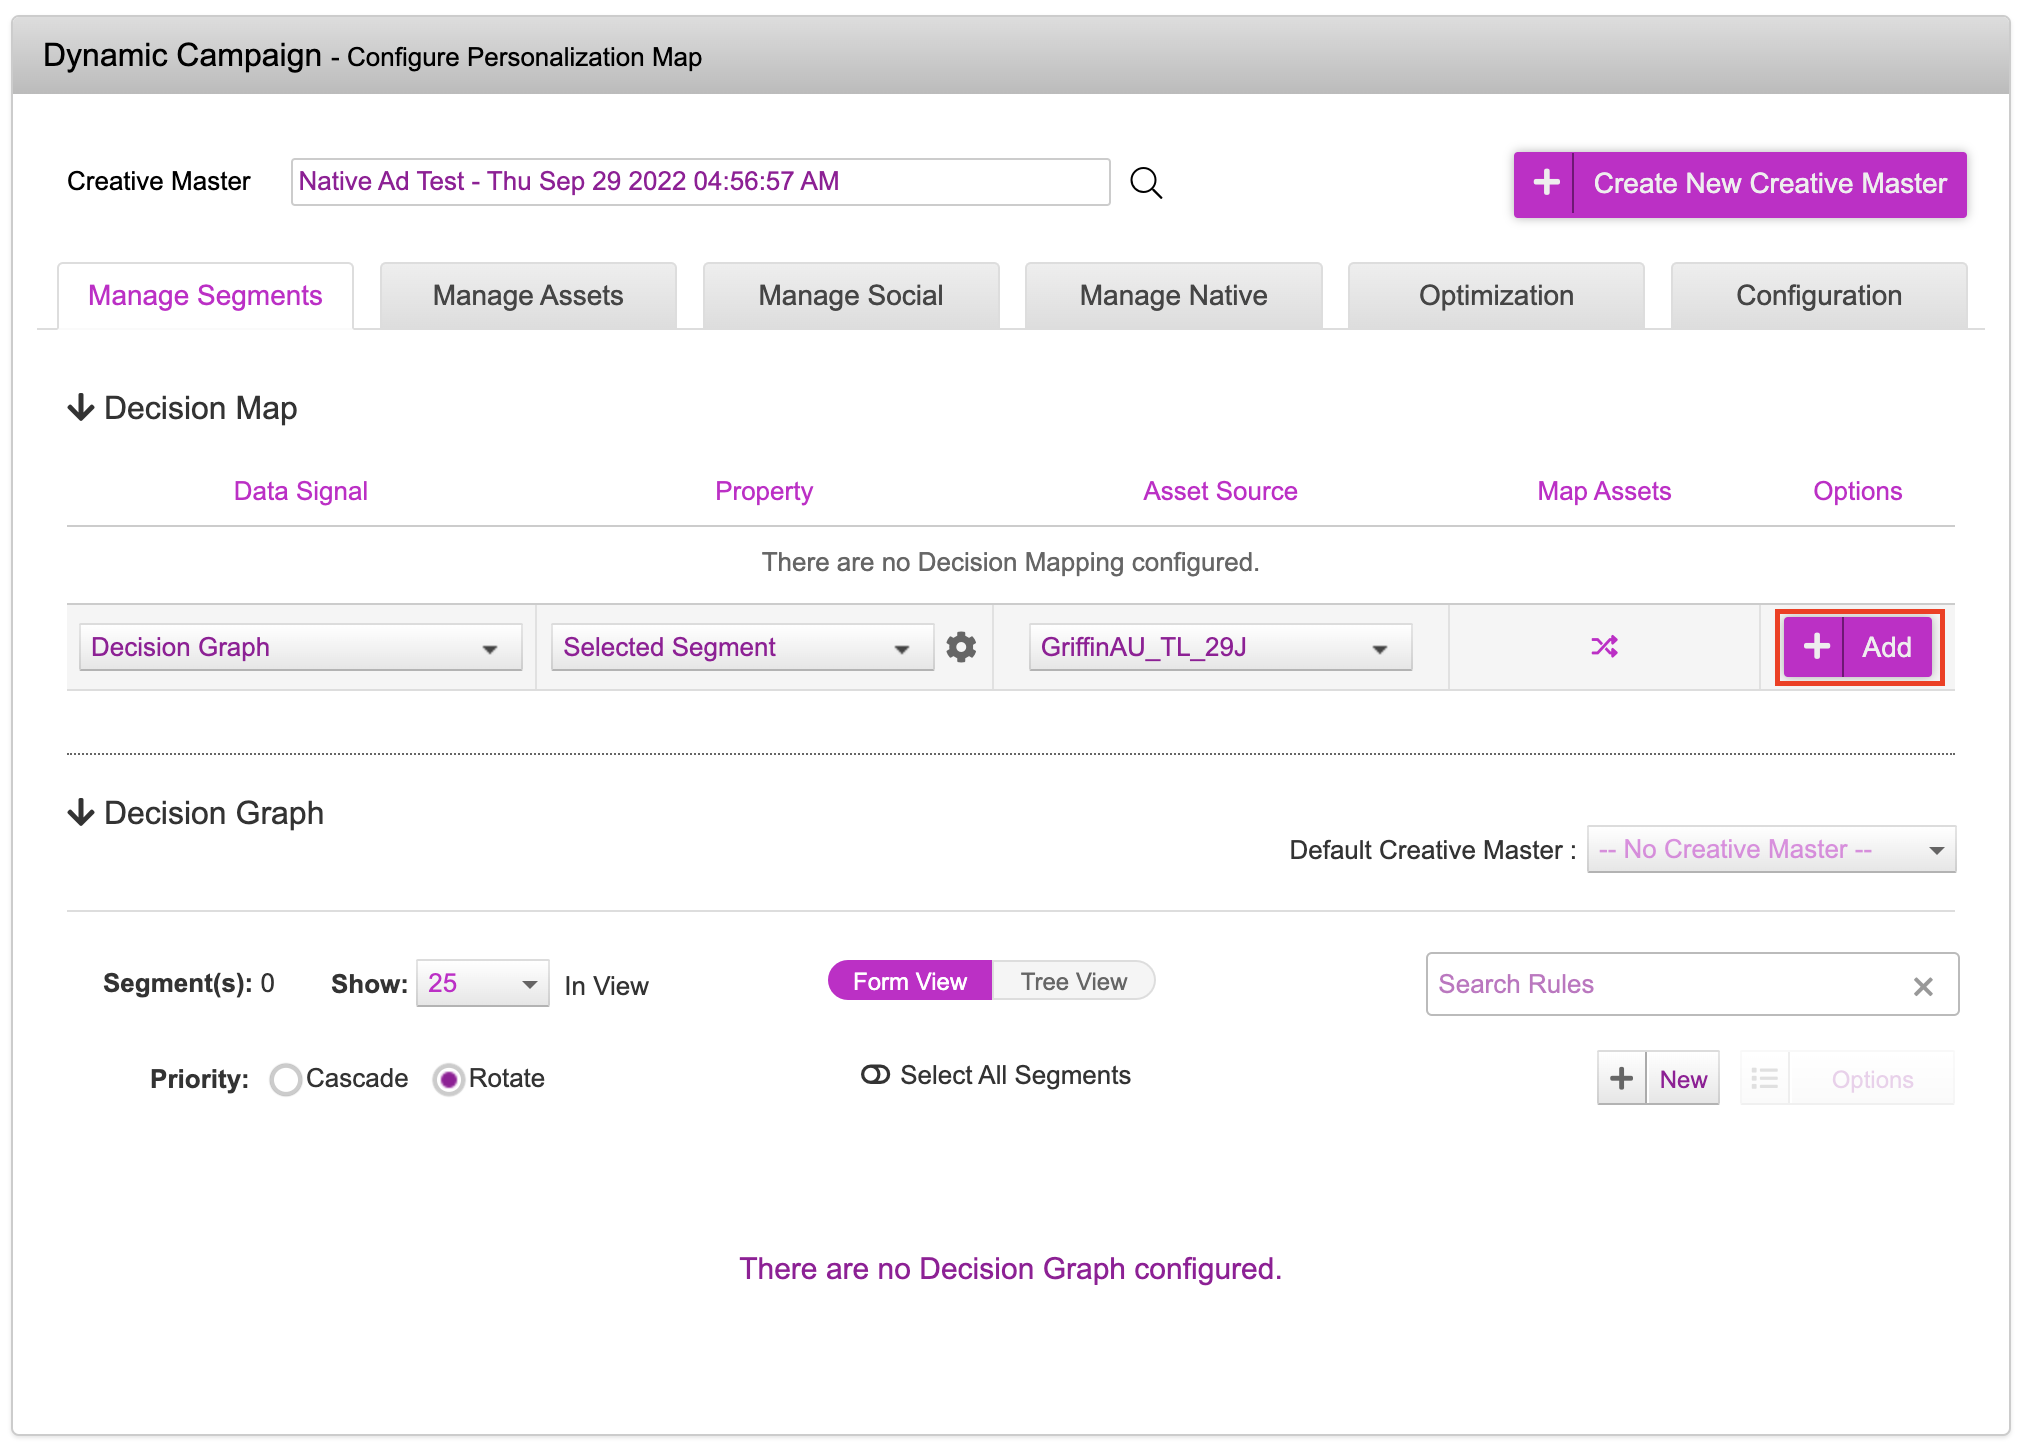
The Decision Map will be added. You can edit the Decision Mapping if required using the Edit icon.
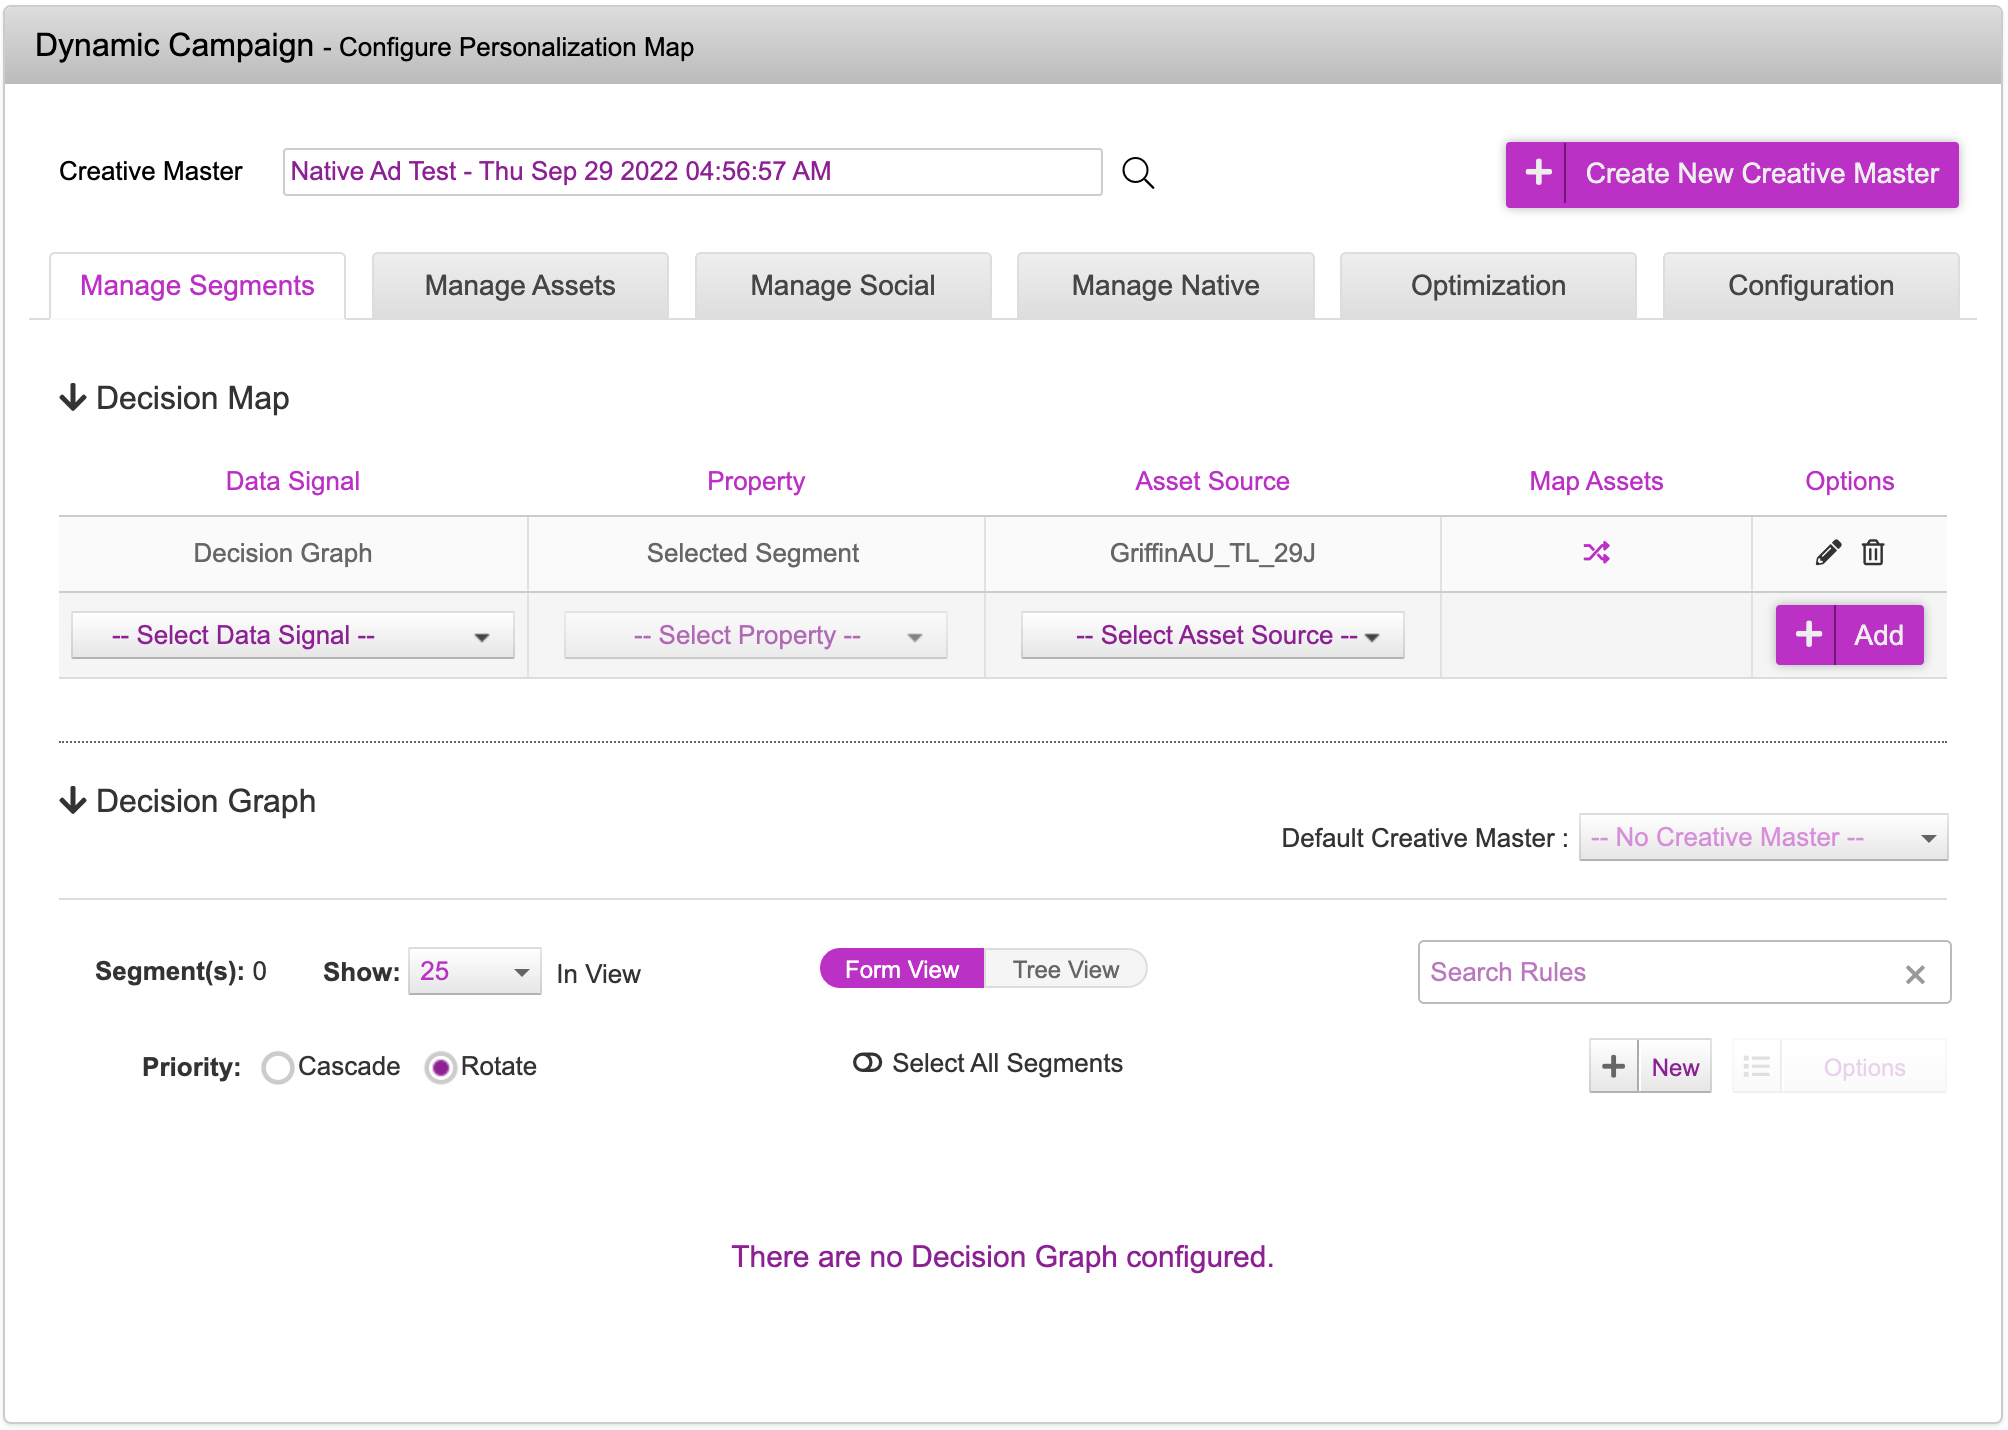
Next, move on to the Decision Graph section to define the decisioning logic based on your campaign by creating segments.
For more details on creating the Decision Graph, refer to the Using Decision Graph section.
Once you've setup the Decision Graph segments, scroll down to the bottom of the page.
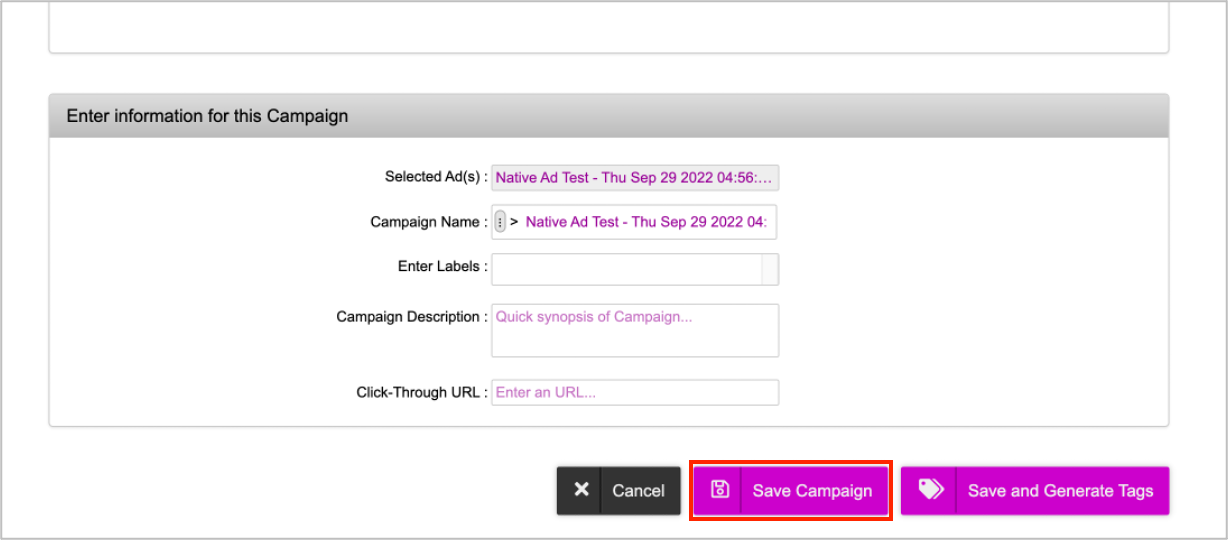
Modify the Campaign Name if required. By default, the system names the campaign as per the selected Ad. Enter a clickthrough URL and then click Save Campaign. The campaign will be saved and you will be redirected to the Campaigns Dashboard.
Next Steps
Now, you can go ahead and generate the tags.