So far we have:
- Uploaded the Creative Master
- Created the Asset Source
- Created the Default Ad
This section details the steps to generate a creative variation by uploading an asset source file created outside the Jivox platform. The platform allows you to download the Asset Source Template that includes the columns and default row as created earlier. You can update the Asset Source as required and then upload it back to the platform.
We will cover the following:
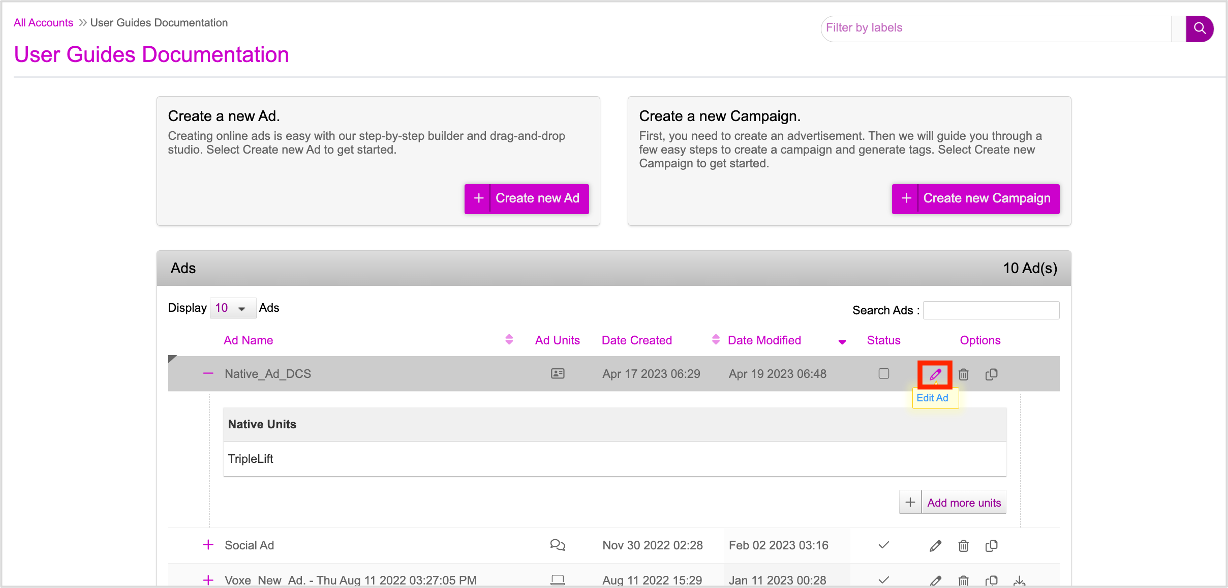
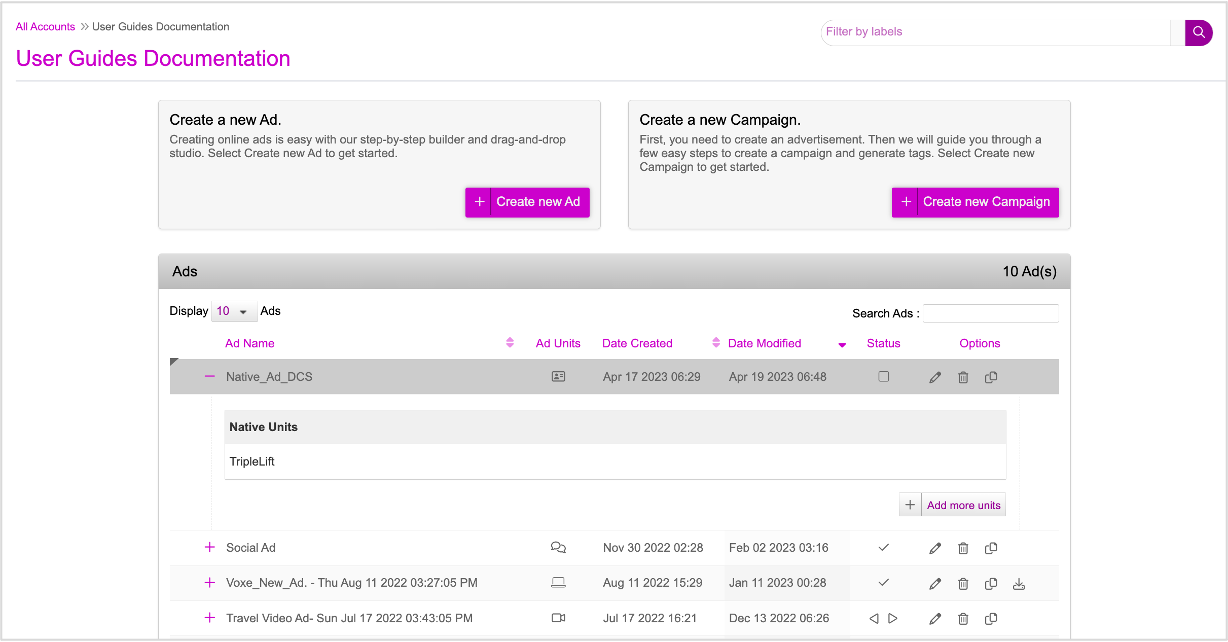
First, on the Ads and Campaigns Dashboard, let's find our ad and click the Edit Ad (pencil) icon.
In the Edit Ad window, click the Edit (Pencil) icon next to the Ad unit you want to edit.

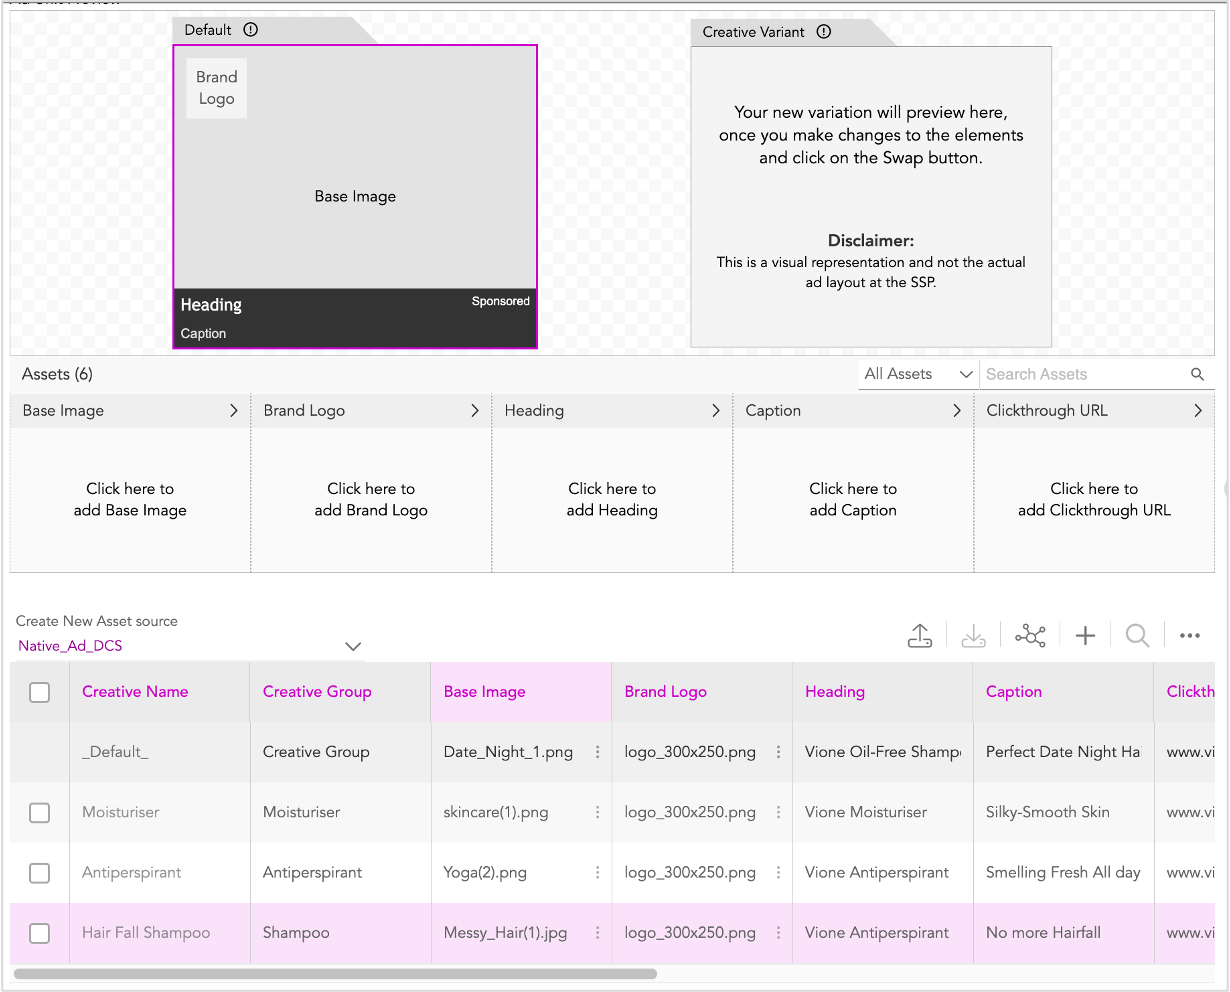
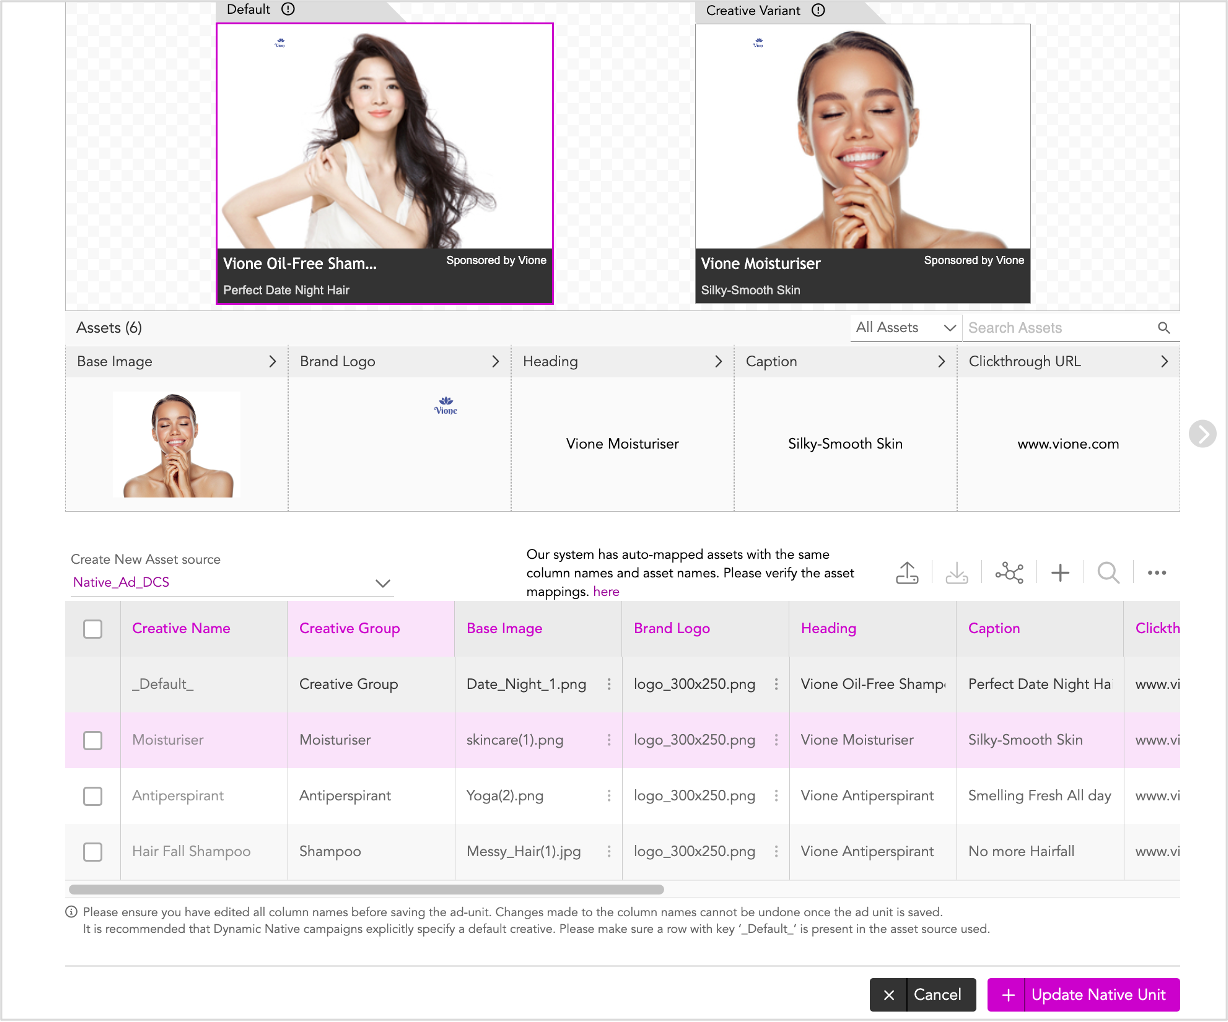
The ad is displayed in the DCS UI with the default row.
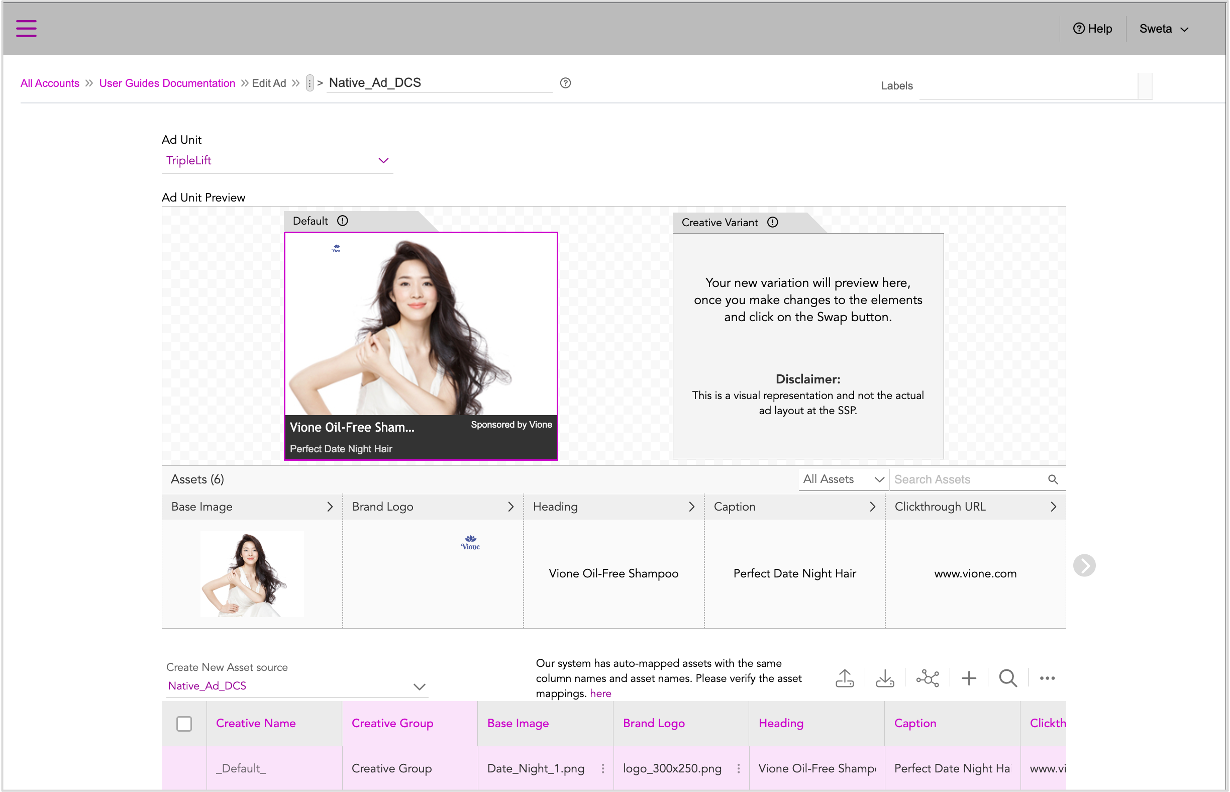
You can download the Asset Source template and then fill the columns outside the platform. The Download Asset Source option is available only when you save the ad.
Downloading the Asset Source Template
To download the Asset Source template, follow these steps:
1- Click the Download Asset Source button at the top of the Asset Source table.
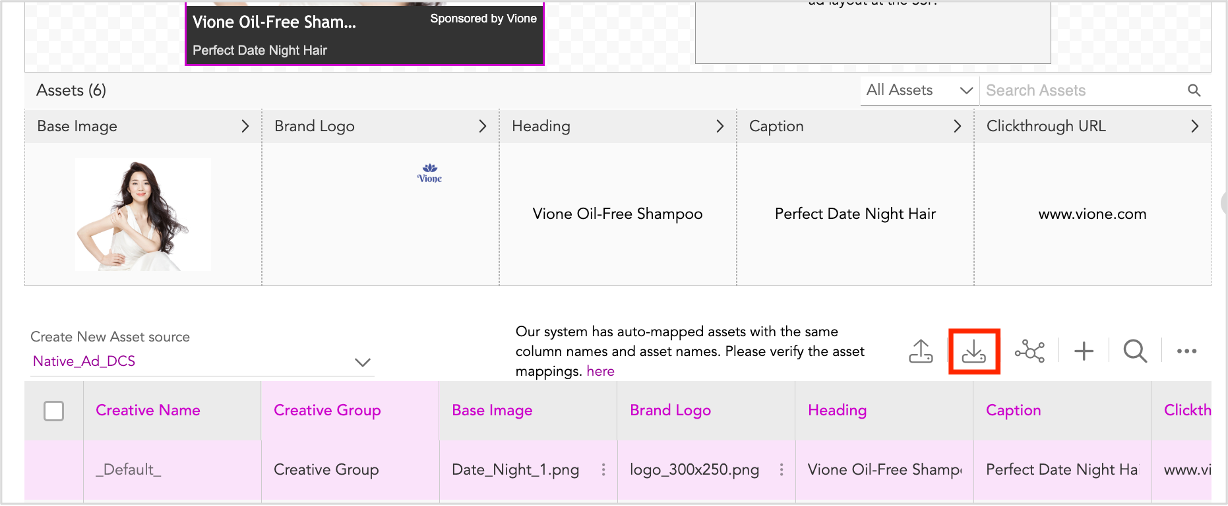
The Asset Source Template is downloaded to the local system. It consists of all the columns in the Native Ad Unit and the default row that we created earlier. This will also include any creative variations or columns added to the Asset Source before last saving the Ad.

2- Now, you can add the details of each creative variation here. Ensure that you provide the CDN links for the Image Assets.
The best way to get the CDN links for your creative assets is to upload them onto the Jivox platform in the Asset Library tab and then download CDN links using the download option. Navigate to the Create Campaign page. In the Dynamic Campaign section, go to Manage Assets > Asset Library.
For detailed steps to upload your assets and download the CDN links, refer to the Asset Library section.
3- Once you are done, save the file.
Uploading Asset Source File
Now, you must upload the asset source file by following these steps:
1- Click the Upload Asset Source icon highlighted below.

2- Select and Upload the file that you modified earlier.
You will see this pop-up message. Since we downloaded the Asset Source from the platform earlier, any creative variations created previously will be included in that.
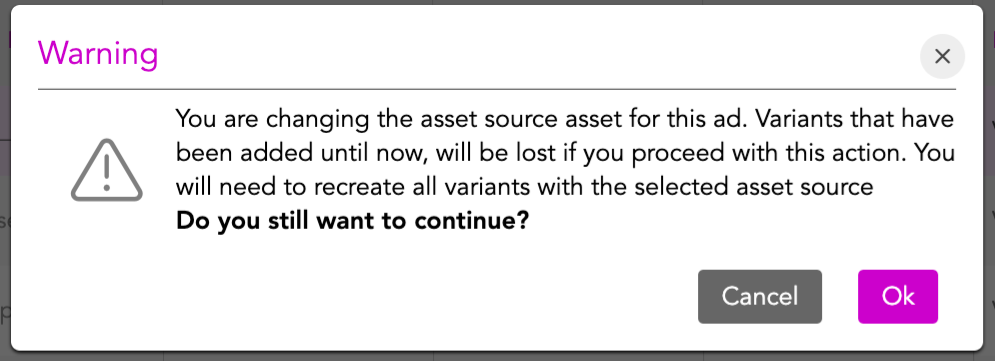
3- Click Ok.
The Asset Source will be uploaded.
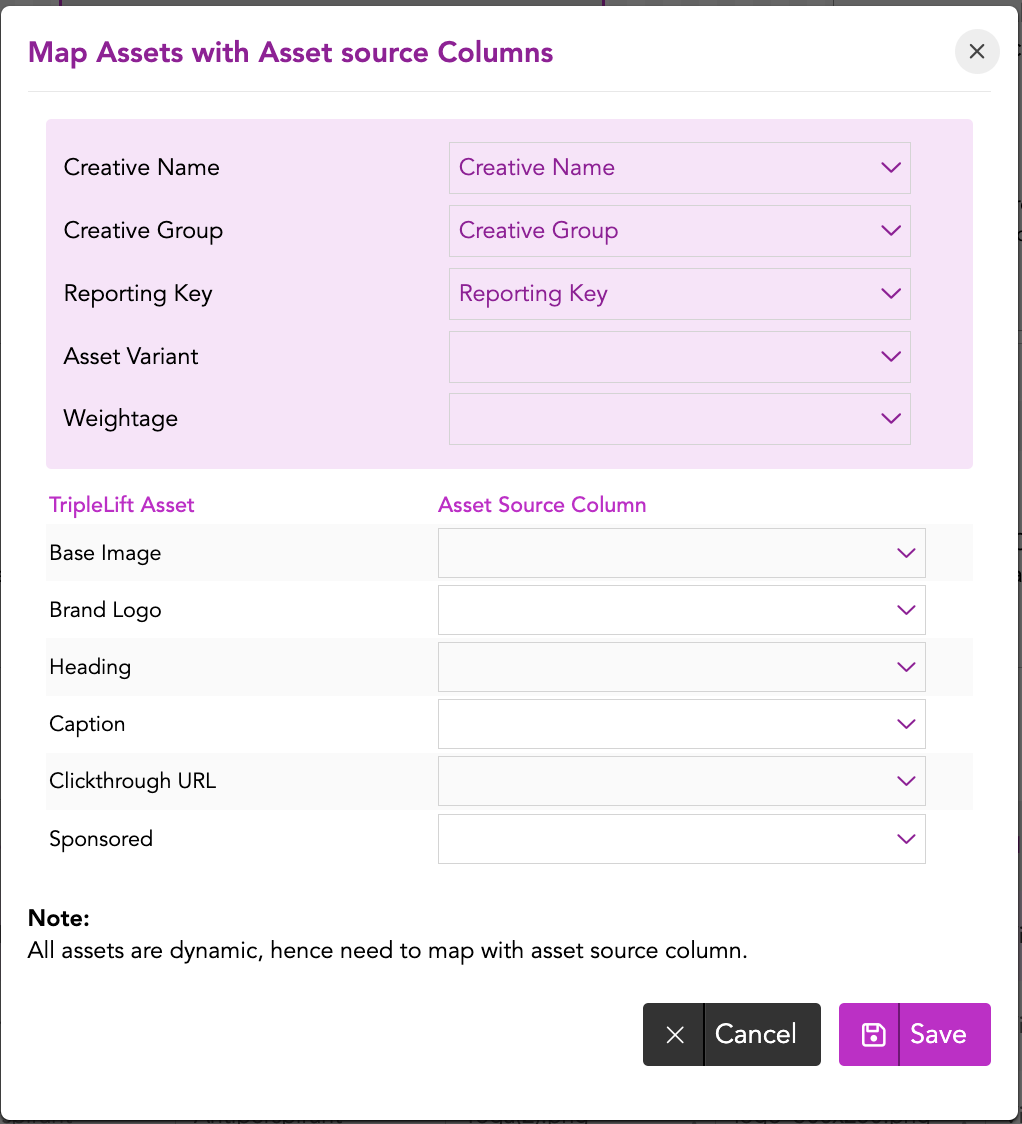
Since the Asset Source was updated externally, the column mappings will be reset. So, we will not be able to preview the variants until we map the assets with the respective columns in the Asset Source again.
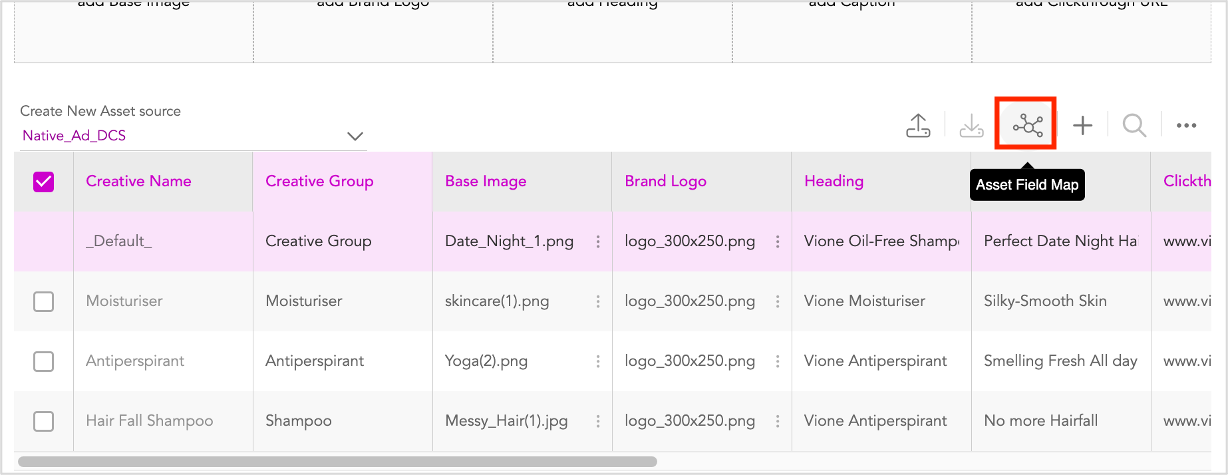
Let's go ahead and map the assets to the columns in the Asset Source.
4- Click the Asset Field Map icon on the top of the Asset Source table.
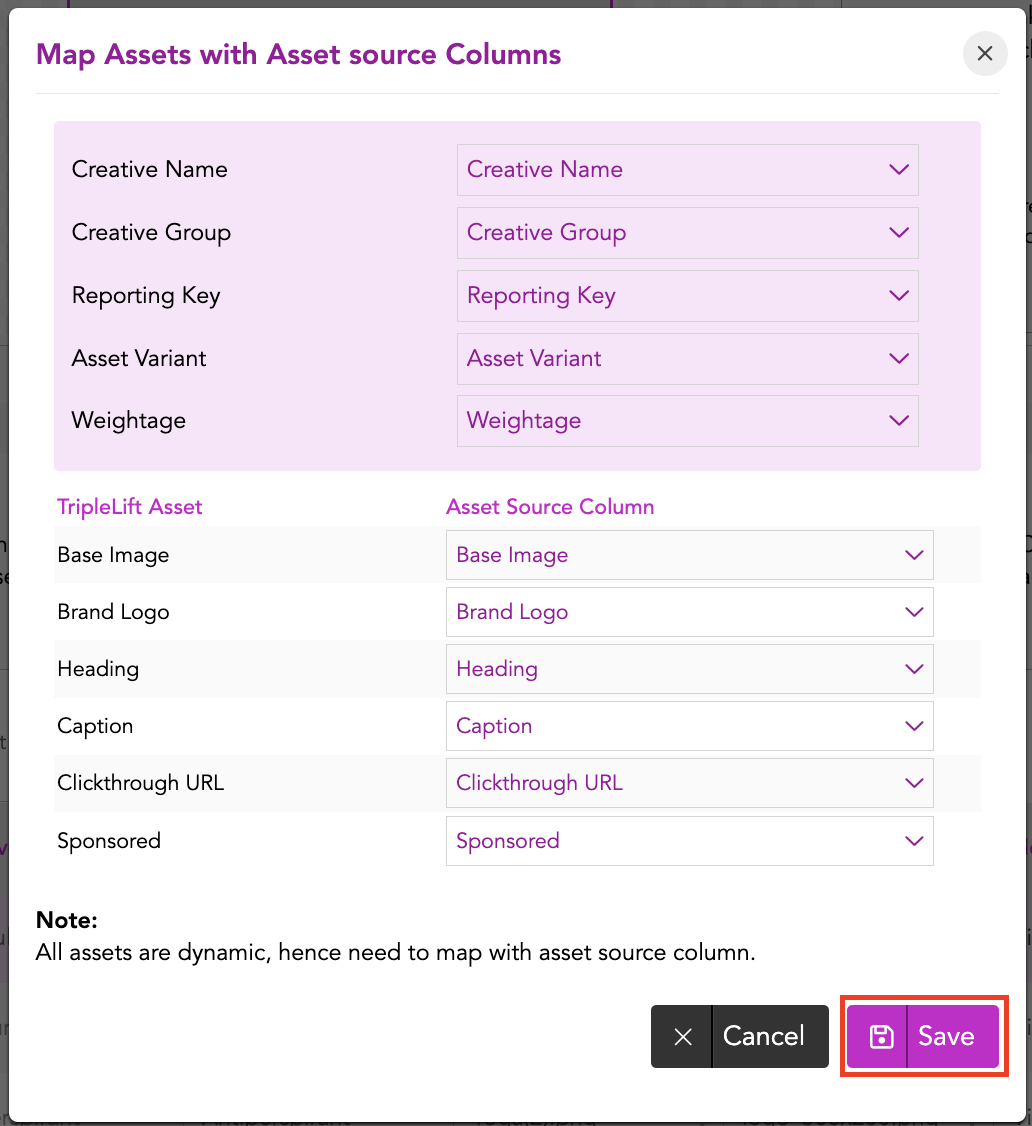
5- In the subsequent window, for each asset, select the respective column in the Asset Source.
6- Once done, click Save.
Once the Assets are mapped, the Default variation is displayed in the Default window. You can select each creative variation to verify the preview in the Creative Variant window.
If you want to make any changes to the variations you can do so from the UI.
After you've verified all the creative variations and require to make no further changes, we can go ahead and save the Ad.
Saving the Ad
To save the Ad, scroll down to the bottom of the page and select Update Native Unit.
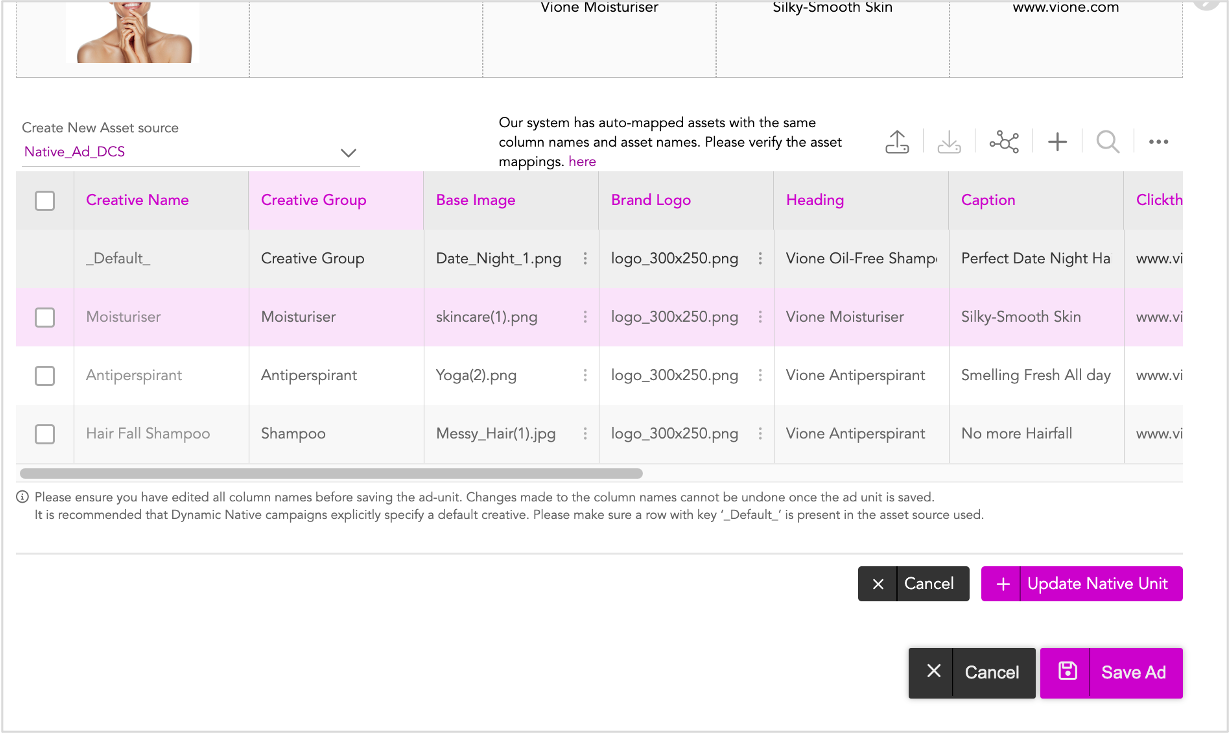
In the subsequent window, click Save Ad.
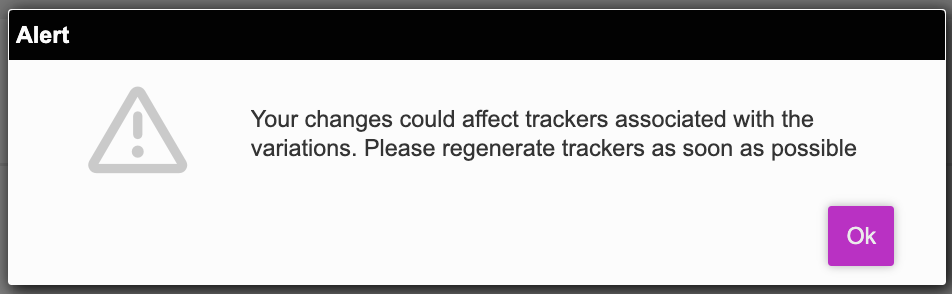
The following pop-up is displayed.
3- Click OK.
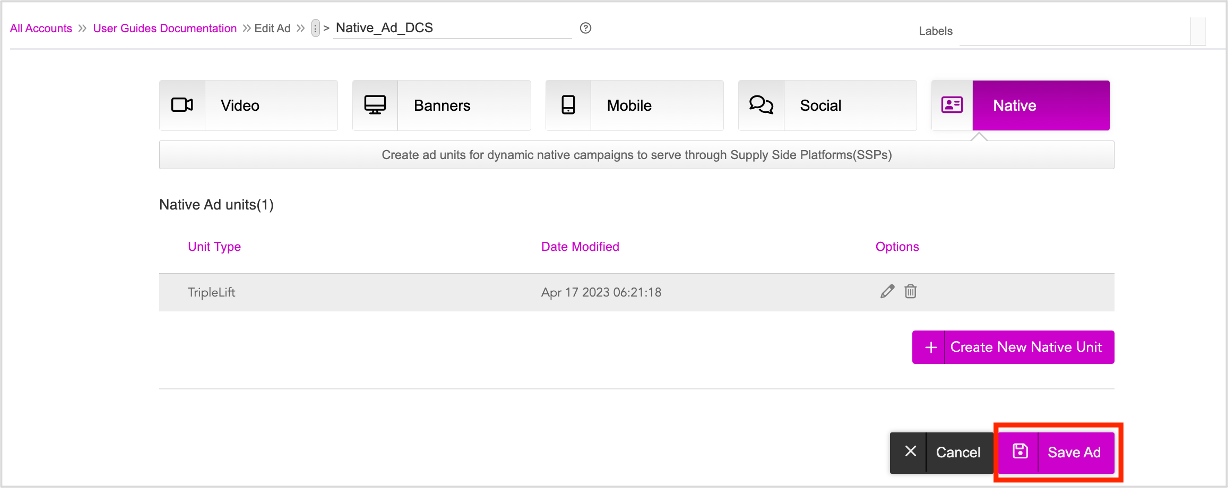
The Ad is now saved and we will be redirected to the Ads and Campaigns dashboard.
Next Steps
This completes the first step of our set-up. Next you must create a campaign and define the various triggers based on which the creative variations that you just created in the ad can be served to different audience groups.
Refer to the Creating a New Campaign section for details.