So far we have:
- Uploaded the Creative Master
- Created the Asset Source and Saved the Ad.
Now, in this section, we'll discuss the steps to generate new creative variations using the Asset Carousel and Interactive Asset Source.
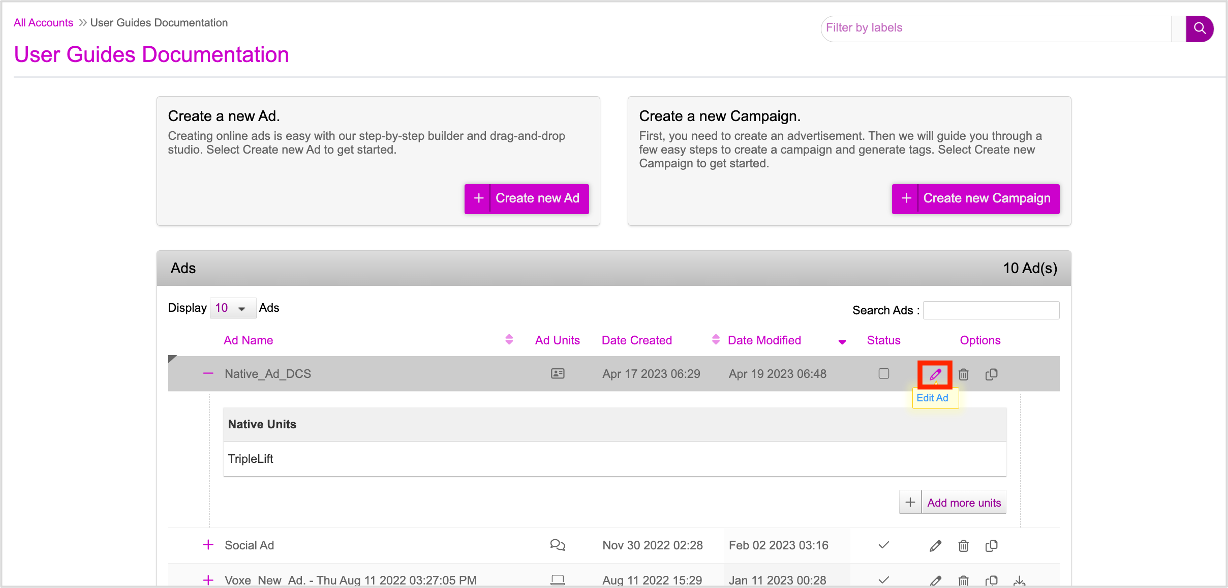
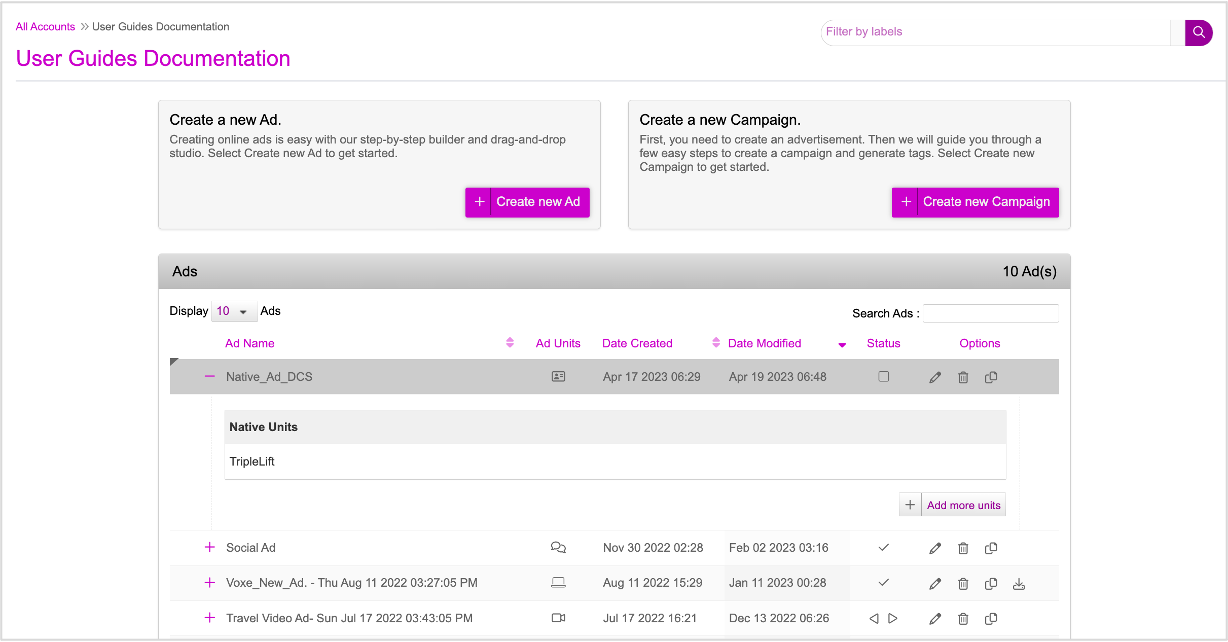
First, on the Ads and Campaigns Dashboard, let's find our ad and click the Edit Ad (pencil) icon.
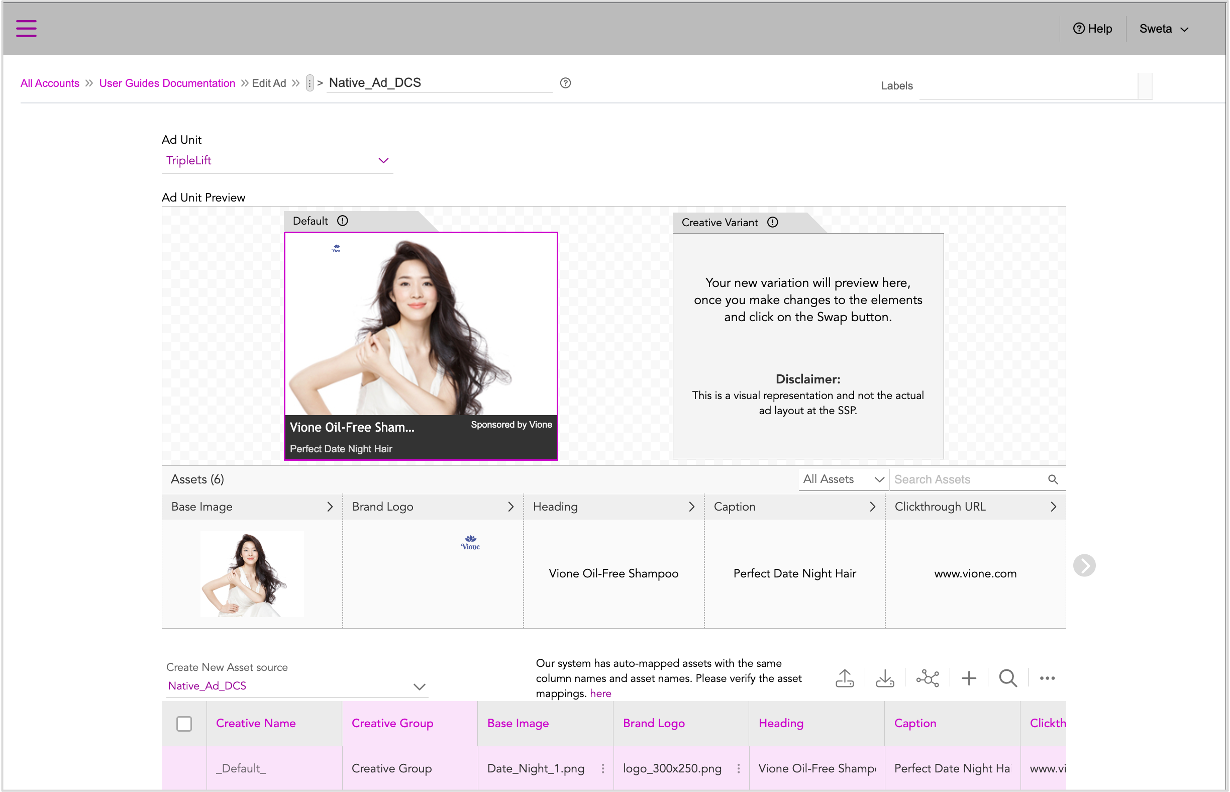
In the Edit Ad window, click the Edit (Pencil) icon next to the Ad unit you want to edit.

The ad is displayed in the DCS UI with the default row.
Now we can go ahead and generate the creative variations from the DCS UI by:
- Using the Asset Carousel
- Using the Interactive Asset Source
Using the Asset Carousel
DCS allows you to generate new creative variations using the Asset Carousel from the UI itself. Let's begin!
1- Click any asset on the Asset Carousel to expand the section and view all available options.
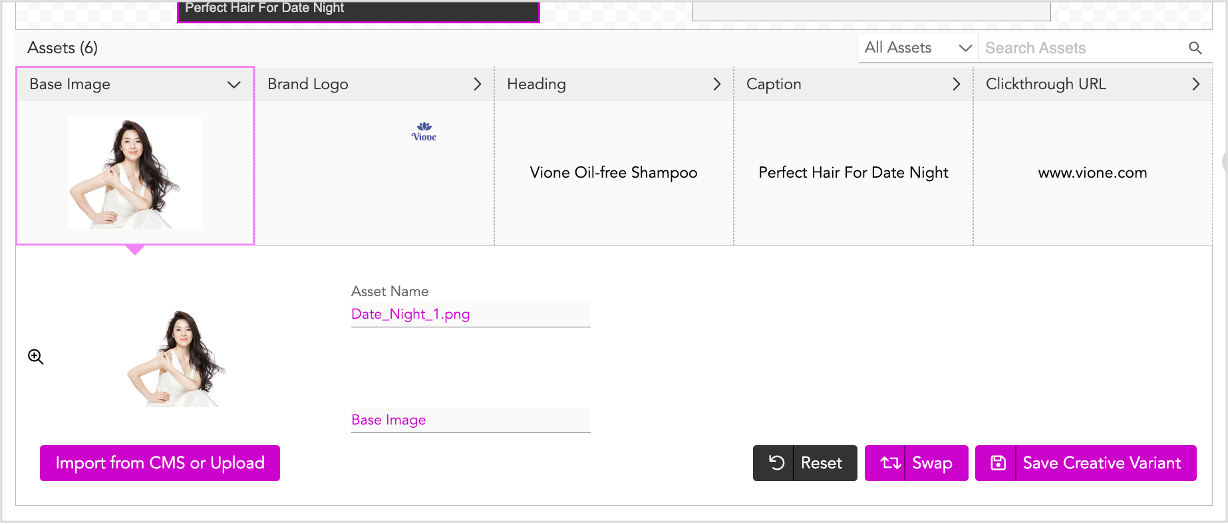
2- To update image assets, follow steps 1-6 as detailed in the Updating the Image Assets section.
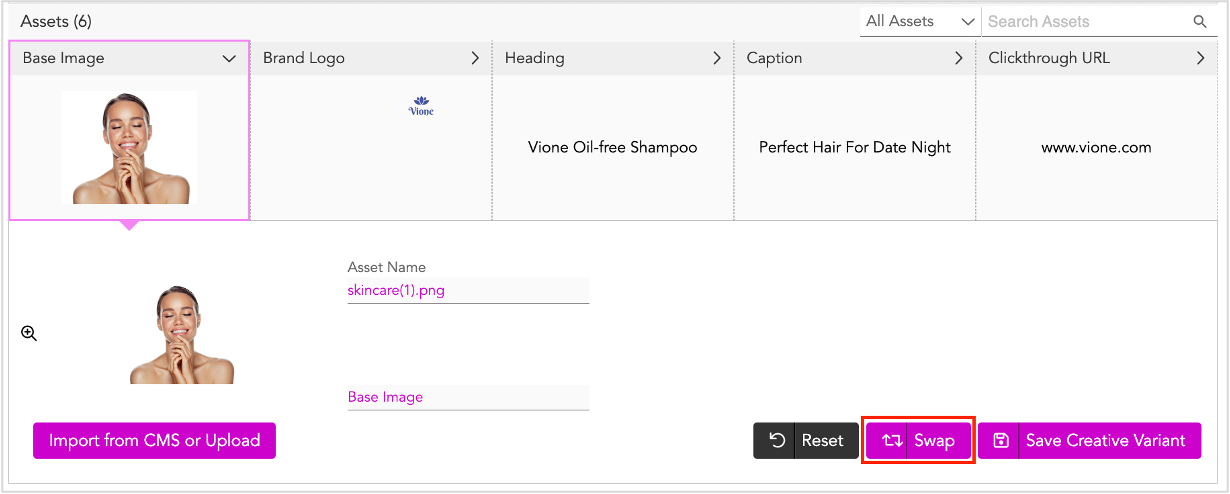
3- Since this is the same brand, we'll leave the Brand Logo as is and click Swap. You can now preview the image in the Creative variant window.
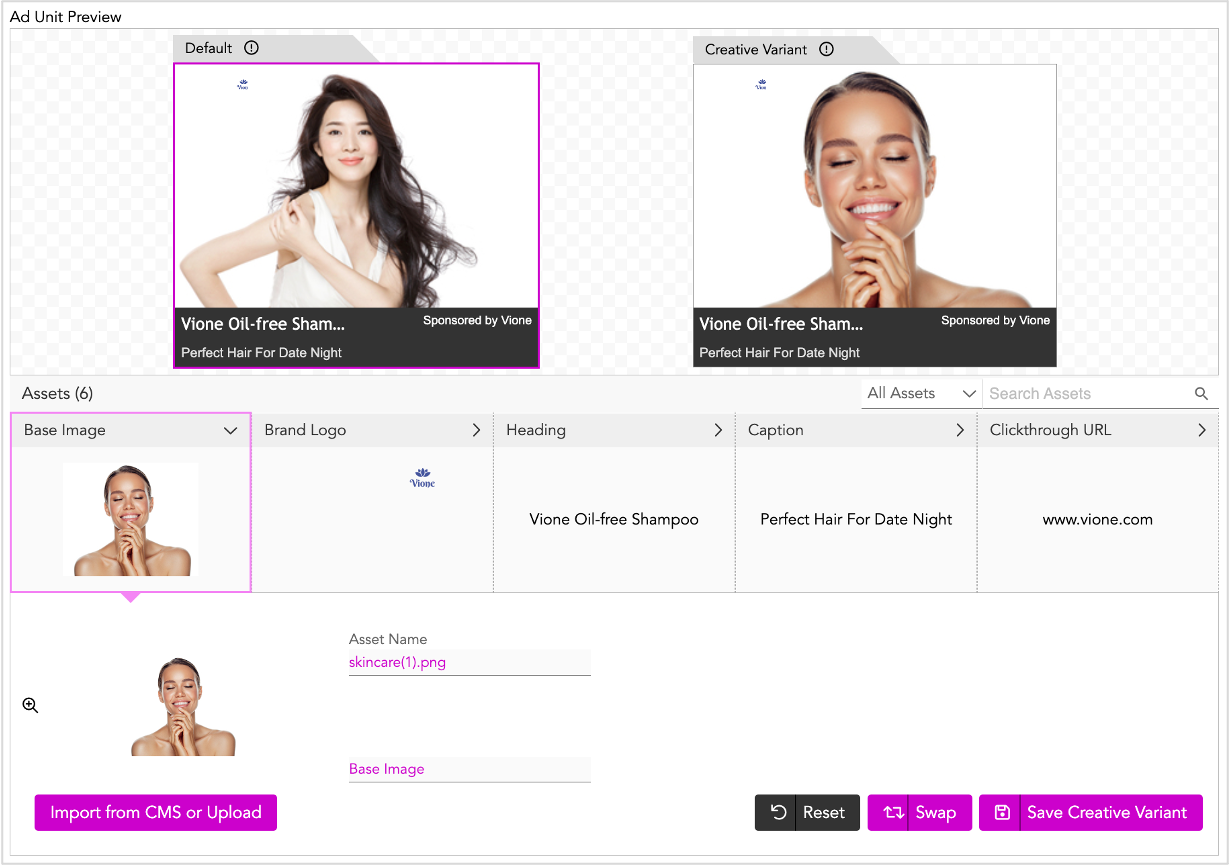
Next, we'll go ahead and update the text assets.
4- Follow steps 1-4 detailed in the Updating the Text Assets section. Some assets such as Clickthrough URL and Sponsored will remain the same for all variations. So you can leave them as is.
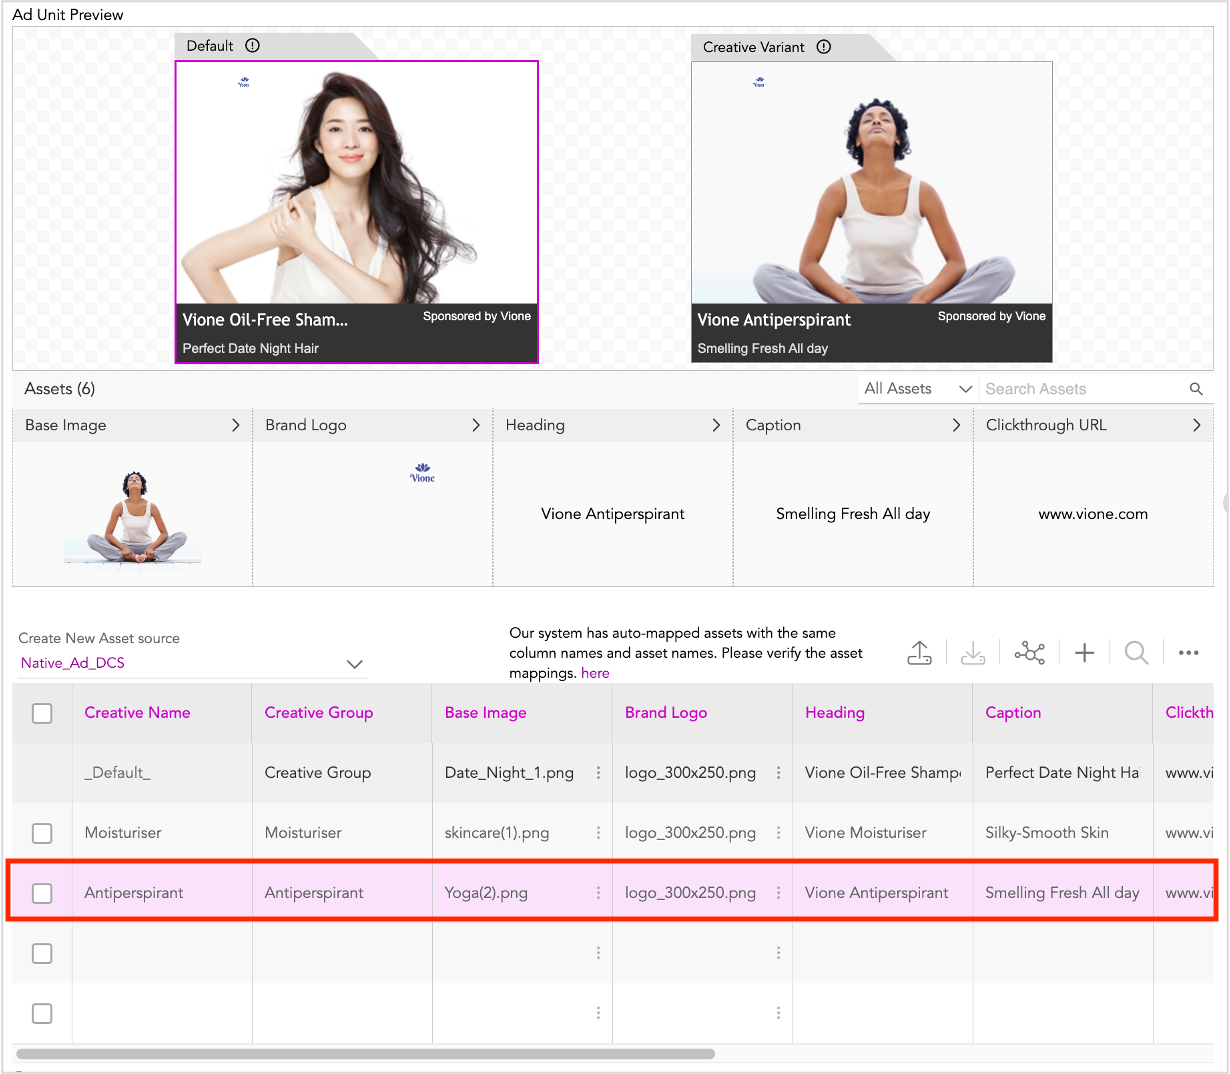
Your creative variant is saved and will be added to the asset source as a unique row below the default row.
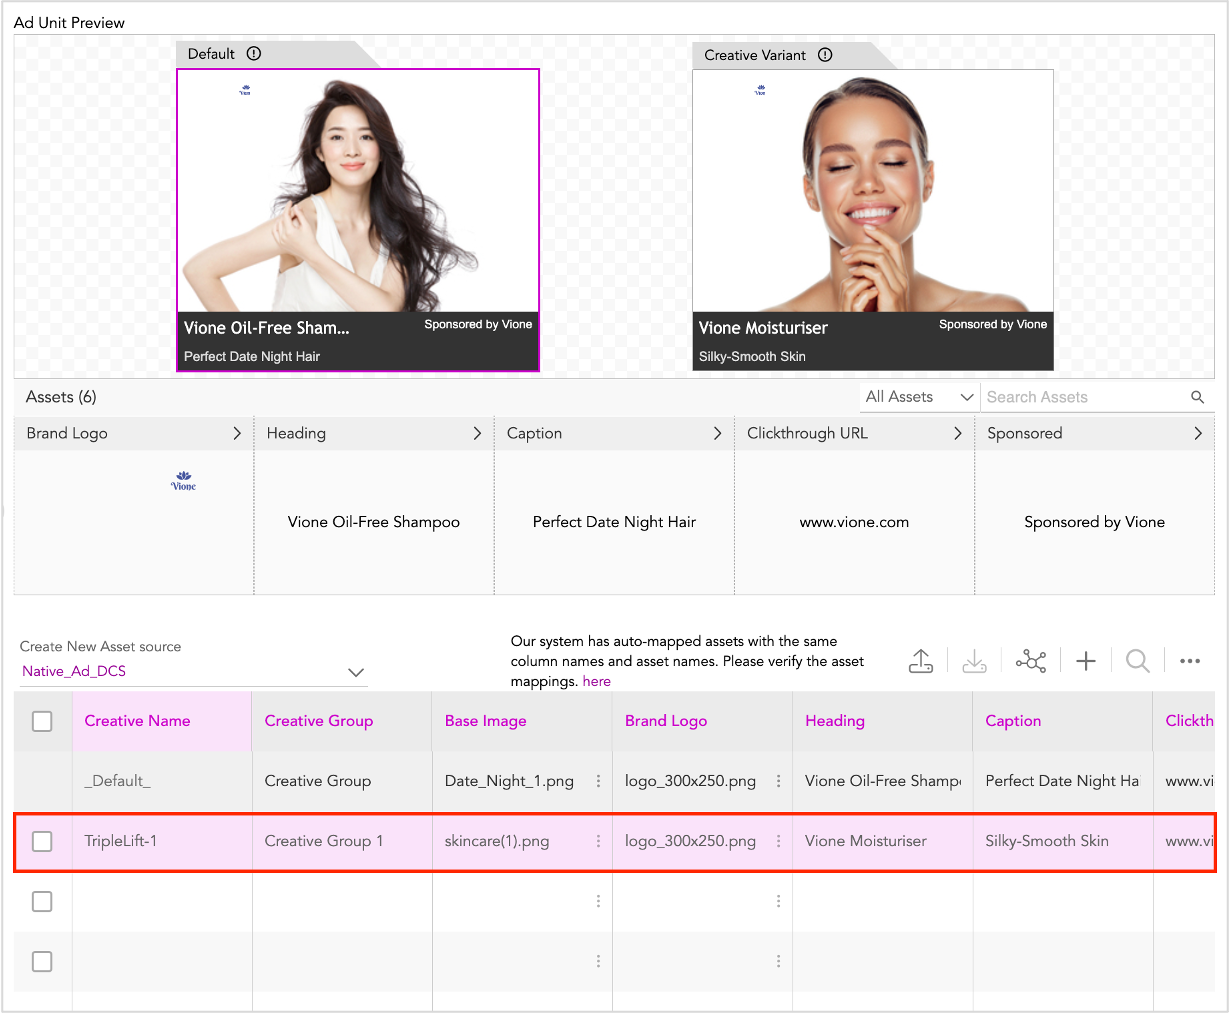
As you can see, the newly generated creative variation is assigned a creative name based on the selected Ad Unit type (Triplelift-1).
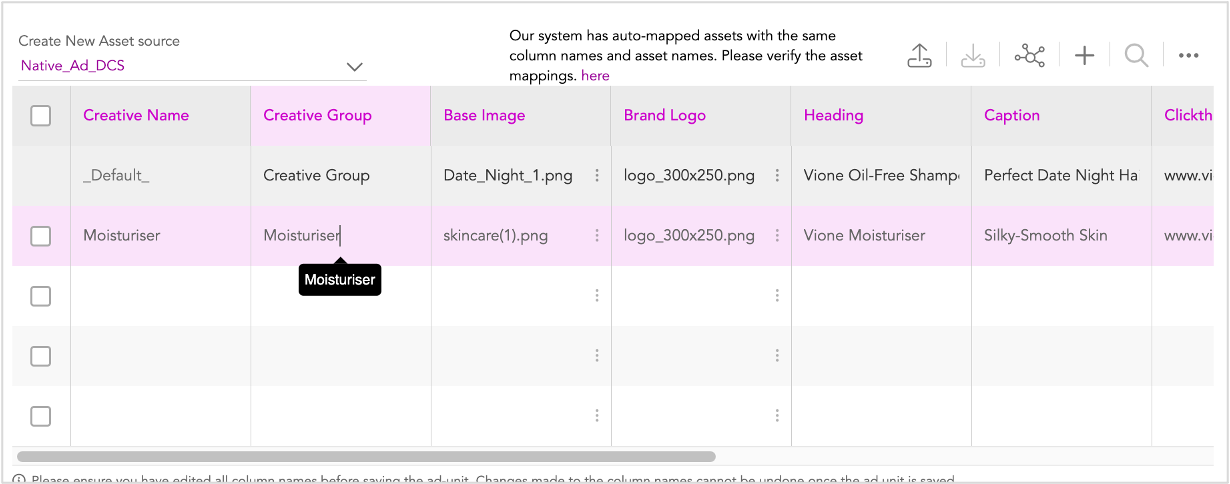
5- You can enter a suitable name here. You can also modify the Creative Group.
6- Next, scroll to the right and enter the Reporting Key. Ensure that the Reporting Key value is provided in the designated column. In this Ad, we'll keep the Reporting Key same as the Creative name for all creative variations.

Now, we can move to the next row and generate another creative variation. Repeat steps 1-6 detailed above to generate creative variations as required.
Using the Interactive Asset Source
We can also generate creative variations directly using the Interactive Asset Source.
1- Scroll down to the interactive Asset Source.
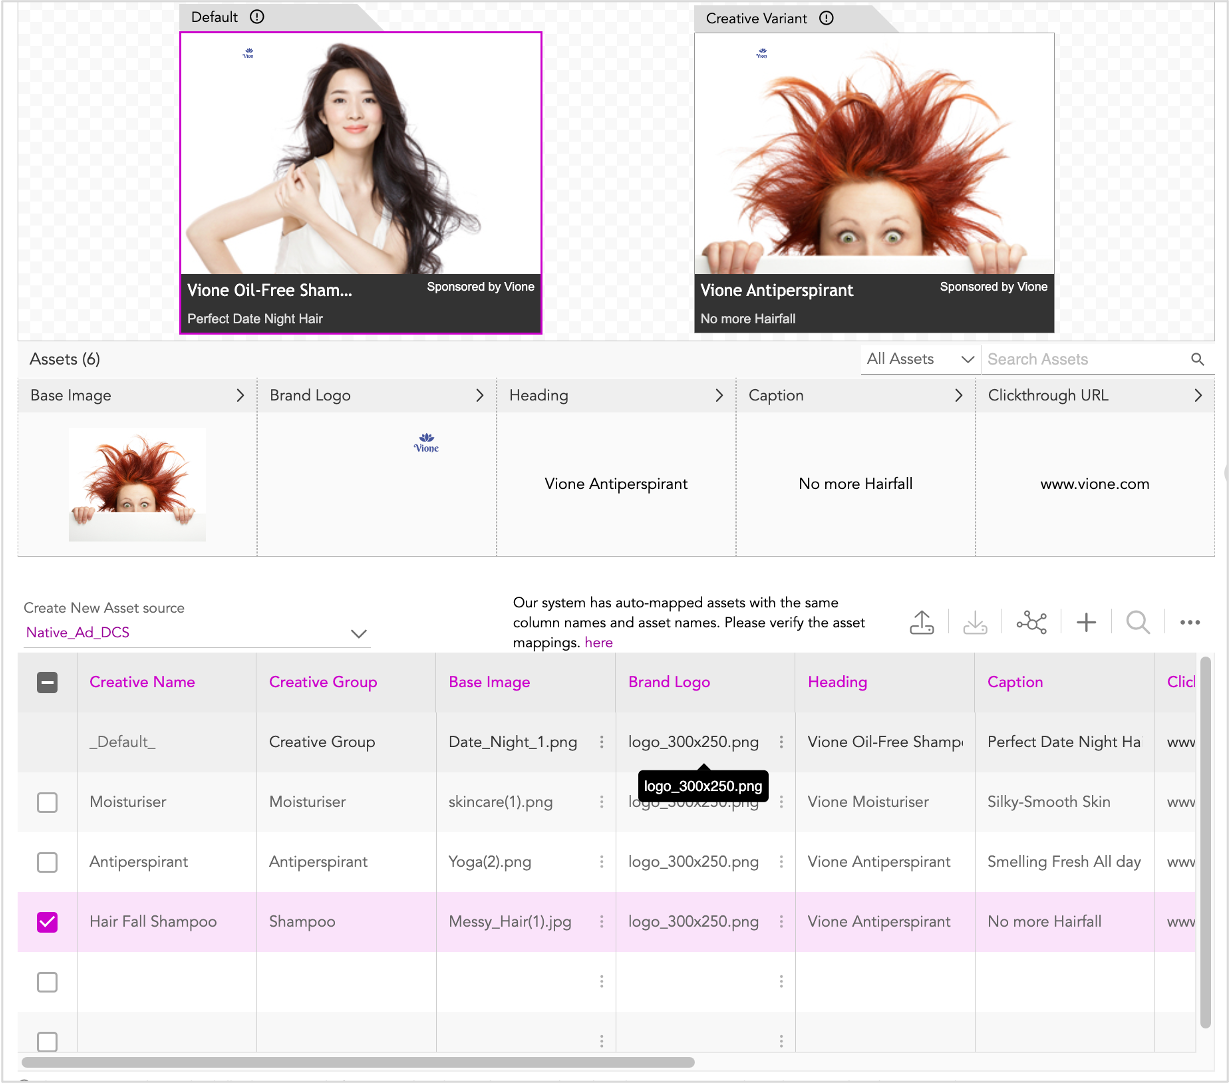
Here, we'll find the Default variation in the first row followed by any other previously generated creative variations.
Each creative variation is a unique row in the Asset Source.
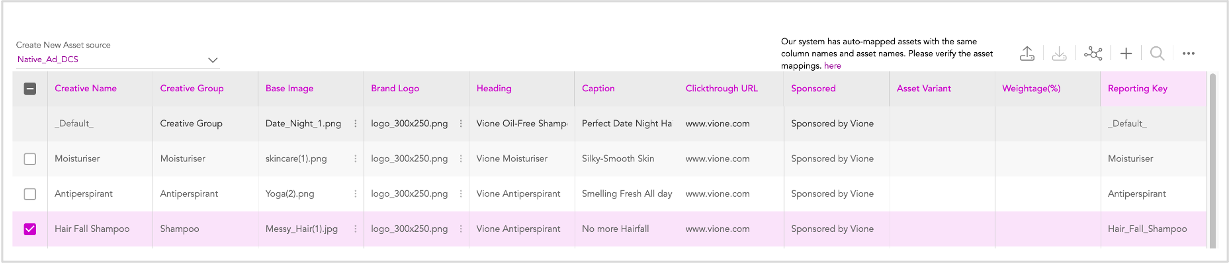
2- Click the next blank row in the Asset Source.
3- Enter a suitable Creative Name and Creative Group.
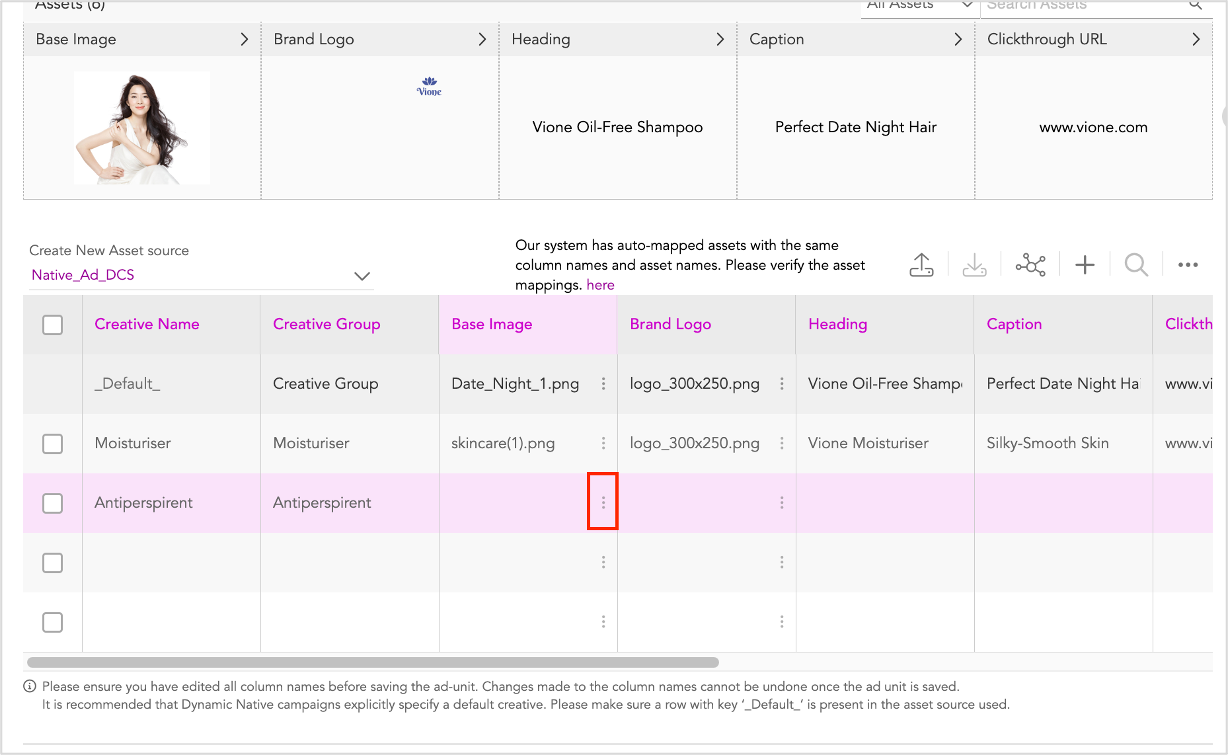
4- Next, click the three dots in the Base Image column.
You will see the following options:
- Insert from Jivox CMS - Use this option to add Images fro your computer
- Restore Default - Since you haven't added the base image for this variation yet, this option is disabled. Once the variation is saved and we make any changes later, we can use this option to restore the Asset to the Default version.
5- Follow steps 2-7 in the Using the Interactive Asset Source section in the previous chapter.
As you can see, the new creative variation is added as an unique row to the Asset Source immediately after the previous row. Ensure that you enter the Reporting Key.
Cloning a Row in the Interactive Asset Source
Sometimes, the creative variations have common assets and only some of the assets need to be updated for each variation. For example, in this case, Brand Logo, Clickthrough URL and Sponsored remain the same for each variation.
To avoid entering the same data repeatedly, we can use the Clone option instead.
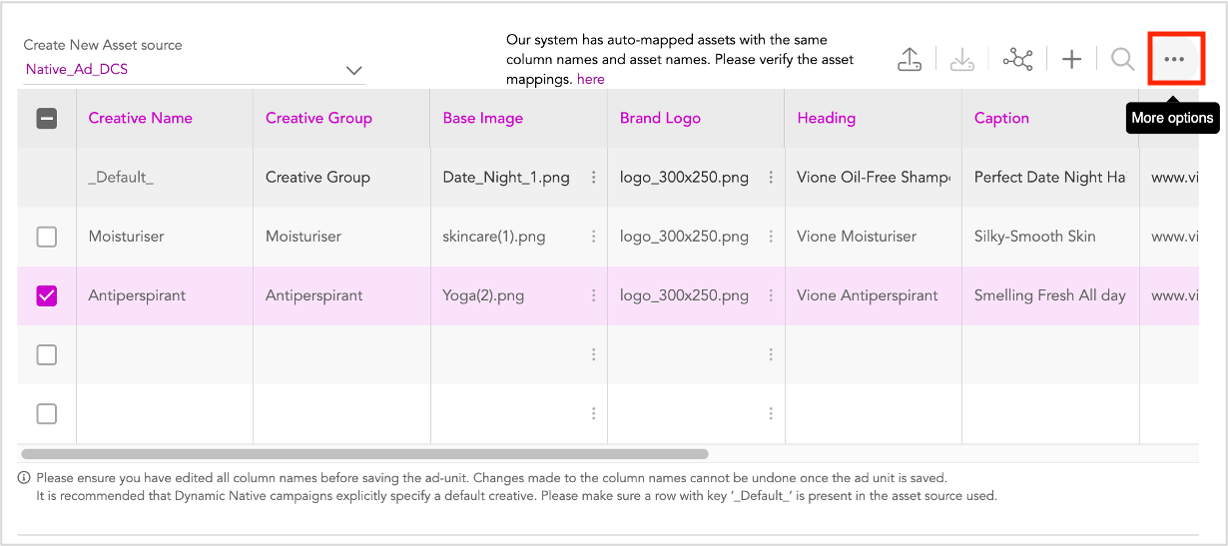
1- Select the previous creative variation and click the More options icon (three dots) on the top right of the Asset Source (highlighted below).
2- Select Clone a Row from the drop-down.
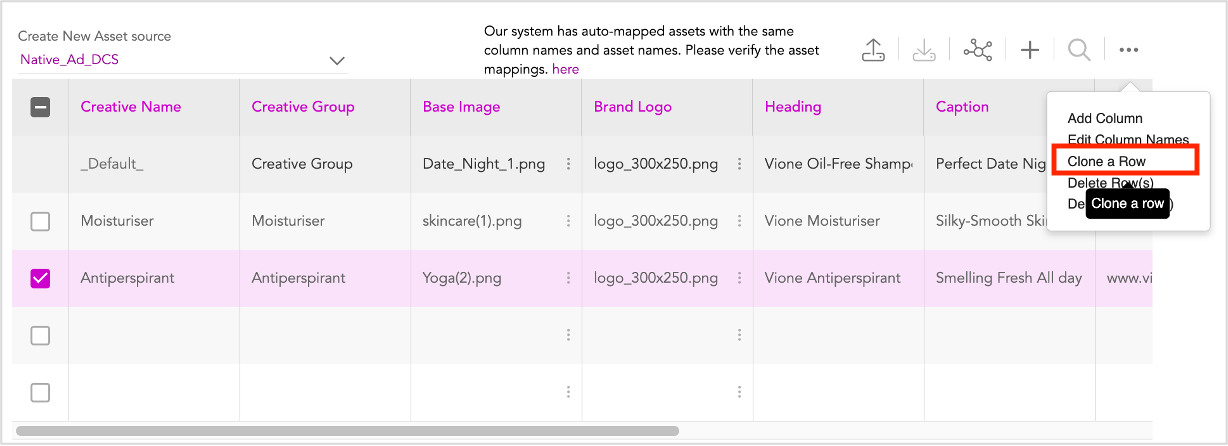
The values of the selected row are copied to the next row and the Creative Name is prefixed by Copy_. You can modify the assets as required by following the steps detailed in the previous sections.
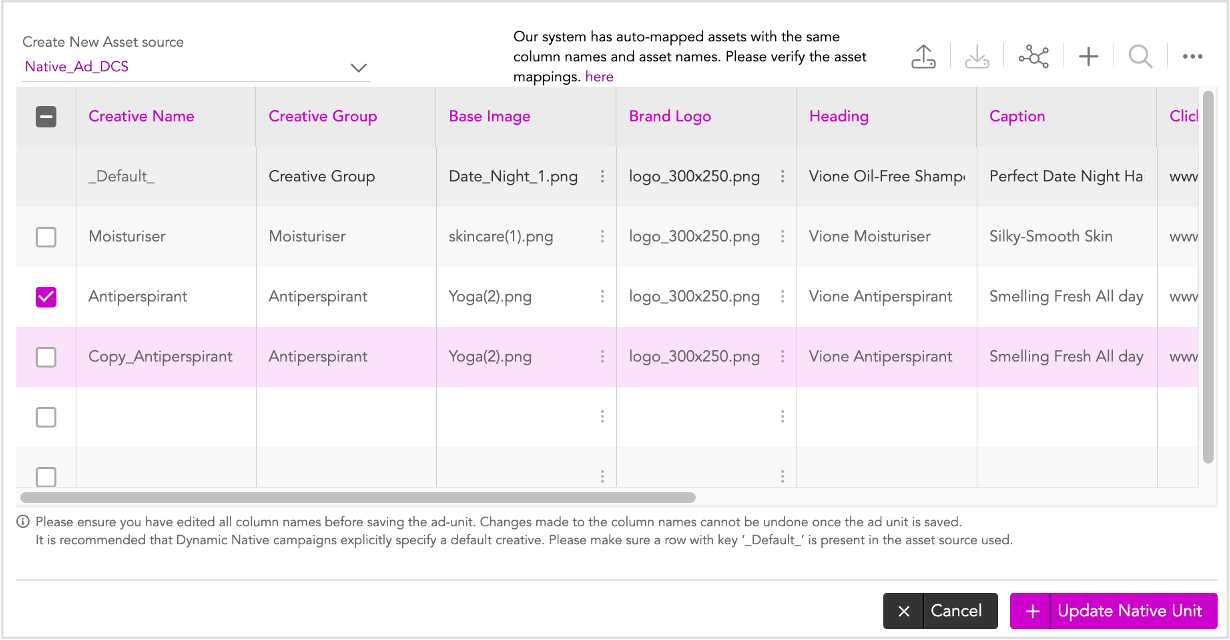
Don't forget to update the Reporting Key. Ensure that this is same as the Creative Name.
Repeat the process as required to generate more creative variations. You can select the checkbox to the left of each variation to preview it in the Creative Variant window.
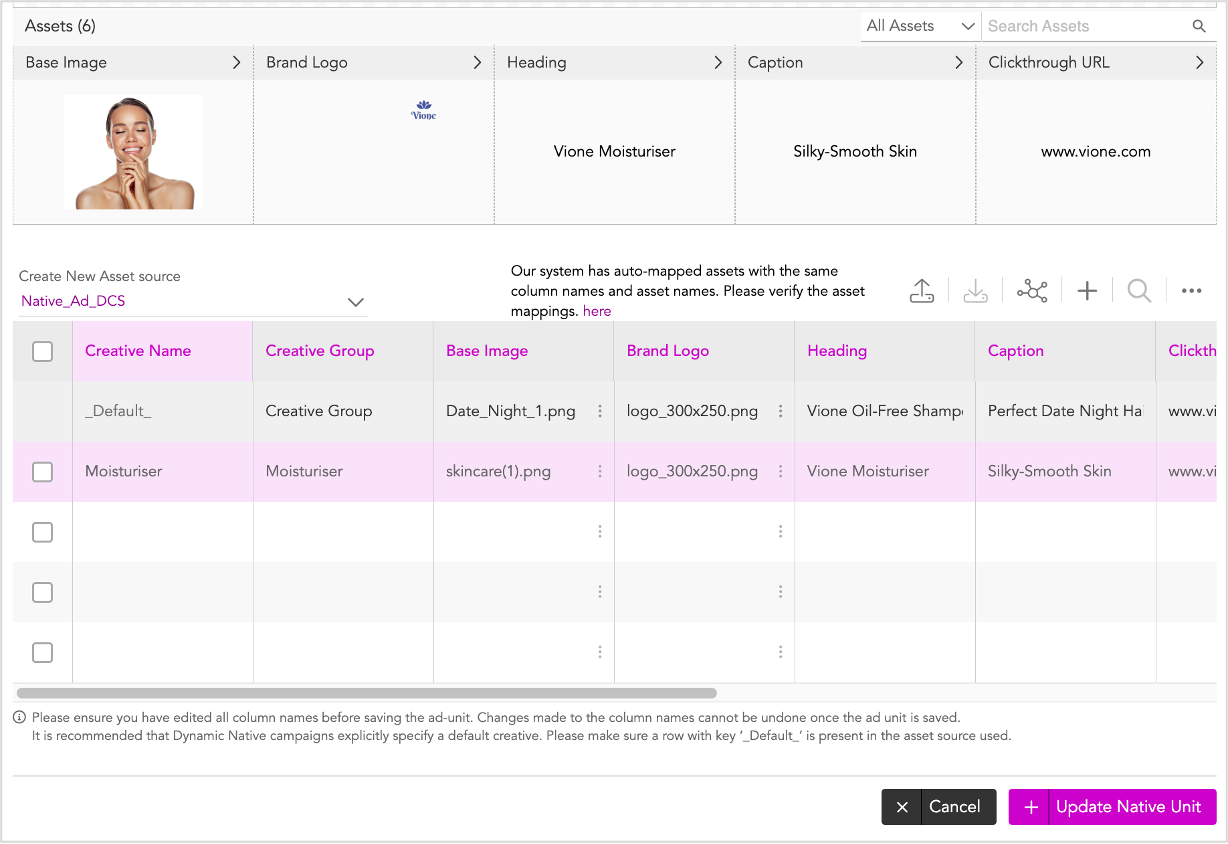
Once you are done, you can go ahead and save the Ad.
1- Click Update Native Ad.
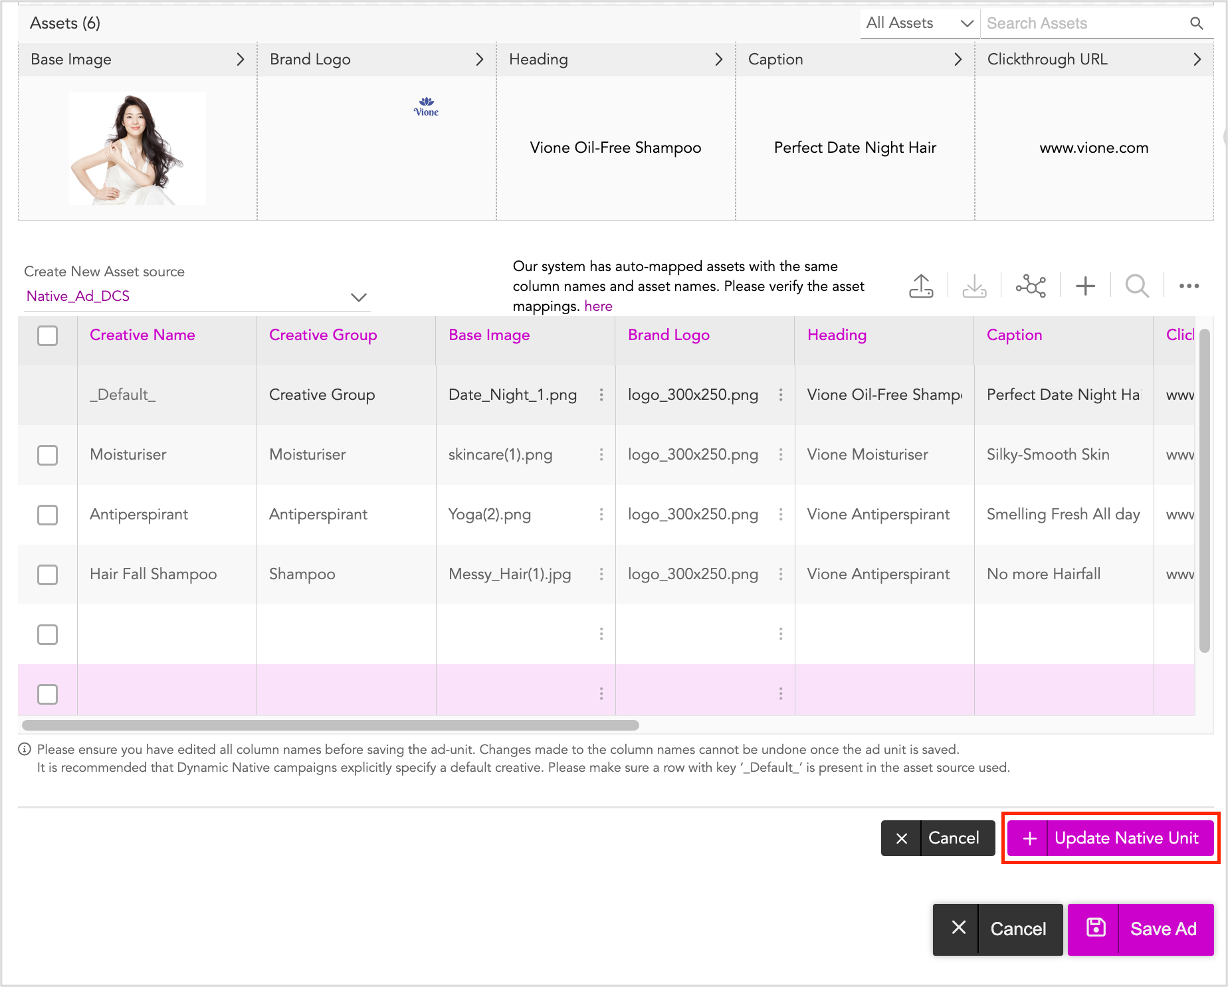
2- In the subsequent window, click Save Ad.

The following pop-up is displayed.
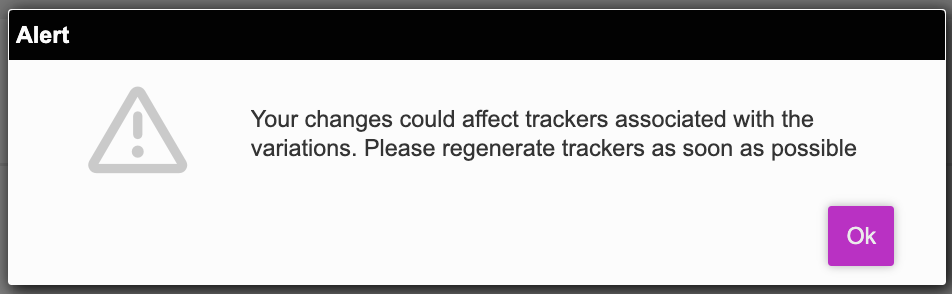
3- Click OK.
The Ad is now saved and we will be redirected to the Ads and Campaigns dashboard.
We can also generate creative variations by downloading the Asset Source template, updating it, and then uploading it to the platform. This can be done using the Download Asset source button. See Generating Creative Variations by Uploading an Asset Source for more details.
Next Steps
This completes the first step of our set-up. Next you must create a campaign and define the various triggers based on which the creative variations that you just created in the ad can be served to different audience groups.
Refer to the Creating a New Campaign section for details.