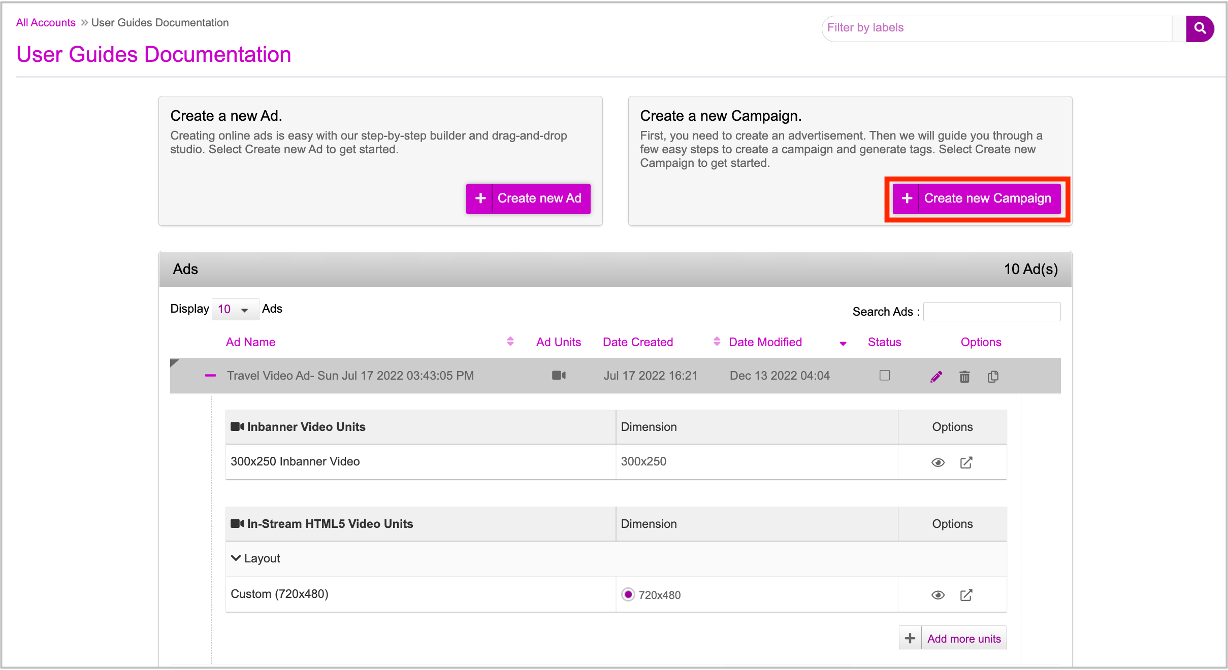
Now that we have created the video Ad using DCS, let's go ahead and set up the campaign.
On the Ads and Campaigns dashboard, click the Create new Campaign button.
The Create Campaign window is displayed. The recently created Ad is selected by default in the Creative Master field. You can search and select any other Creative Master if you wish.

Depending on your Campaign Strategy, map the Data Signal and Property values in the Update Assets section.
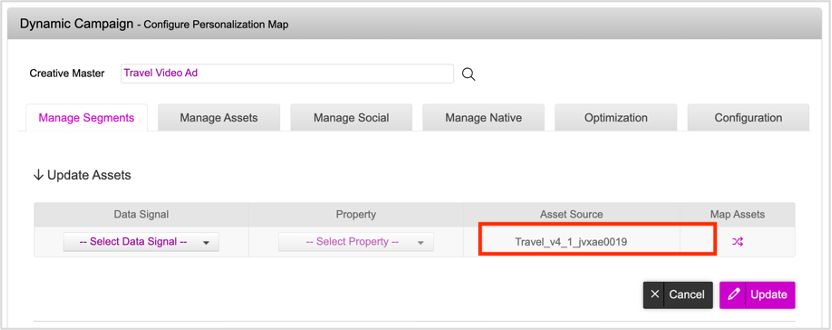
The system generated Asset Source associated with the Ad will be automatically selected depending on the selected Ad. The system generated Asset Source will have the same name as specified while creating the Asset Source in DCS suffixed by an alphanumeric serial number as evident in the image above.
Click the Update button to save the Data Signal values.
For more details, check out the following sections:
If you are working with a Decision Map, see here.
If you are working with a Decision Graph, see here.
Once you've specified the Decision Map/Decision Graph values, scroll down to the campaign information section.

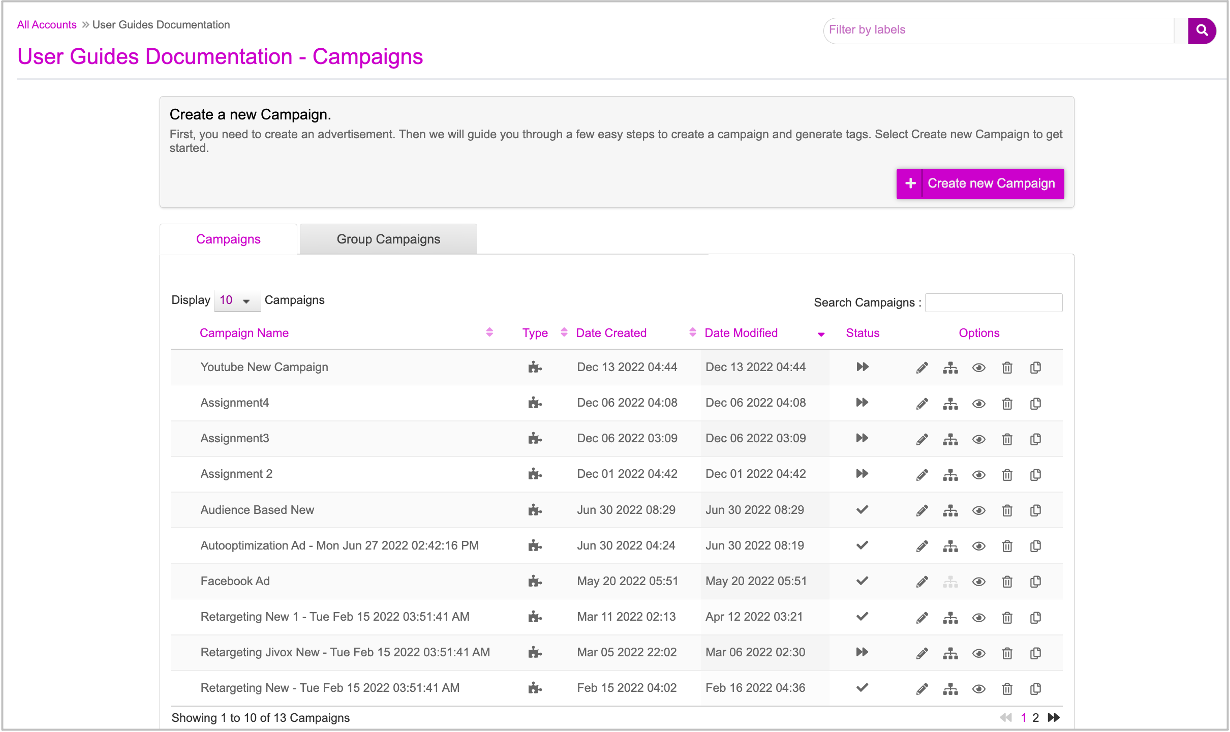
As you can see, the system assigns the campaign name based on the selected Ad suffixed with the date and time by default. You can update the name as required. Add a campaign description and a click-through URL.
Next, go ahead and click Save Campaign. Your campaign will be saved and you'll be redirected to the Campaigns dashboard.
Next, we will edit the Campaign and complete the Youtube setup.
You cannot proceed to Youtube Setup without saving the Ad. So, ensure that you save the Ad before proceeding.