In this section we will cover the detailed steps to generate retargeting pixels.
Retargeting pixels enable advertisers to collect first party data from their own websites so they can create personalized, dynamic creatives based on a user's direct action. For example, if the user last viewed a specific shirt, the targeted ads can then feature similar shirts, in order to make the content more relevant.
Let's start creating the retargeting pixel.
1- On the Data Pixels page, enter a unique Pixel Name in the text box as highlighted below. If you try to save a pixel configuration with a duplicate name, an error message is displayed.
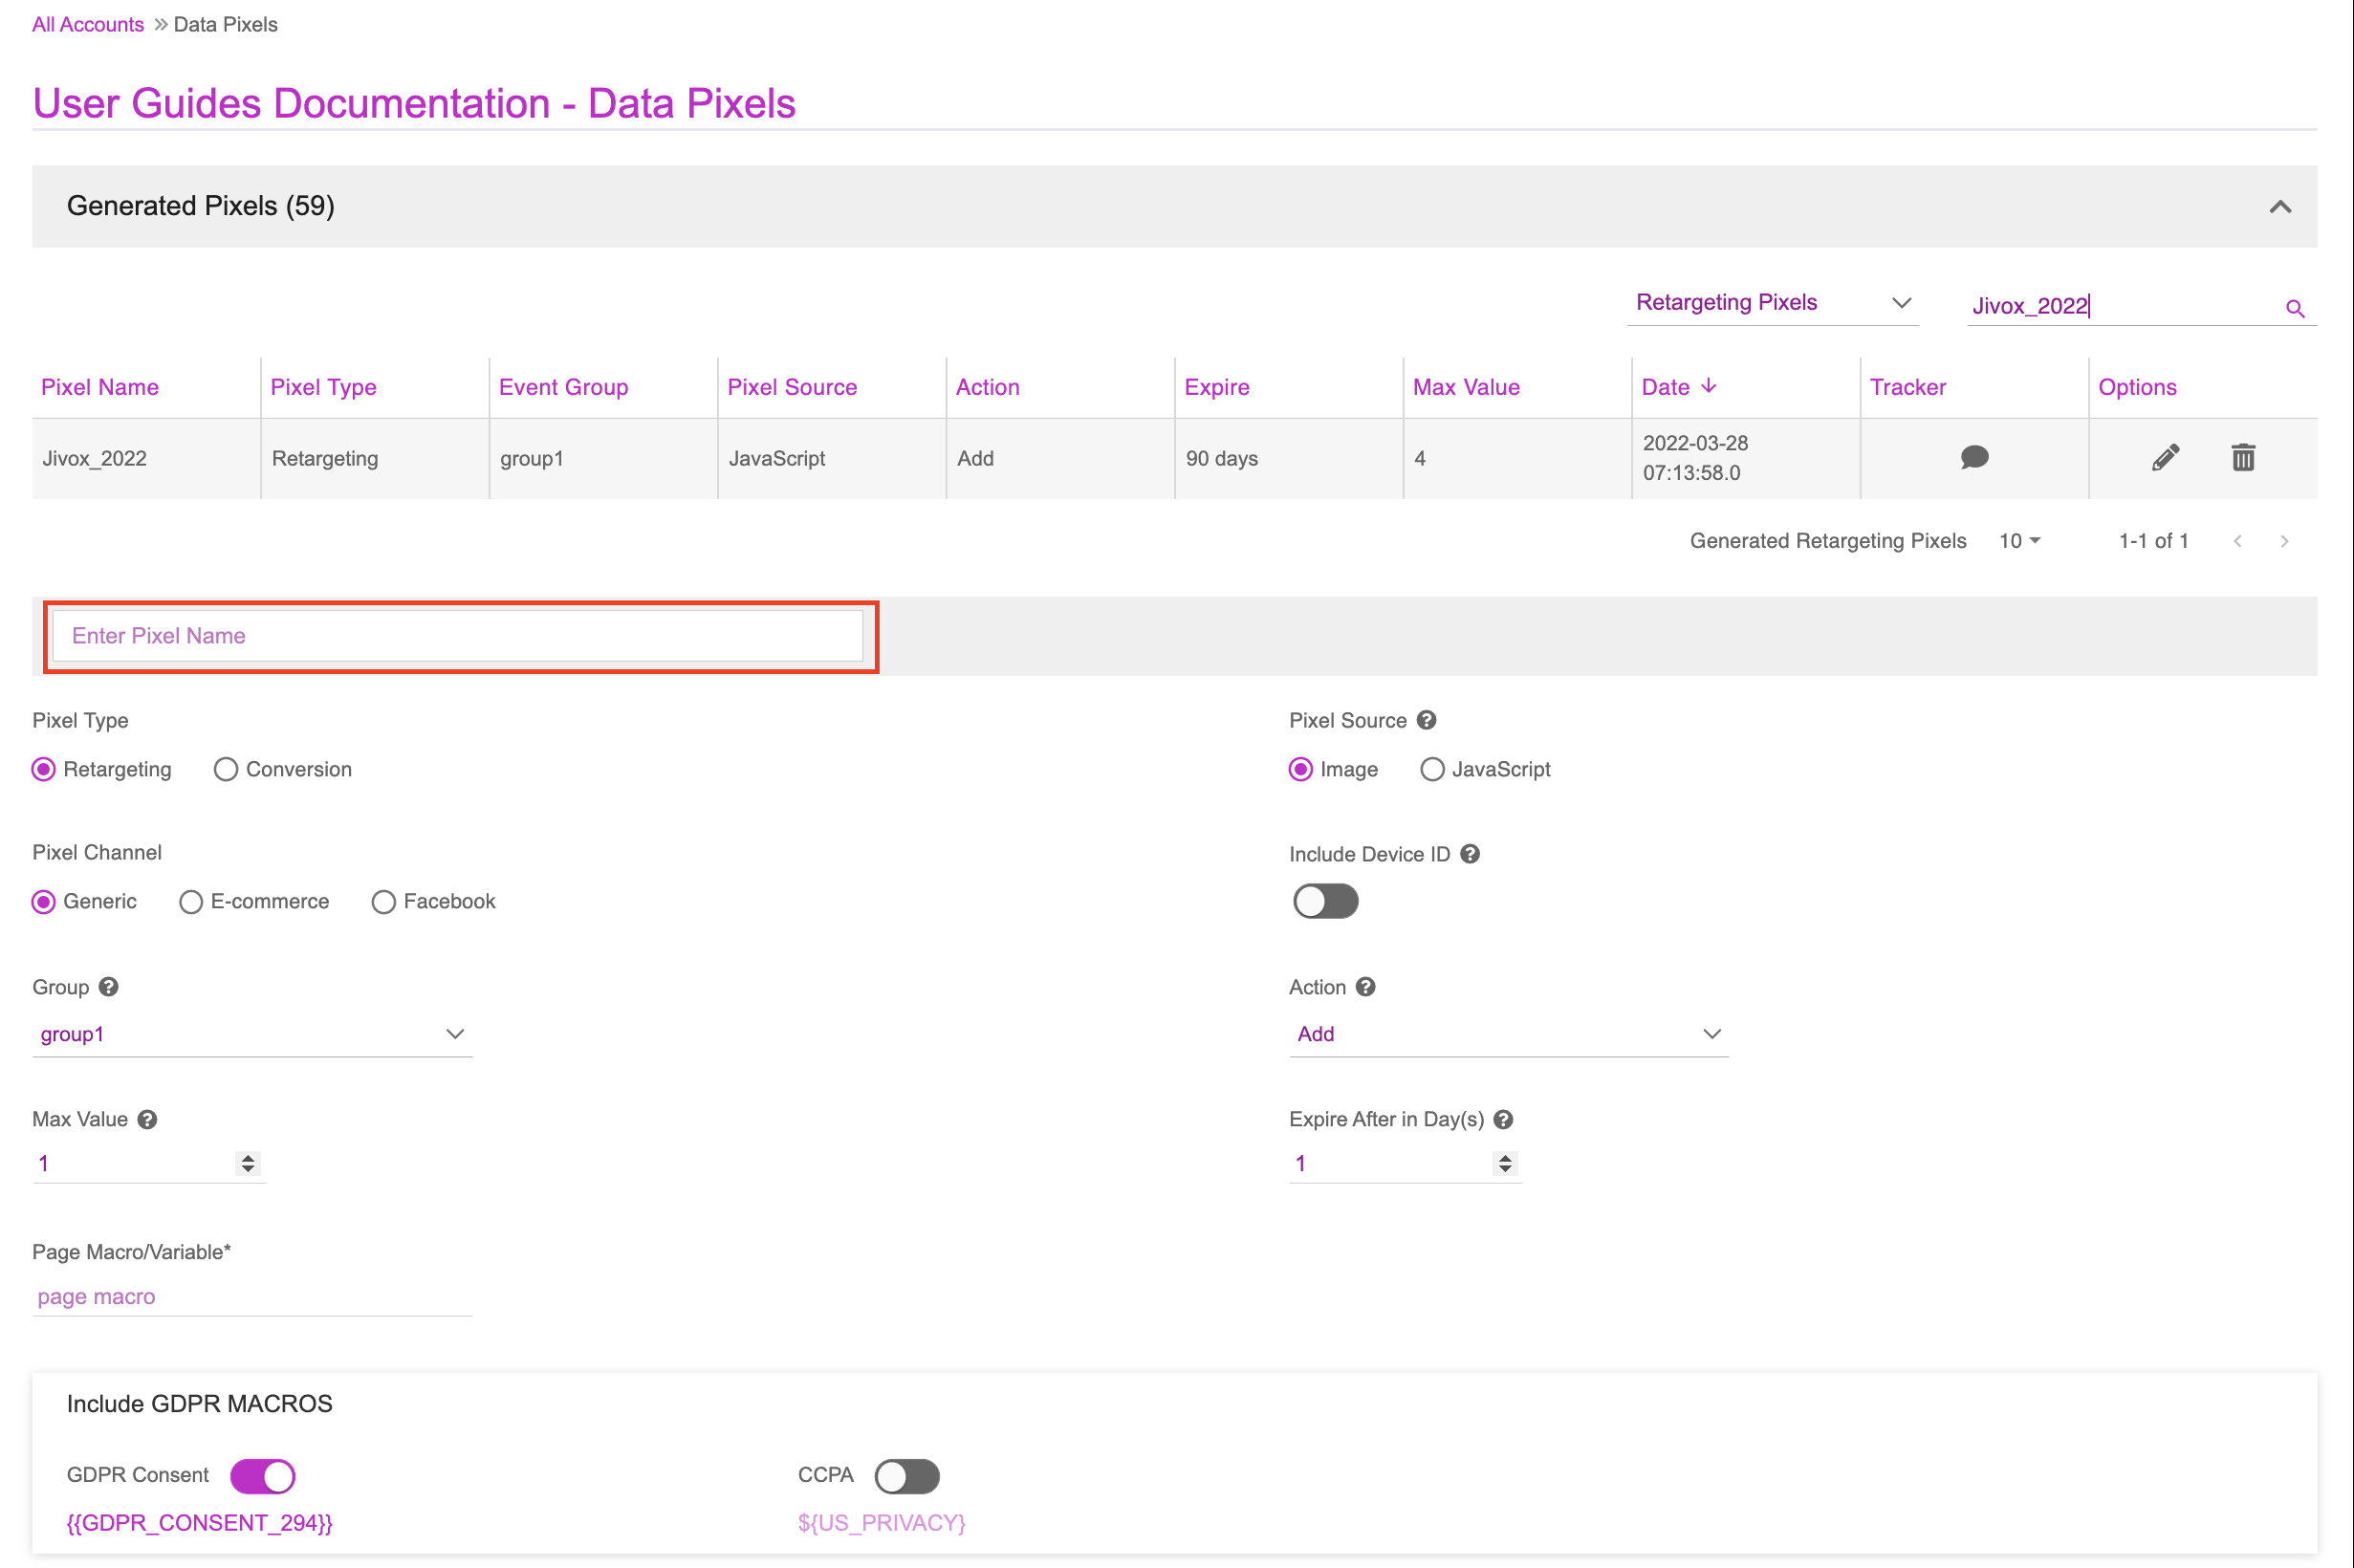
2- Select Retargeting as the Pixel Type.
3- Select the Pixel Channel based on the campaign strategy. The following pixel channels are supported:
- Generic: Use this option for campaigns other than e-commerce and Facebook domain.
- E-commerce: Use this option for the e-commerce advertising campaign. This type of pixel will list only select cookie groups specific to e-commerce events capture i.e. Add To Cart, Page/Content View and Select Product.
- Facebook: Use this option for the Facebook advertising campaign.
4- Provide the details as required based on the option you selected. Click the hyperlinks in the previous step to view individual sections for more information on the required details.
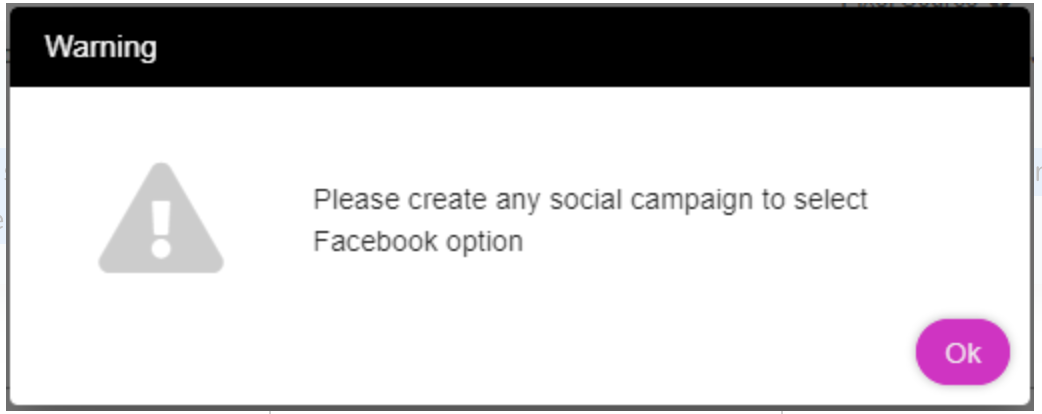
If you try to select Facebook as the Pixel Channel without setting up any Social campaign in your account, an error message will be displayed.
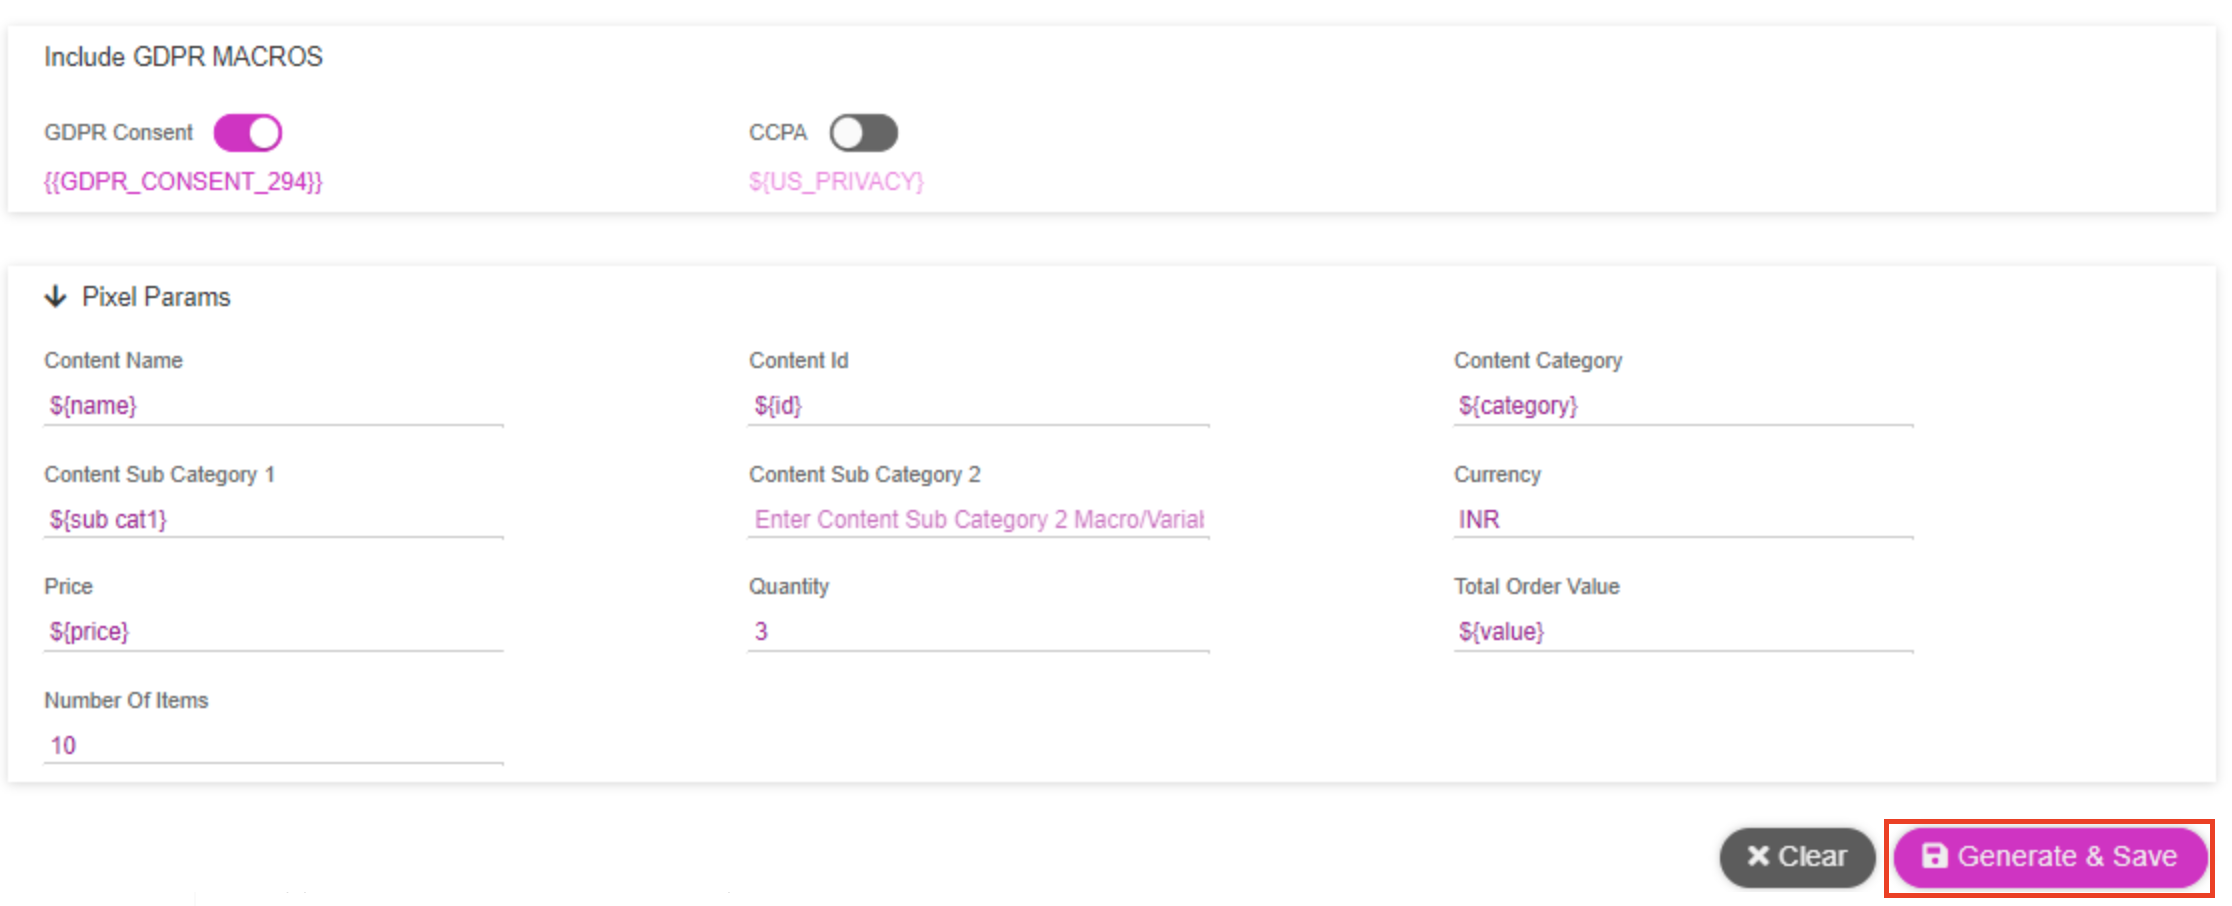
5- You also have an option to include privacy Macros in the data pixels. These are selected by default based on your location.
- GDPR Consent: If enabled, inserts ‘{{GDPR_CONSENT_294}}’ in the data pixel.
- CCPA: If enabled, inserts ‘${US_PRIVACY}’ in the data pixel.
6- If you are generating a Javascript pixel, you can use custom JavaScript to organize and collect data so it can be used in a dynamic creative.
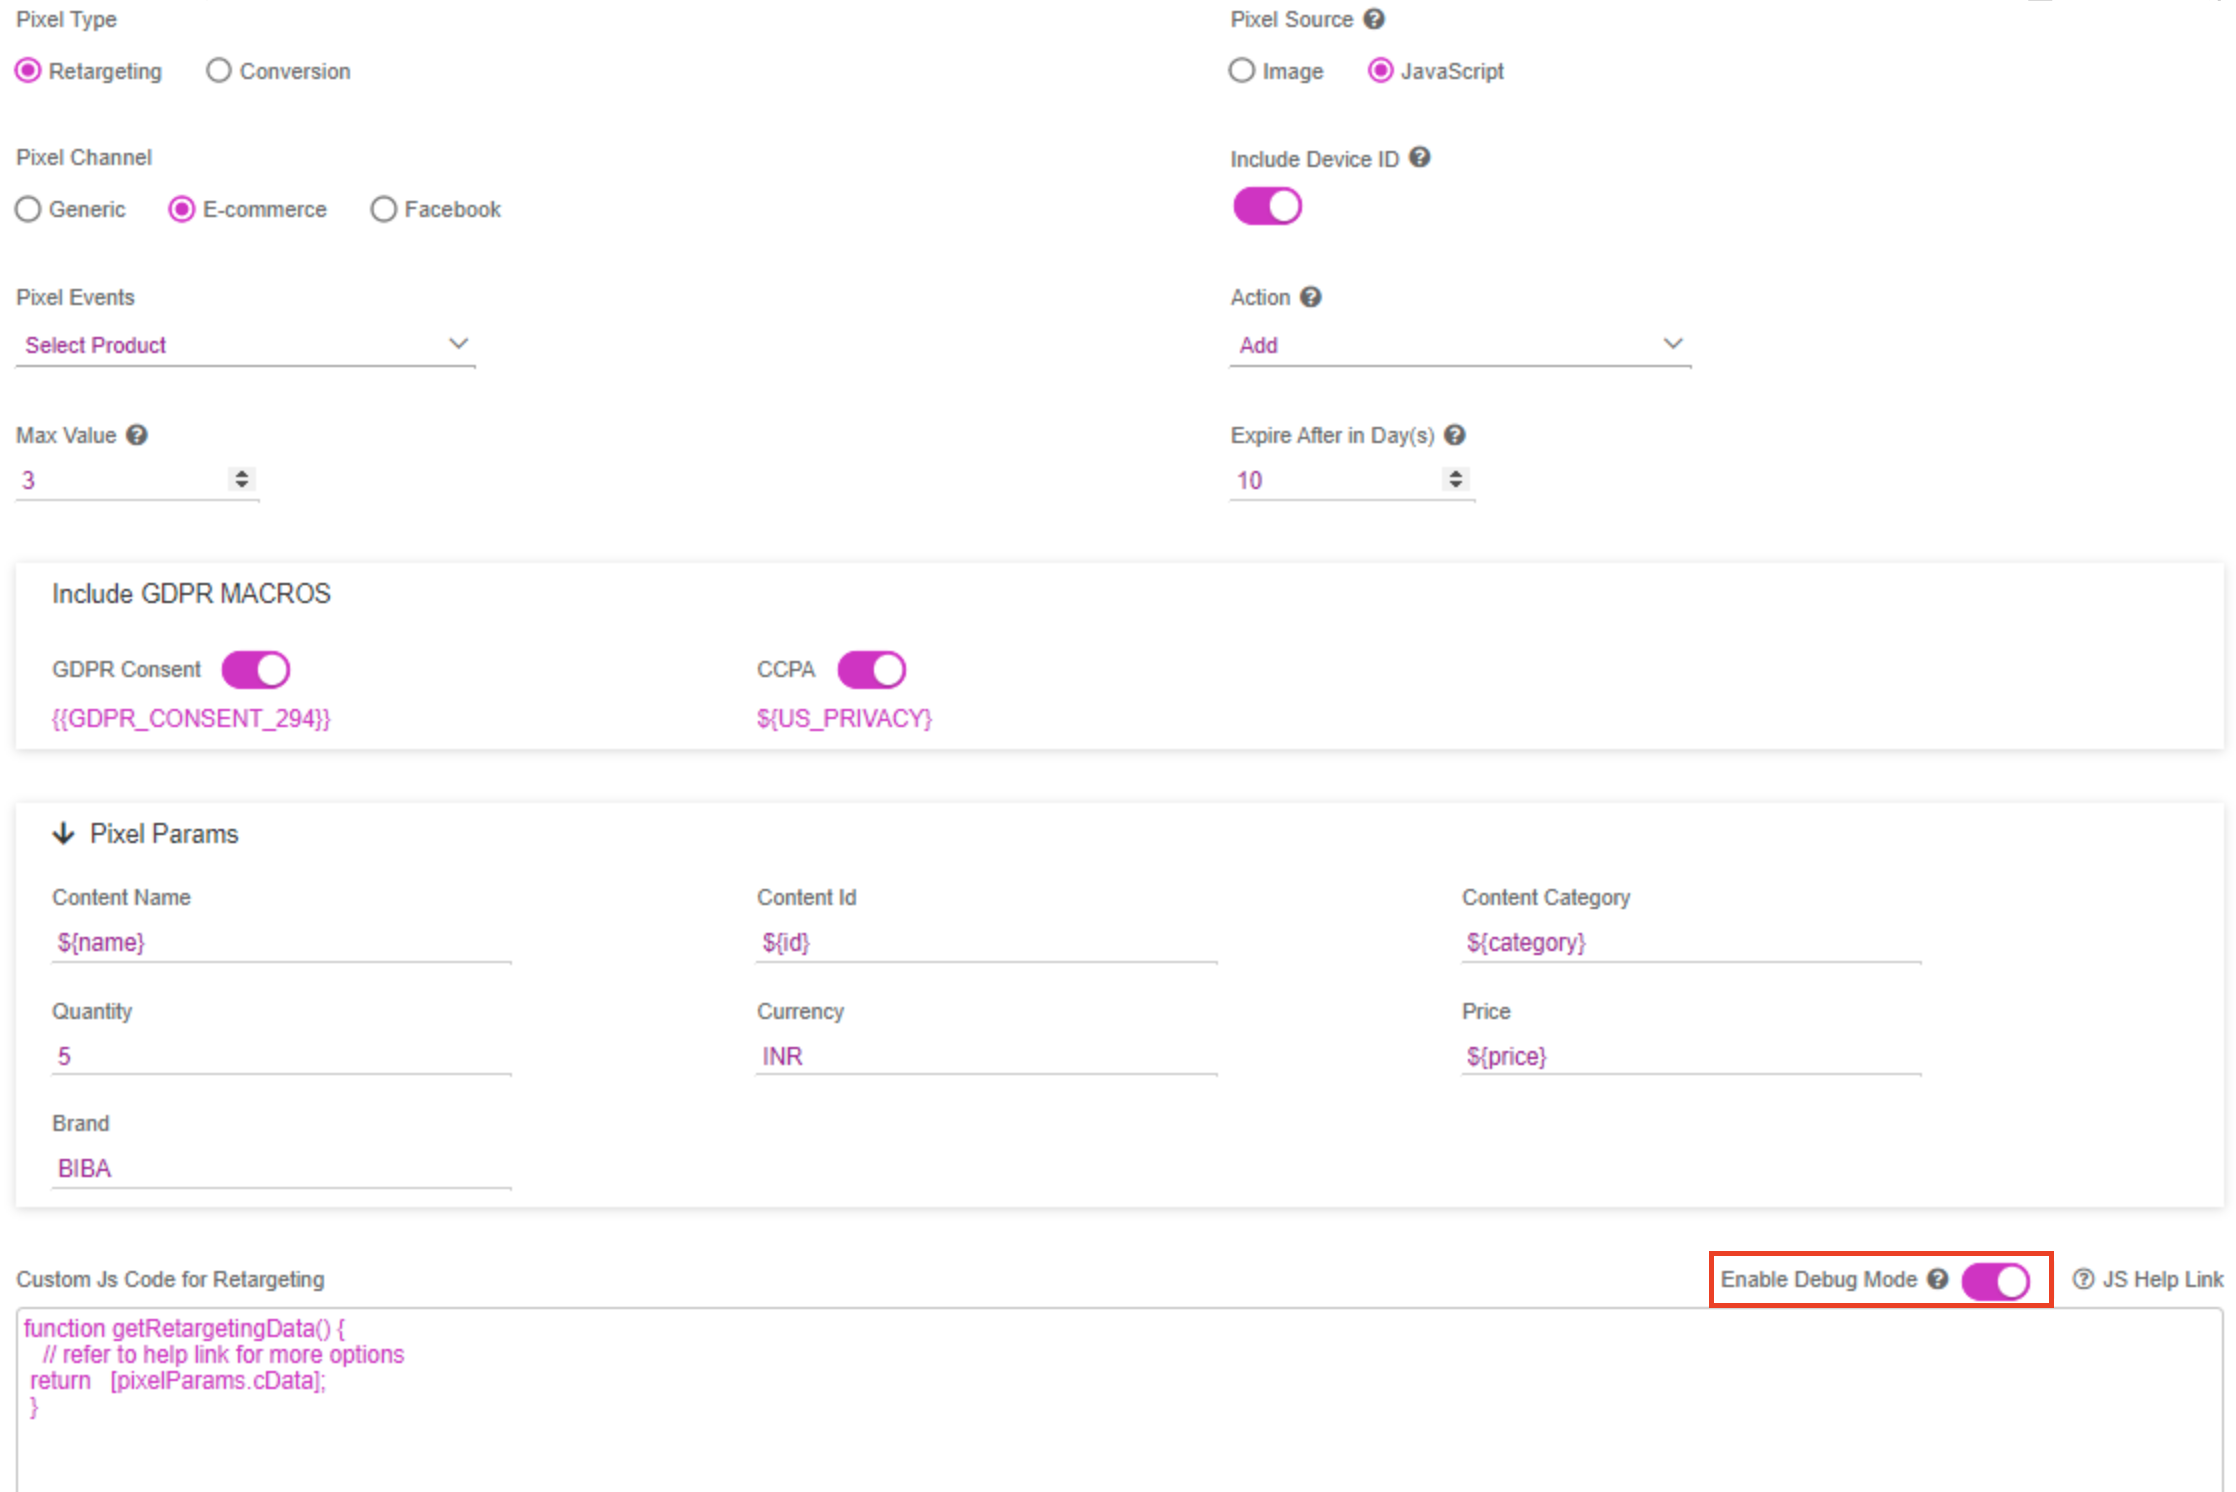
7- Click the Enable Debug Mode button if you want to allow console logging to help debug issues.
8- Click the ‘Generate and Save’ button when you have entered all the configuration options.
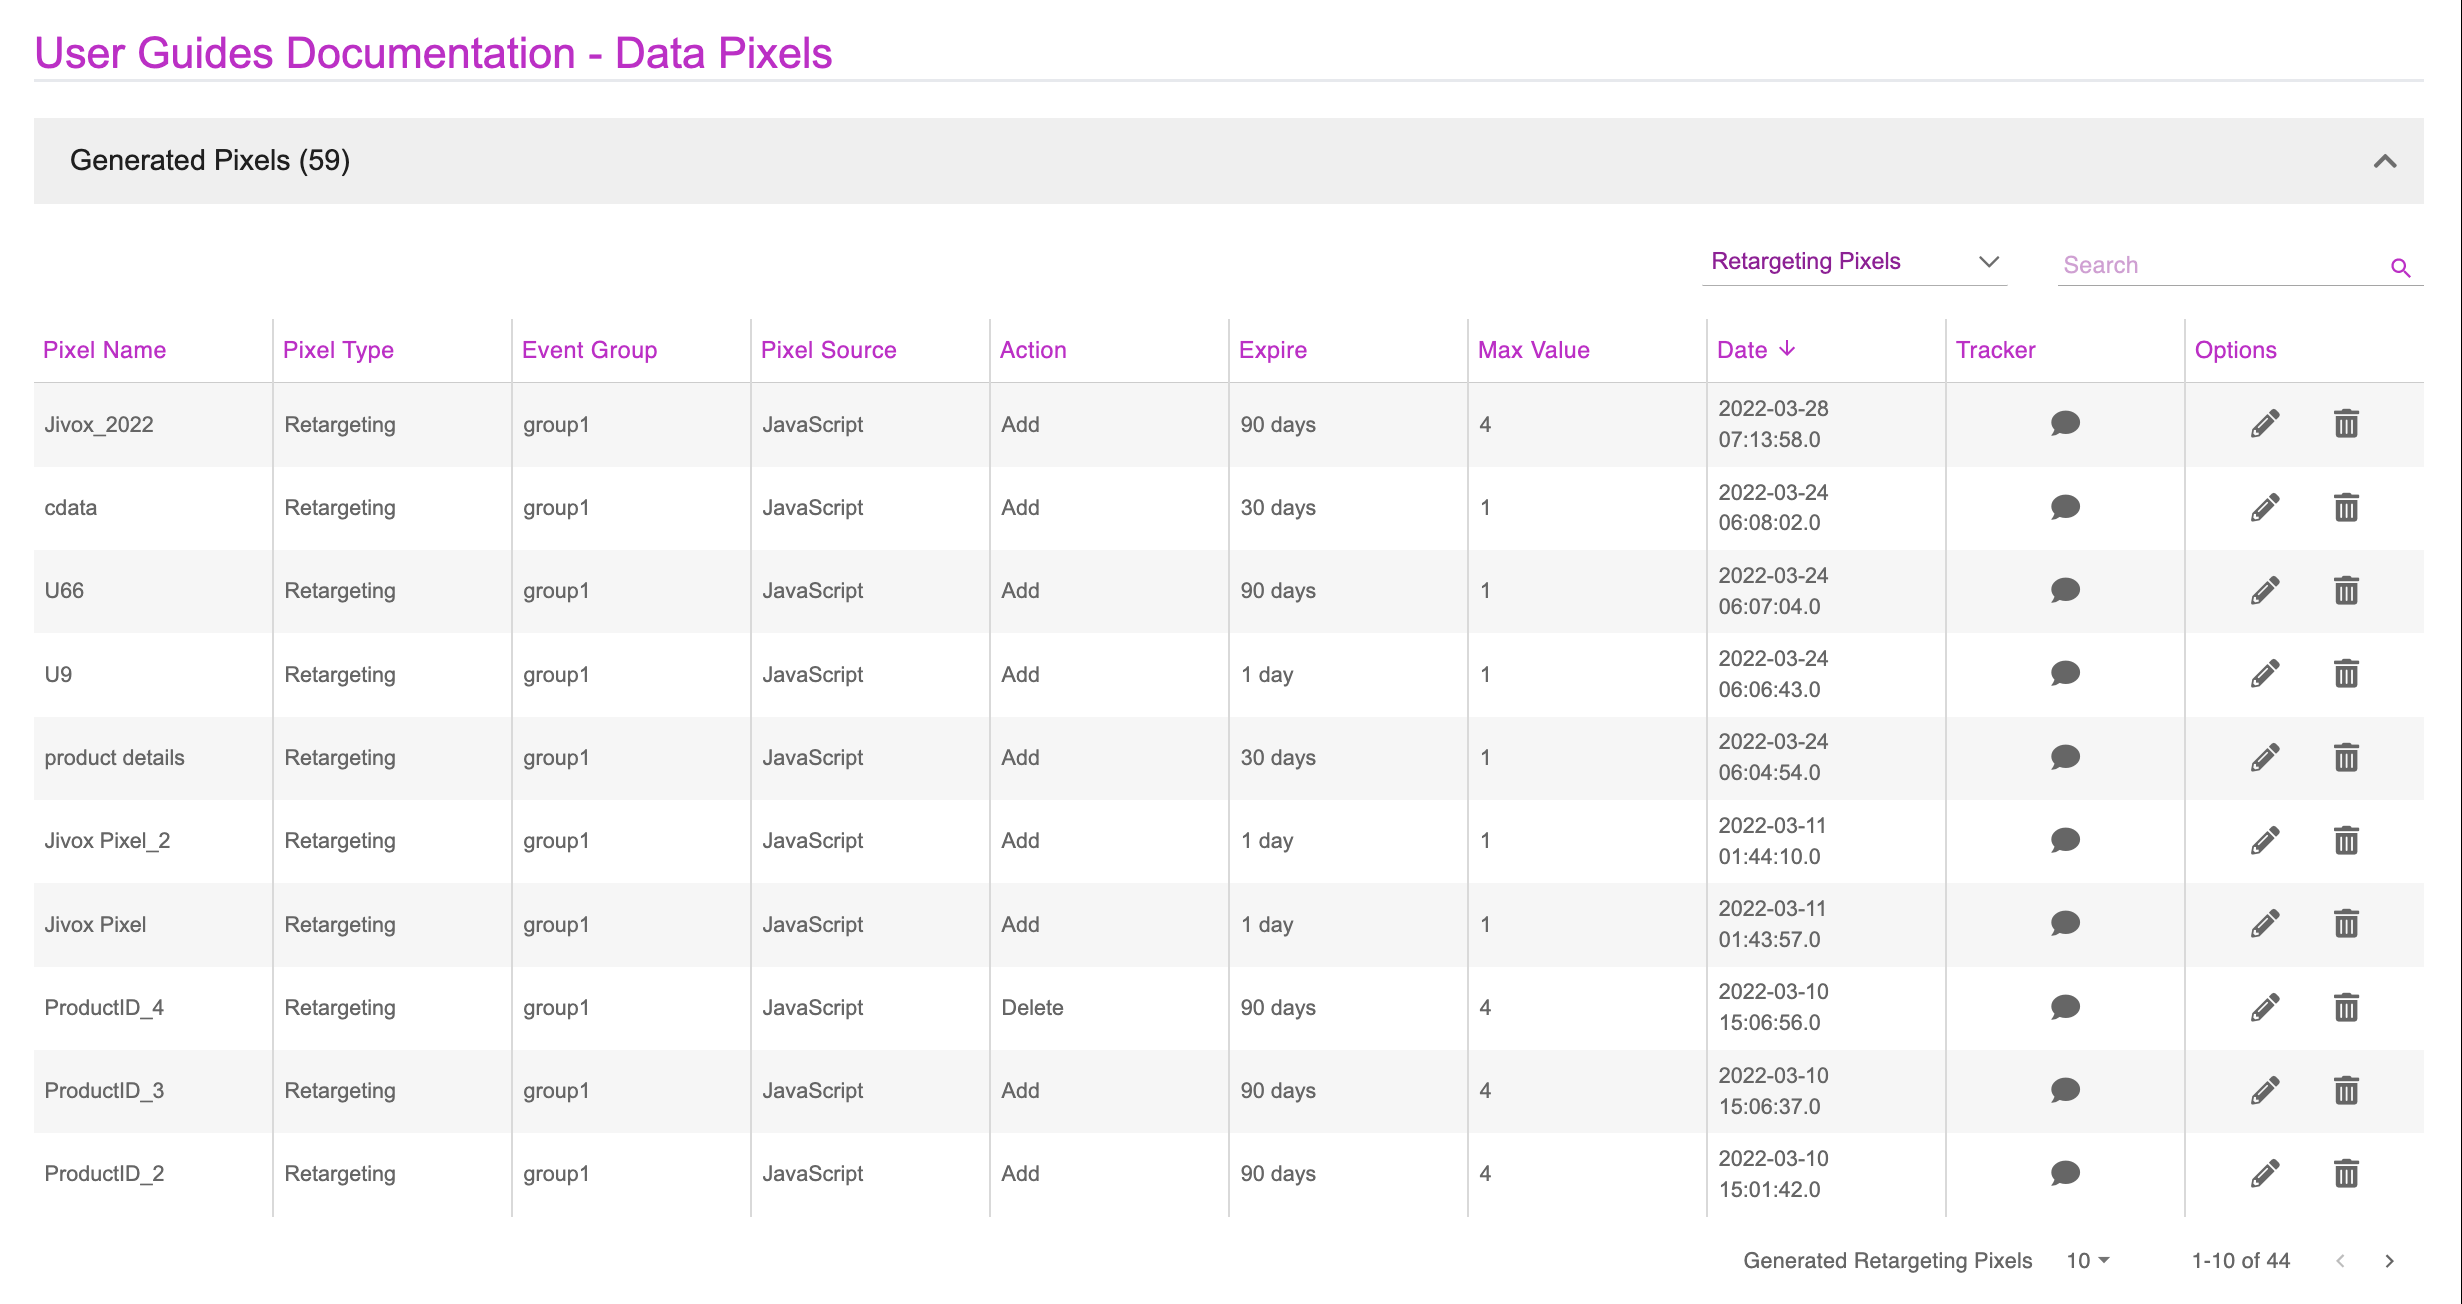
The generated pixel appears in the ‘Generated Pixels’ panel.
11- To reset the pixel configuration to the default settings, click onto the ‘Clear’ button.