Jivox IQ allows you to preview all the creative variations, create a preview for approval request and send it for approval.
The user who creates the Preview for Approval request.
In this section, we'll create a preview for approval request using the Jivox IQ platform. Let's begin!
1- After logging into the account, navigate to Campaigns > Campaigns using the Left Pane.
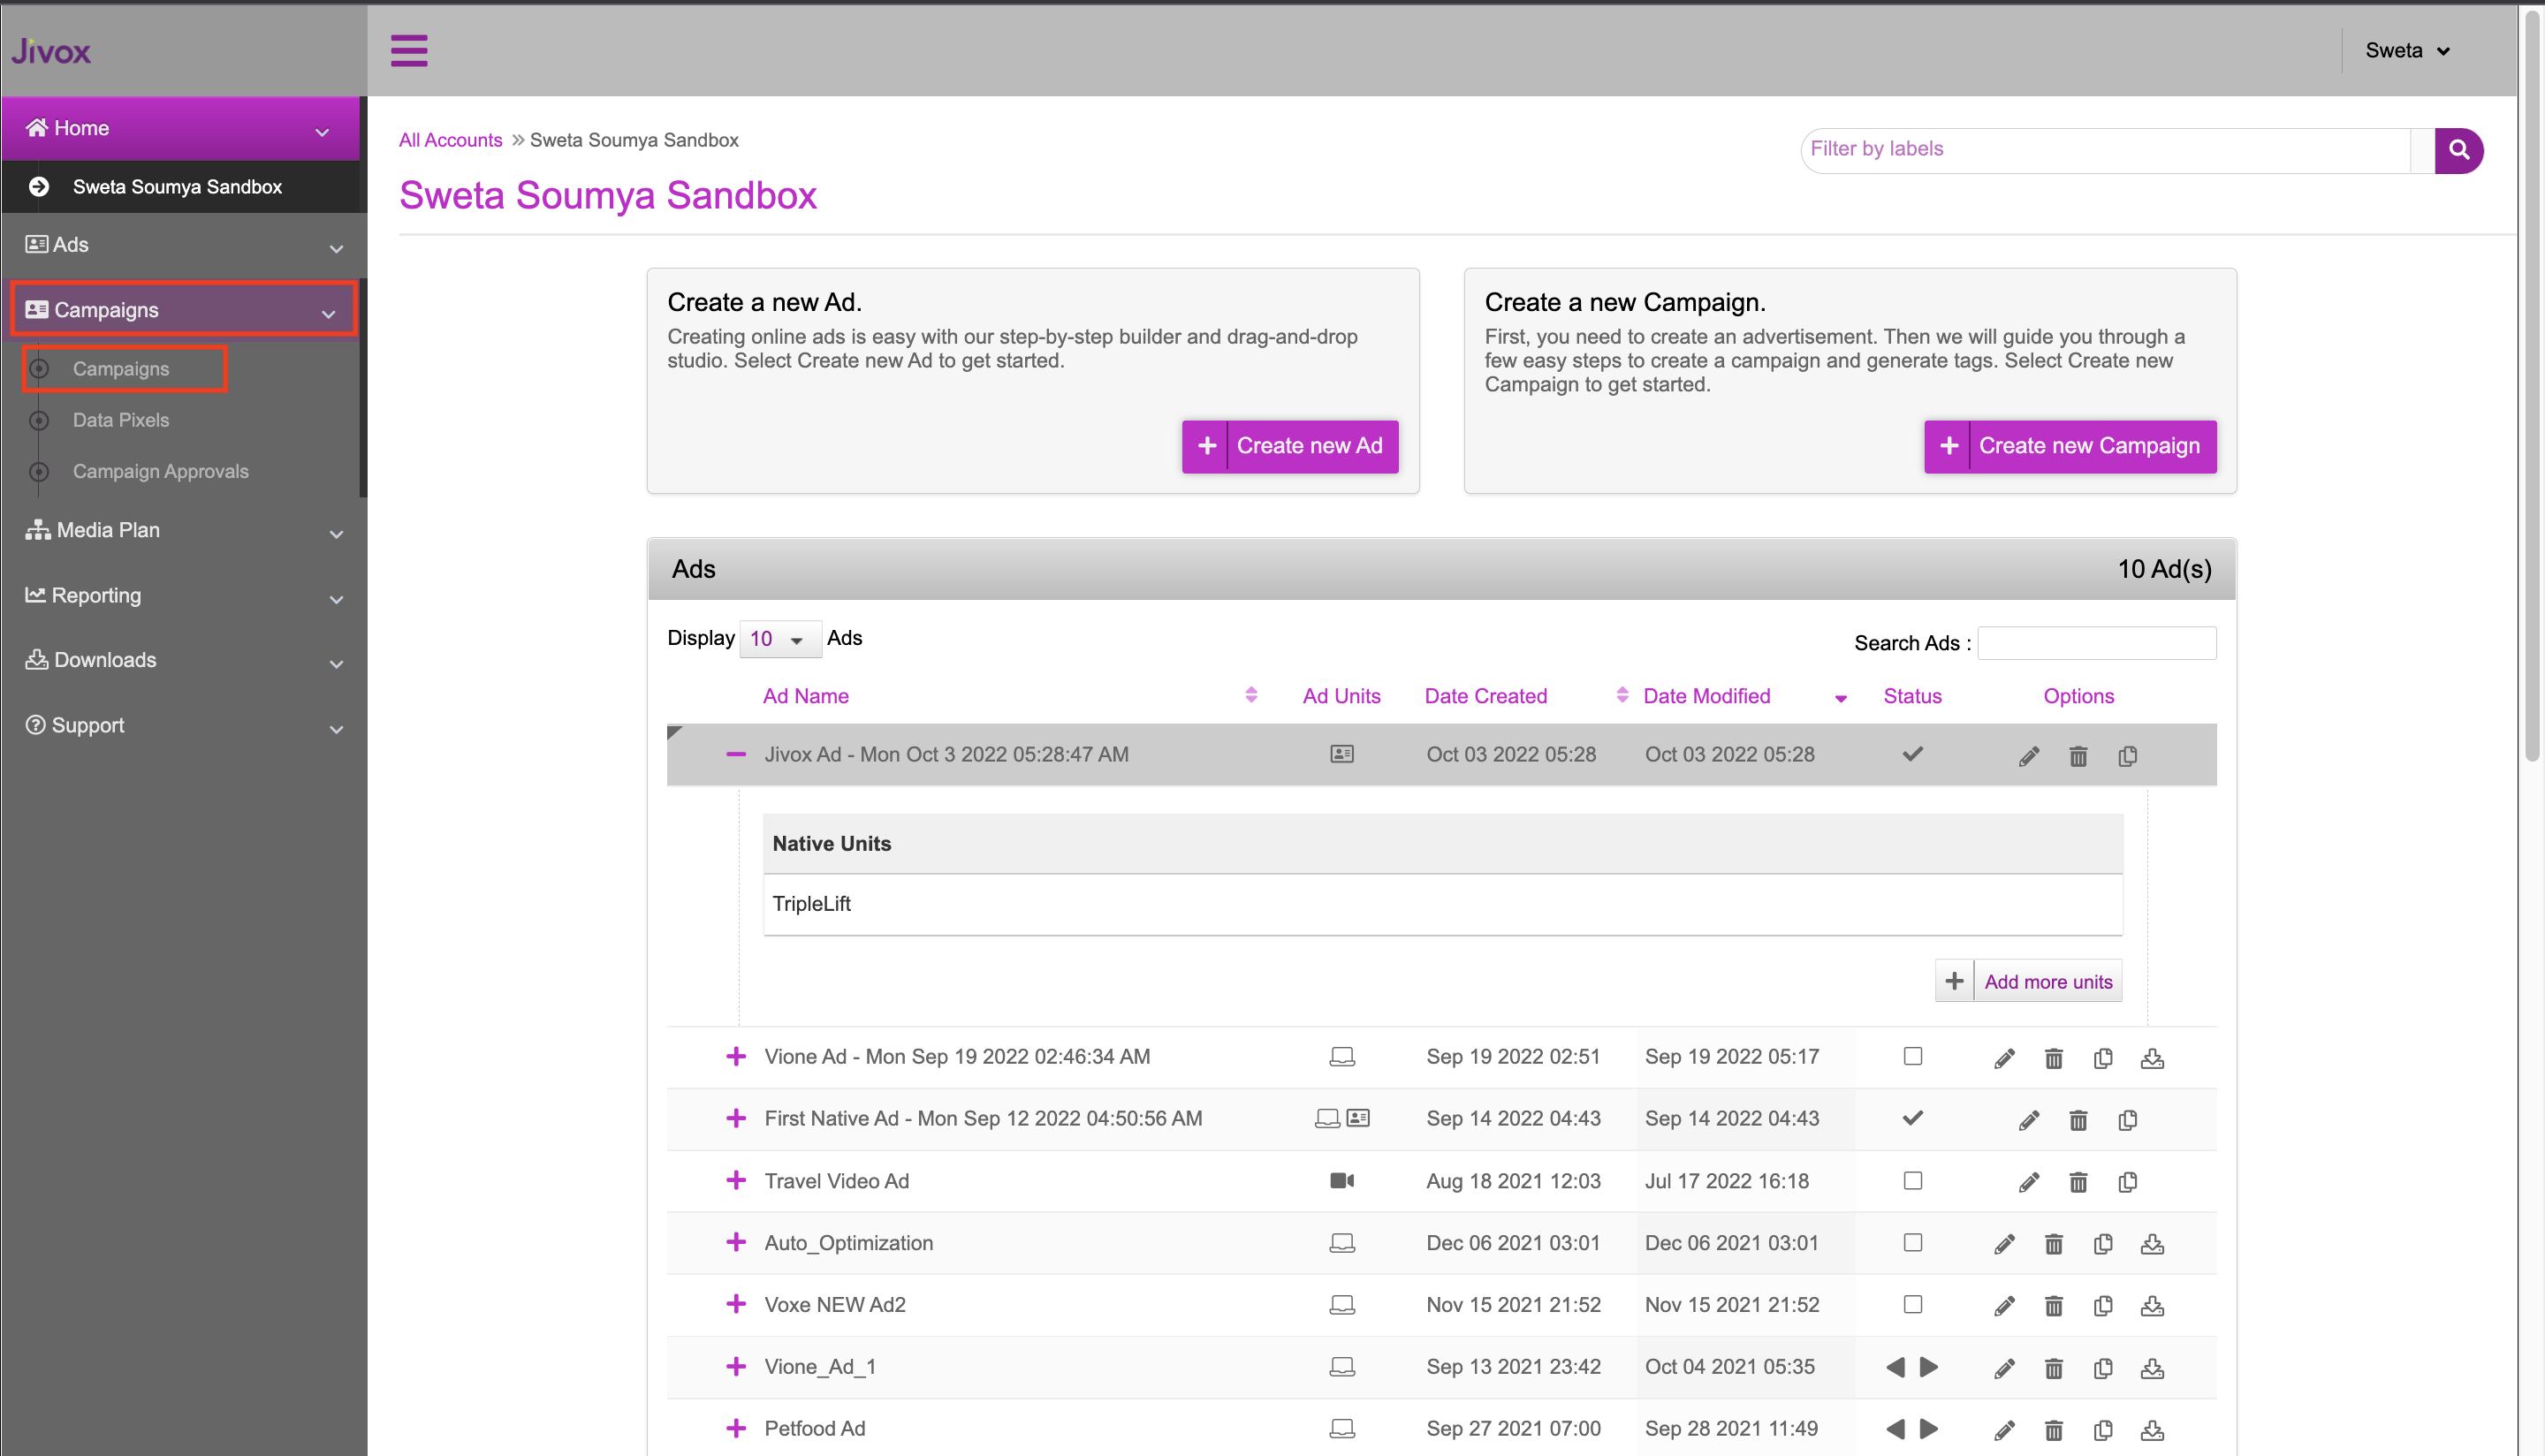
The Campaigns dashboard is displayed.
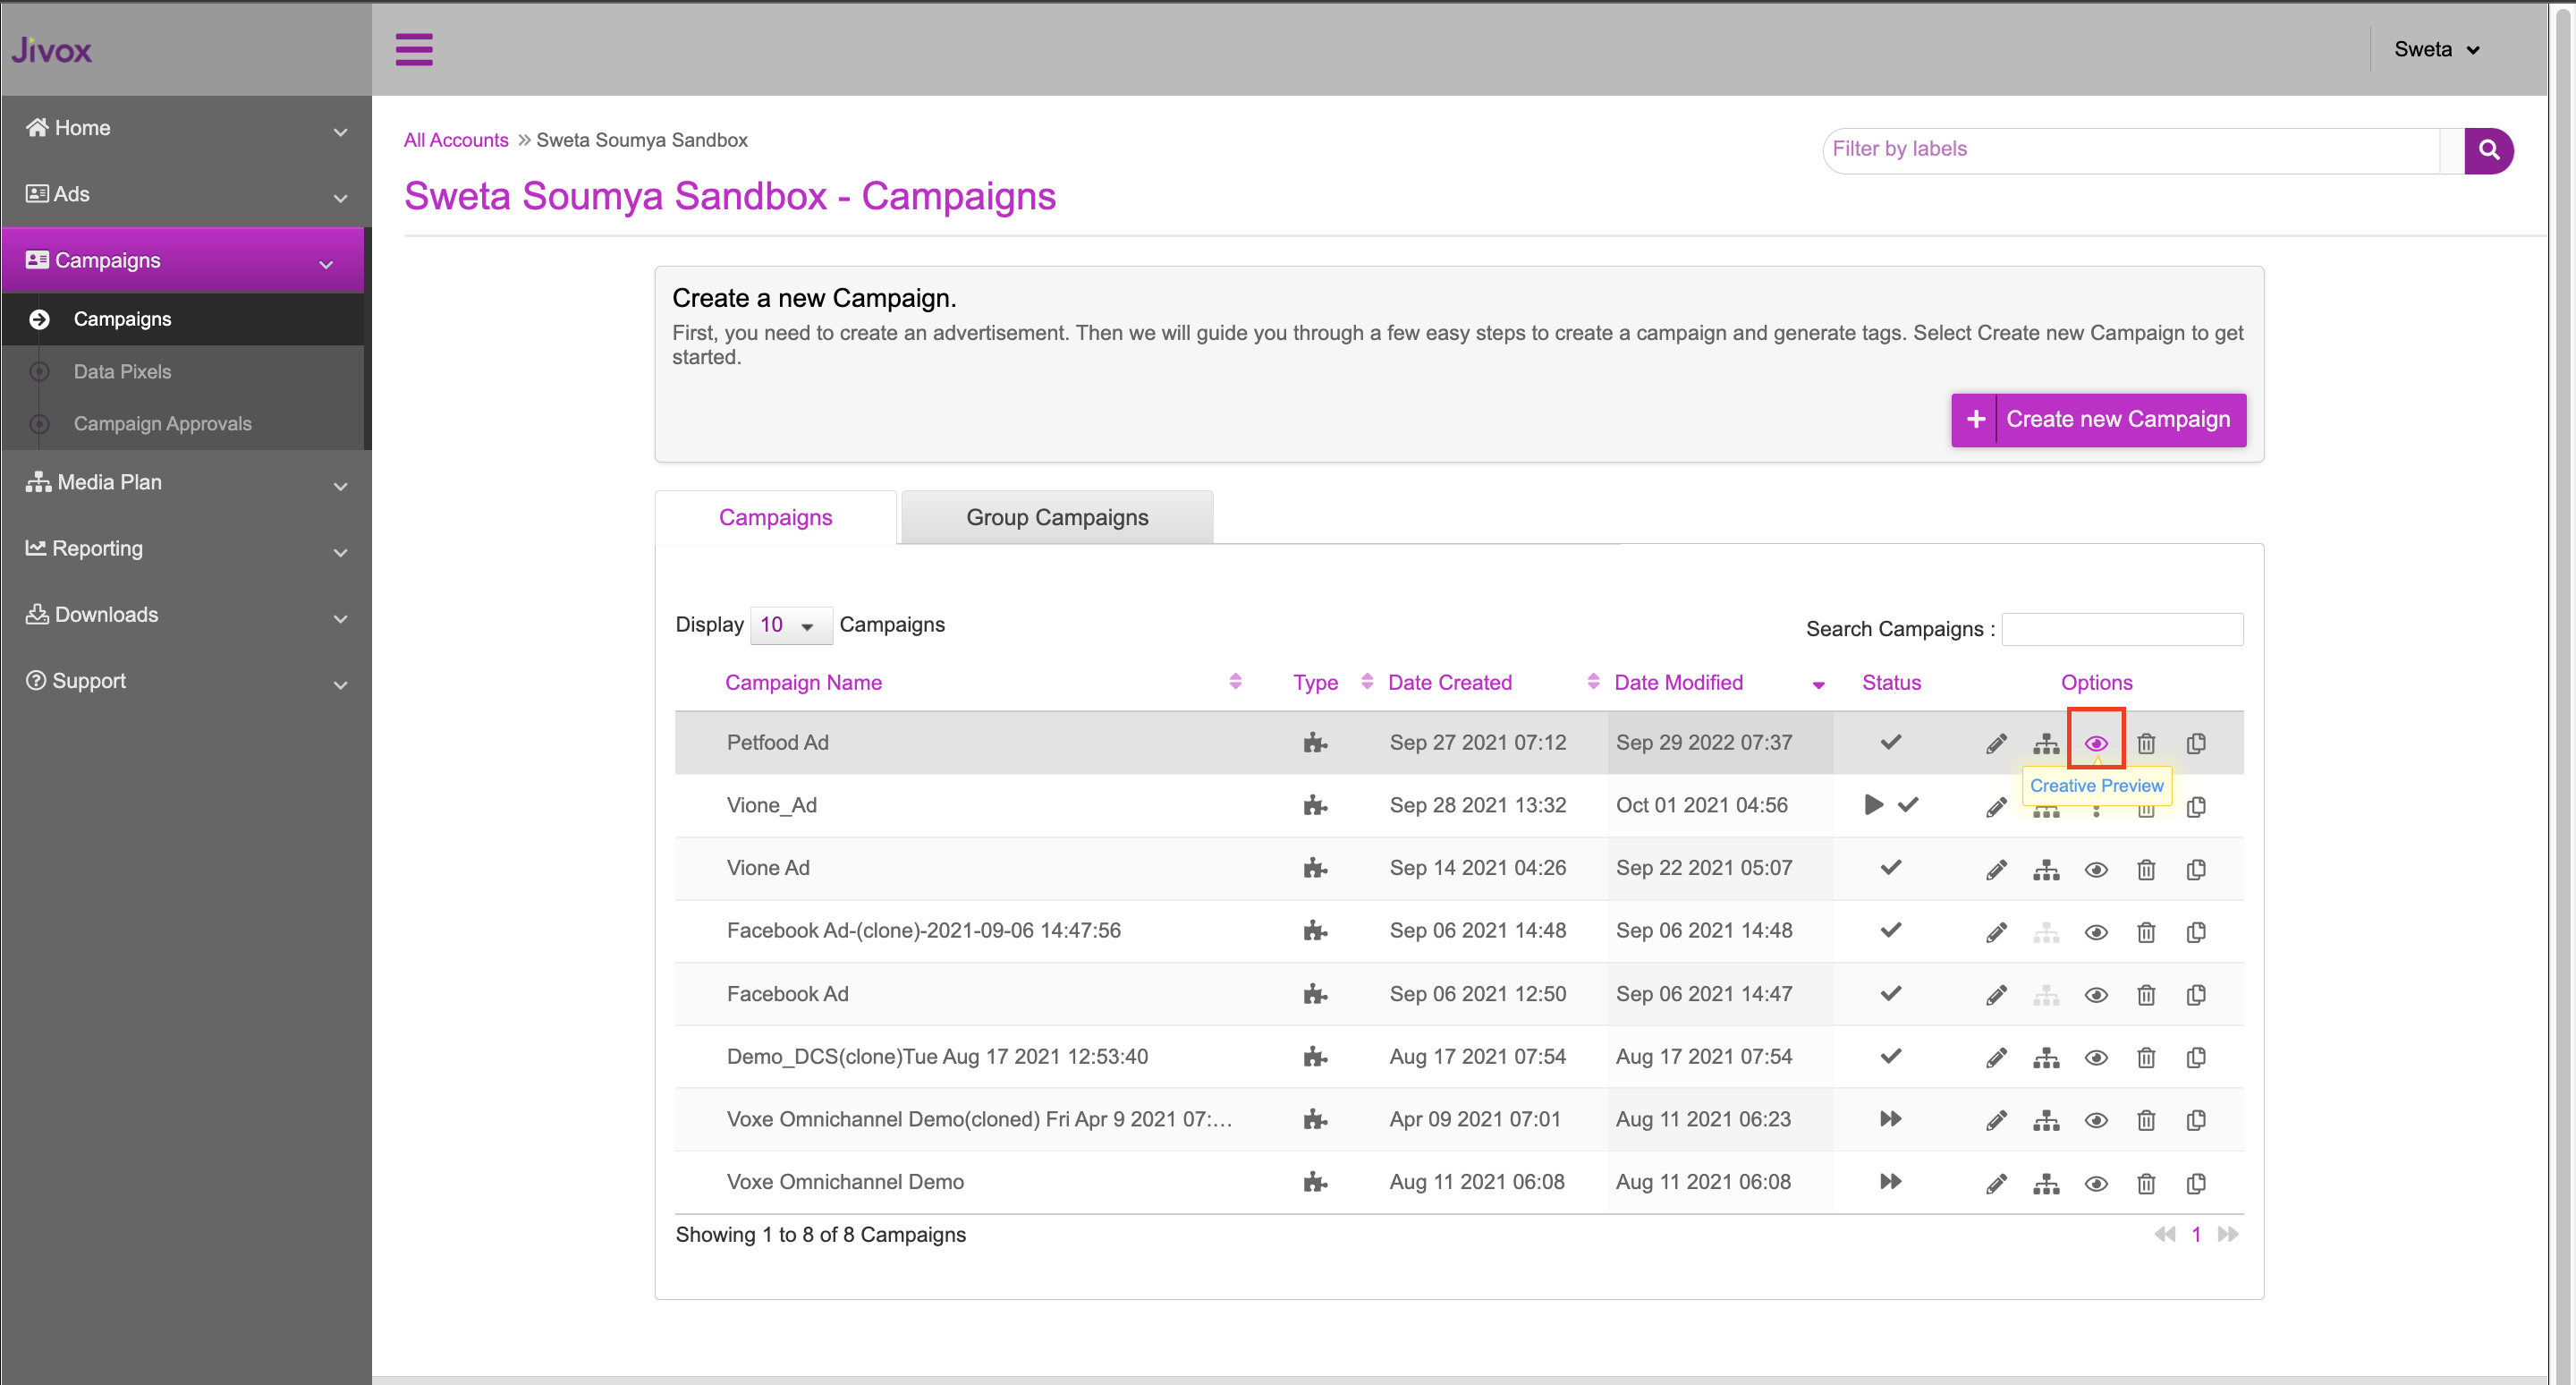
2- Select the required Campaign from the table and click the eye (Creative Preview) icon (highlighted in the image above).
3-Select Preview for Approval from the available options.
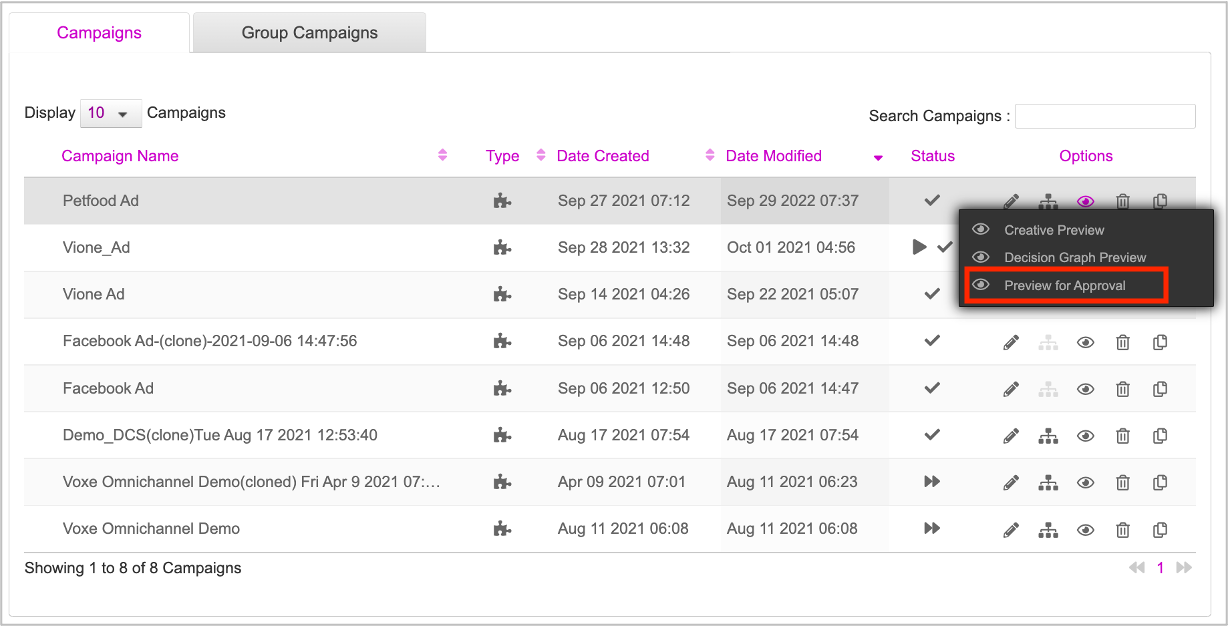
The Preview for Approval window is displayed.
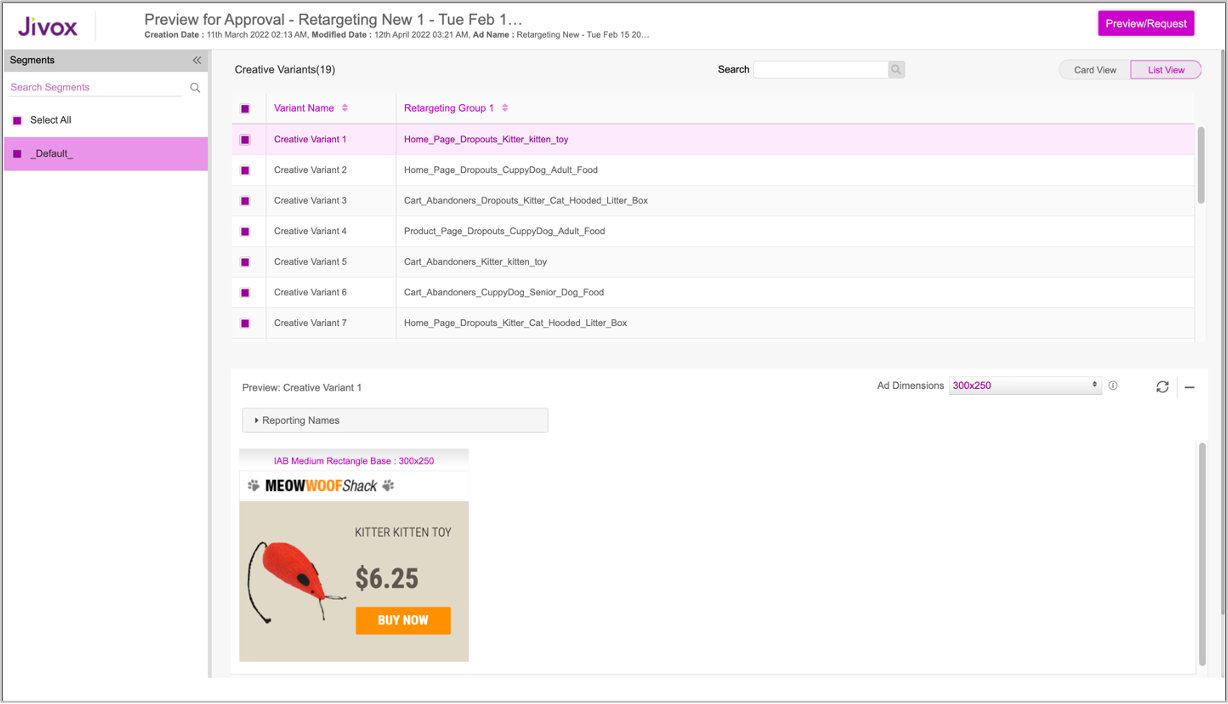
4- From the Segments section in the Left Pane, select the segment, to generate and view all the respective creative variants. By default, the first segment is selected.
You can use the Select All checkbox to select all the segments. You'll see this warning message.
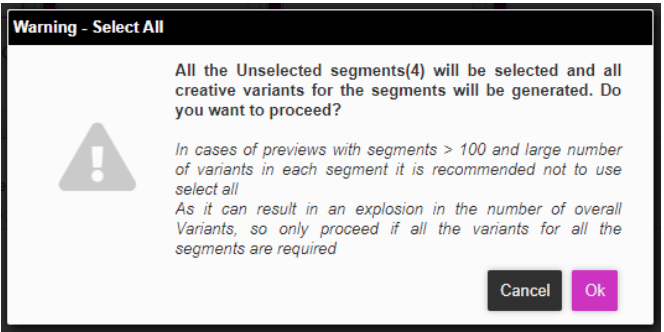
Once you click OK, all the segments will be selected and all the creative variants for the selected segments will be generated.
You can uncheck the Select All checkbox to deselect all the segments.
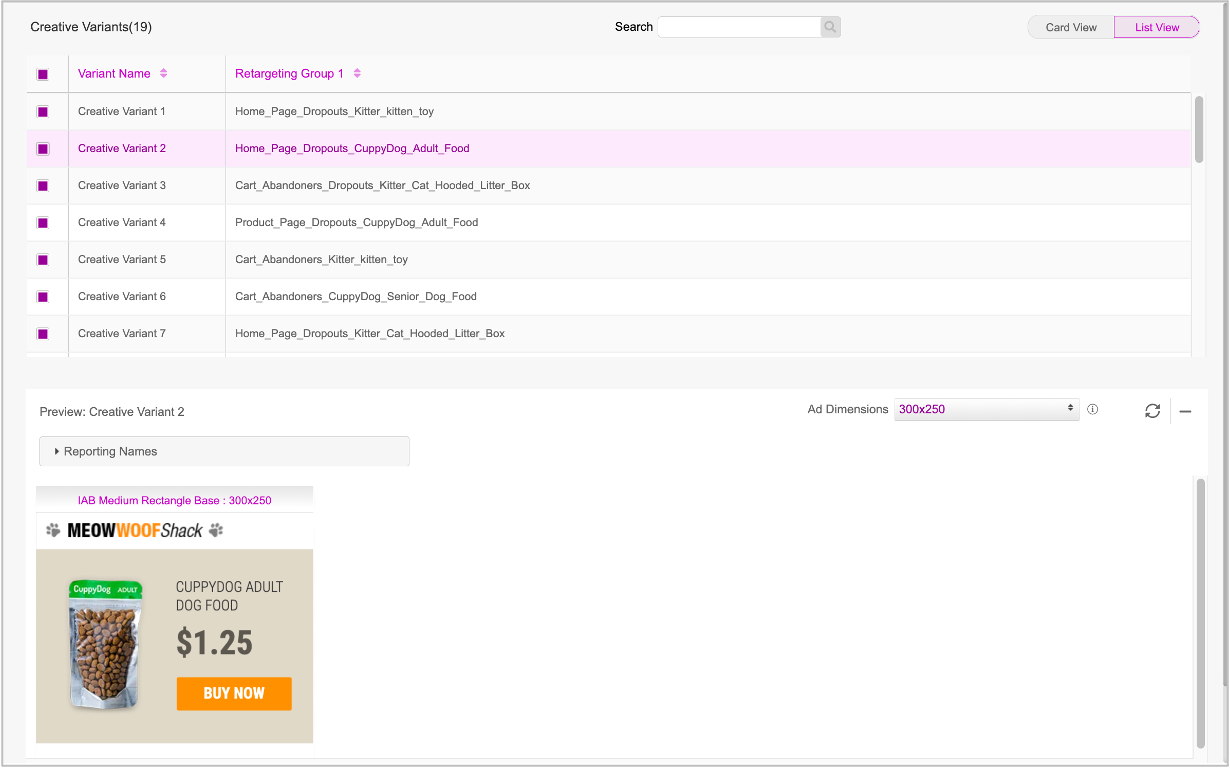
By default, all the creative variations are displayed in List View. Click anywhere on each row to preview the Creative Variant in the Preview section below.
You can double-click each row and rename the creative variant if required.
Once we've previewed each creative variation and renamed them as required, let's go ahead and create the preview request.
5- Select the creative variants that you want to include in the preview for approval request. By default, all the creative variants from the list are selected.
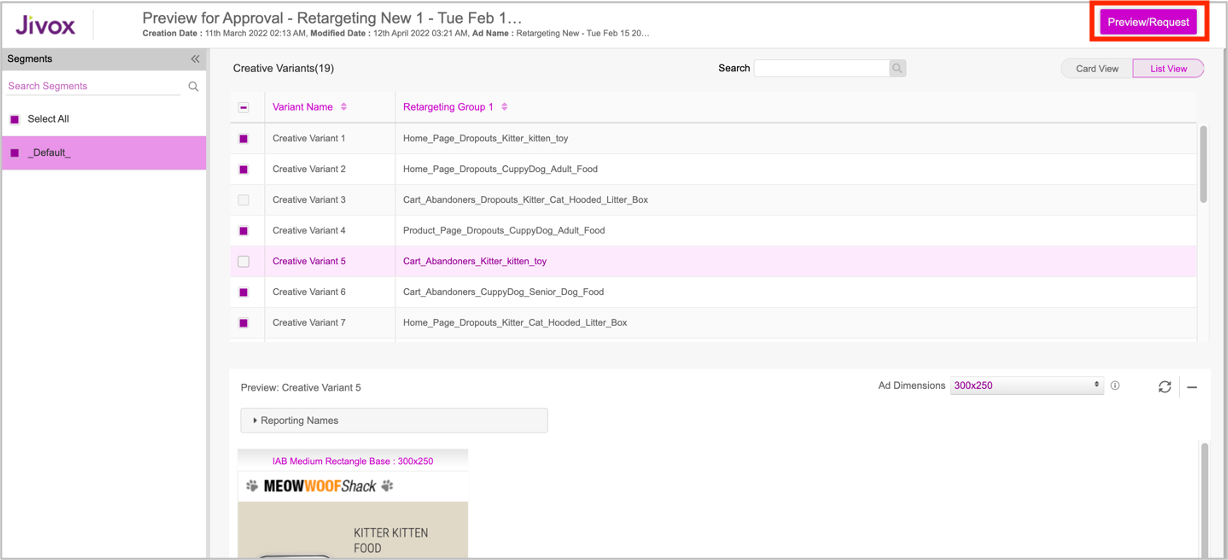
6- Click Preview/Request. The Select users and grant permissions window is displayed.
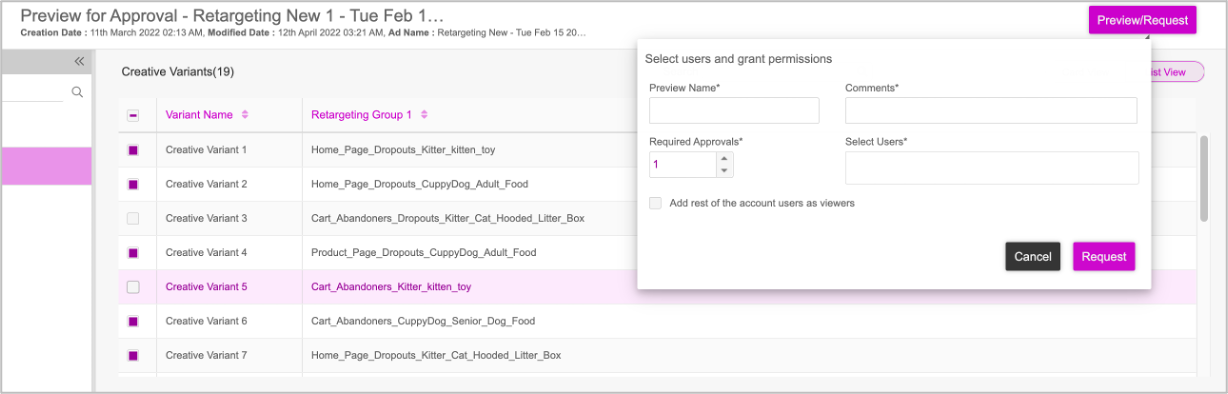
7- Enter the Preview Name and add some comments.
8- Next, select the number of approvers.
If you want all the users in an account to have Viewer access, then set ‘Required approvals’ as ‘0’. The ‘Select Approvers’ field will be disabled.
If you want to assign specific users in the account as approvers for the preview approval request, then set ‘Required approvals’ the same as the number of approvers to be added.
Ensure that the number of users added in the ‘Select Approvers' field is the same as the number mentioned in the ‘Required Approvals’ field. If the number of users added does not match, then an error message is displayed.
8-Select or enter the users that you want to add from the drop-down.

9- Select the Add rest of the account users as viewers checkbox, if you want all the account users to be able to view the preview for approval request.
10- For each user, you have the option to assign them as Viewer or Approver.
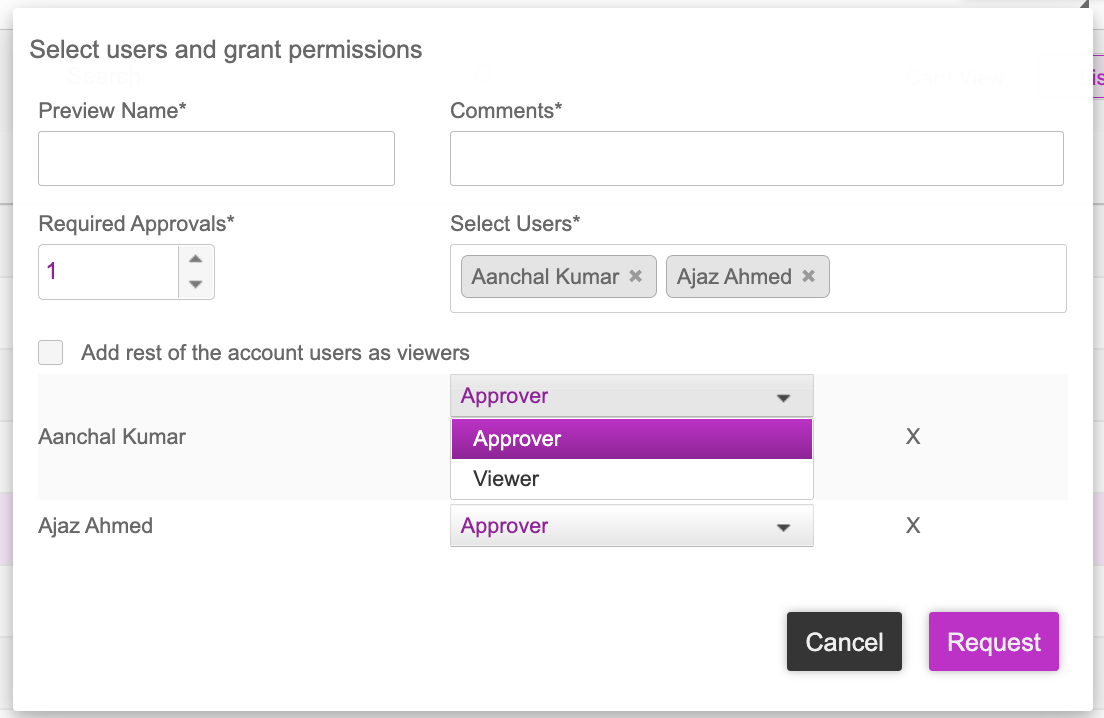
10- Once you've assigned the users and roles, click Request to send the preview approval request to all the users who are assigned as approvers.
The added Approvers will receive an email notification with the preview approval links. The other users in the account will receive an email notifying them of the request creation, with viewer access.
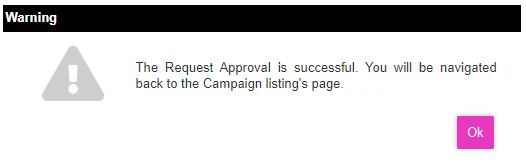
A confirmation message is displayed.
The preview approval request will be listed in the Campaigns Approvals page. The Status will be set as In Progress.
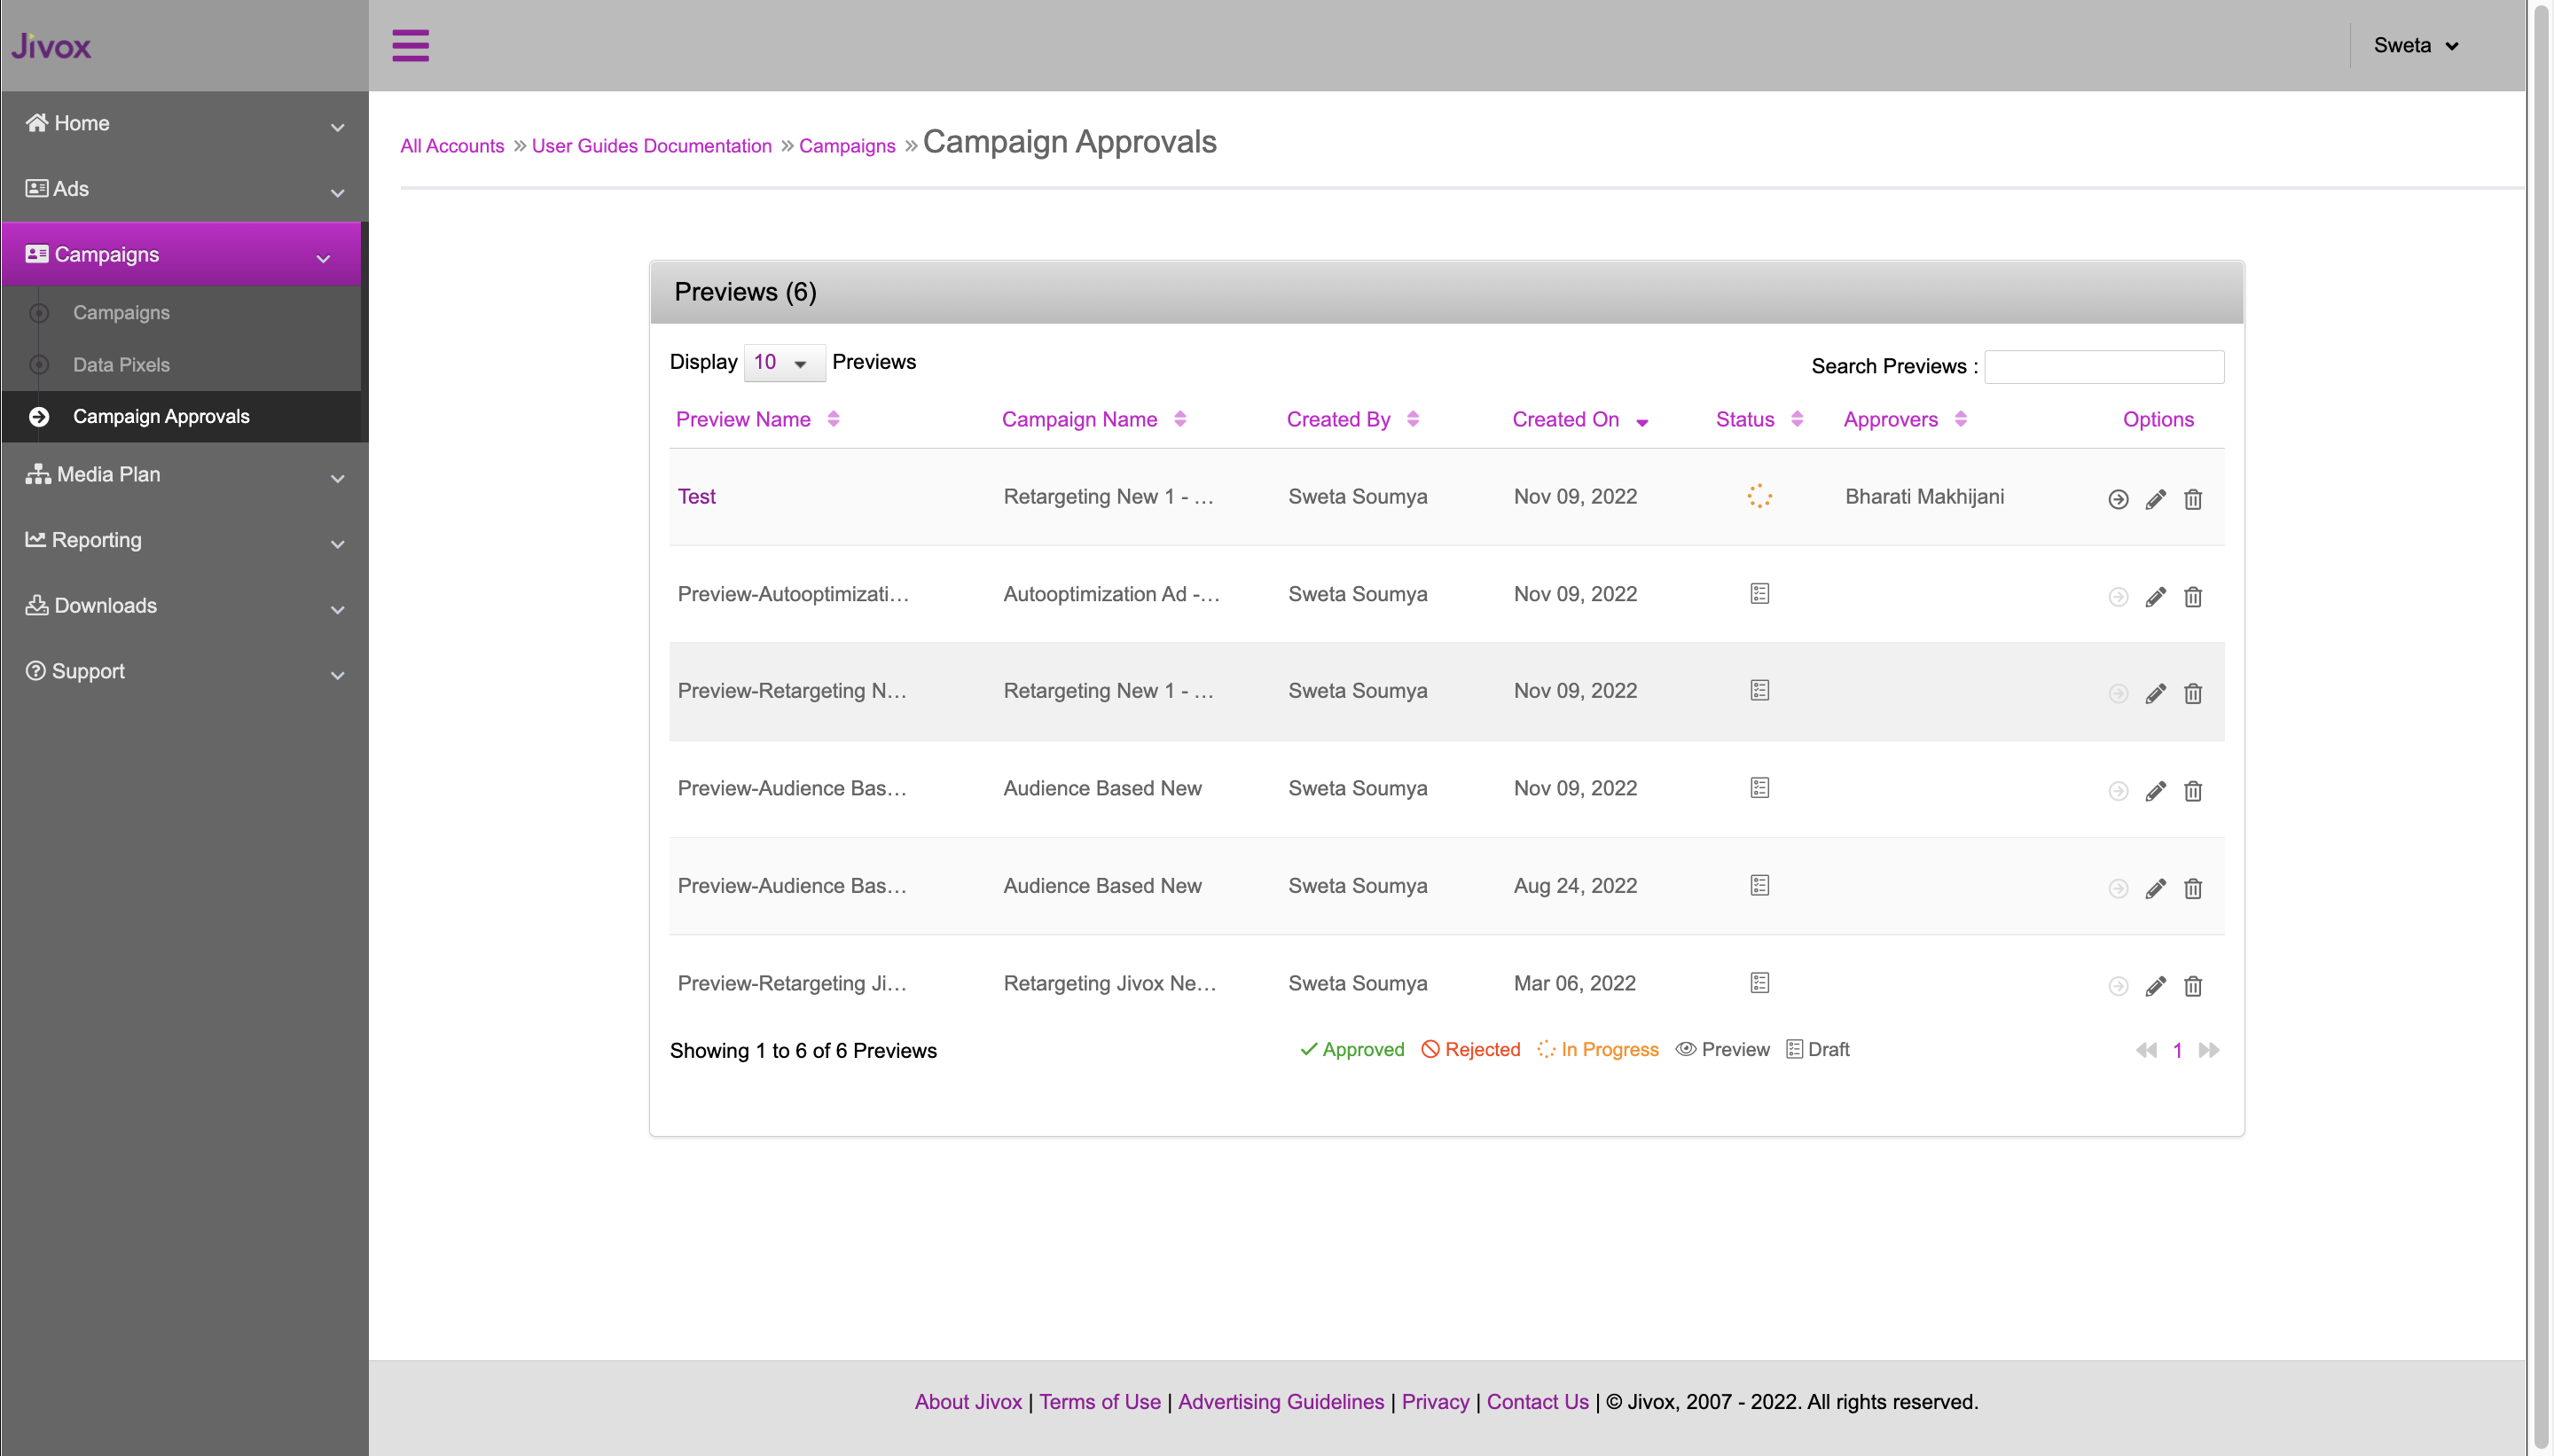
In the next section, we'll discuss the Campaign Approvals page in detail.