In this section, let's see how we can setup the campaign.
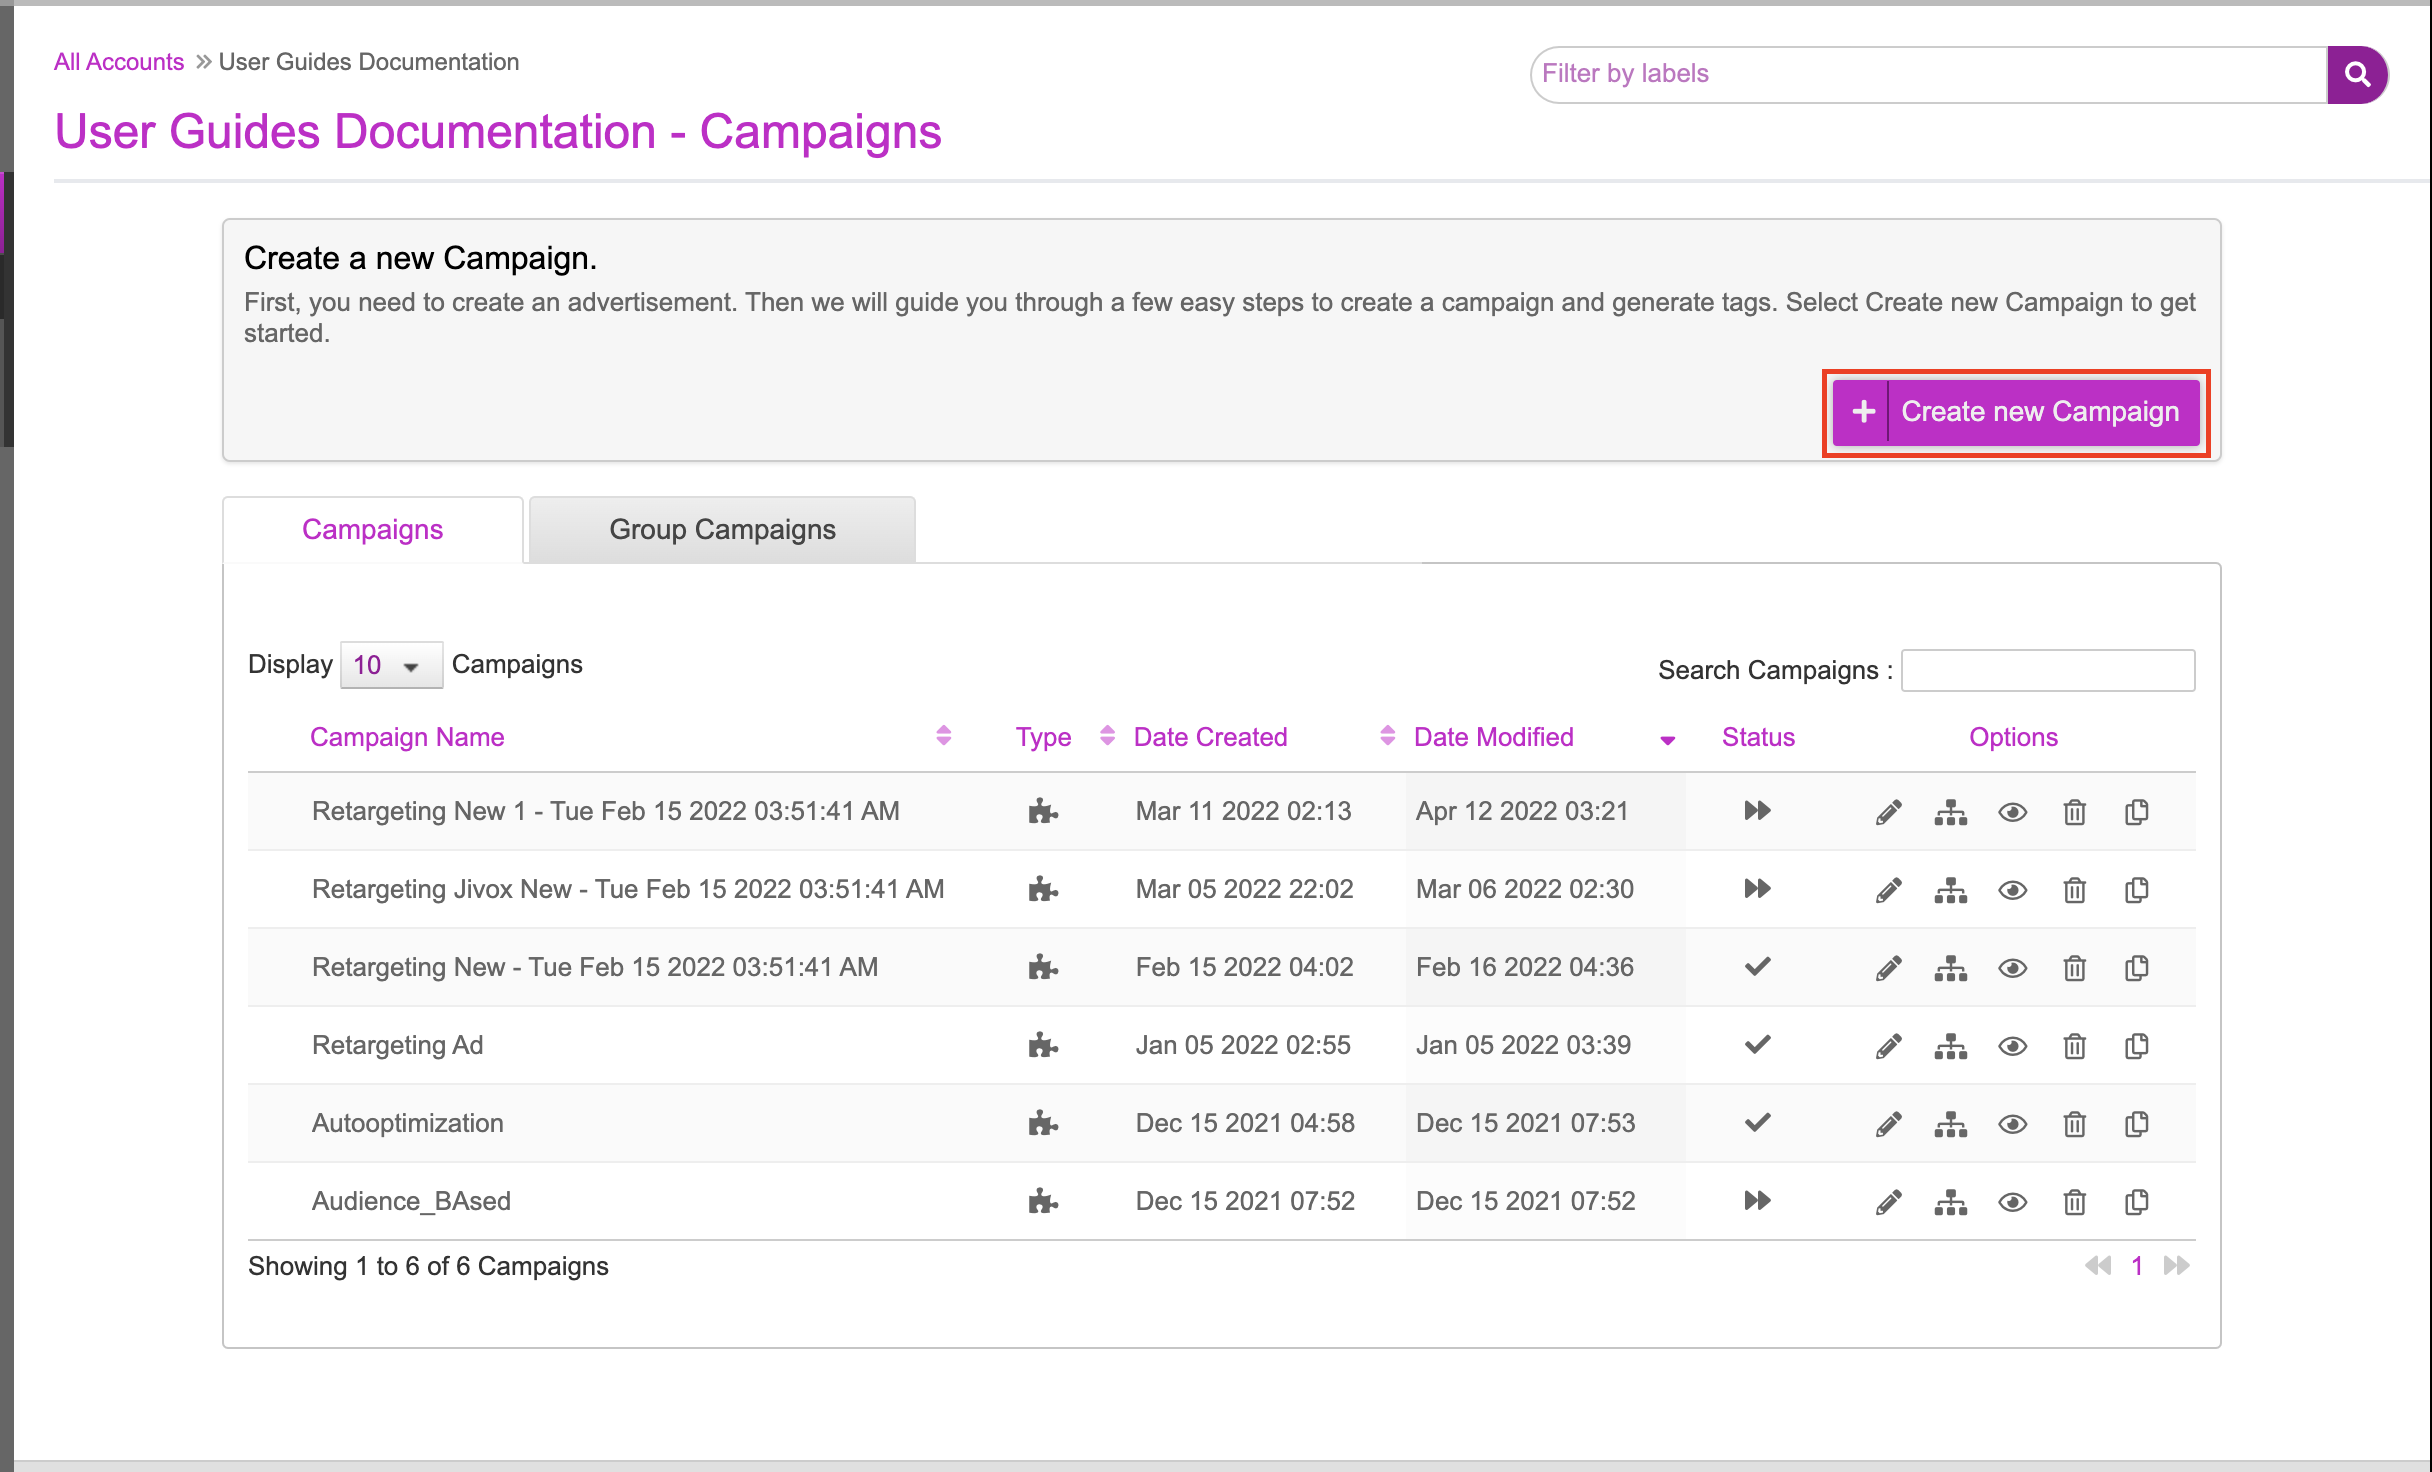
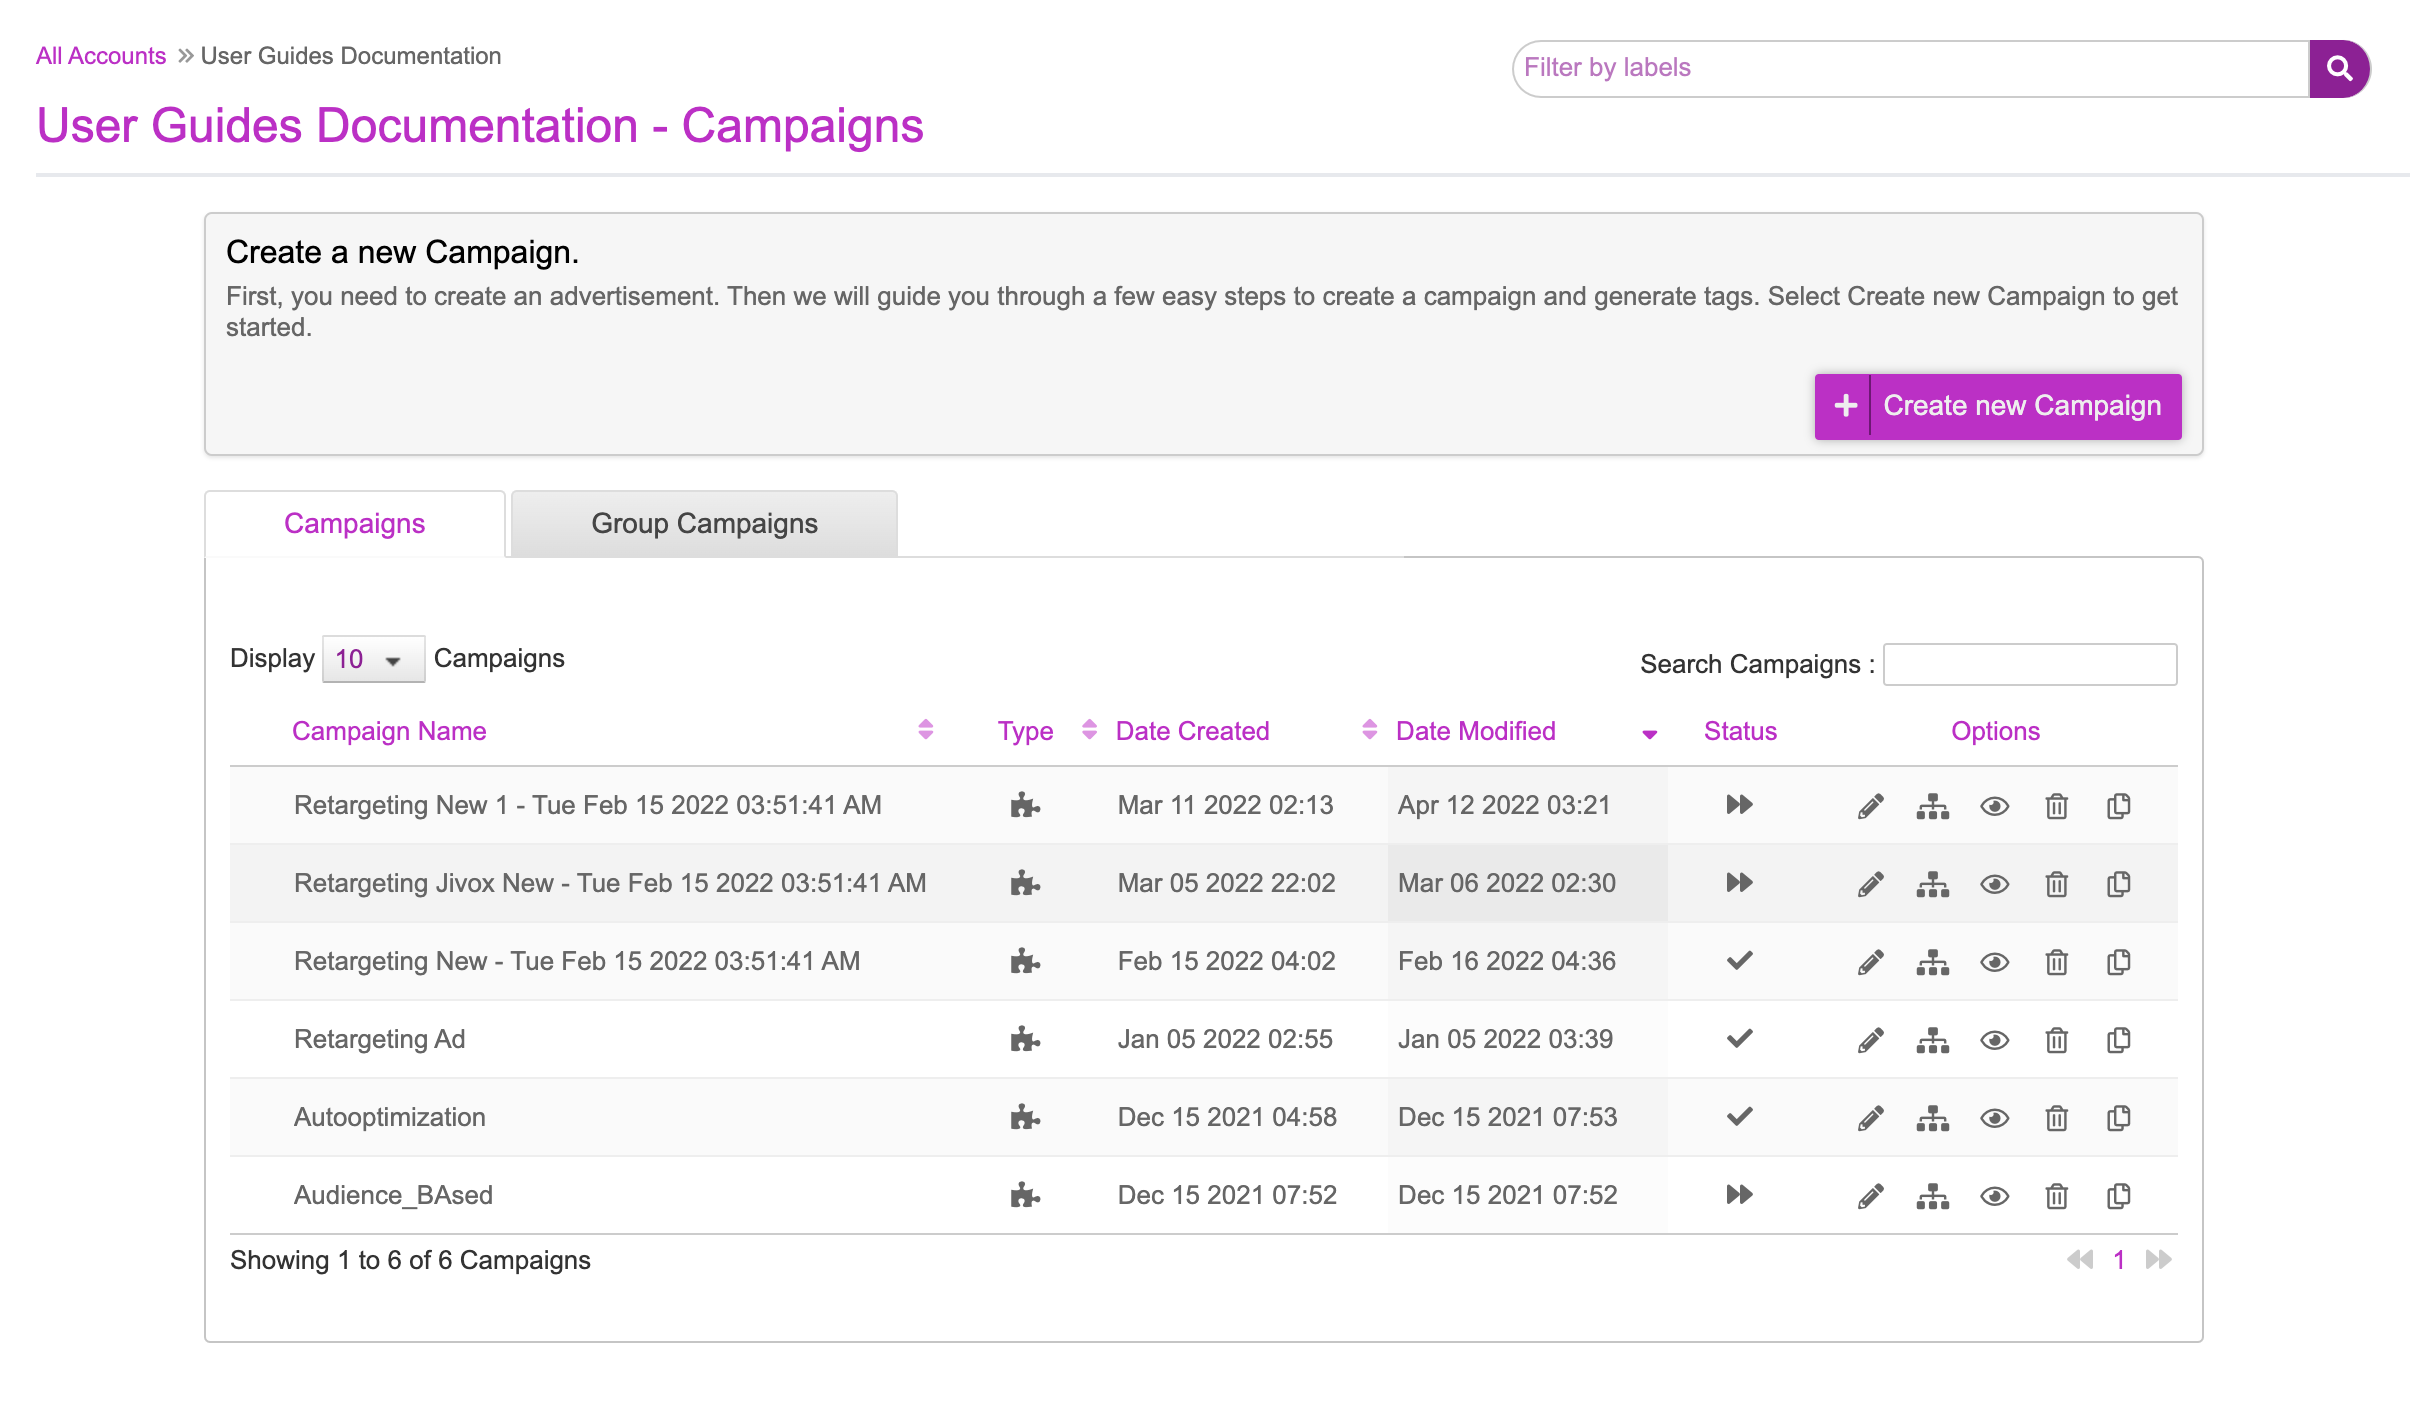
1- From the Data Pixels page, on the left navigation panel, select Campaigns. You will be taken to the campaign listings page.

2- Click Create new Campaign to view the Create Campaign page.
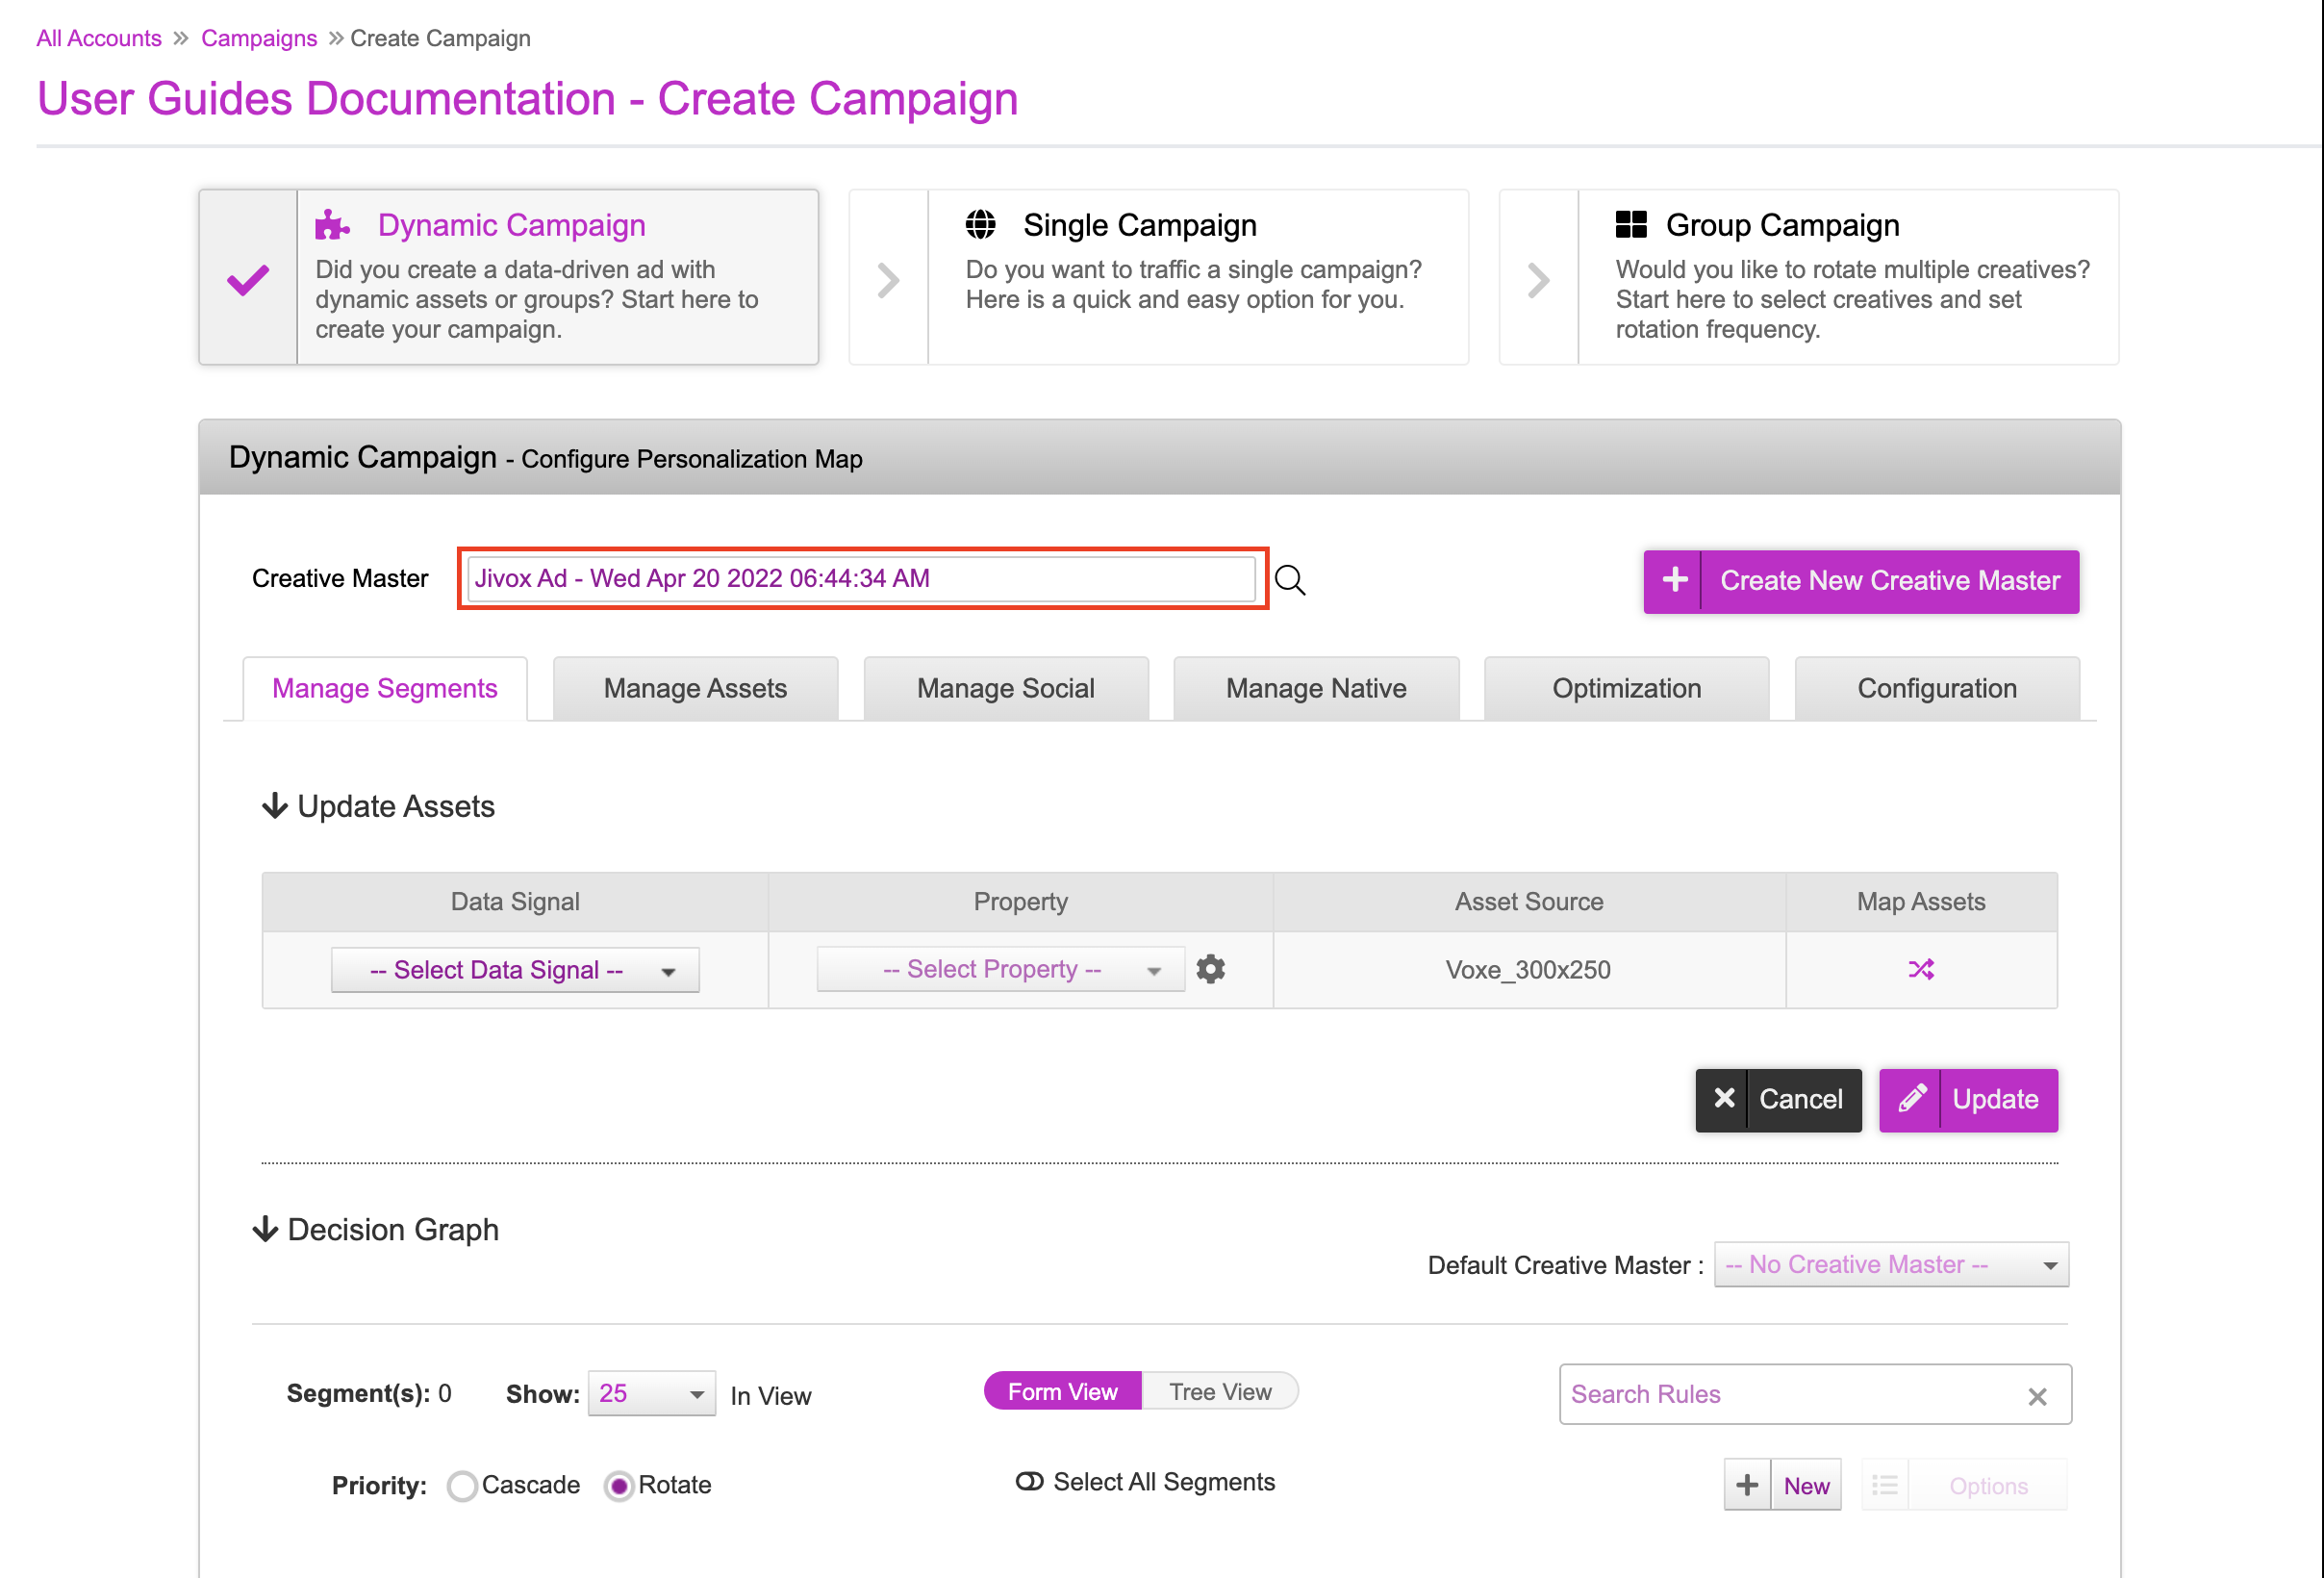
3- In the Creative Master field, the most recently created Ad is selected by default. You can search and select the Ad of your choice.
The next step in the campaign setup is to configure the Decision Map or Decision Graph based solely on the strategy of your campaign. This is where we define the decisioning rules that will resolve a specific creative variation to be served to a user.
- The Decision Map can be used when we only have one data trigger. For example, the local time can be leveraged to serve a personalised and relevant creative variation depending on the time of day or day of week.
- The Decision Graph allows you to leverage multiple data triggers for a more personalised ad. For example, you can leverage the local time and as well as audience information to serve a personalised ad.
4- You can decide the method you want ti use based on your campaign strategy.
A) If you are configuring a campaign with the Decision Map, under Update Assets, select the following based on the type of Data Pixel used:
| When Using Generic Data Pixels | When Using Ecommerce Data Pixels |
|---|---|
|
|
For the decisioning done solely using the Decision map and the e-commerce Pixels, the retargeting will be executed only based on the Product Id values, irrespective of the other data captured in the pixel. The Product Id value coming from the cookie call will be matched against the Product Id data available in the asset source. The corresponding creative gets resolved.
B) If you are using Decision Graph , then select the following in the Update Assets section:
- Data Signal: Decision Graph
- Property: Selected Segment
The asset source associated with the creative master in the ad gets added automatically.
5- After selecting the appropriate options, let's click Update button to update the Data signal and Asset Source mapping. The asset source and data signal mapping process is now complete.
If you used a Decision Map, you can go ahead and save the campaign. Enter the following information to identify the campaign, and click Save Campaign.
- Campaign Name: The campaign name must be unique.
- Enter Labels: It is a feature, label or prefix, to filter out Ads and Campaigns.
- Campaign Description: Add notes for future reference (optional).
- Click-Through URL: The URL to open when the user clicks on the ad.
You can configure the recommendation engine only after saving the campaign.
If you are using a Decision Graph, scroll down to the Decision Graph section and set up the segments. The name of the segment should be the Product Id column value of the asset source, mapped to the data signal in the Decision Map setup.
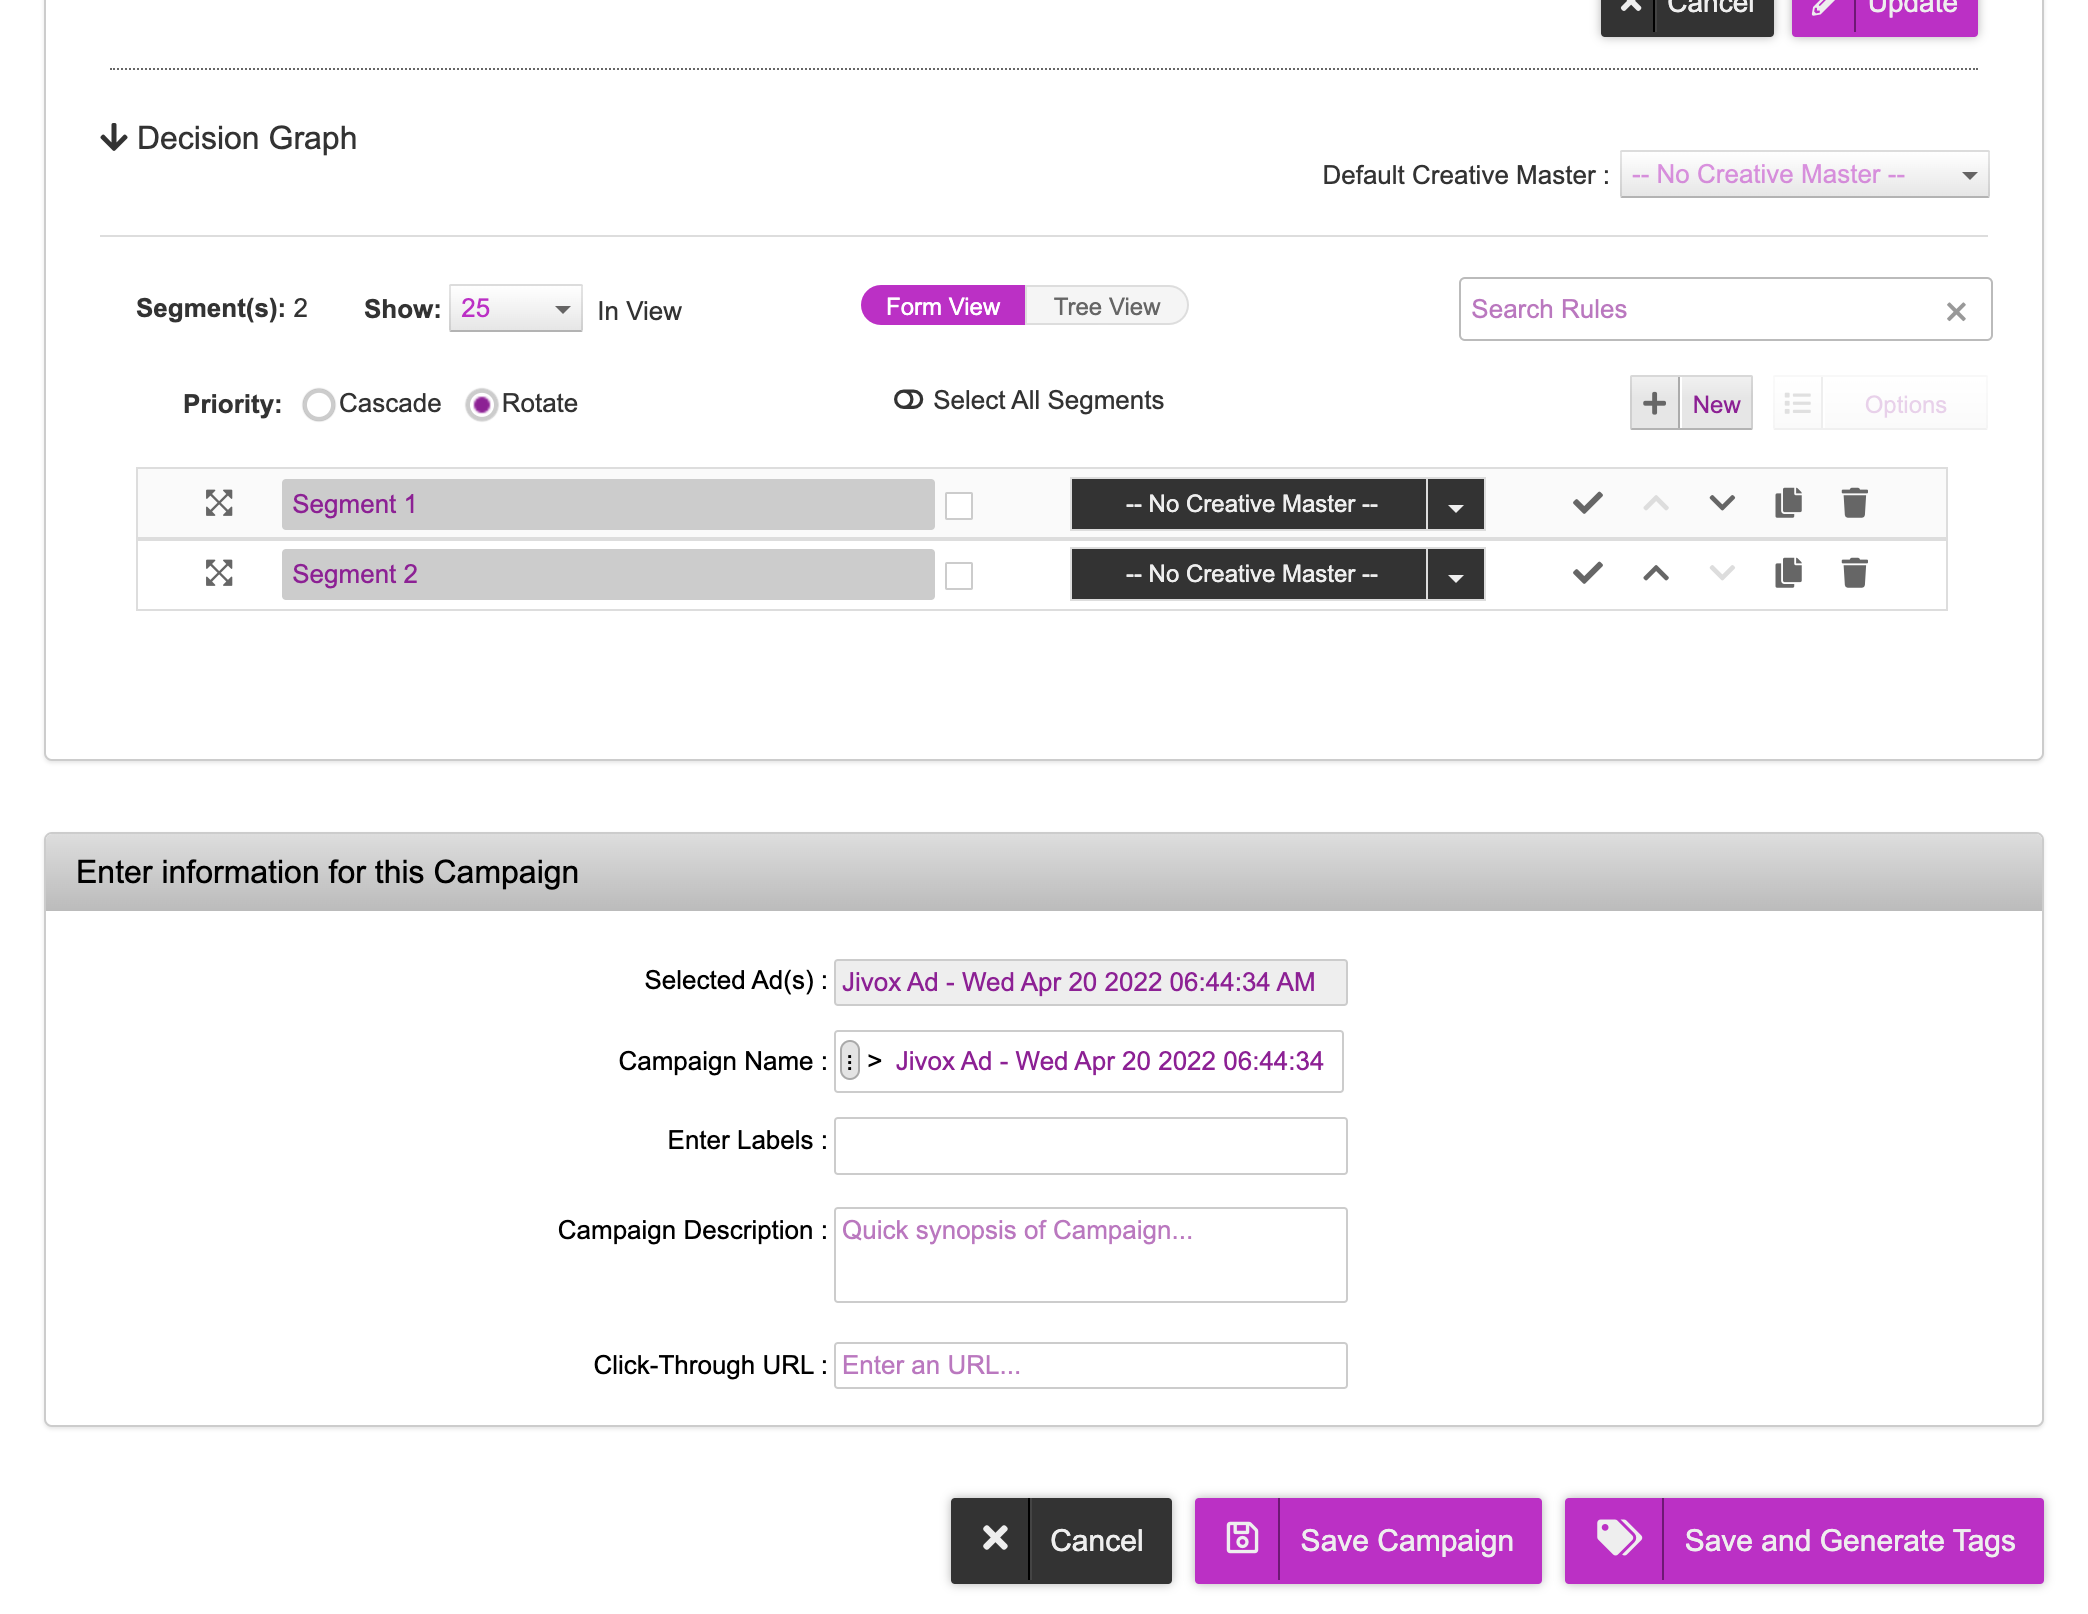
The ‘Default Creative Master’ dropdown will list all the creative masters available in the associated ad. Select the default creative master from the dropdown, that should be resolved when the segment rules fail.
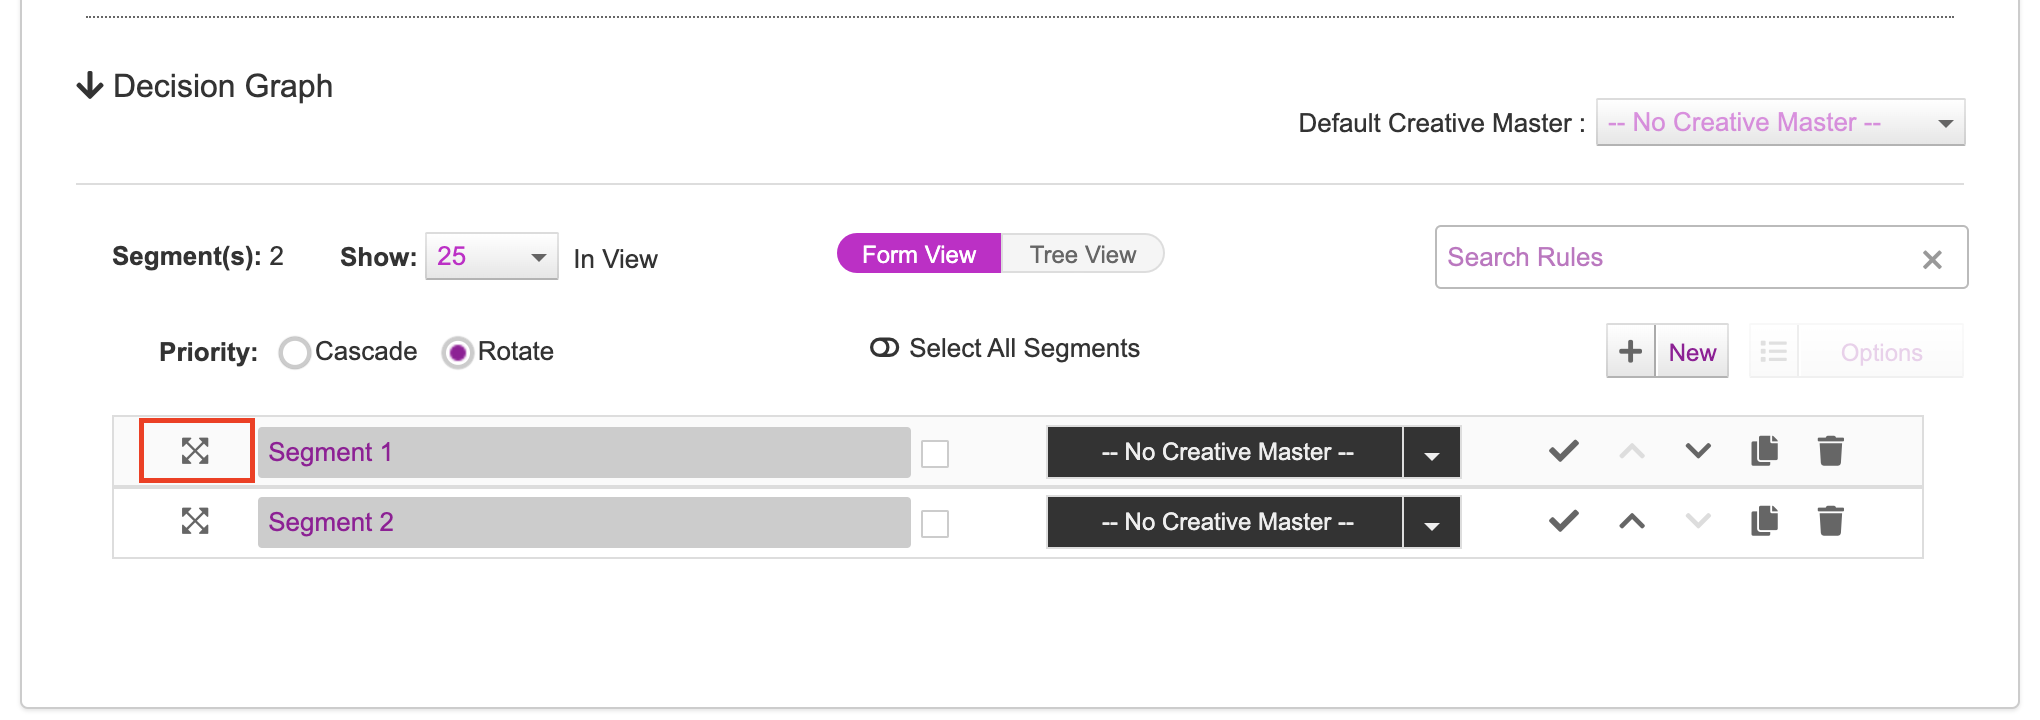
7- Click the icon to the left of the Segment name to setup the Conditions and Triggers.
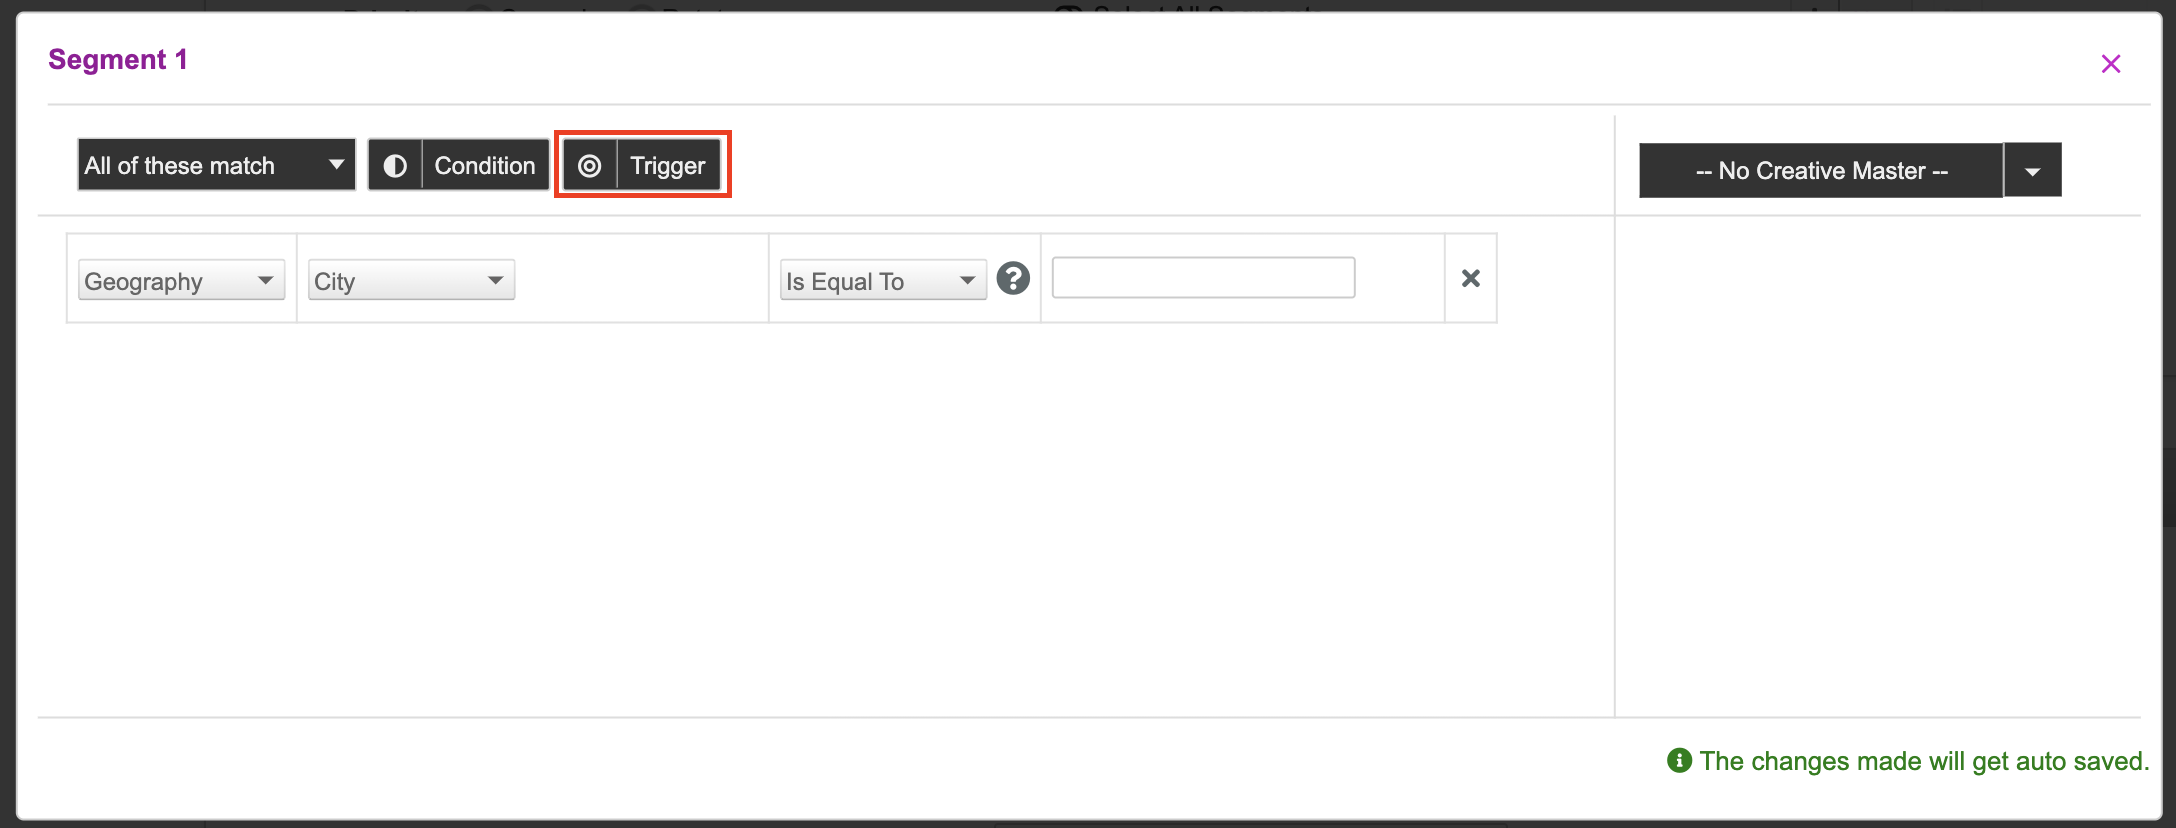
If you are using Generic Data Pixels for recommendation, do the following in the fields:
- From the first dropdown, select ‘Sequential and Retargeting-Generic’ option as trigger/service.
- From the second dropdown, select the pixel group as the property based on your recommendation strategy.
If you are using E-commerce Data Pixels for recommendation, do the following in the fields:
- From the first dropdown, select ‘Sequential and Retargeting-eCommerce’ option as trigger/service.
- From the second dropdown, select the Pixel Event, based on your recommendation strategy. The available options are Add to Cart, Page/ContentView, Select Product.
- From the third dropdown, select the relevant Pixel Parameter, based on your recommendation strategy.
You can add as many conditions and triggers as required based on your strategy. For more details, see Using a Decision Graph.
Once you have set up all the required conditions and triggers, exit the rule setup window and configure other segments as required.
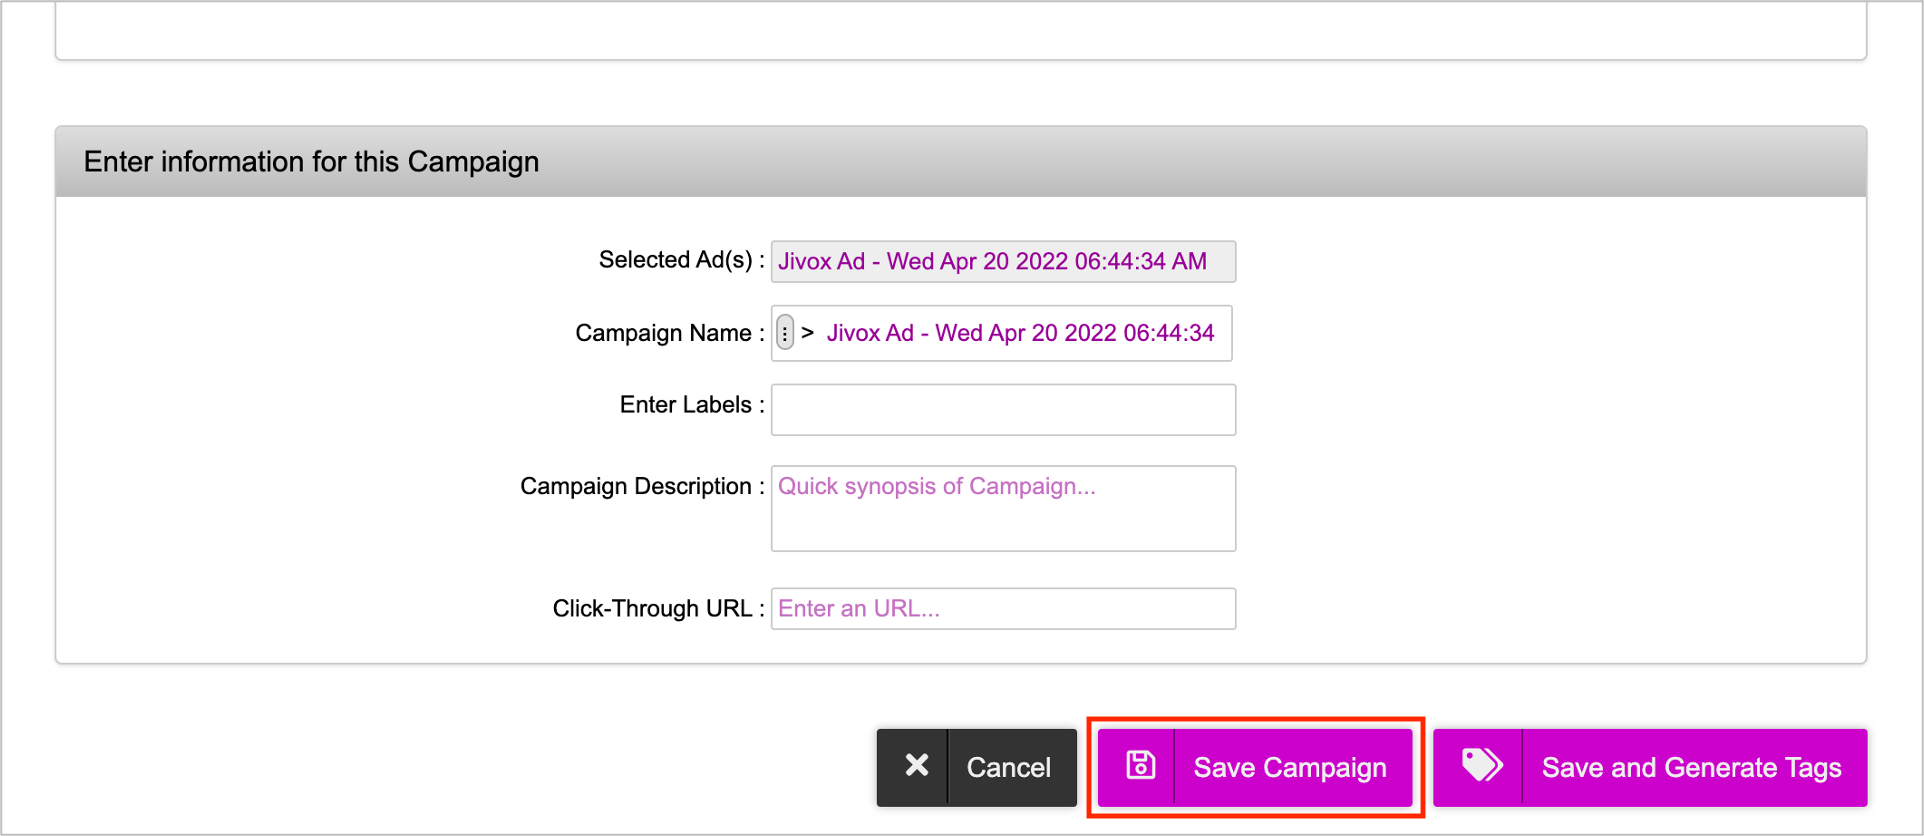
Once done, enter the following information to identify the campaign and then click Save Campaign.
- Campaign Name: The campaign name must be unique.
- Enter Labels: It is a feature, label or prefix, to filter out Ads and Campaigns.
- Campaign Description: Add notes for future reference (optional).
- Click-Through URL: The URL to open when the user clicks on the ad.
Once the campaign is saved, you will see the campaign in the campaign listing page.
Next Steps
Now that we have set up the campaign, we can now go ahead and set up the recommendation engine.