The Jivox IQ platform supports the generation of Jivox ad tags against a media plan for the campaigns built on the platform. The ad tags are trafficked using DSPs to be displayed on websites or mobile applications. It allows users to generate a large number of bulk tags to save time and manual effort. This feature supports image, video, mobile and native ads.
An Ad tag (sometimes called a placement tag or creative tag) is a piece of HTML or Javascript code snippet that is implanted on the web page to get an ad from the ad server. This integrated code signifies the space where the ad will be displayed. The tag not only indicates the space but also key parameters including – the size of the ad, topic/sub-topic of the page requesting for an ad, basic page info, custom key values, and more.
Jivox IQ allows you to generate a large number of tags in bulk to save time and manual effort.
Bulk Tag Generation involves the following steps:
In this section, we will generate multiple tags at one go using the Bulk Tag Generation option.
Before you can go ahead and generate tags, you must first create the Ad using DCS and set up your campaign.
Let's begin!
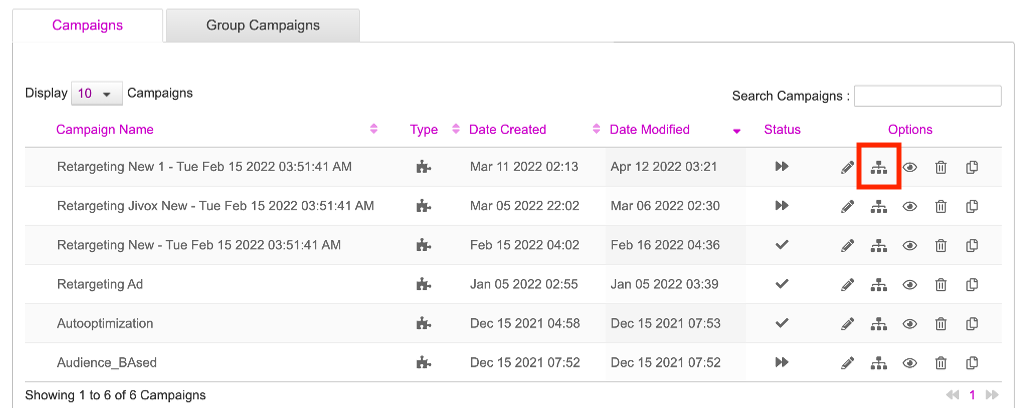
1- After you create an ad and save your campaign, from the campaign listing page, select the Tag Generation icon as highlighted below.
The tag generation icon will display two options - Tag Generation and Bulk Tag Generation.
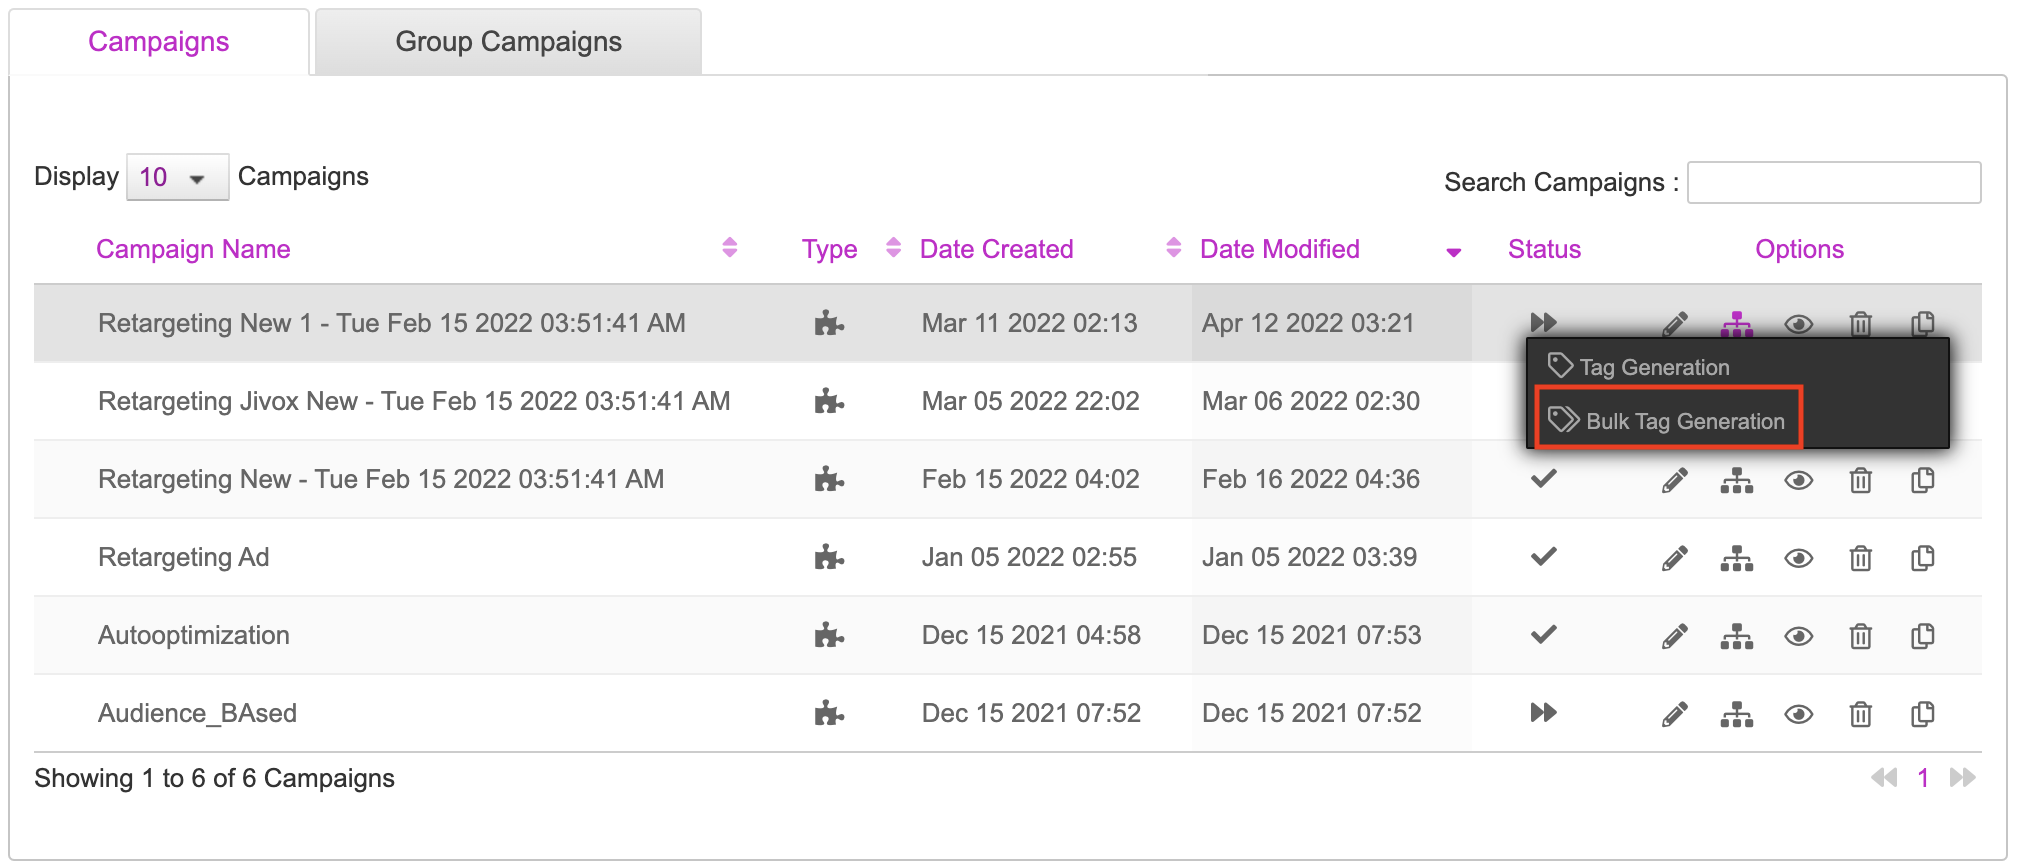
2- Click Bulk Tag Generation.
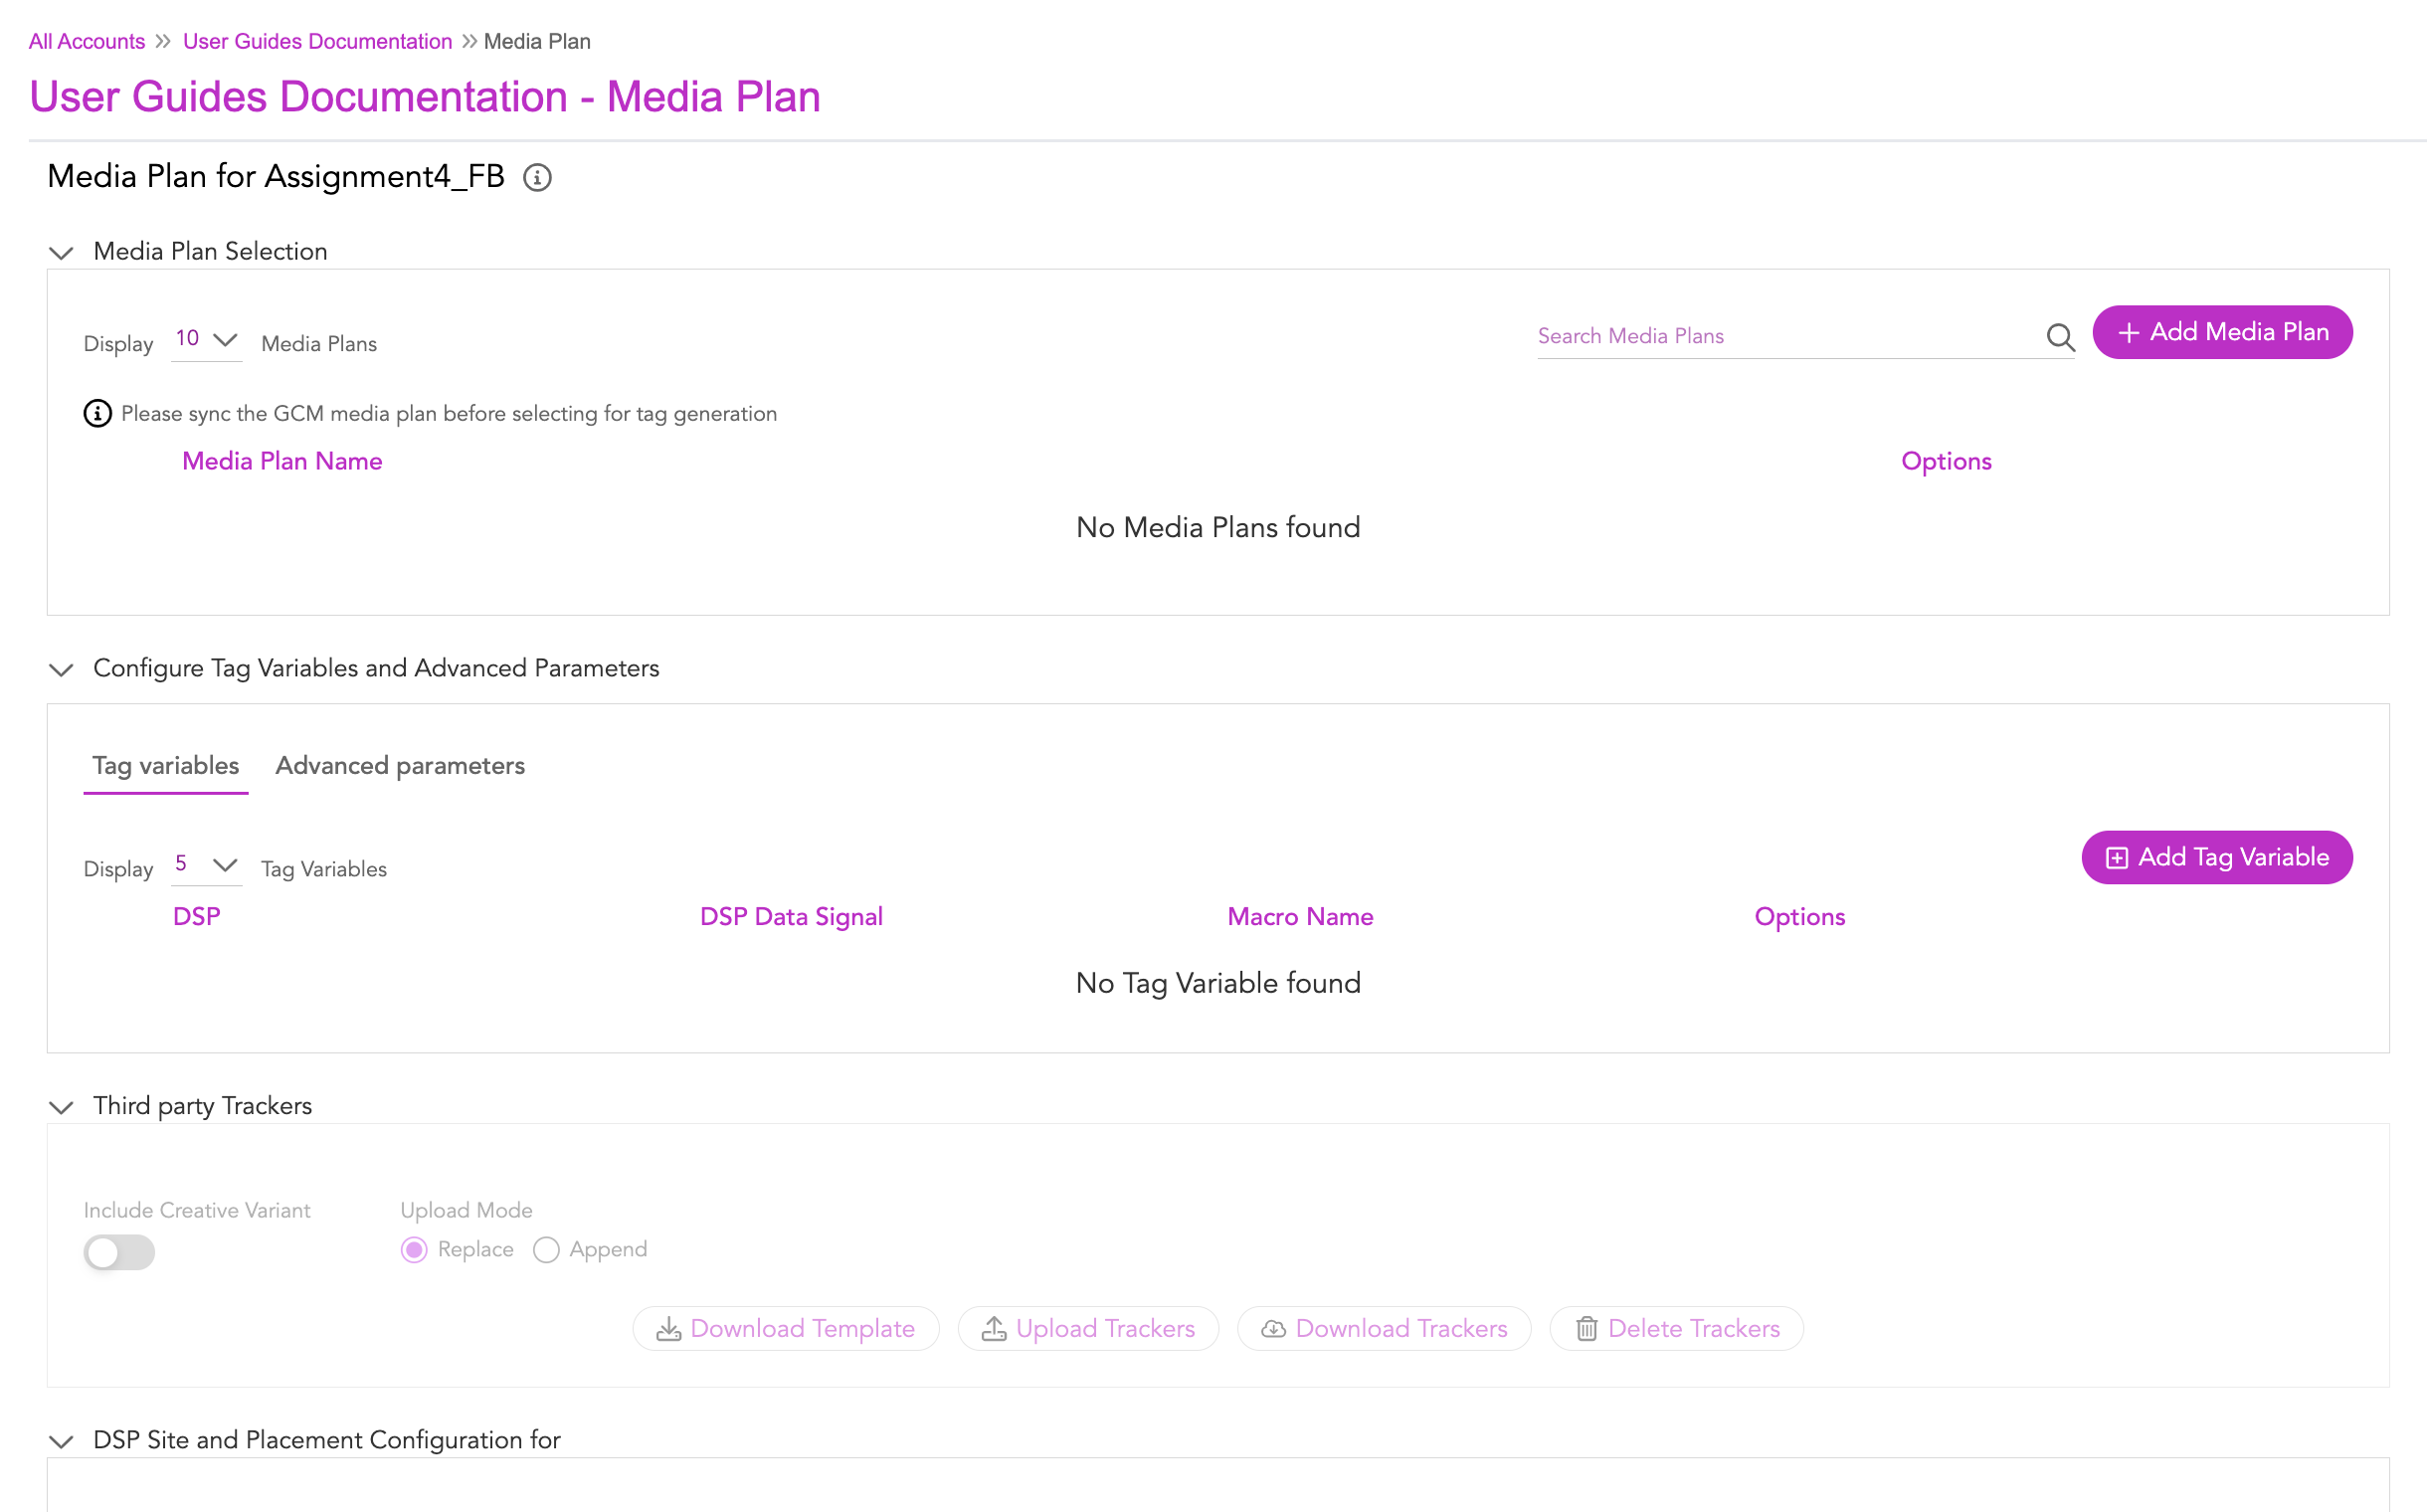
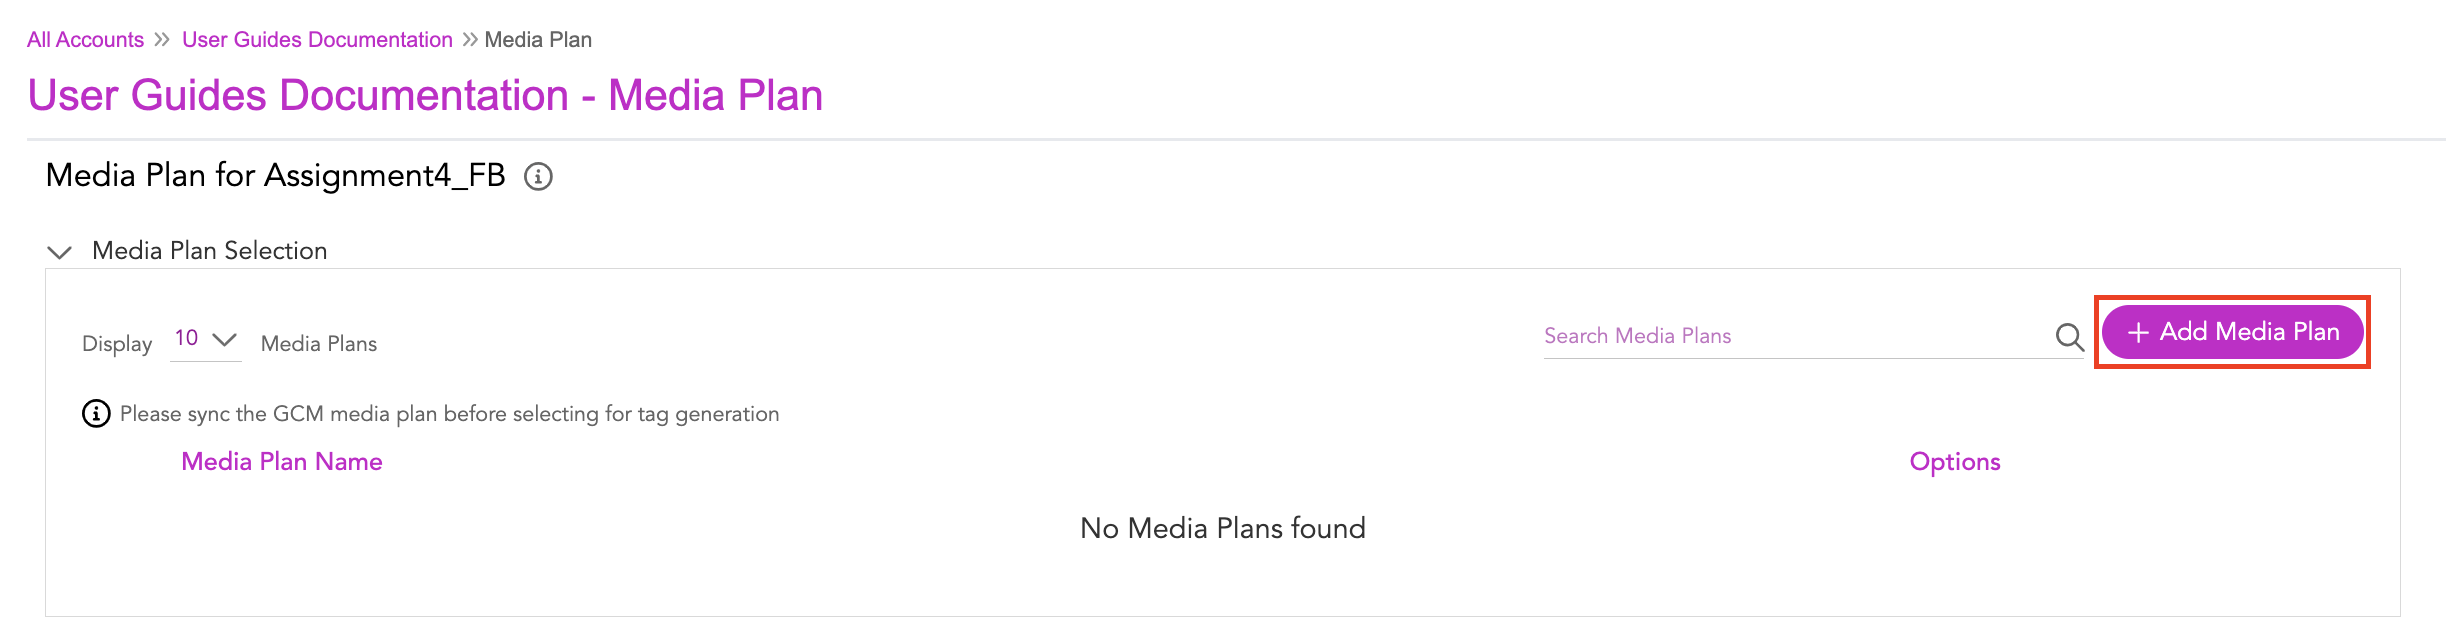
The Media Plan section for the selected campaign is displayed. Any existing media plans for the selected campaign are displayed under Media Plan Selection. In this case, since we have not created any media plans earlier, the Media Plan Name section is blank.
Creating Media Plan
While generating tags using this option, it is mandatory to create a Media Plan first. Let's start!
1- Let's click the Add Media Plan button to create a new media plan**.**
On clicking the Add Media Plan button, we will be taken to the Create new Media Plan section, as shown in the image below.
Here, it's mandatory to download the Media Plan template. This will ensure the details provided in the uploaded document is compatible with the system.

2- Let's click the Download Media Plan Template button.
The media plan template gets downloaded to your local system. You will be given an option to save it to your desired location in your system.
The media plan template is made available for users at the time of creating a new media plan.
Enter the required data in the template like DSP Name, Site Name, Placement name, Placement dimension, which are mandatory fields. For the remaining columns in the template, based on your requirements you can pass the values for the tracker details, primary banner trackers, secondary banner trackers, image and javascript trackers, instream etc. After updating the template with the desired values, save the media plan template and then upload.

Here's a sample Media Plan that we have used here.
3- To upload, go to the Create new Media Plan section, and click the Upload Media Plan button.

After the media plan is uploaded successfully, the following screen gets displayed with the columns DSP Name, Site Name, Ad Unit type, Placement name, Placement dimension, Expansion unit, etc.
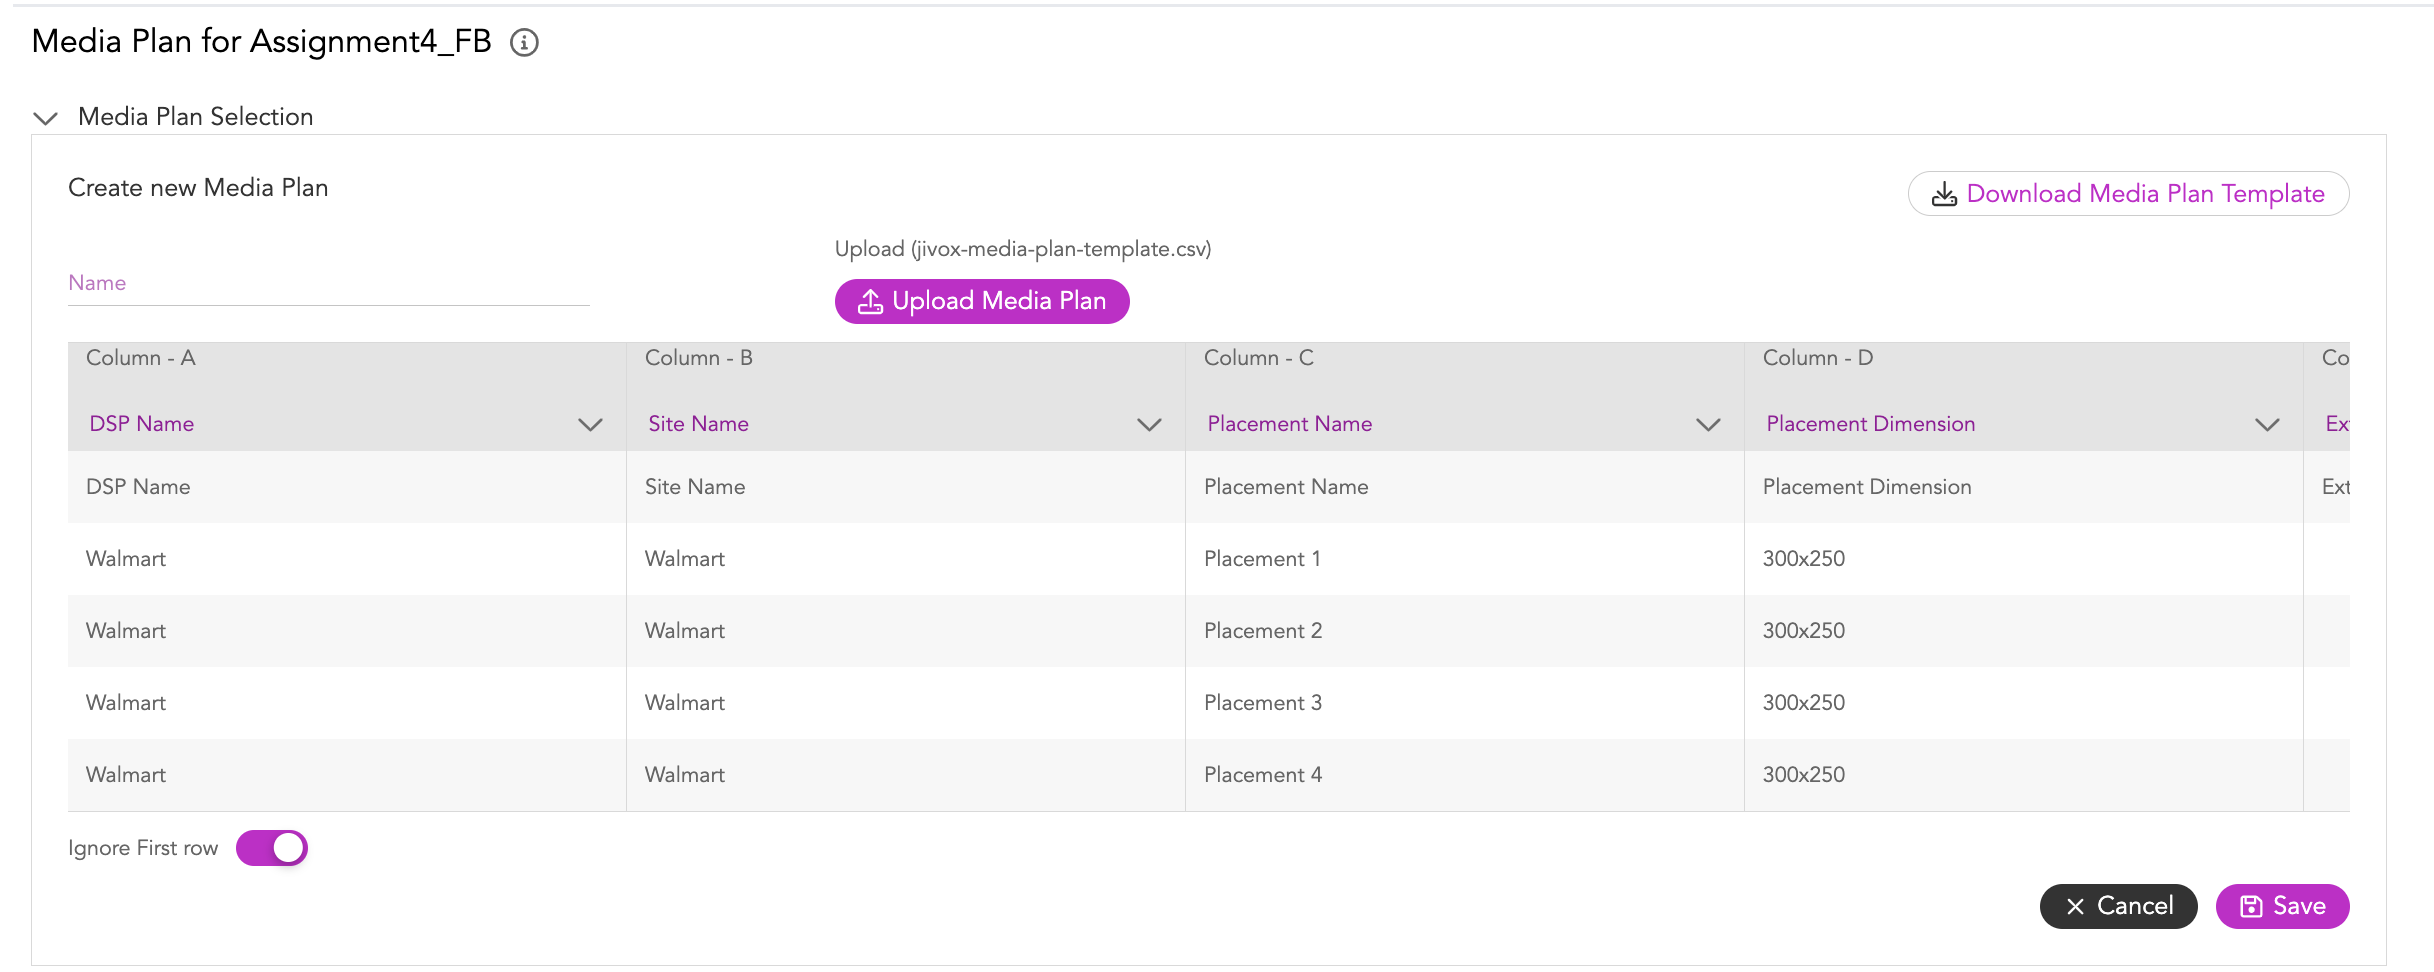
4- Enable the Ignore First row toggle switch. This will ignore the first row in the table that has the name same as column header like DSP Name, Site Name, Ad Unit type.
If the columns in the uploaded media plan are not mapped correctly with the column headers in the media plan screen, click the column header dropdown and select the relevant column header.
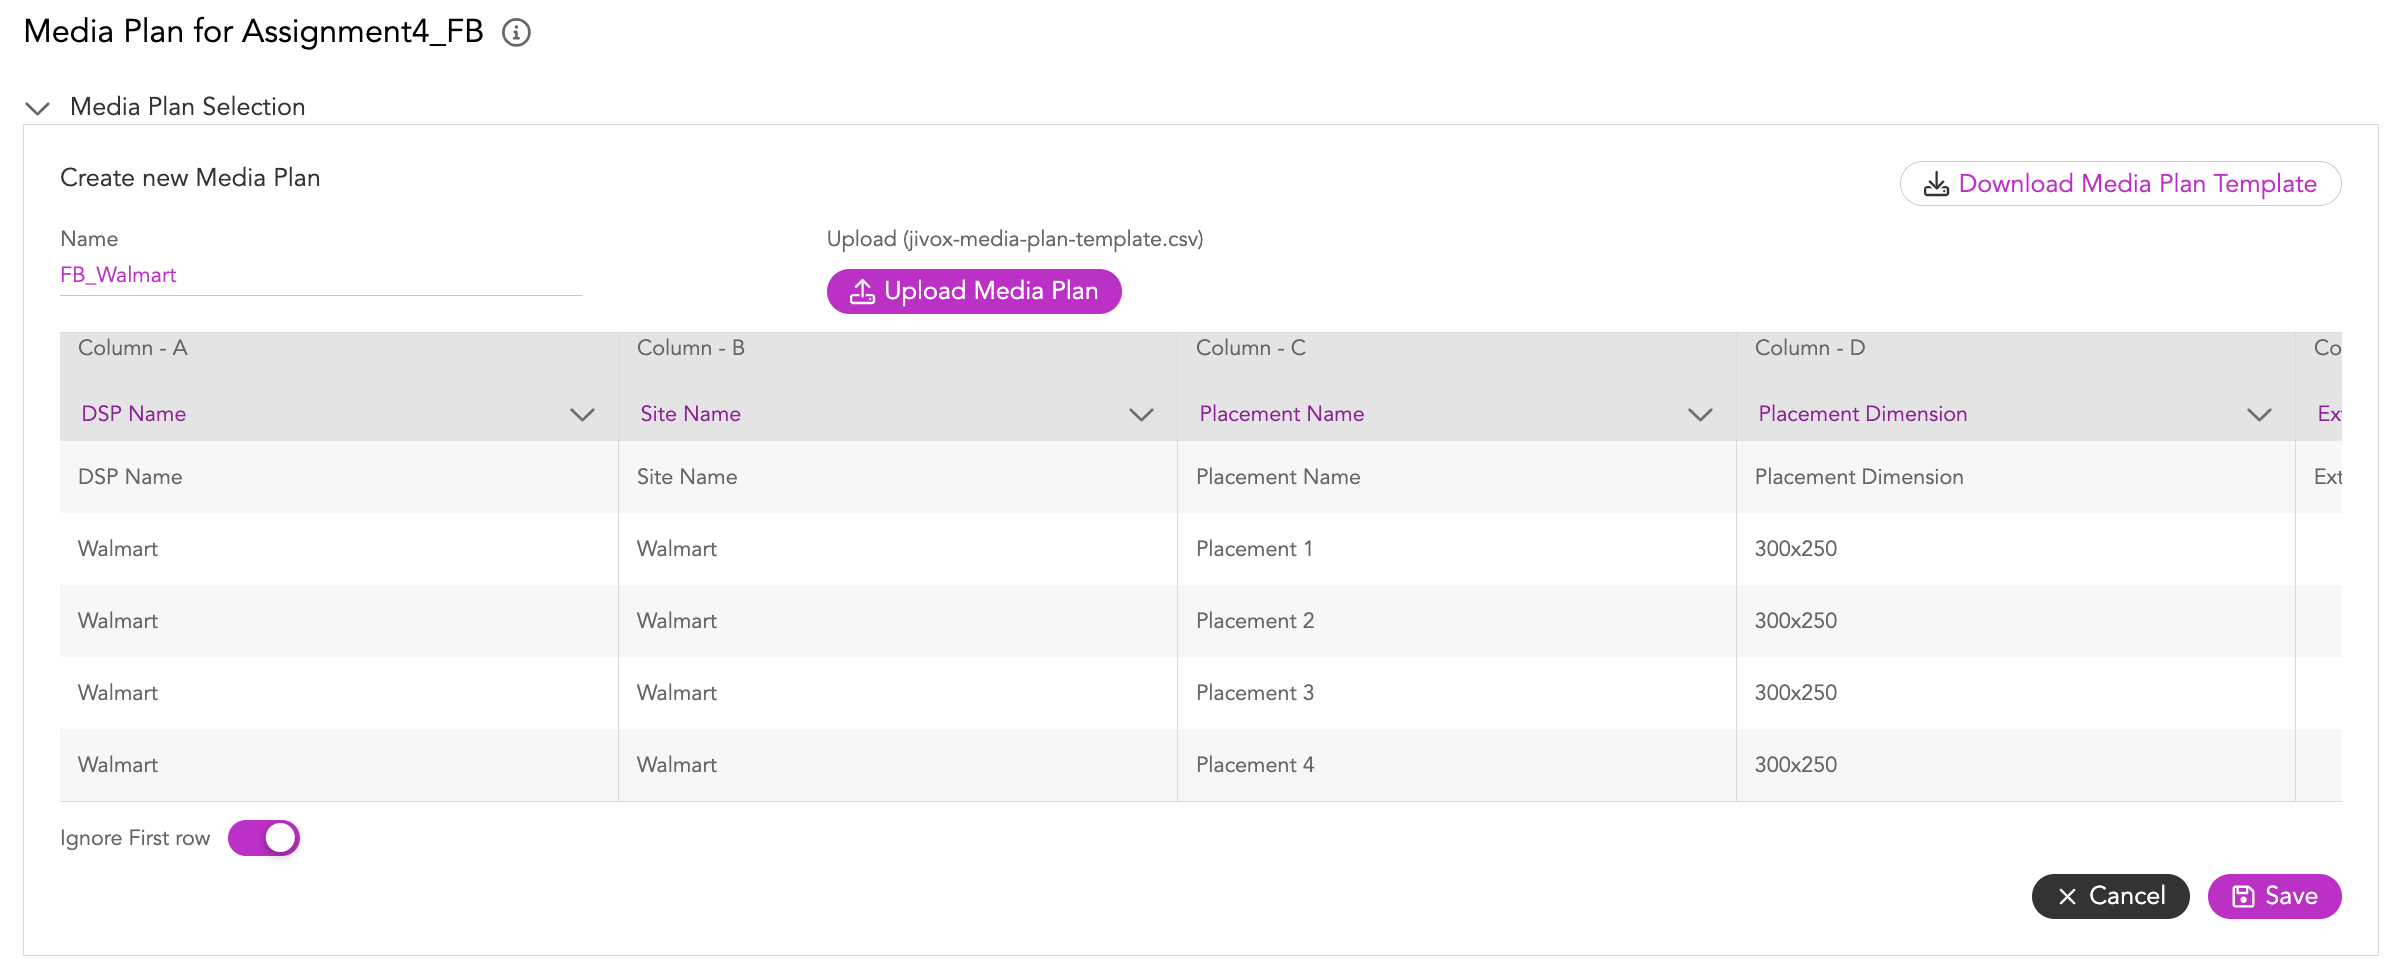
5- Enter a name for the Media plan under the Name field and click the Save button.
If you enter a name that already exists for the placement, an error message gets displayed "Media Plan already exists"
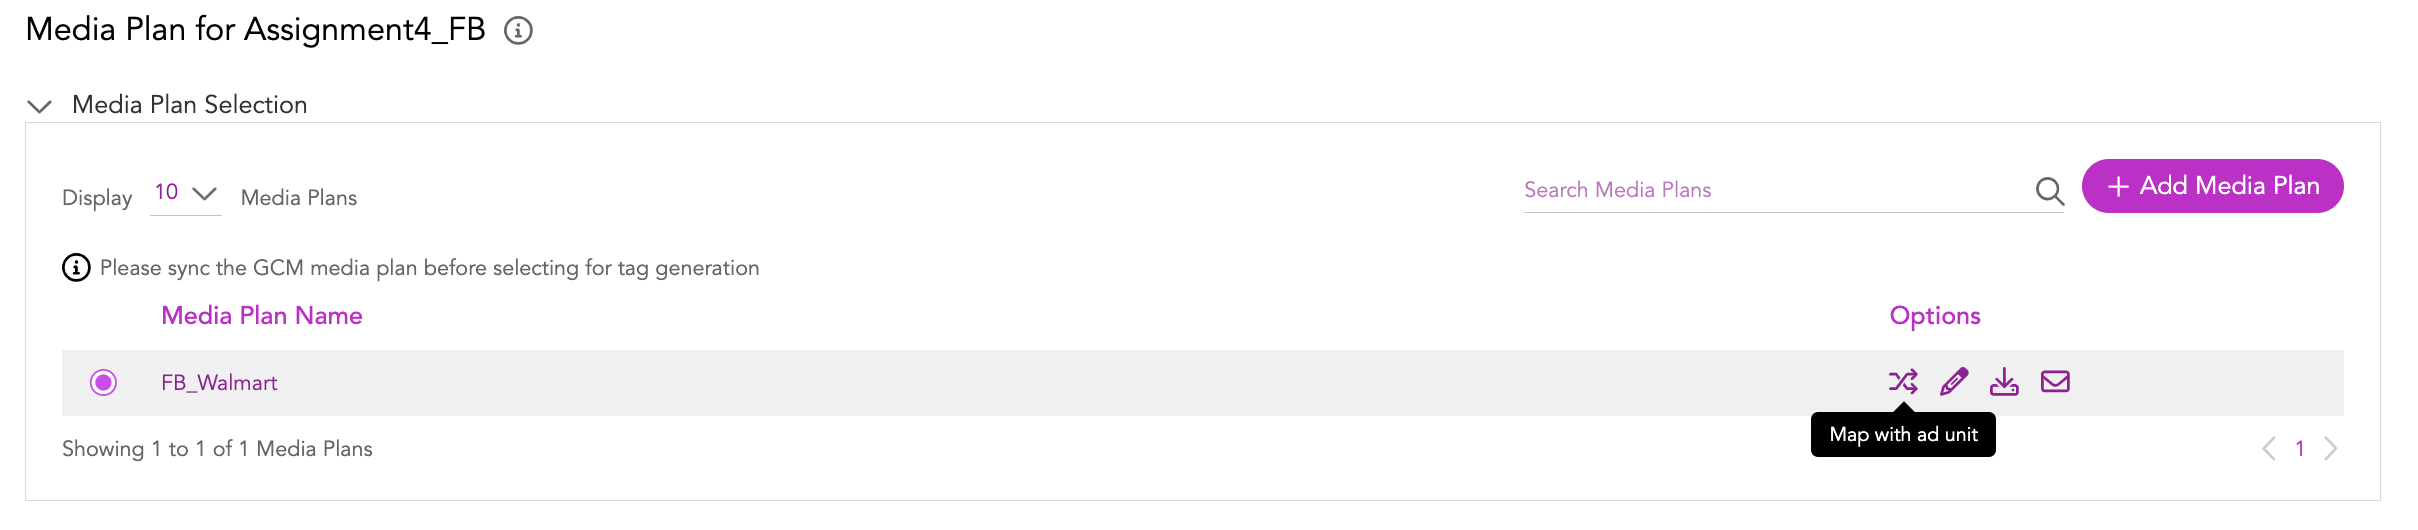
The media plan created will get listed under the Media Plan Name in the Media Plan Selection section.

Mapping the Media Plan to the Ad
To map the placement with the ad unit, follow the below steps:
1- Click the (Map with ad unit ) icon under the Options column to open the Ad unit - Placement Mapping setup.
The placements defined for the media plan are listed in the table here. The Ad Unit, and Skip this Placement fields are blank before you do the mapping.
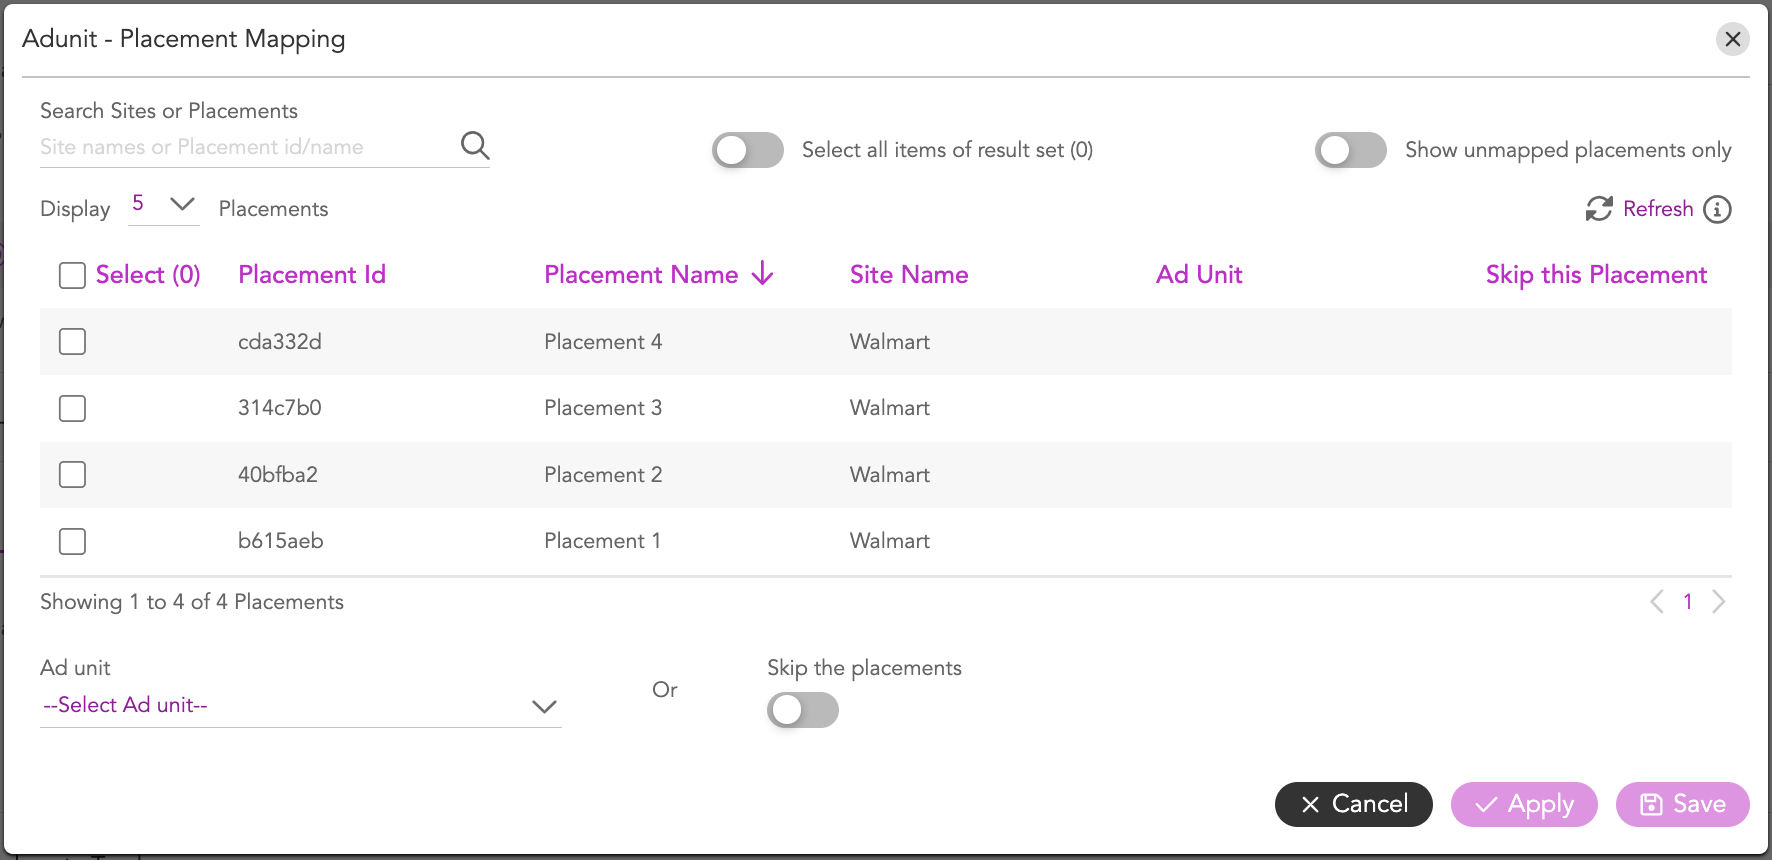
2- Click the checkbox next to each placement to select them. If you want to select all placements, select the checkbox on the top.
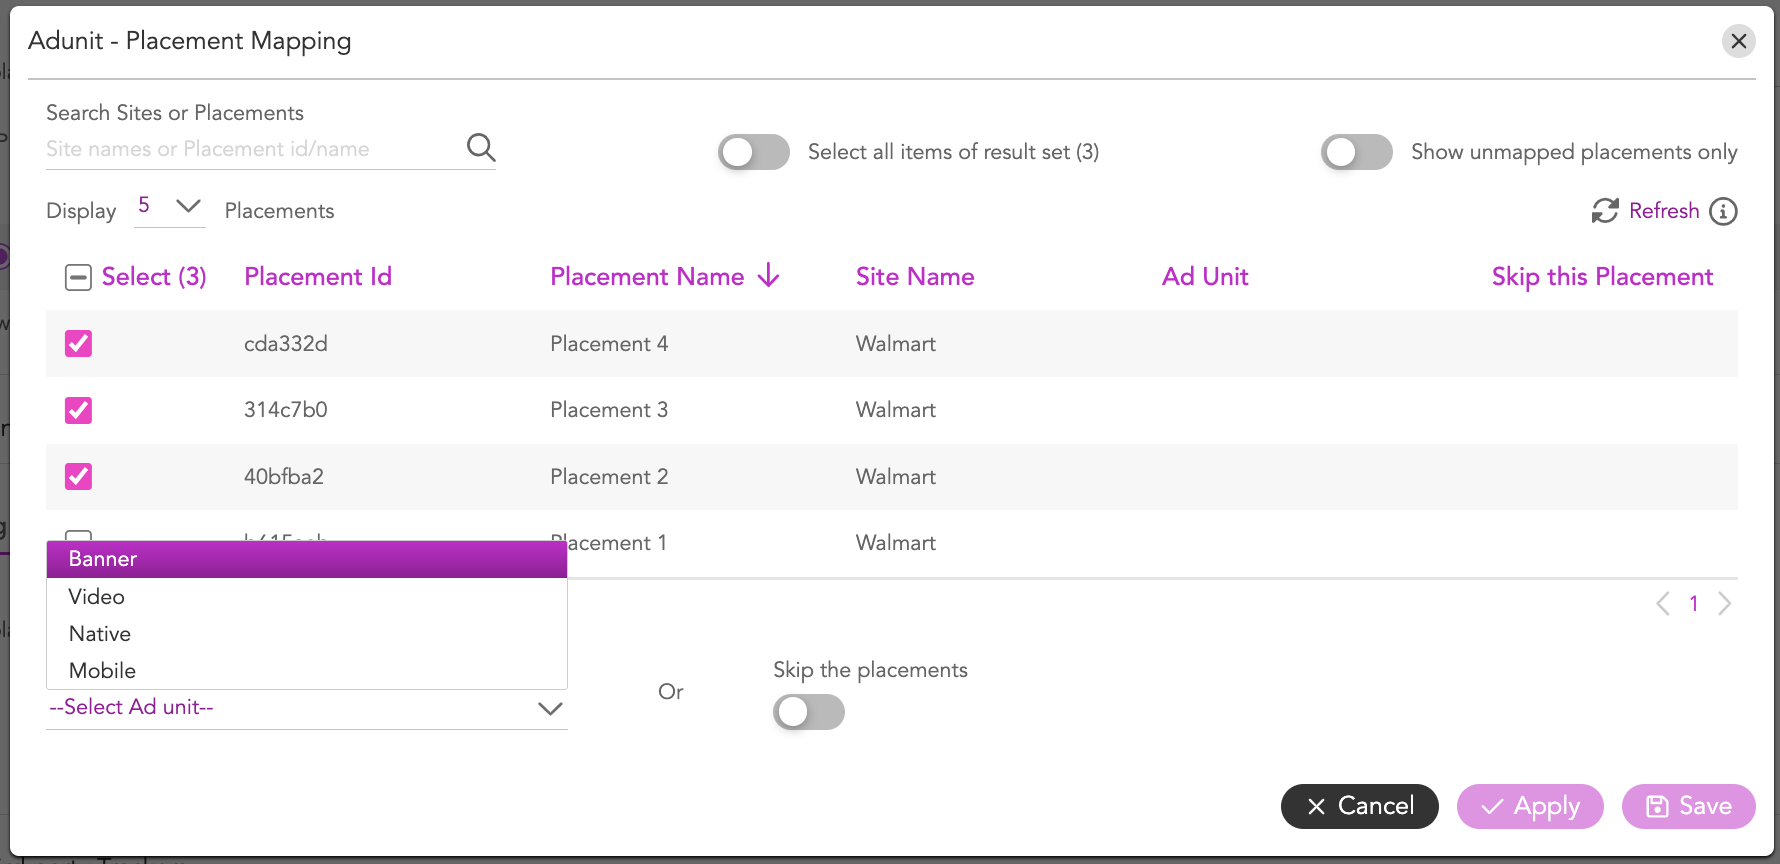
3- Next, select the Ad Unit type from the drop-down. Here, we will select Banner.

Next, click Apply to apply the mappings.
You can repeat the steps to map any othe placements to other Ad Units if required.
If you do not wish to generate tags for specific placement(s), then do the following:
Select those placements for which you do not want to generate tags by following steps 3 and 4 above.
Click the Skip the placements toggle button.
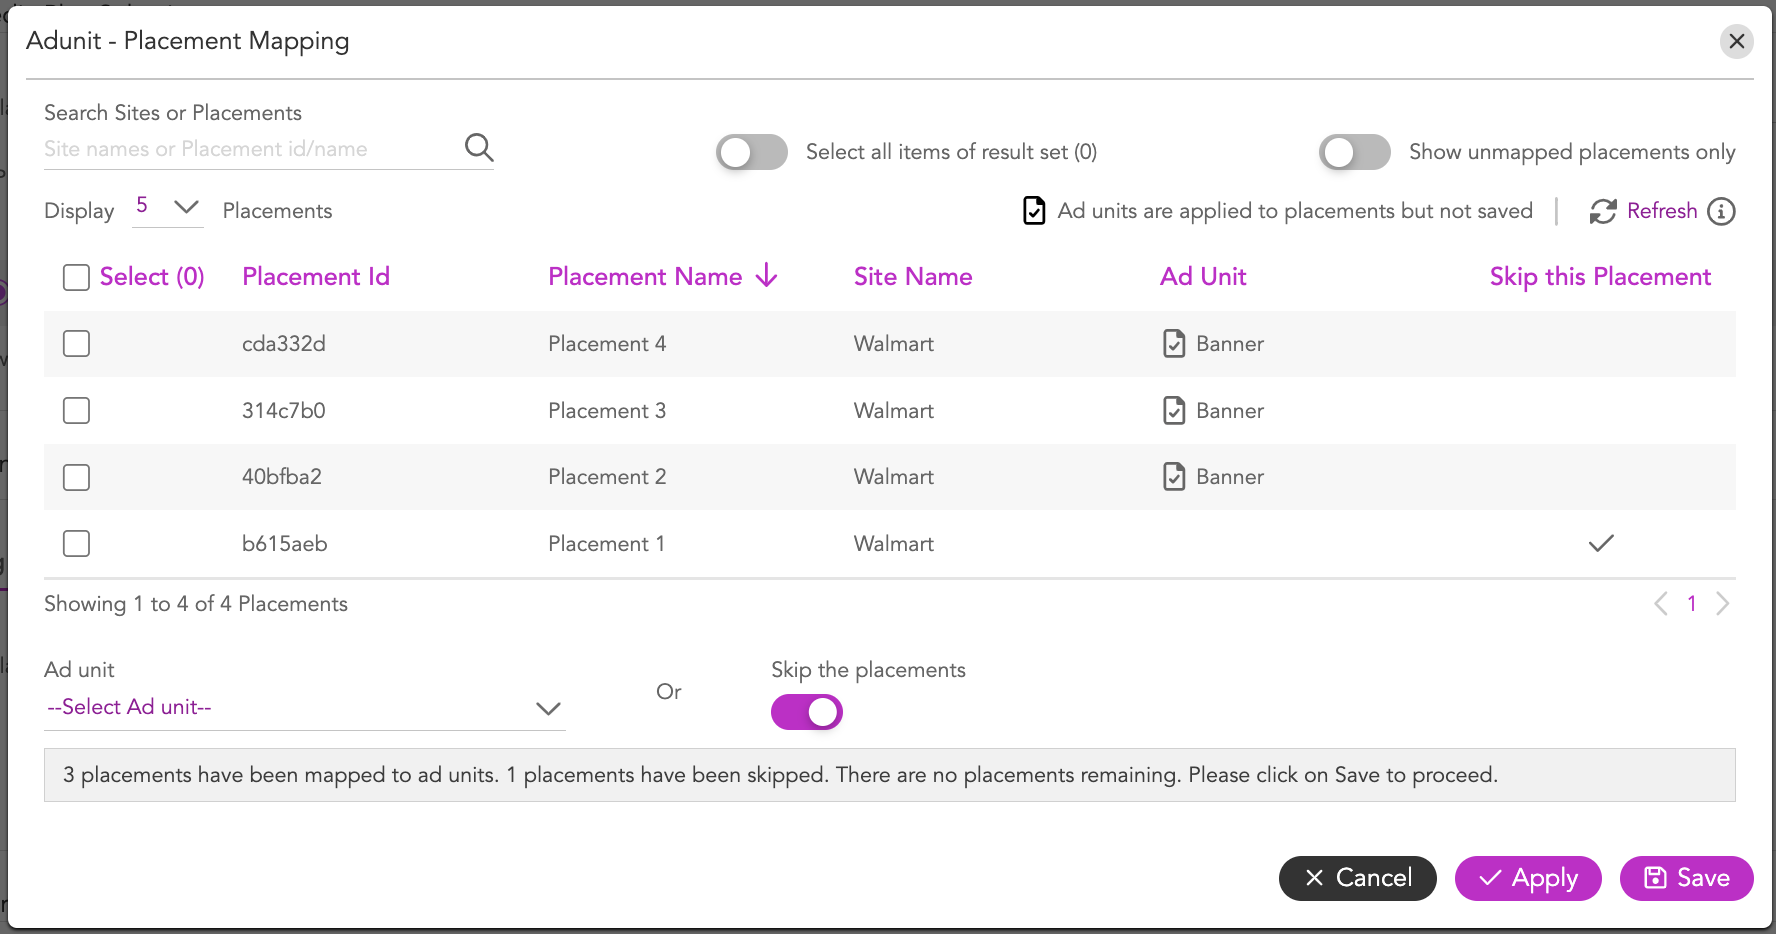
Once you are done, click Save to save the mappings.
Configuring Tag Variables
You can map the data signal with the macro variable for all the placements under respective DSP(s). This configuration applies to all the placements defined under respective DSP(s).
After generating the tag, the DSP- Data signal mapping is included for the Macro Name in the tag. You can view the DSP- Data signal mapping in the generated tag.
Now that we have created the media plan, let's configure the tag variables.
1- Click the Add Tag Variable button, to open the Add Tag Variable setup.

2- Select Walmart from the DSP drop-down.
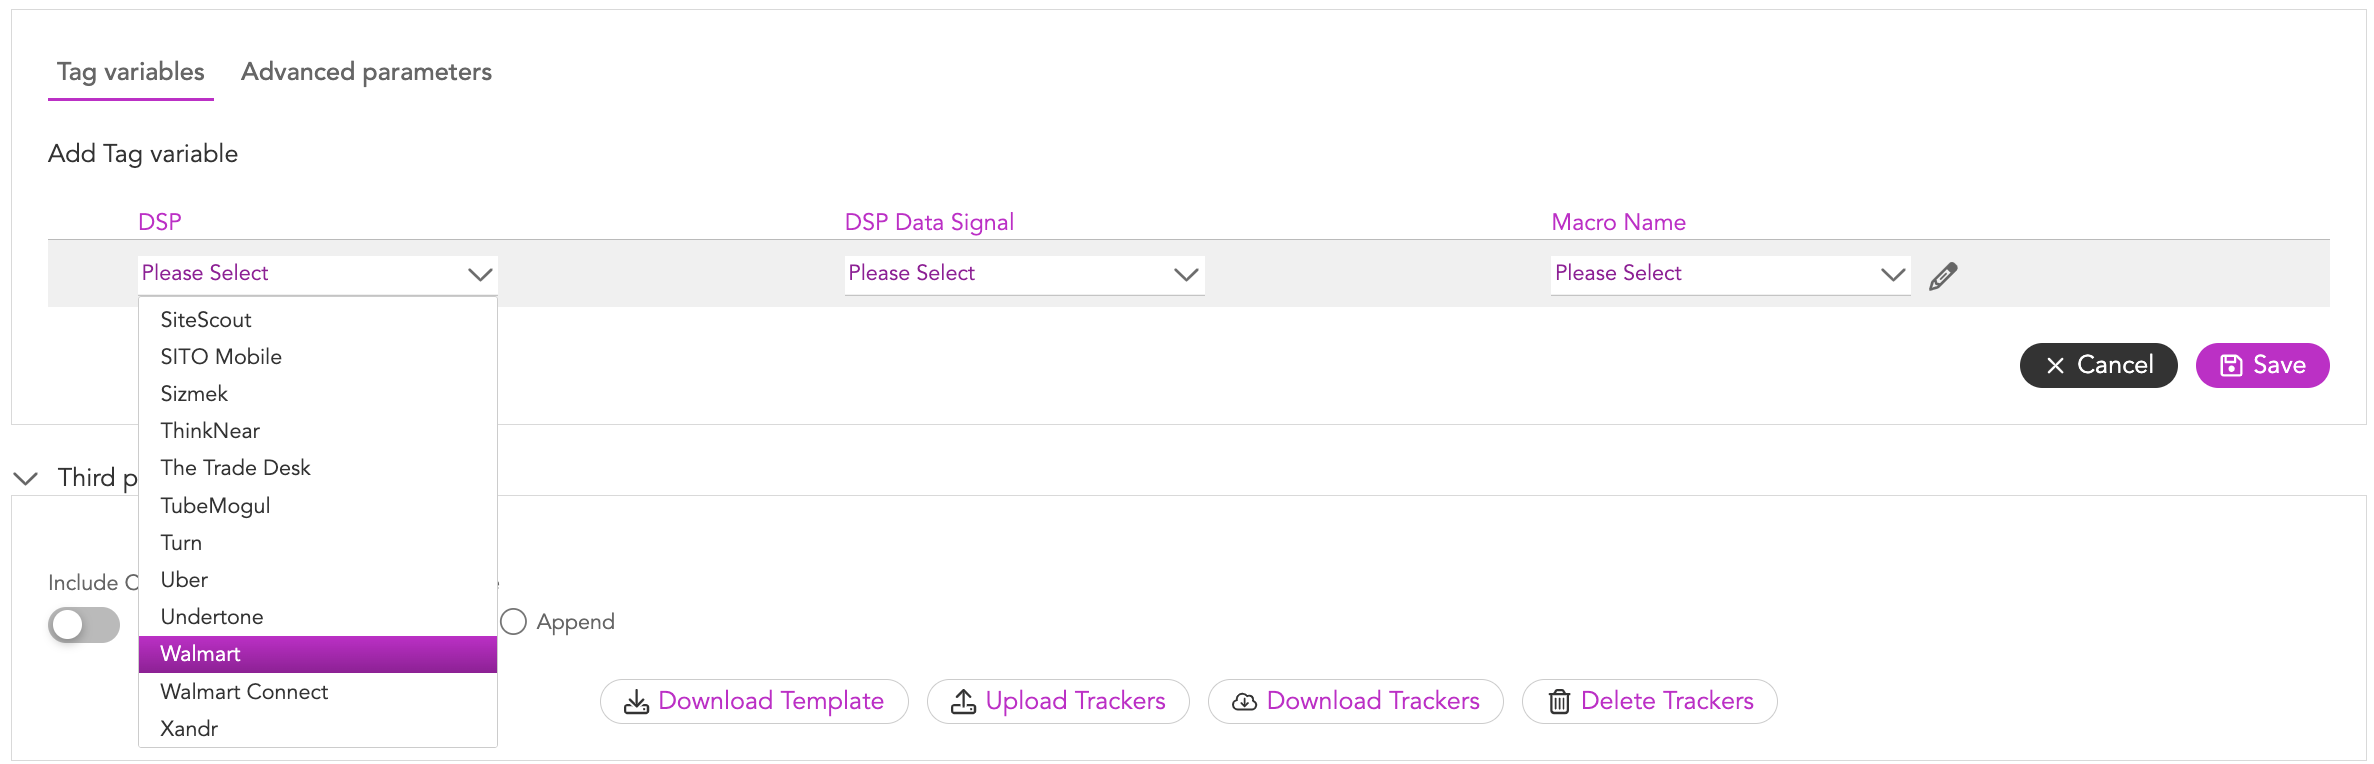
3- Select the DSP Data Signal and Macro Name from the respective drop-downs. You can also use the Edit (Pencil) icon to enter a custom Macro name.

4- Once done, click Save.

You can click the Edit (Pencil) icon to edit the values if required.
Advanced Parameters (Optional)
Next, we will update the advanced parameters. Follow these steps:
1- Switch to the Advanced parameters tab and then click on Add Advanced parameters button.

2- Enter the parameter name and Value that you would like to use and click Save.

Configuring DSP Site and Placement
After configuring the tag variables, the next step is to configure the DSP site and placement.
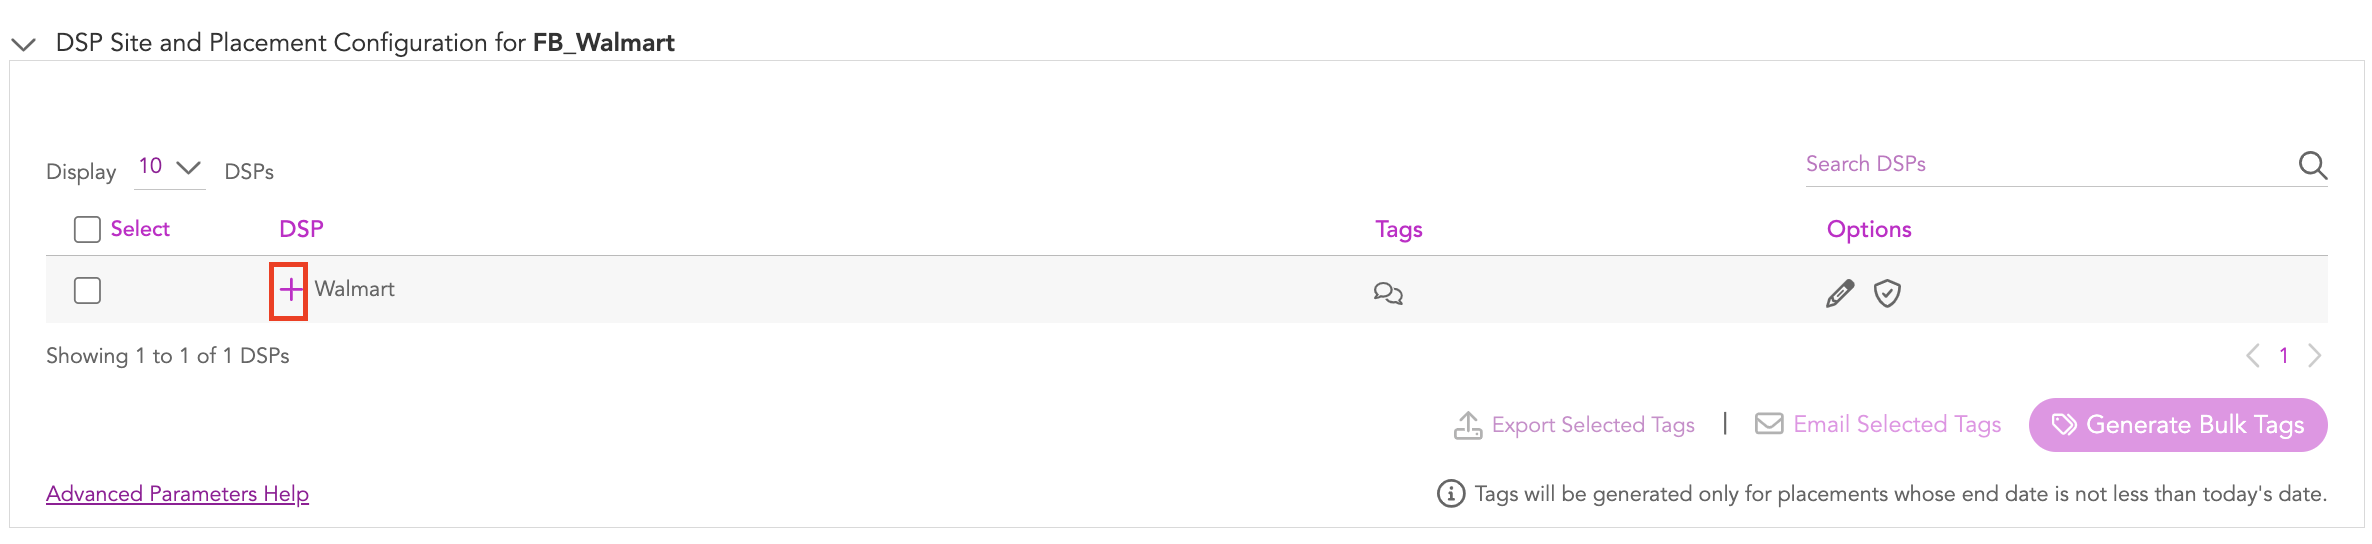
Once you upload your media plan, the DSPs defined in your media plan appear under the DSP Site and Placement Configuration section. In this case, since we had defined Media Plan had Walmart listed as the DSP, we will see Walmart here.
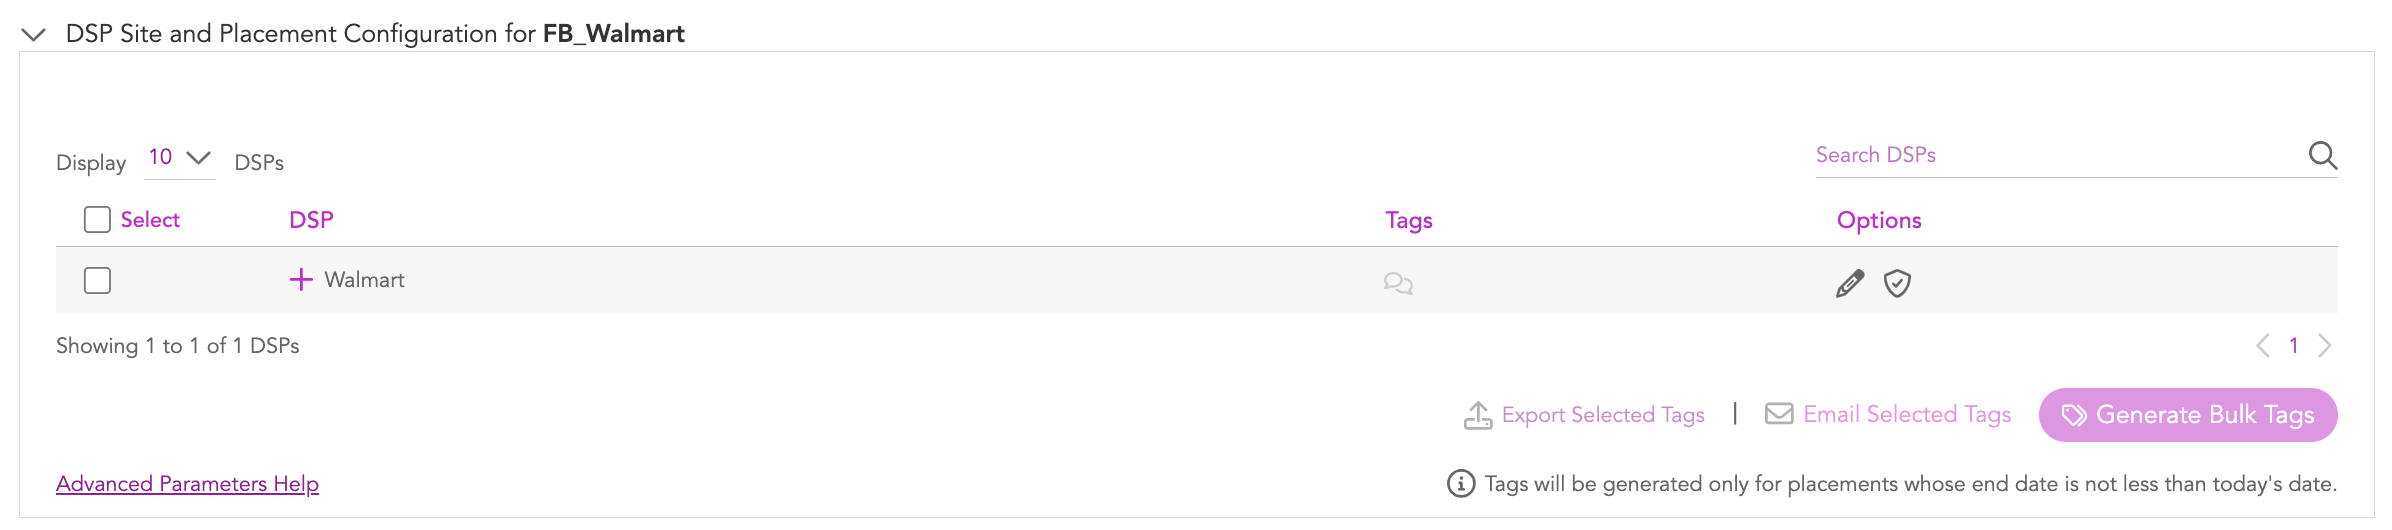
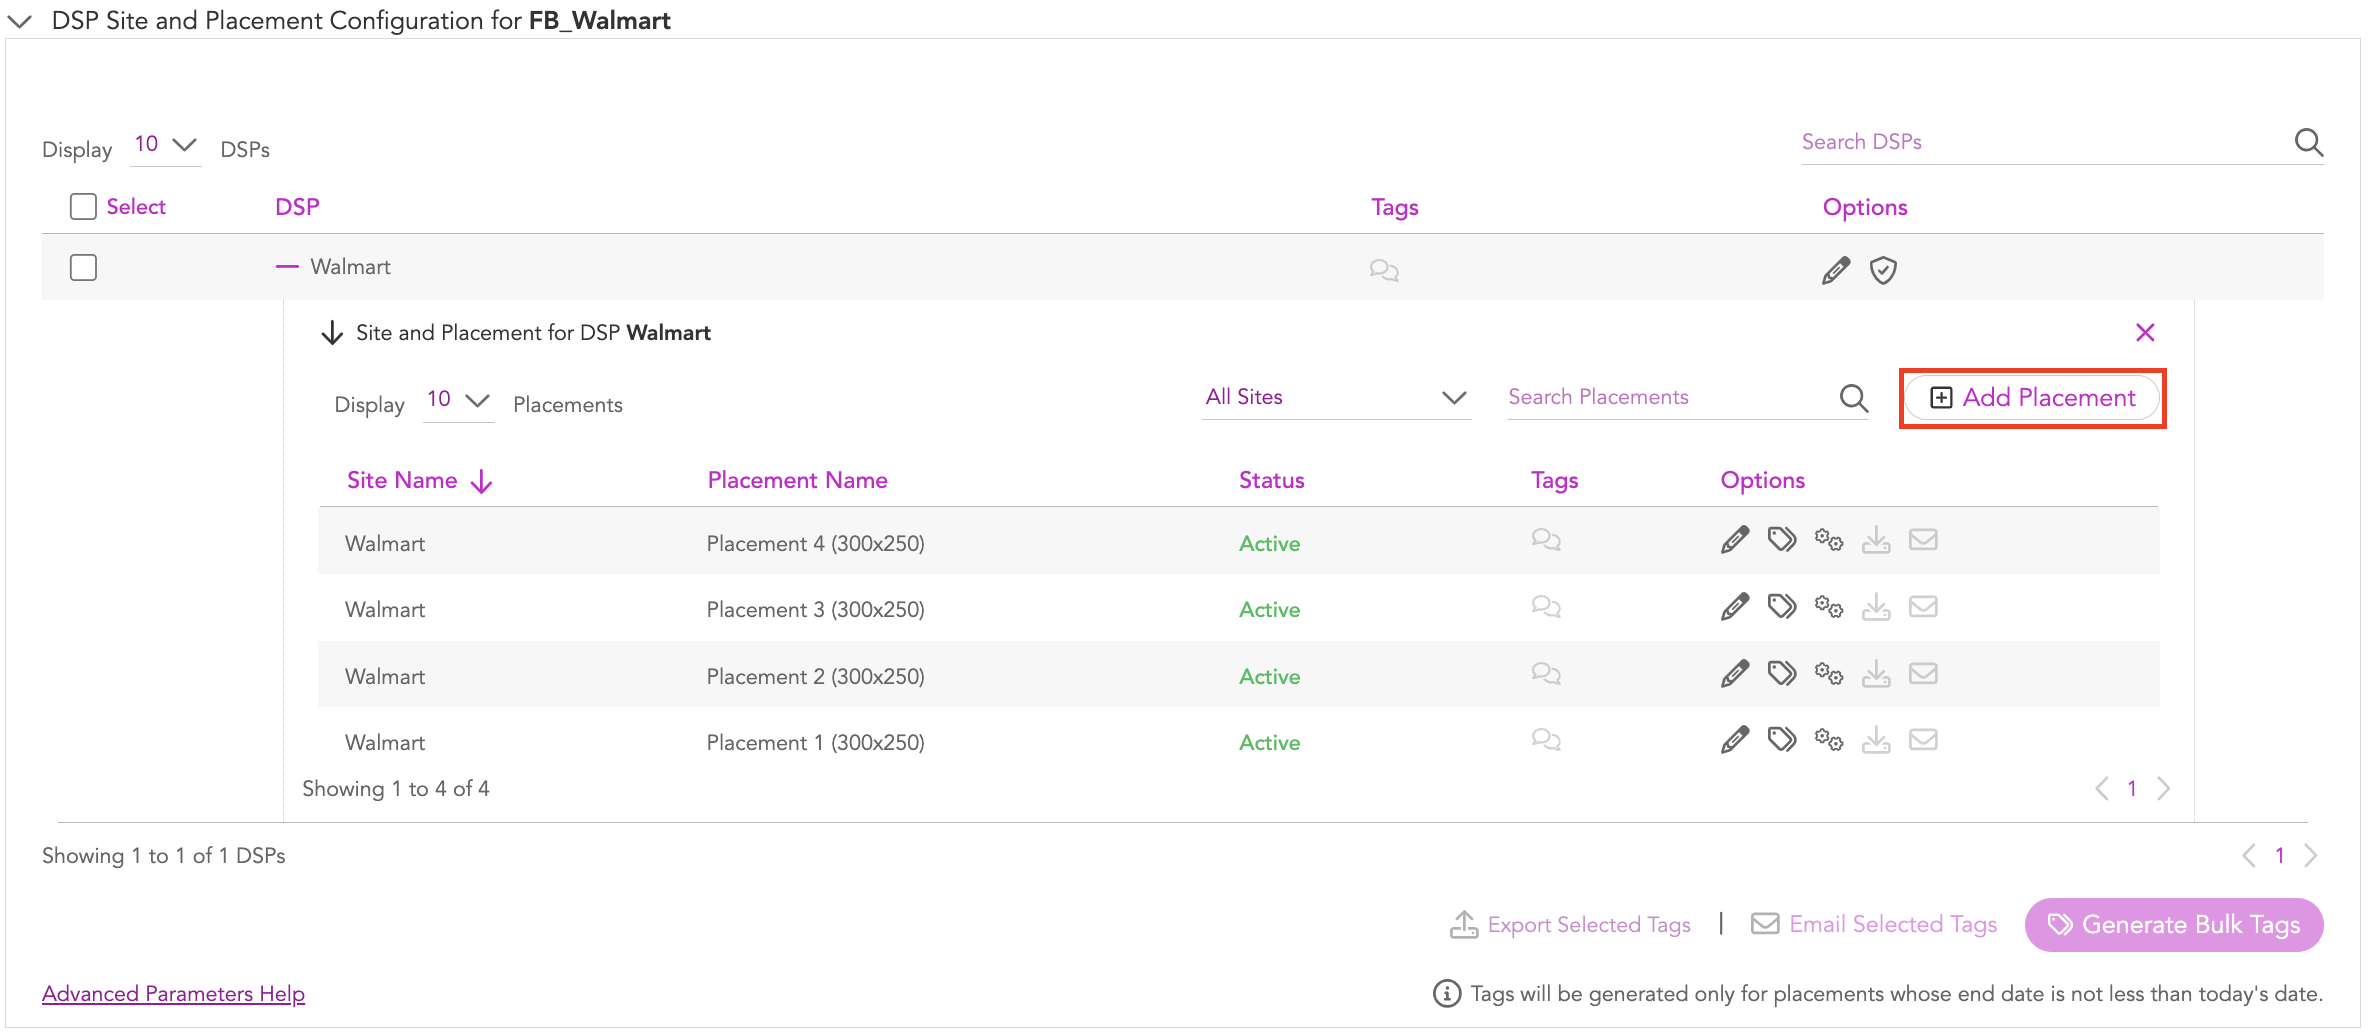
1- Click the + icon next to Walmart (DSP Name) to view all the Sites and Placements associated with it.

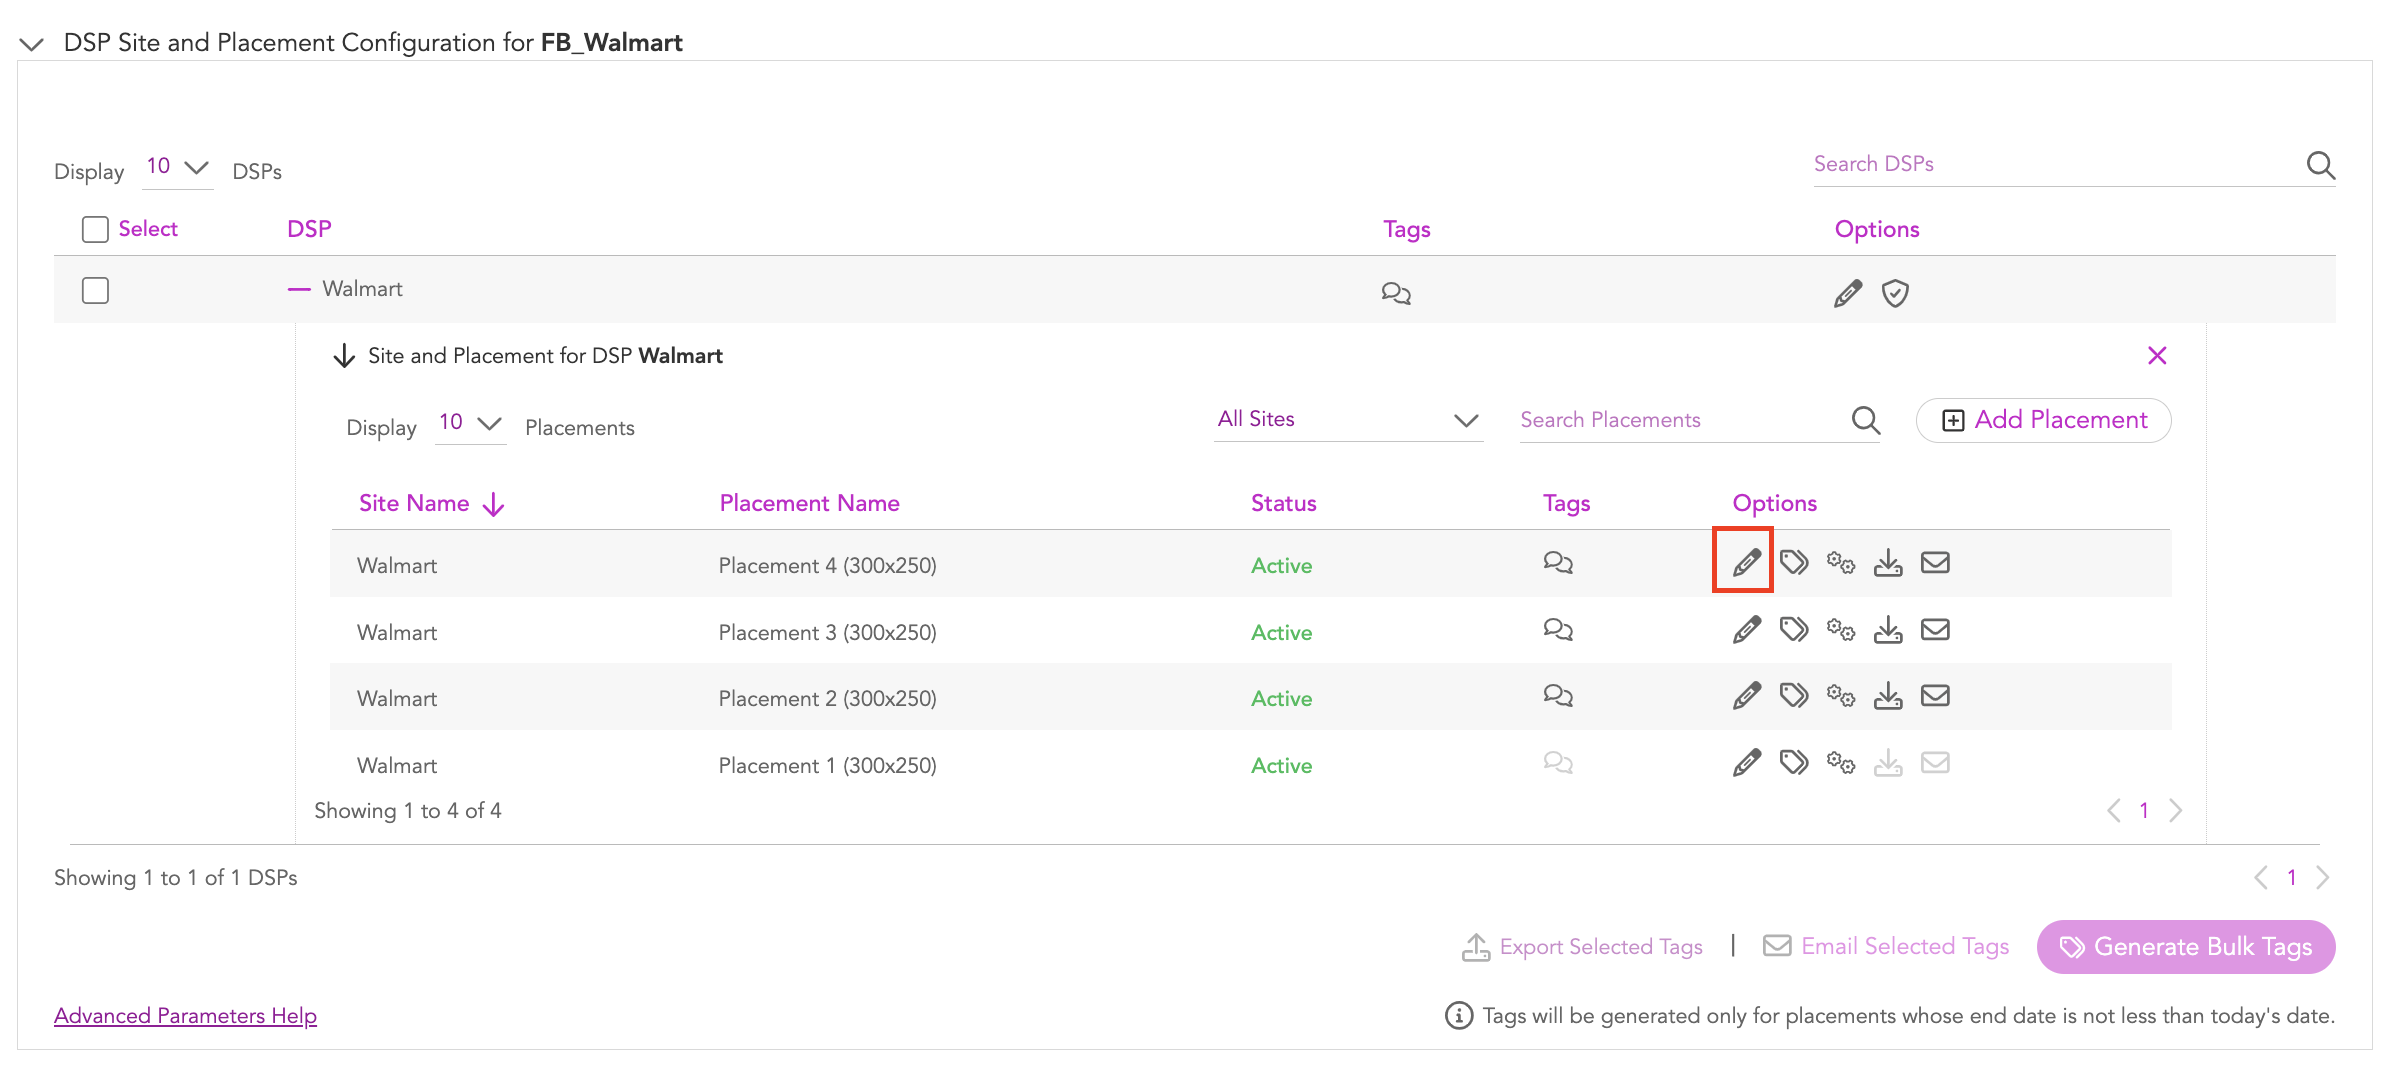
The Status of a placement can be Active or Inactive depending on the date range you specify. A placement is active if the current date is within the specified start and end date range. It becomes inactive when the current date is not within the specified start and end date range.
You can generate the tags for the placement(s) only if the end date has not elapsed.
Since we have already added site and placement details in the Media Plan, you don't need to do anything here. We can just verify the details and go ahead and generate tags. You can also add more placements if required.
Adding Placements and Sites
Jivox IQ allows you to add placement(s) from the UI. You can use this option when you wish to add fewer placements.
1- Click the Add Placement button to open the setup.
2- Provide the following details:
Site Name: Enter the site name.
Placement Name: Enter the placement name.
Ad unit: Select the ad unit type you would like to associate with the placement.
Dimension: Enter the dimension of the ad unit associated with the placement.
Start Date: Select the placement activation start date using the date-picker.
End Date: Select the placement activation end date using the date-picker.
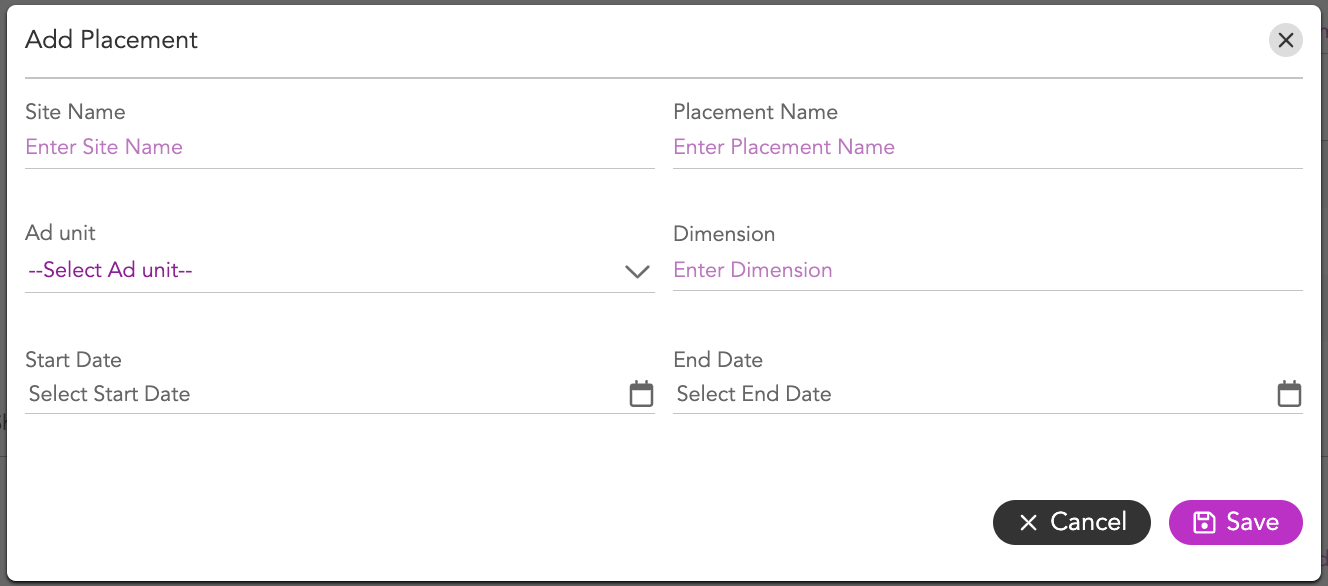
3- Click Save.
The placement details will be saved.
Generating Tags in Bulk
Jivox IQ allows you to generate tags in bulk using the Bulk Tag Generation option.
Select the checkbox next to Walmart.
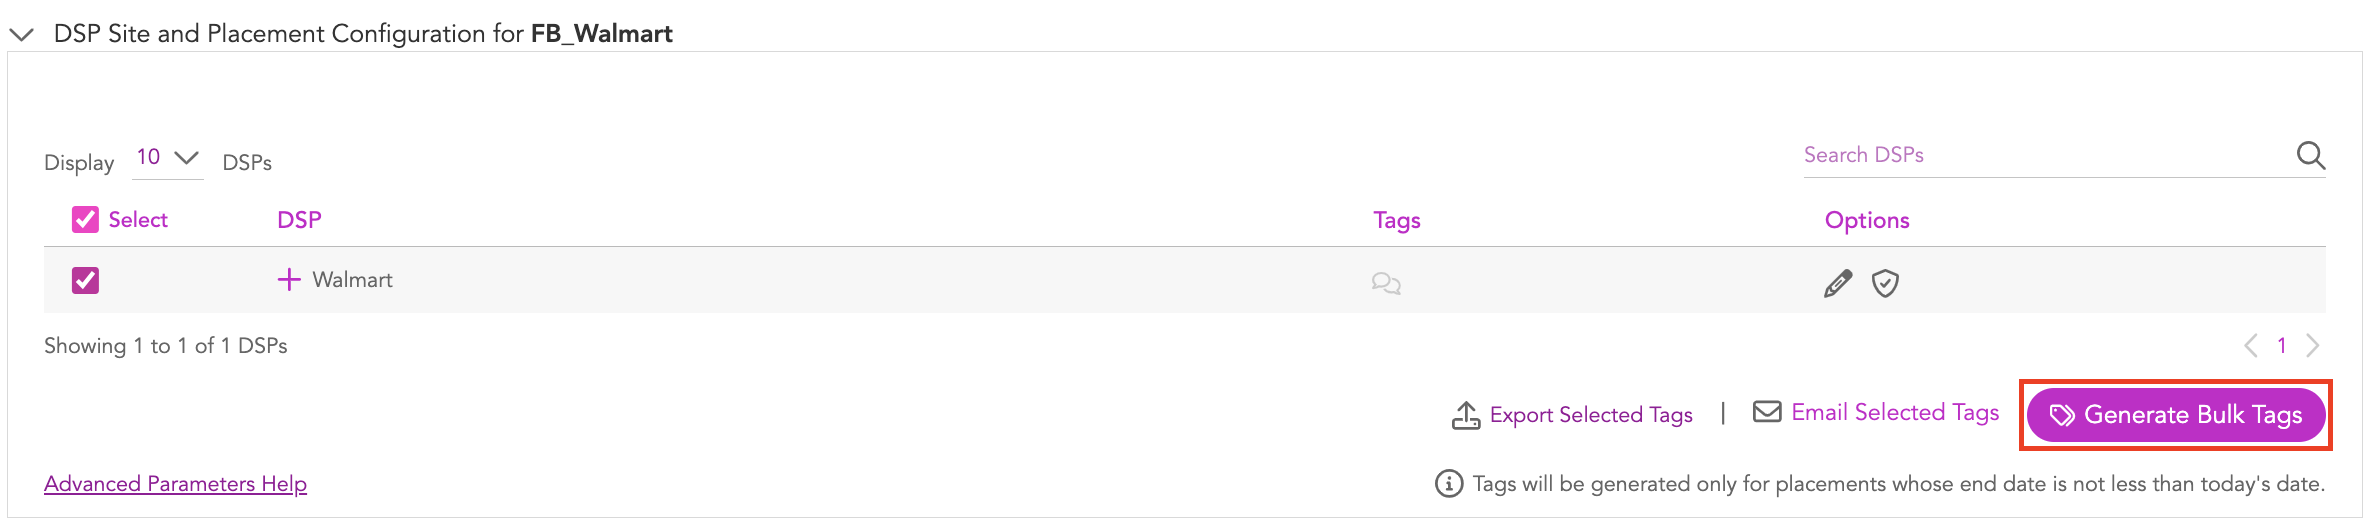
2- Click Generate Bulk Tags. Tag generation process might take some time.
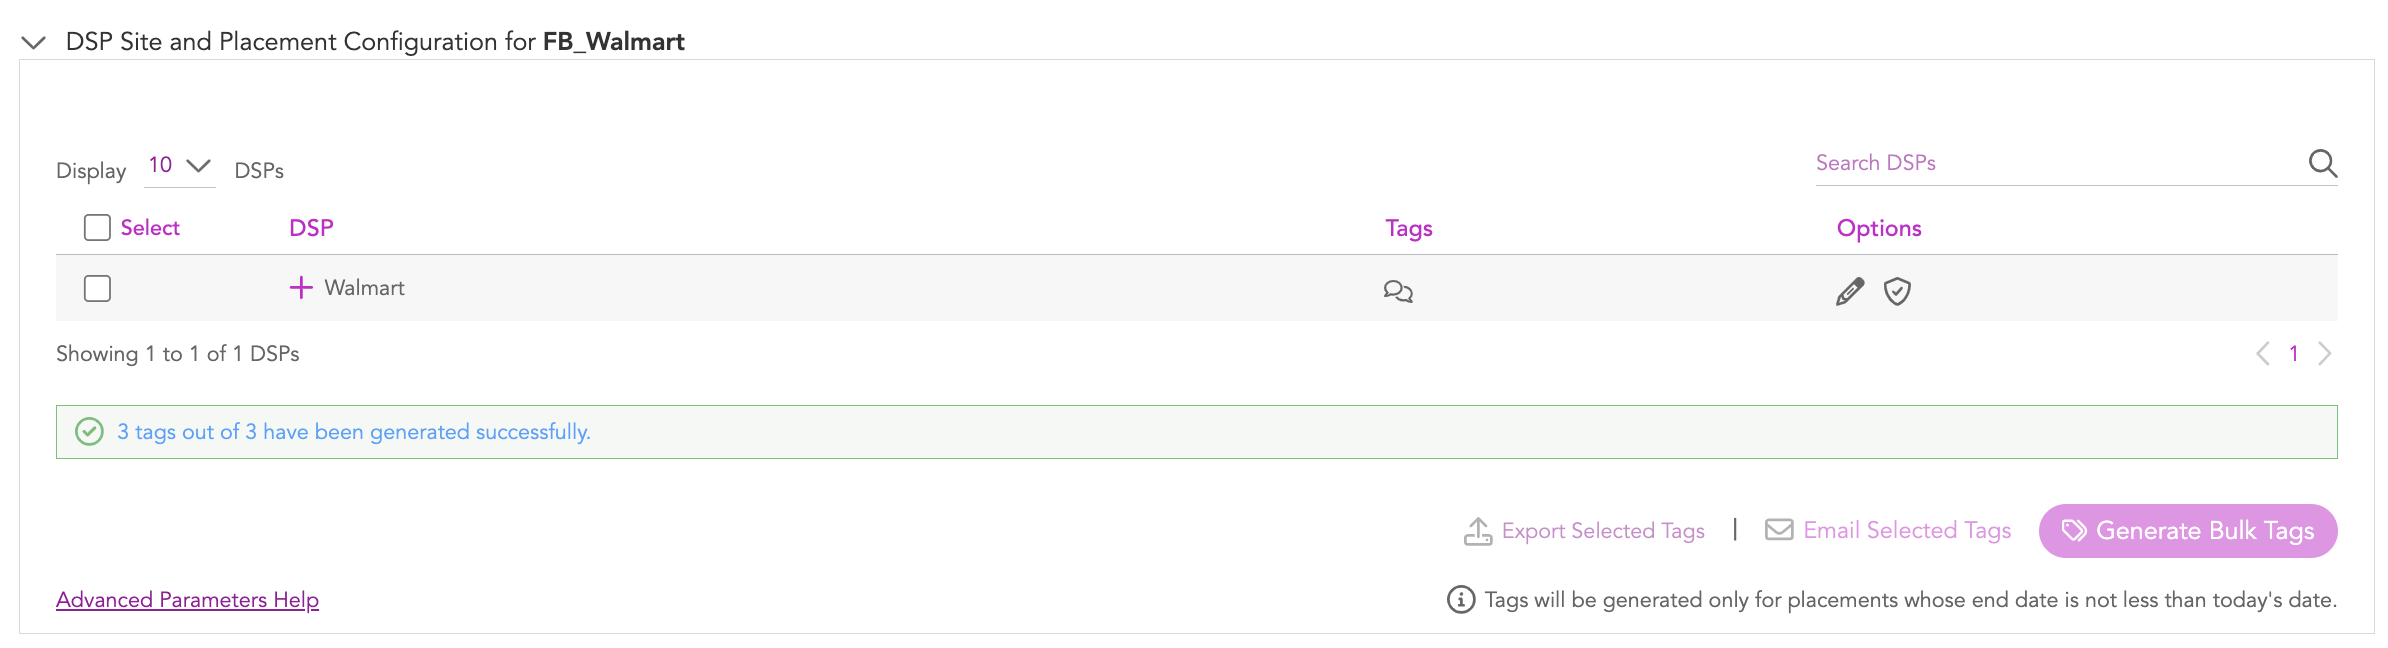
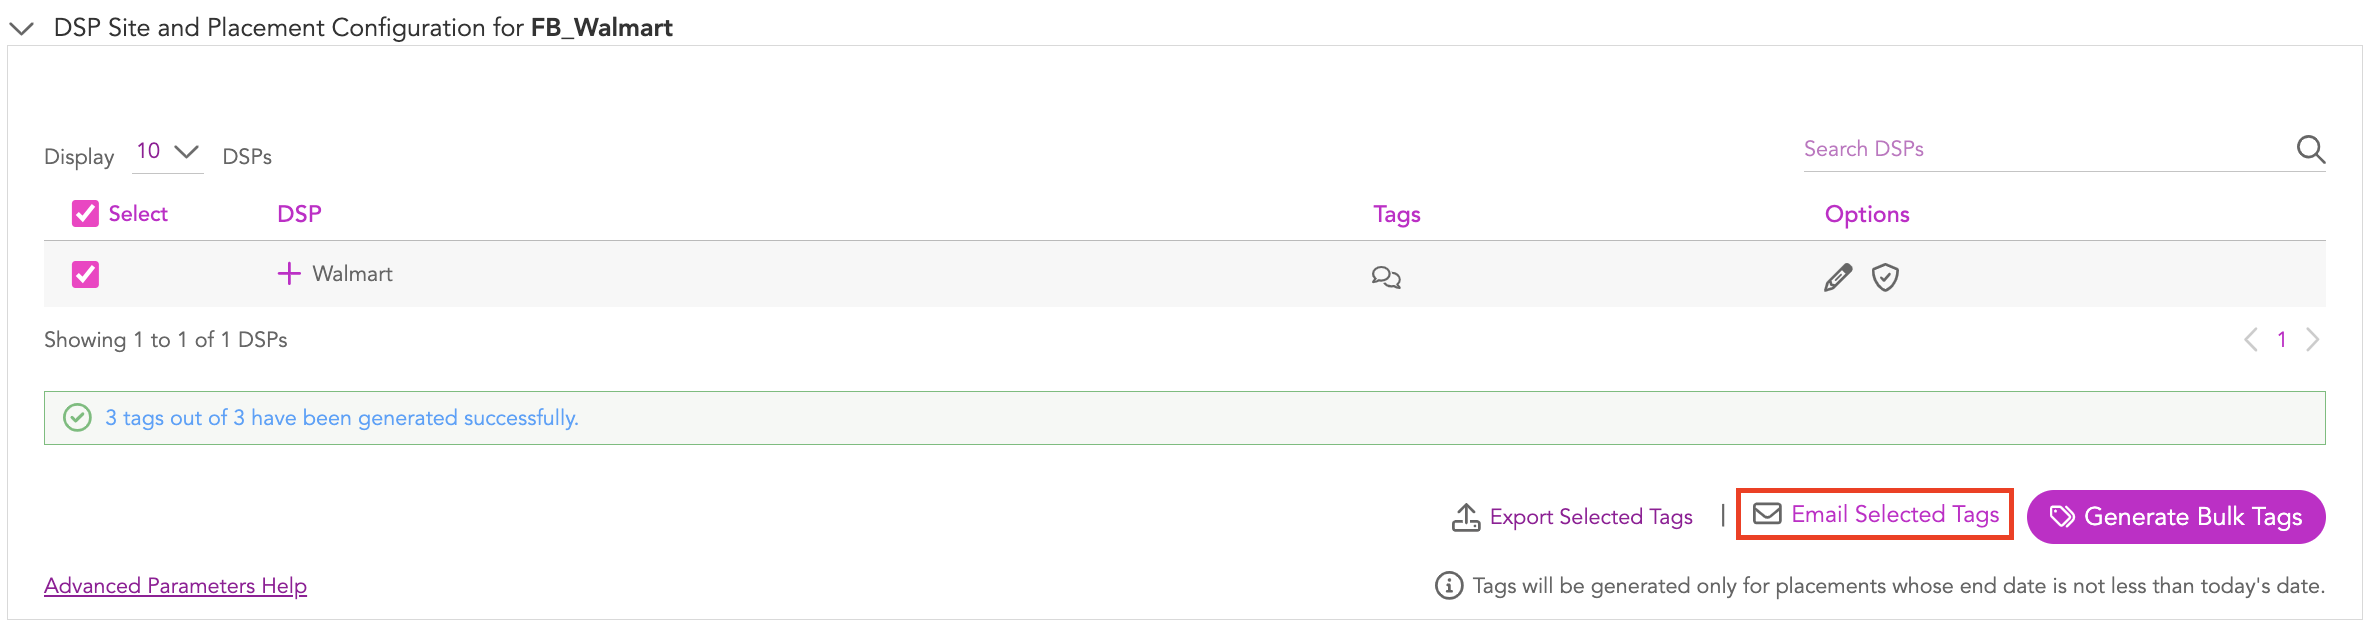
Once the process is complete, you will see the status message. As you can see here, since we skipped a placement while mapping, only 3 tags were generated and one was skipped.
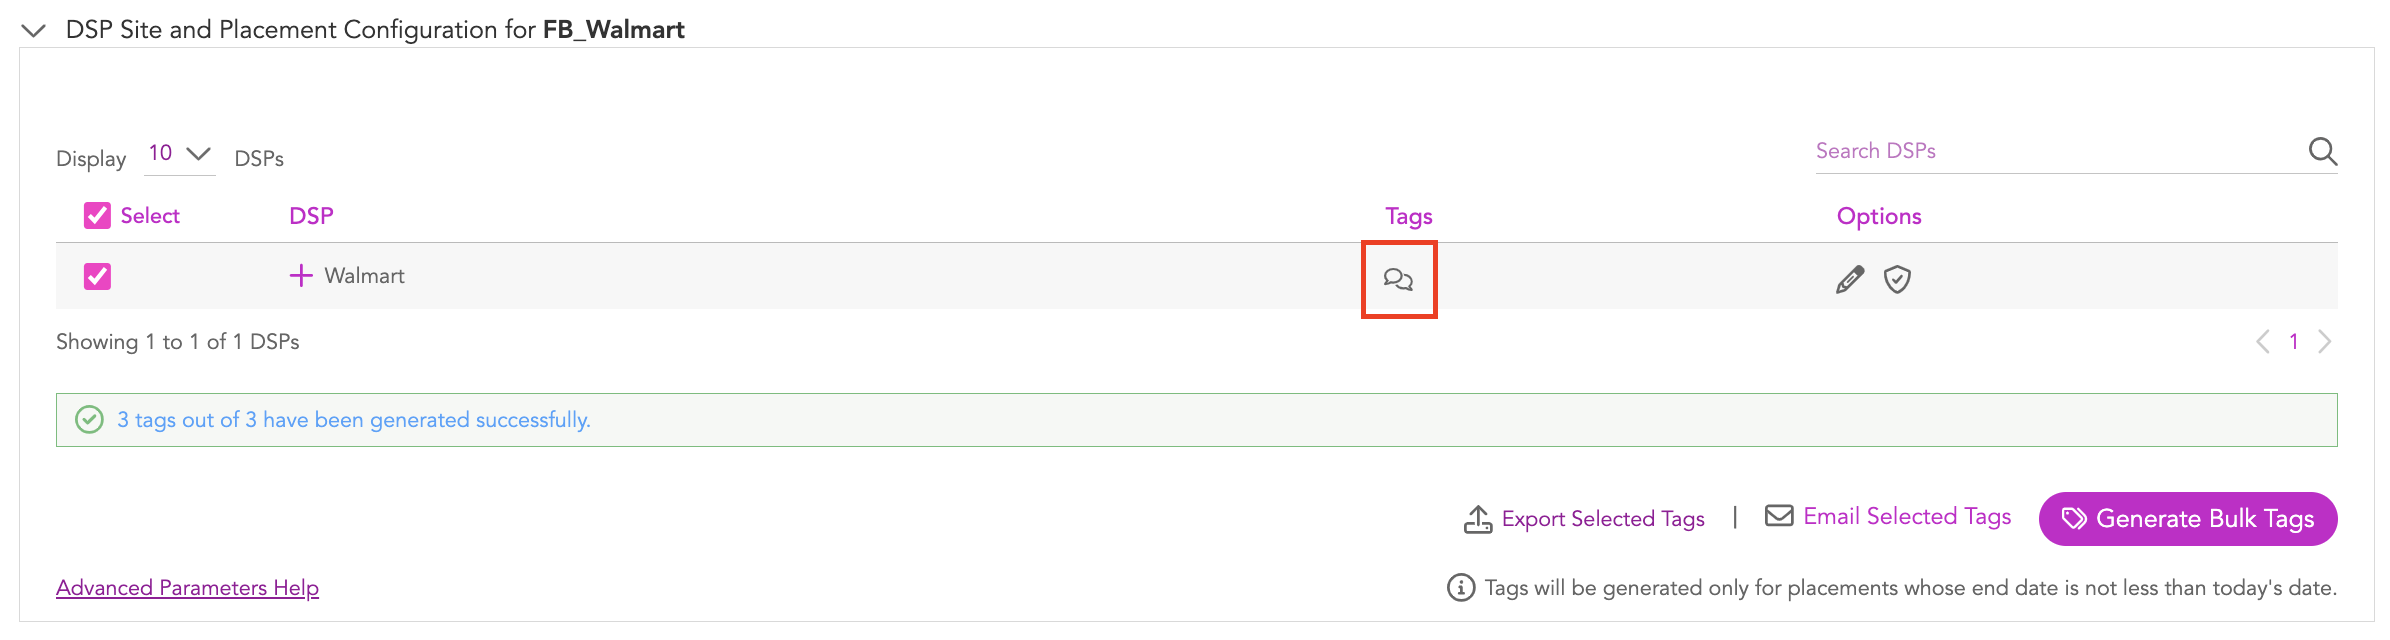
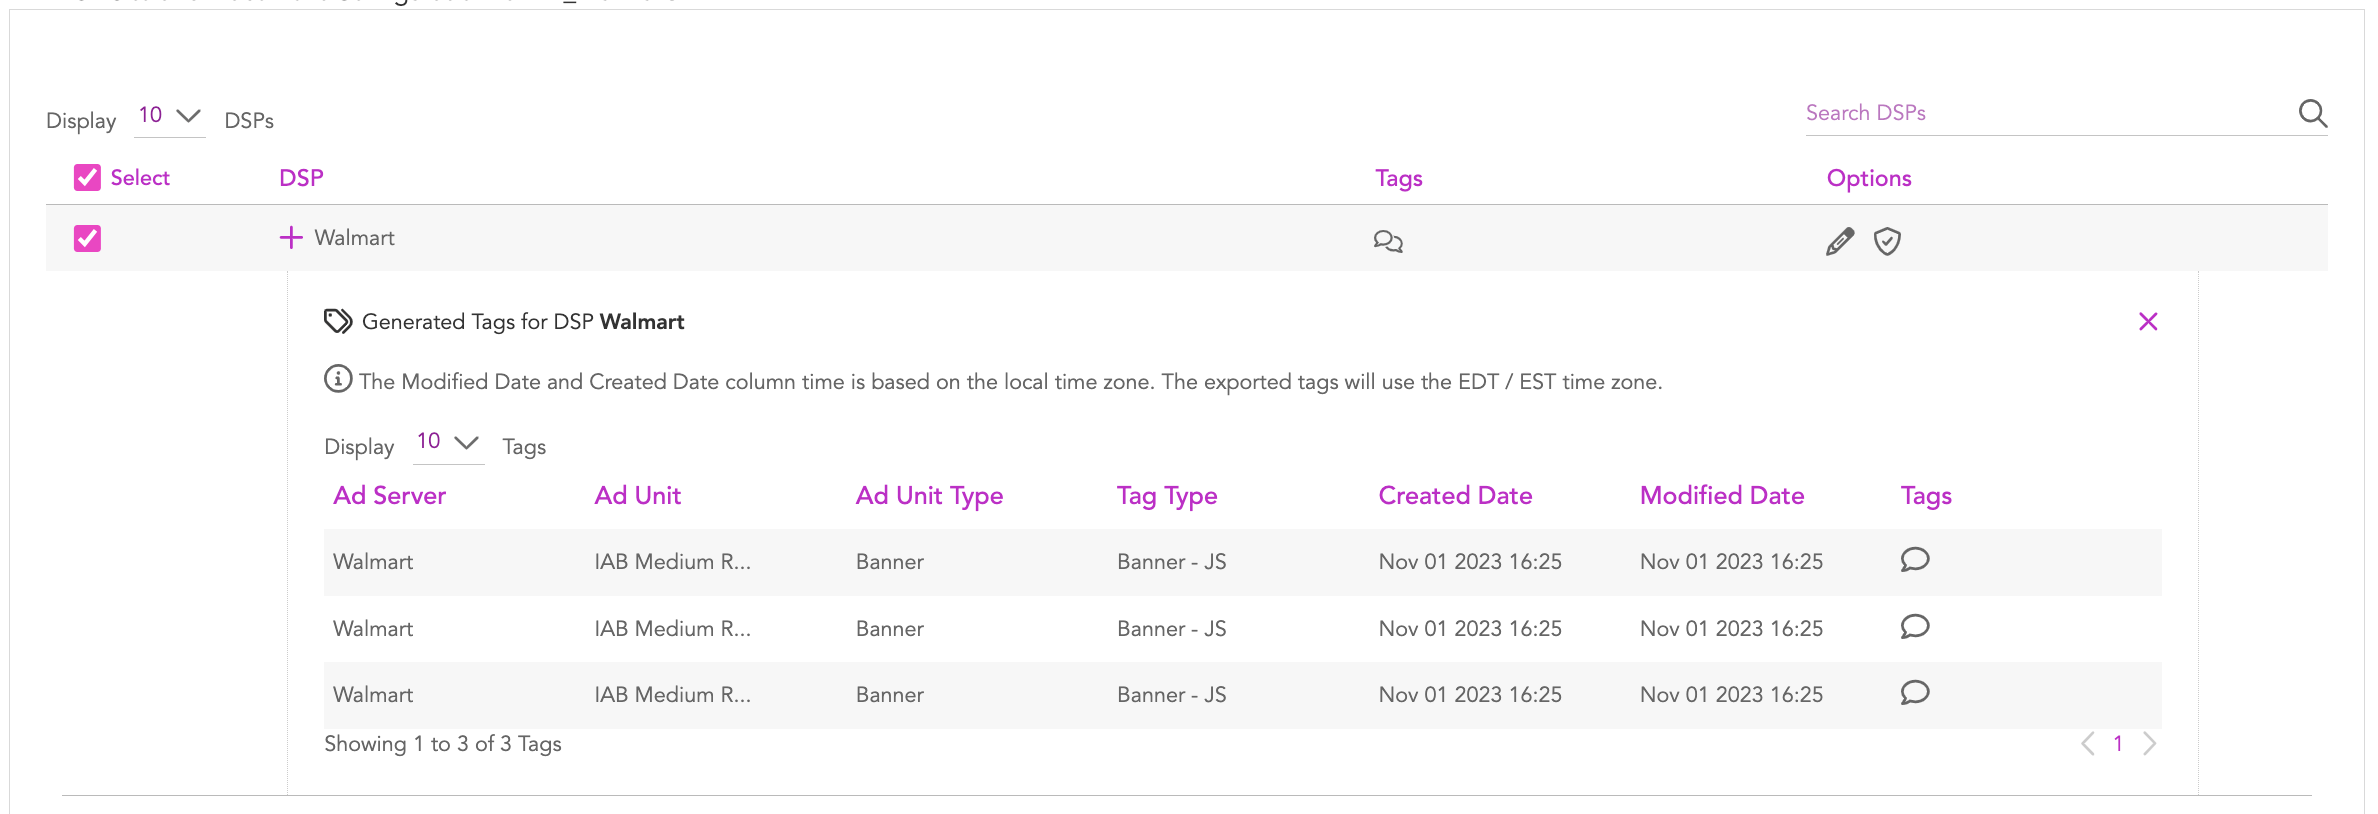
You can view the generated tags by clicking the Tags icon.
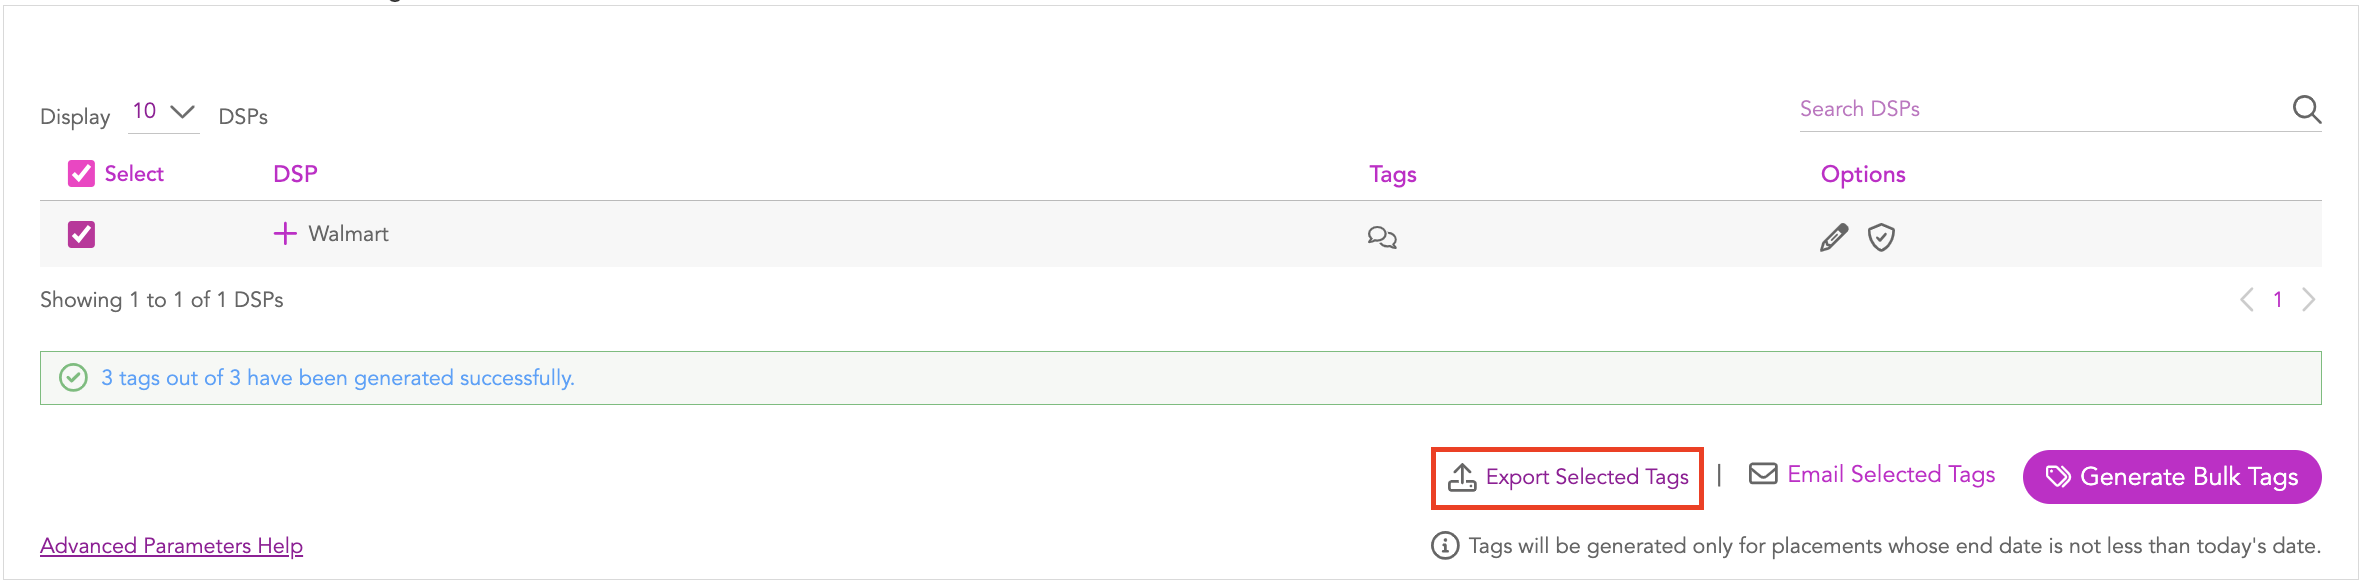
You can download the CSV file containing bulk tags to your local drive. Select the DSP (Walmart) and click Export Selected Tags.
You can send a CSV file containing bulk tags as an email. Select the DSP (Walmart) and click Email Selected Tags.
Next, enter the email address and click on the icon. If you want to email the media plan to multiple email Ids, enter the Ids separated by a comma.
You can also generate individual tags using the Jivox IQ platform.
Generating Individual Tags
You can generate individual tags at the placement level. To do this, follow these steps:
1- Click the + icon next to the DSP Name (Walmart) to view all the placement details.
If required, you can configure the options under each ad unit to override the default settings by clicking the Edit (pencil) icon next to the placement.
Edit the details as required.
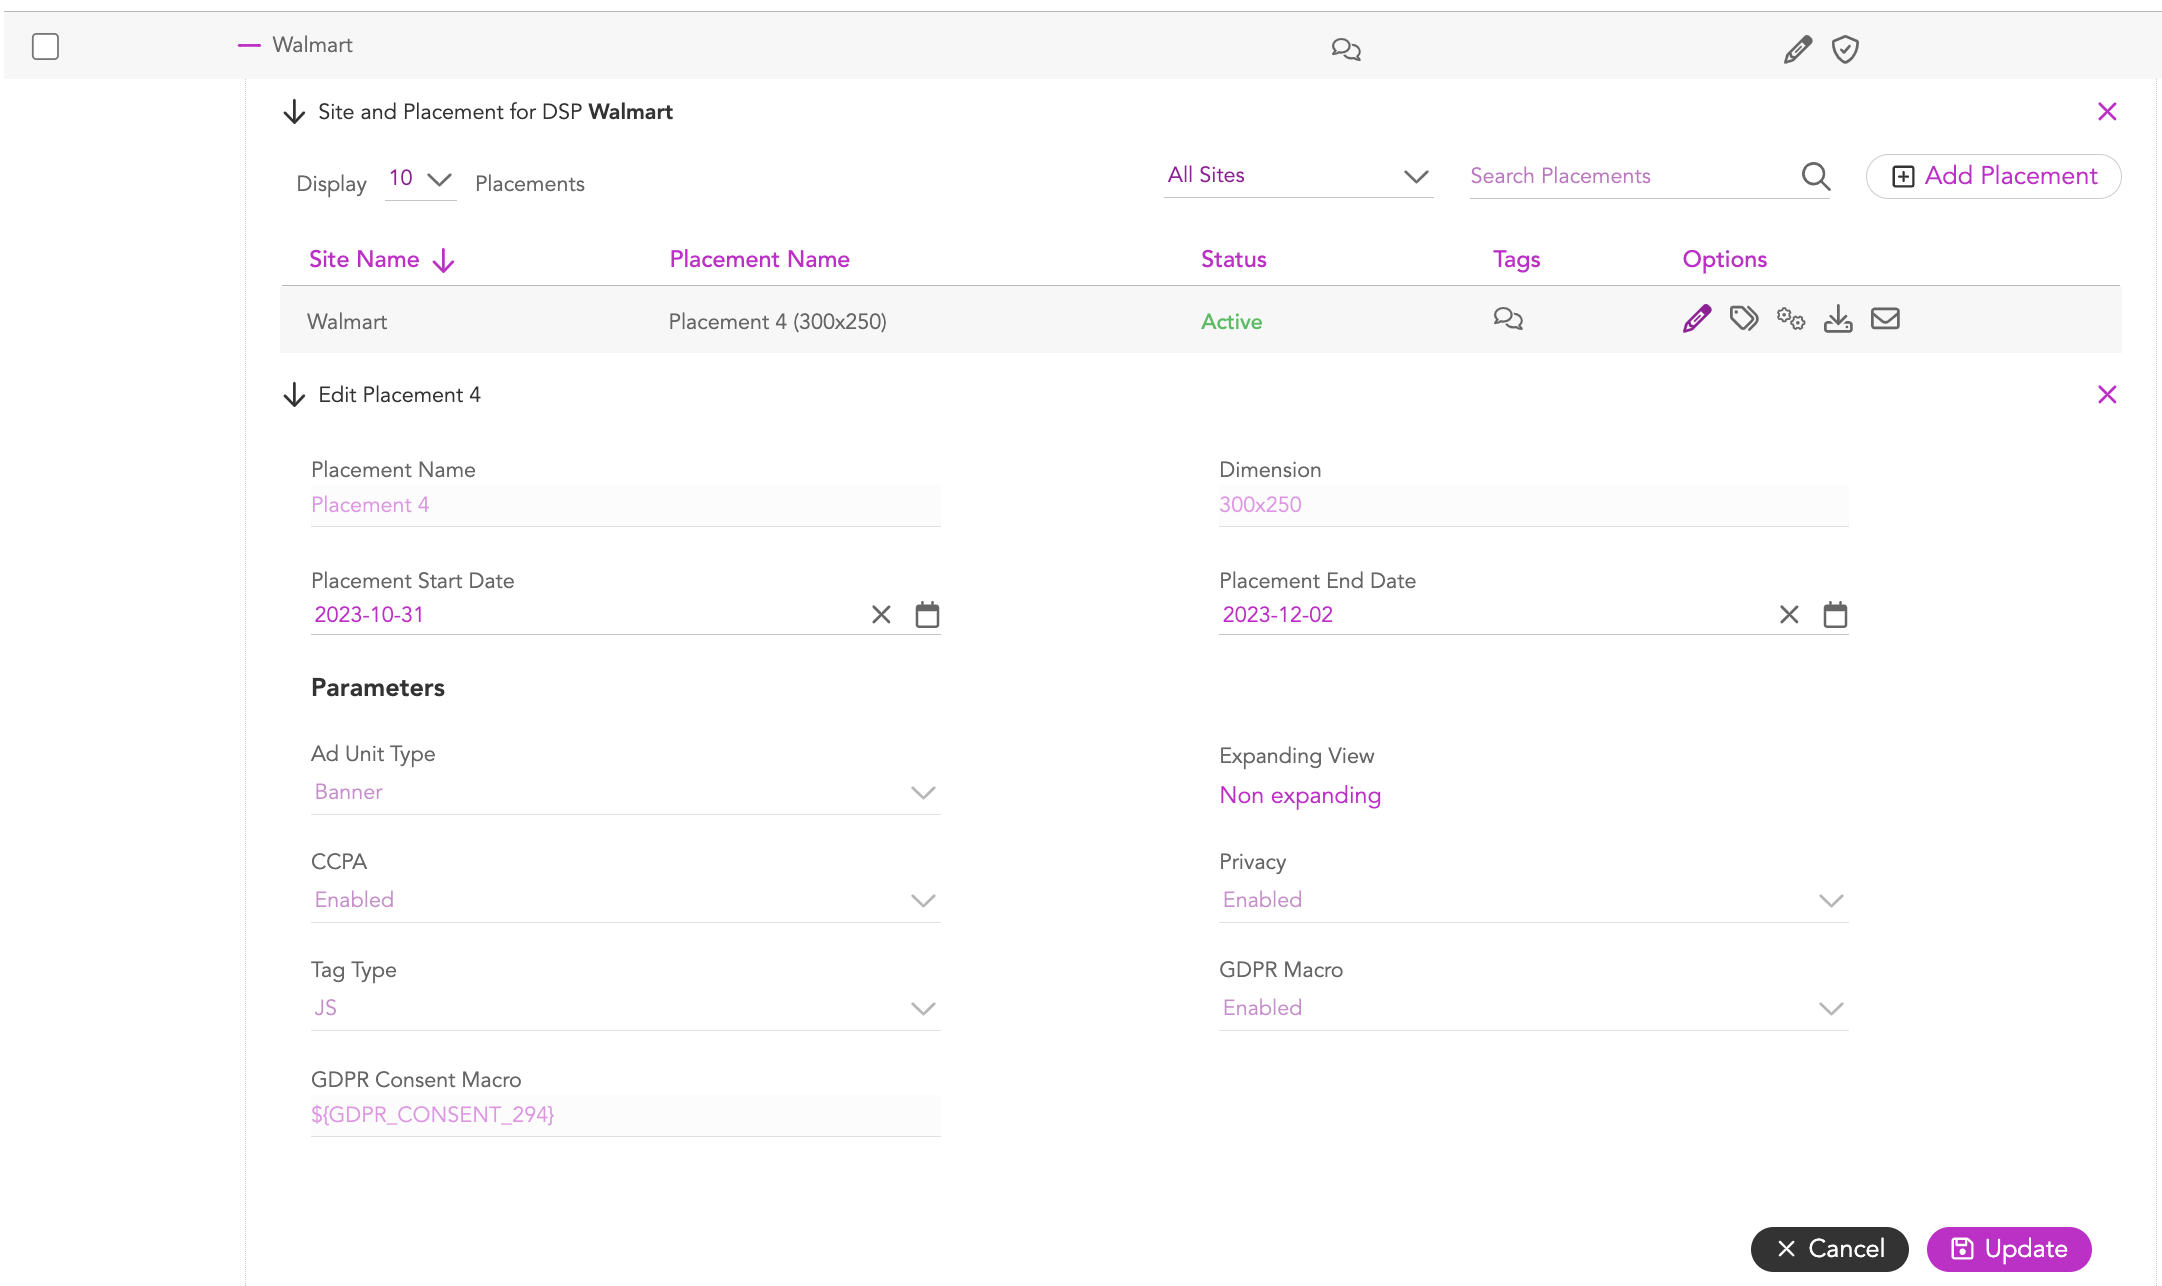
Once done, click Update.
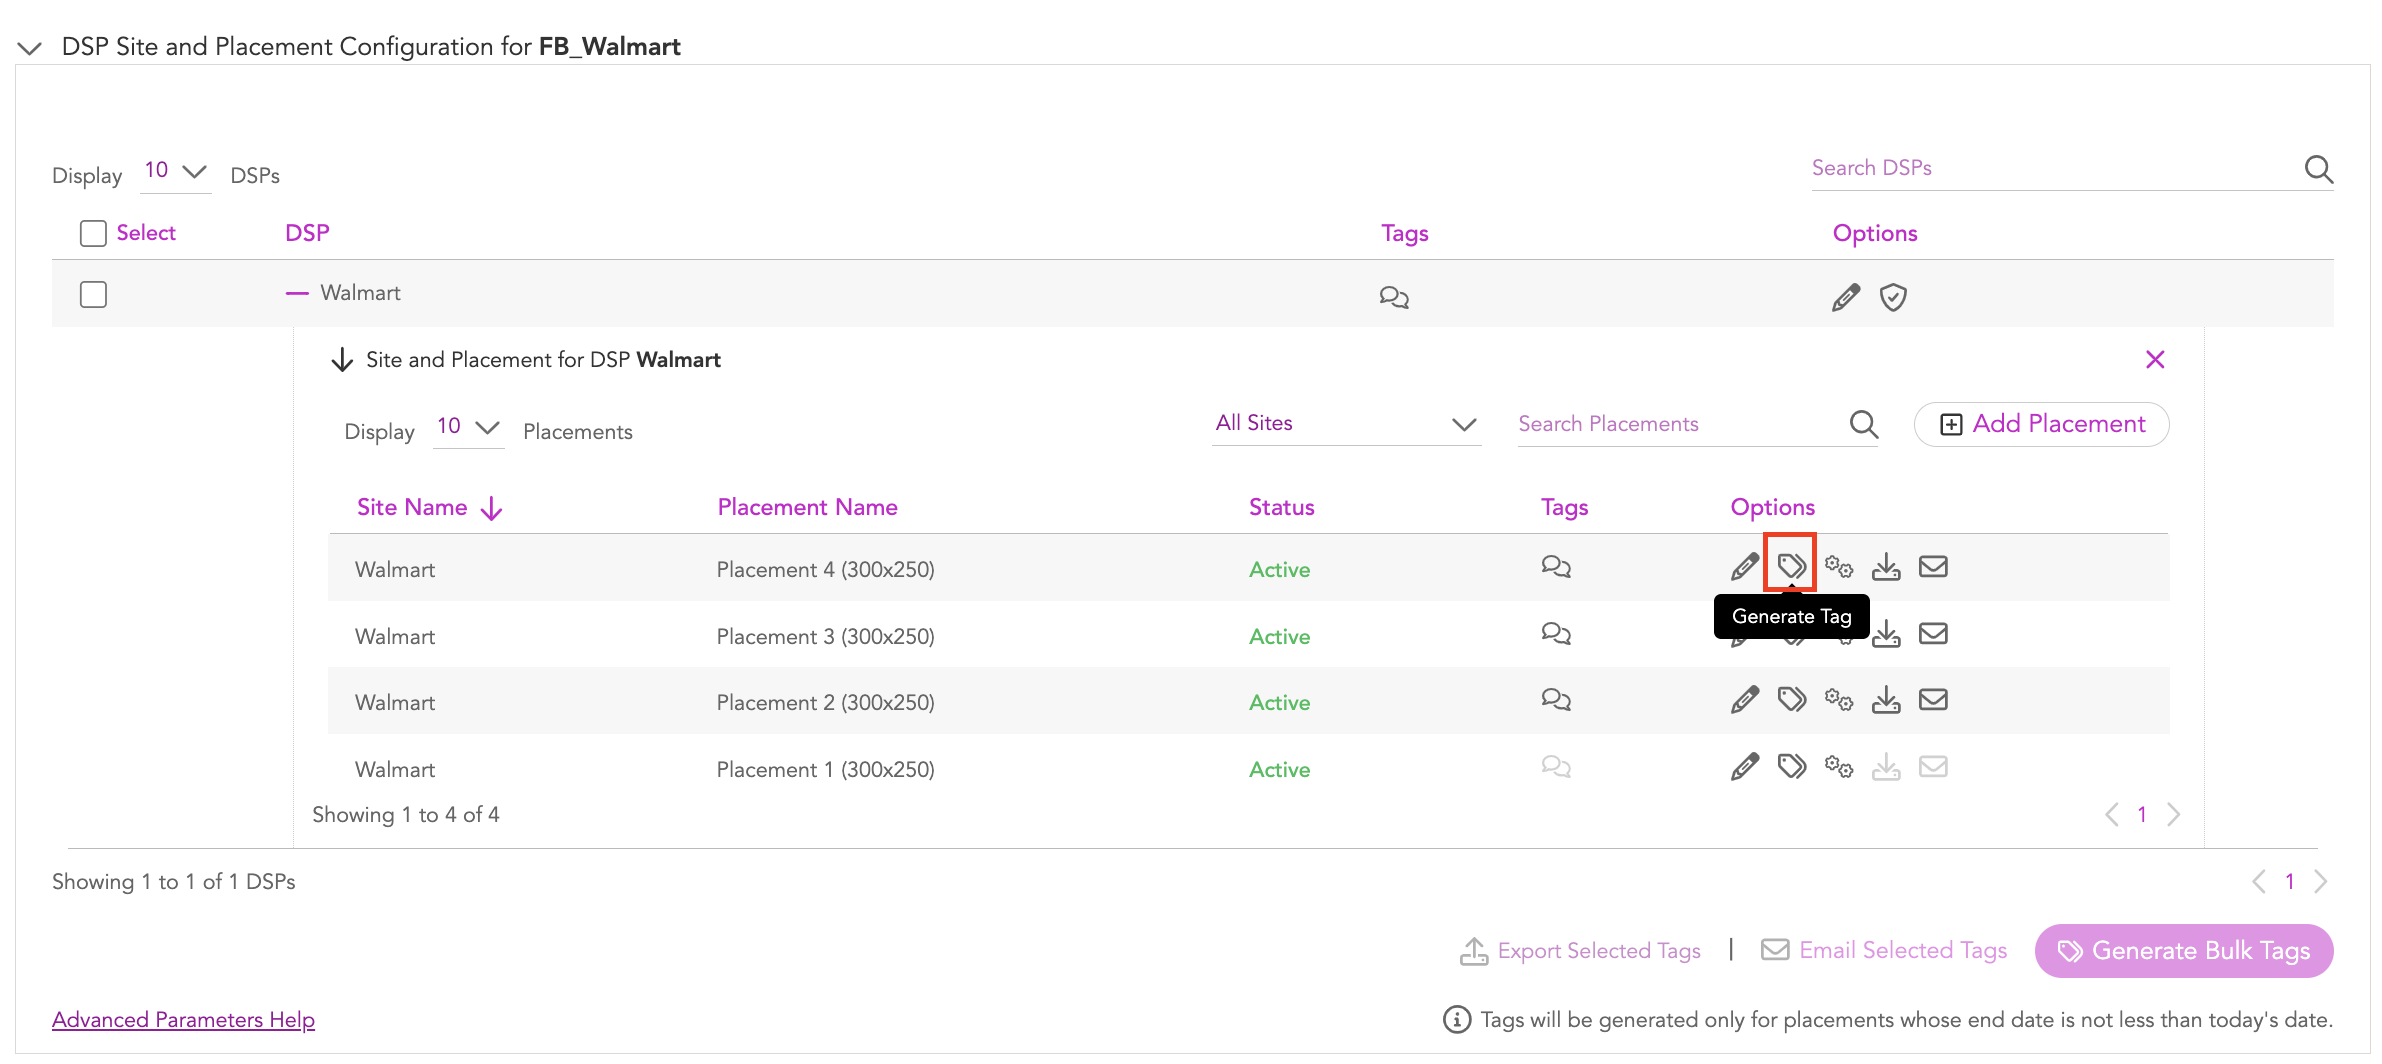
2-Click on the (Generate Tag) icon to expand the tag generation setup for the placement.

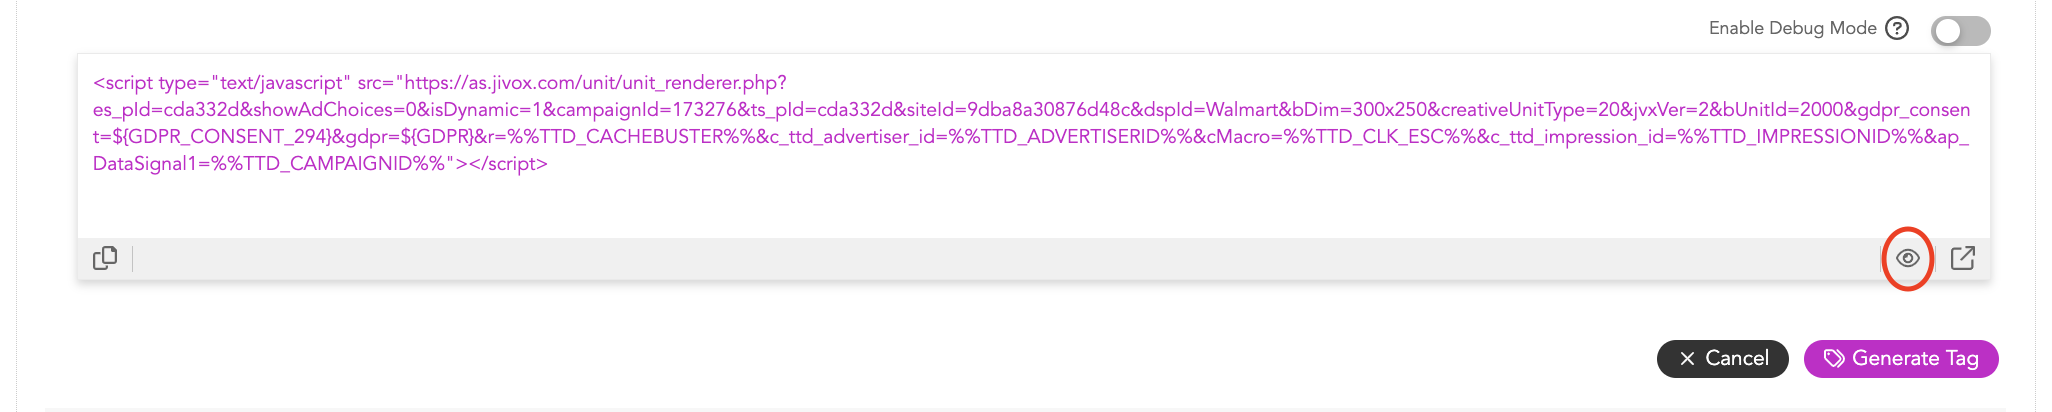
You can click the Enable Debug Mode button if you want to allow console logging to help debug issues.
3- Click the Generate Tag button.

The generated tag appears below the configuration setup. You can click the Copy icon (highlighted in image above) to copy the tag to your clipboard.
Previewing the Tag
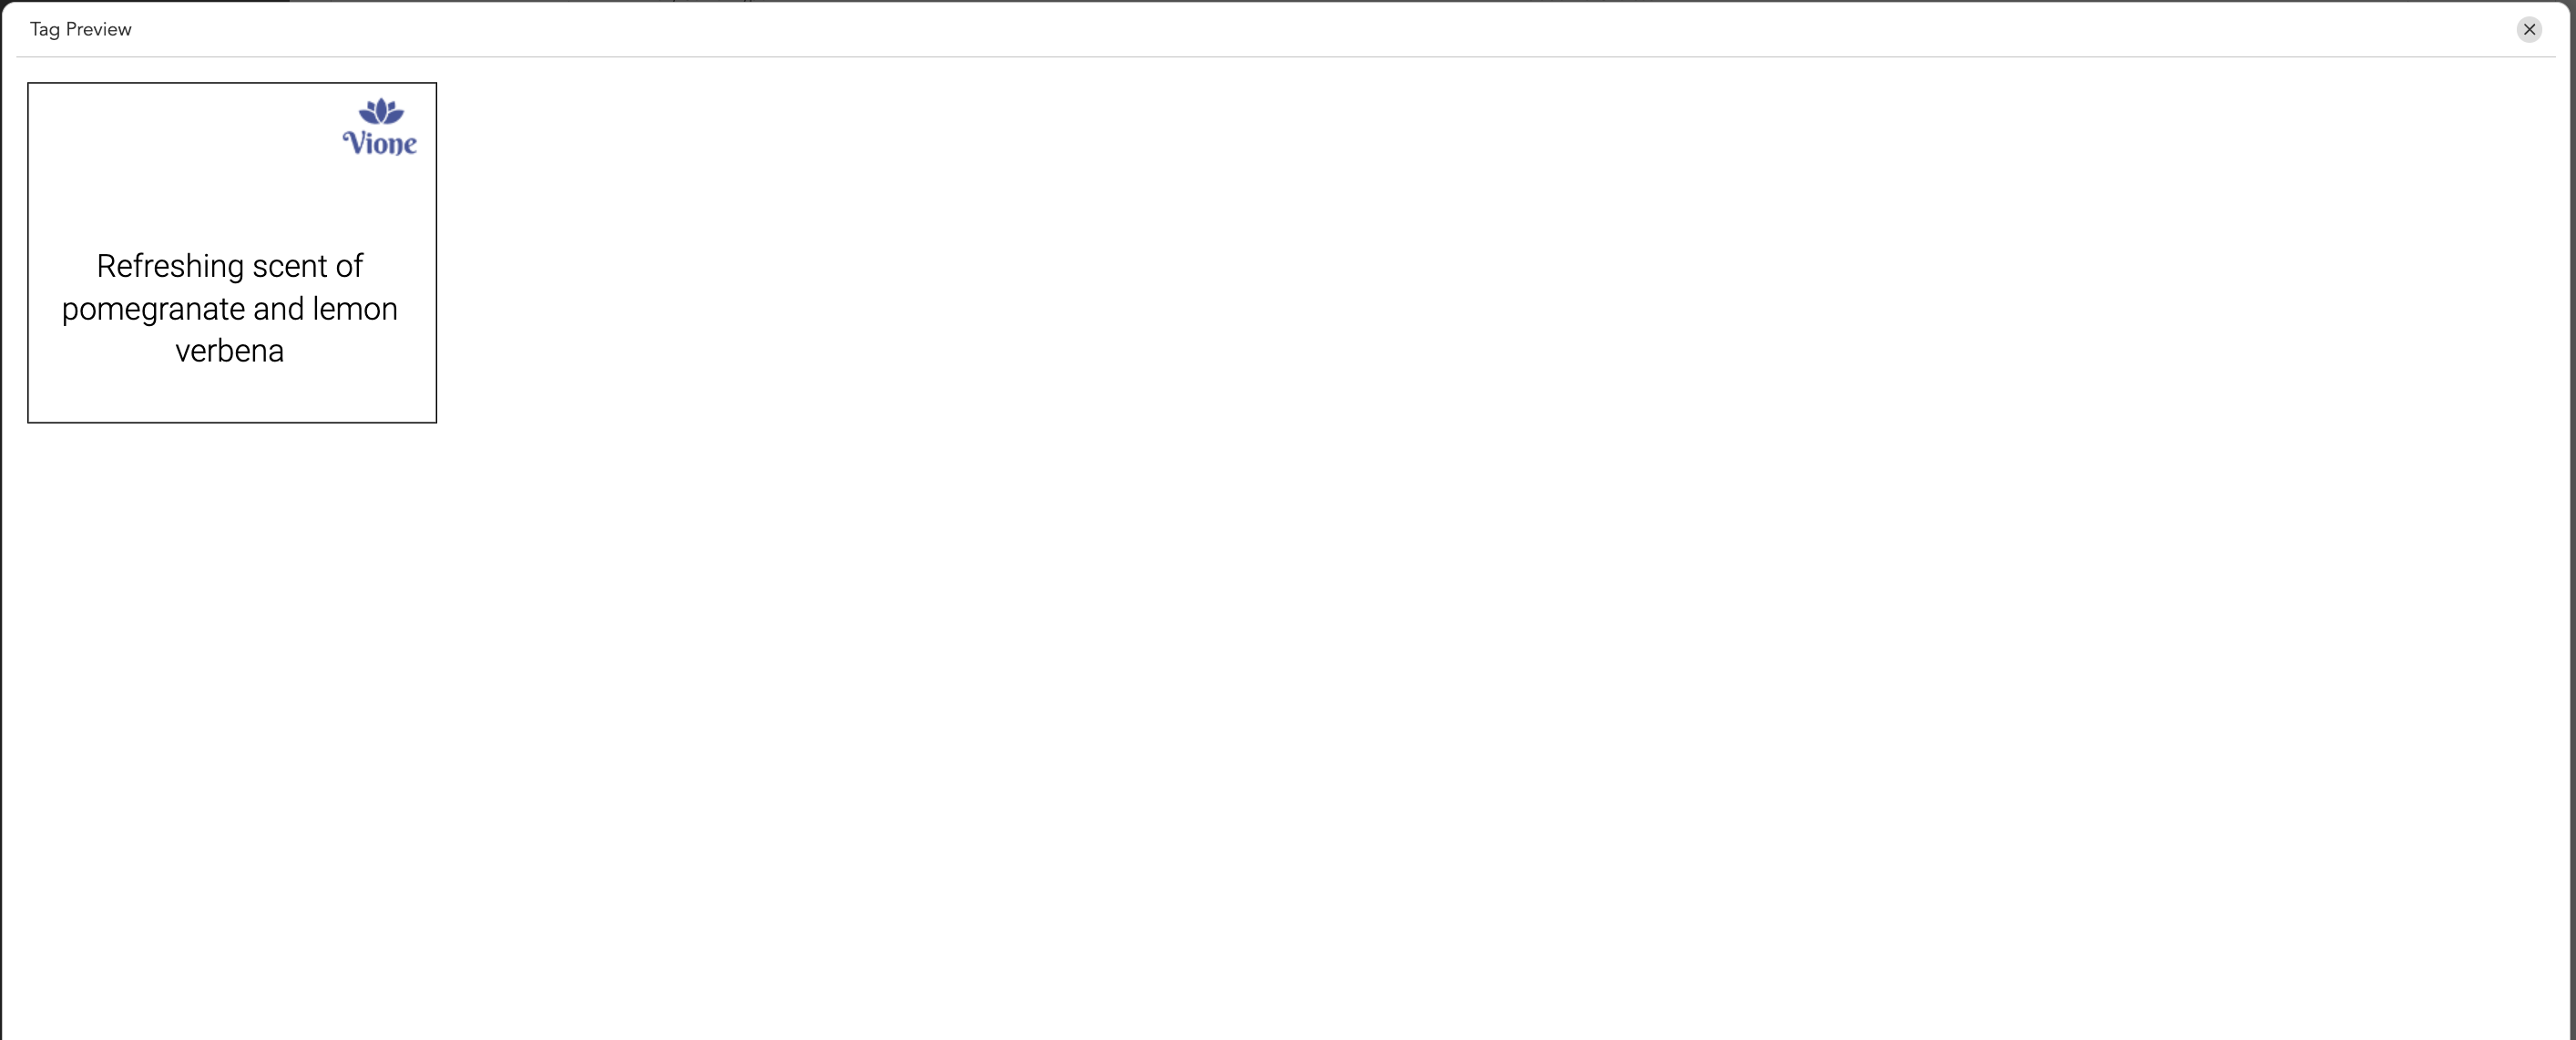
1- To preview the generated tag in the same window, click the (Preview tag) icon.
The preview appears in a pop-up window.
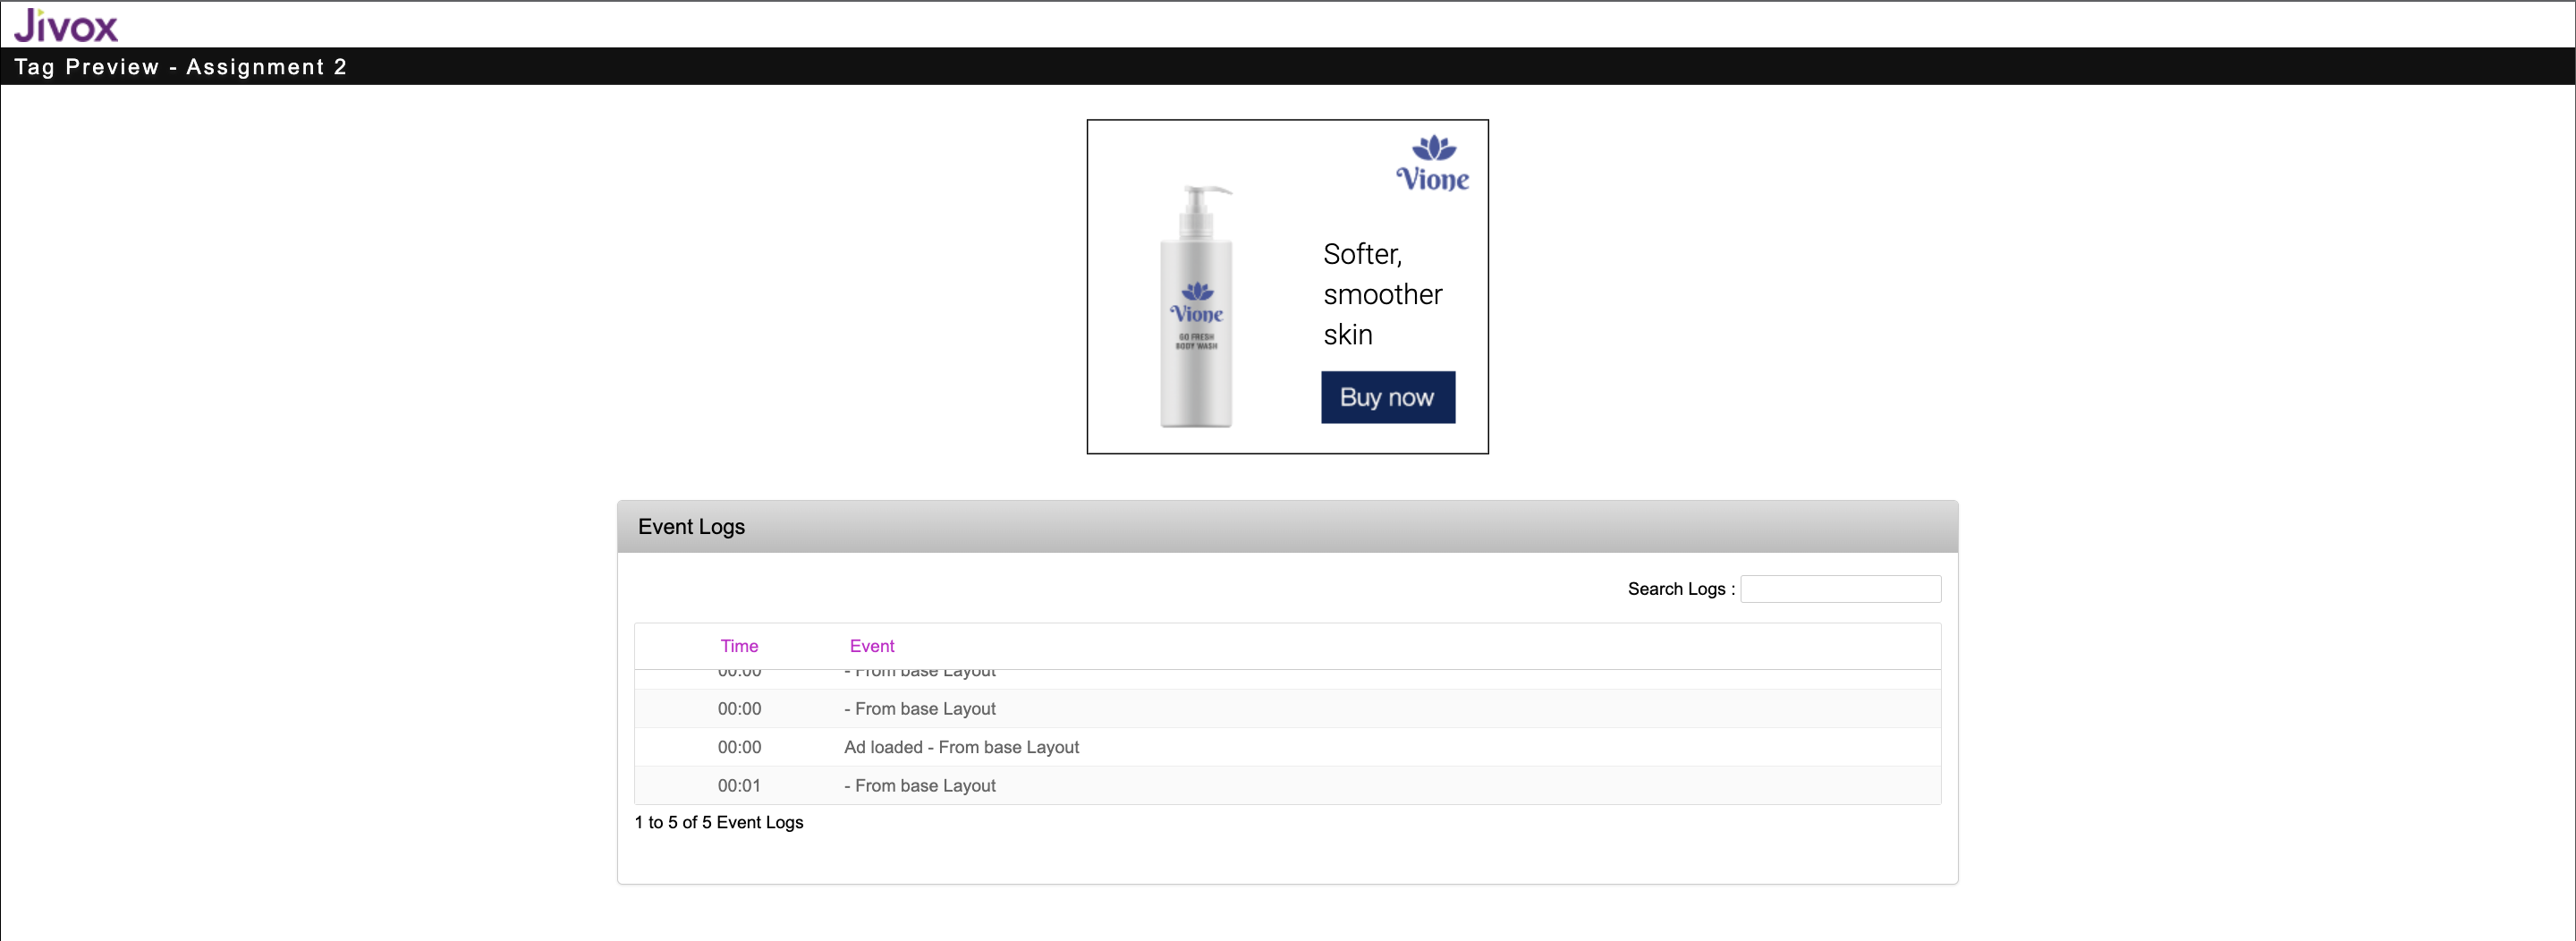
To see the generated tag's preview and event logs, you can click the (Preview tag in a new window) icon (highlighted in image below).

The event logs are displayed in a new window.