On the last part of the platform, you will be generating tags that you can traffic into the the DSP of your choice.
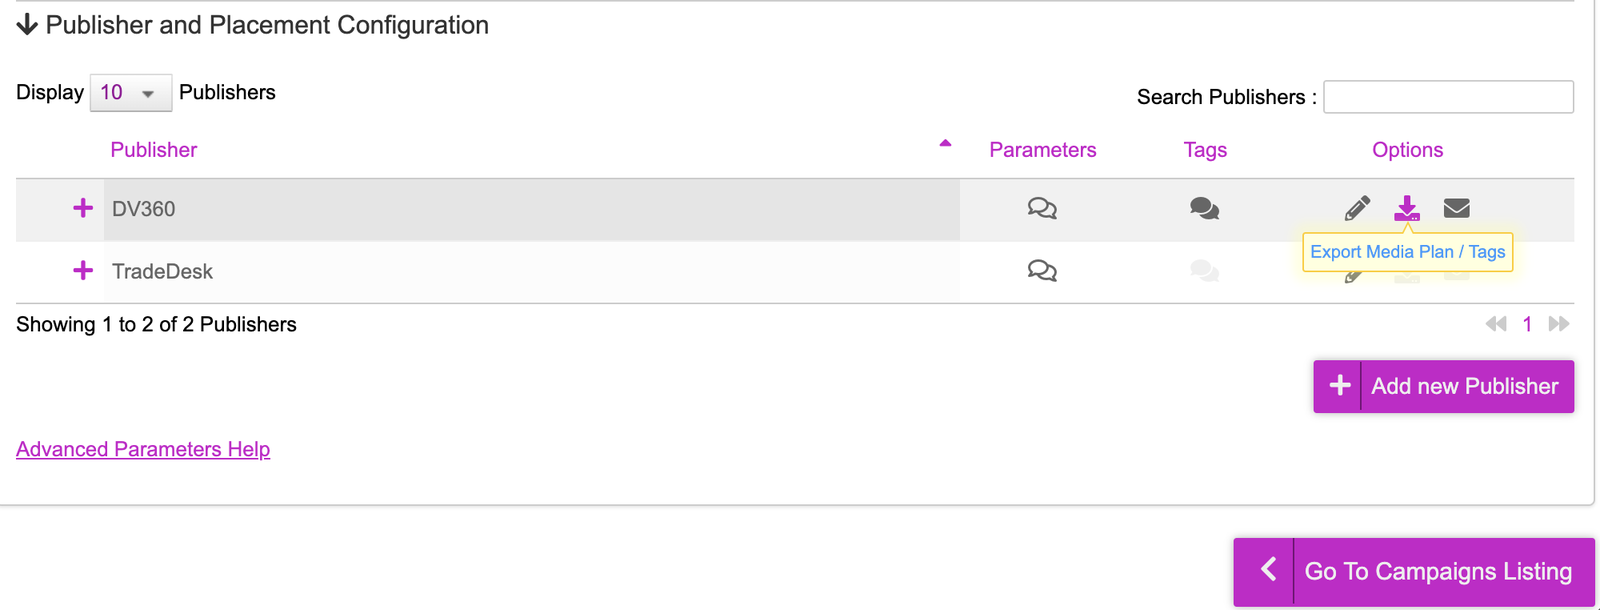
With the media plan uploaded, you will now see two DSPs show up; DV360 & TradeDesk. Within these DSPs, there will be two placements that were generated.
Click onto the + icon next to DV360, you will now see the placements that were created for it

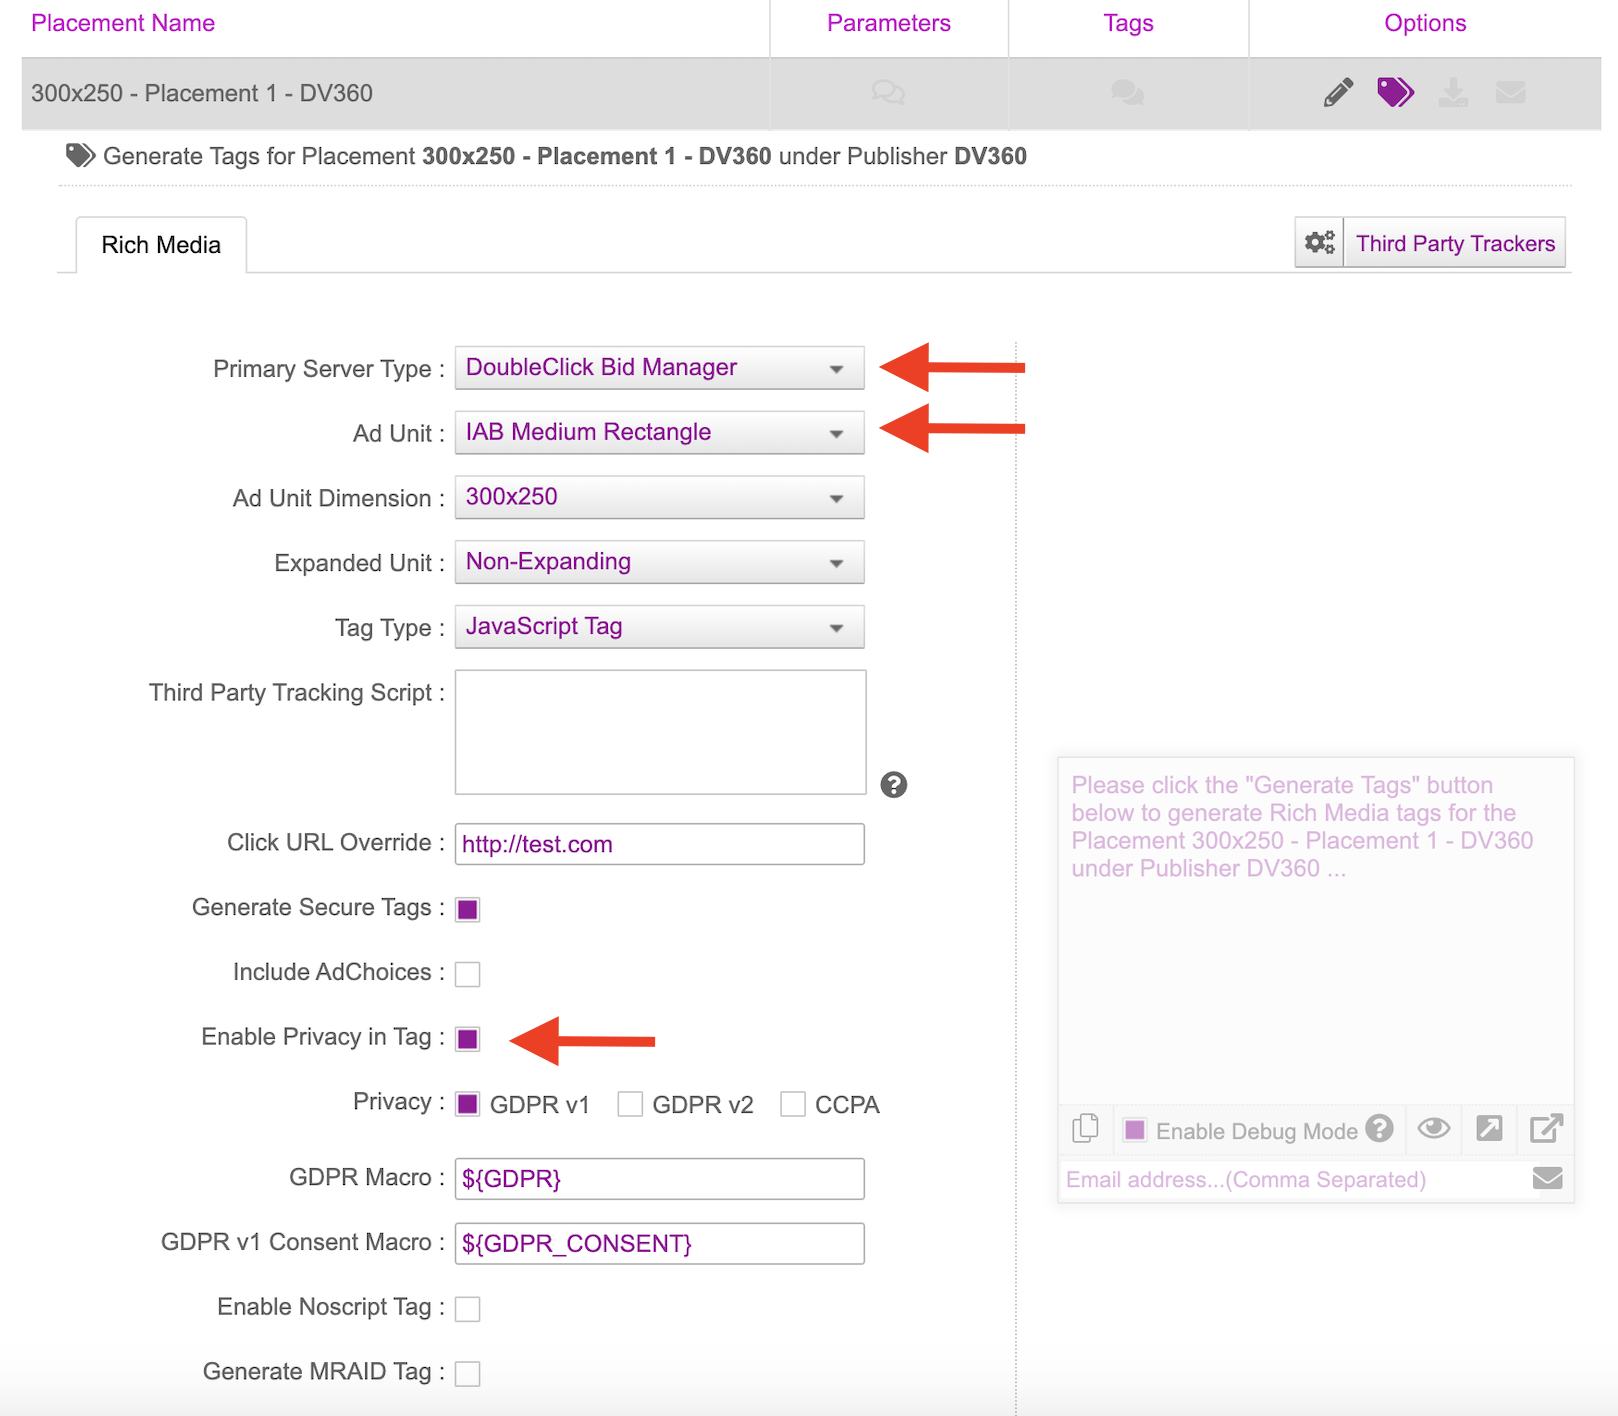
On the placement, click onto the generate tag button
On the tag generation screen, select your ad server and ad unit size. Mark the checkbox next to Privacy
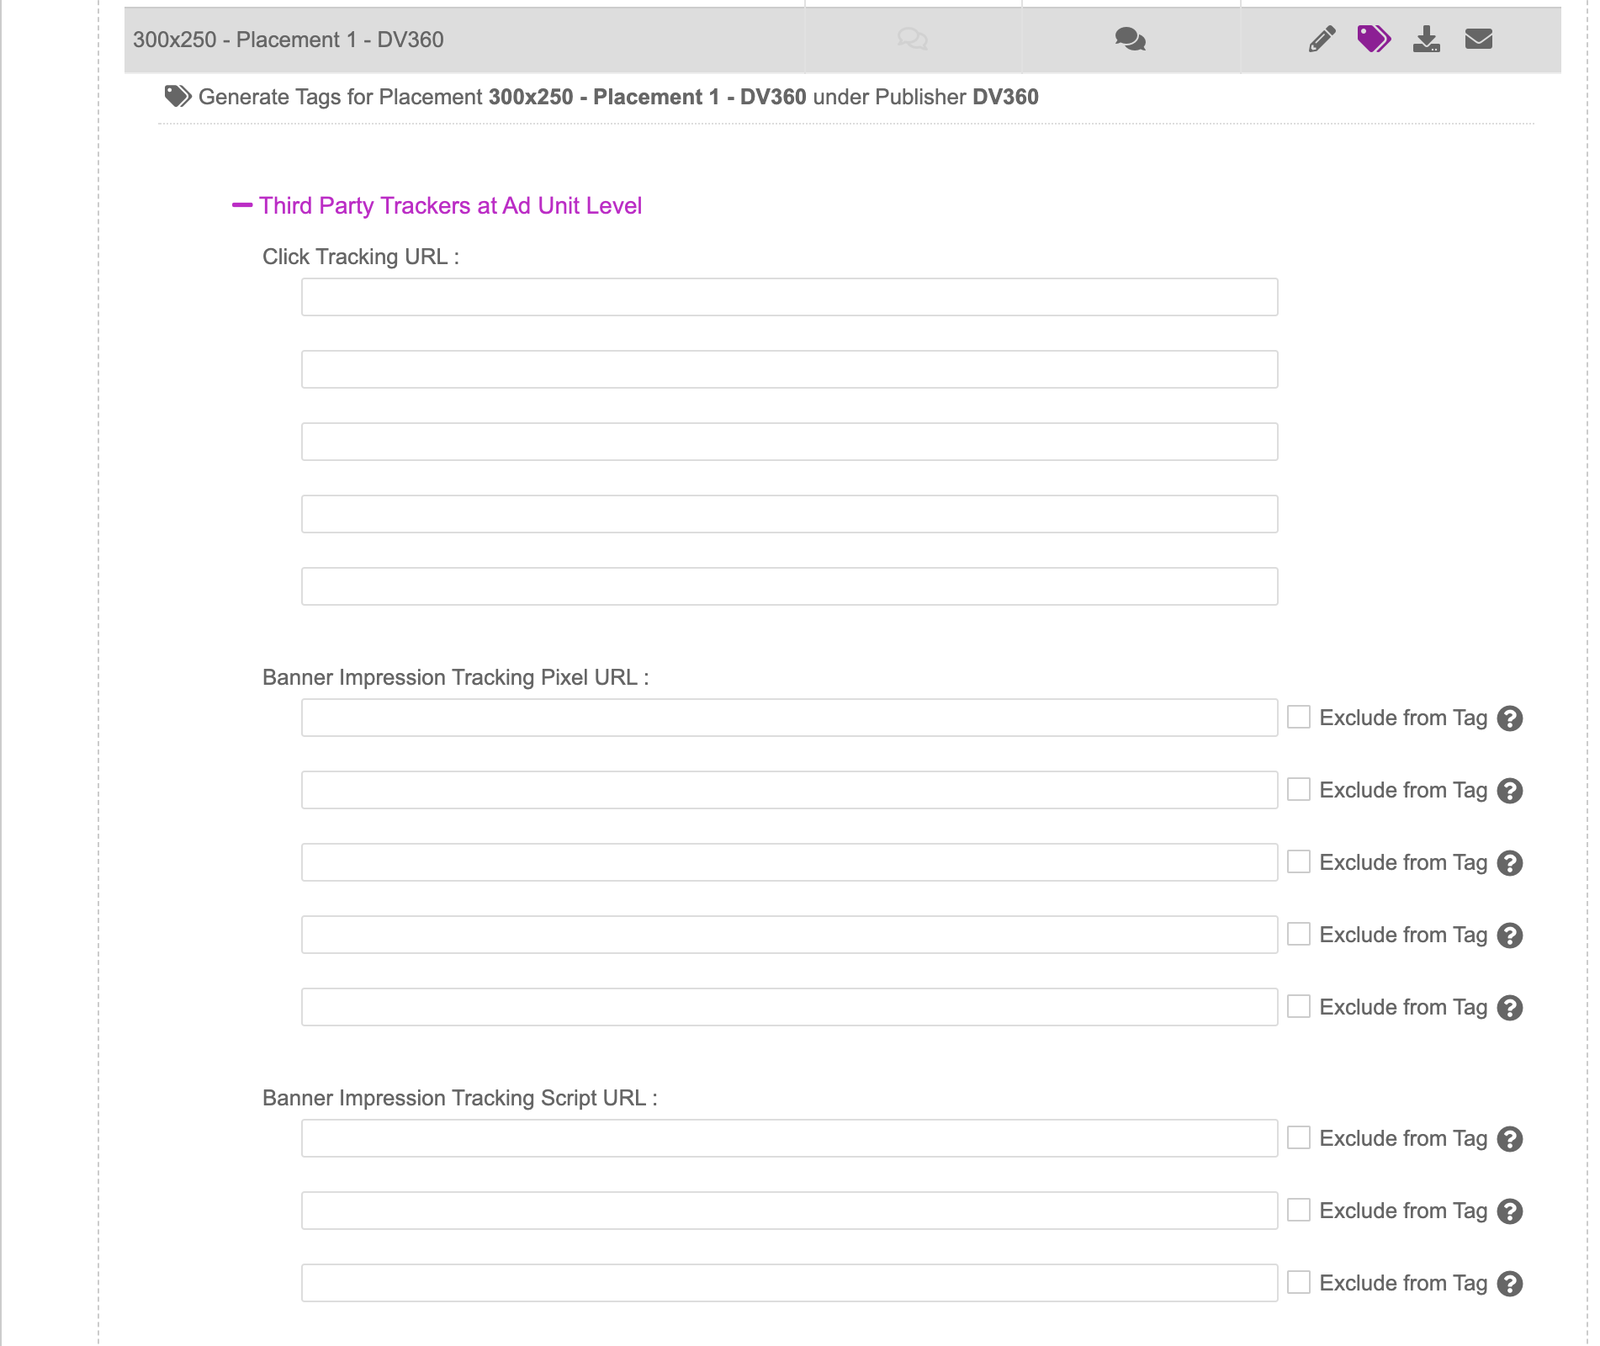
There is also an option to upload third party trackers on a placement level from within the tag generation part of the setup. On step 4, by clicking onto the ‘Third Party Trackers’ button, you will be presented with a screen that will allow you to paste in Third Party Trackers. These will be placement level trackers and will fire when the tag is called. You can paste in any Click Tracking URLs, impression tracking pixels and javascript pixels. One added benefit for the impression pixels and javascript pixels is they can be excluded from the tag itself. What this means is trackers will be fired from the backend, allowing you to replace trackers without having to re-traffic.
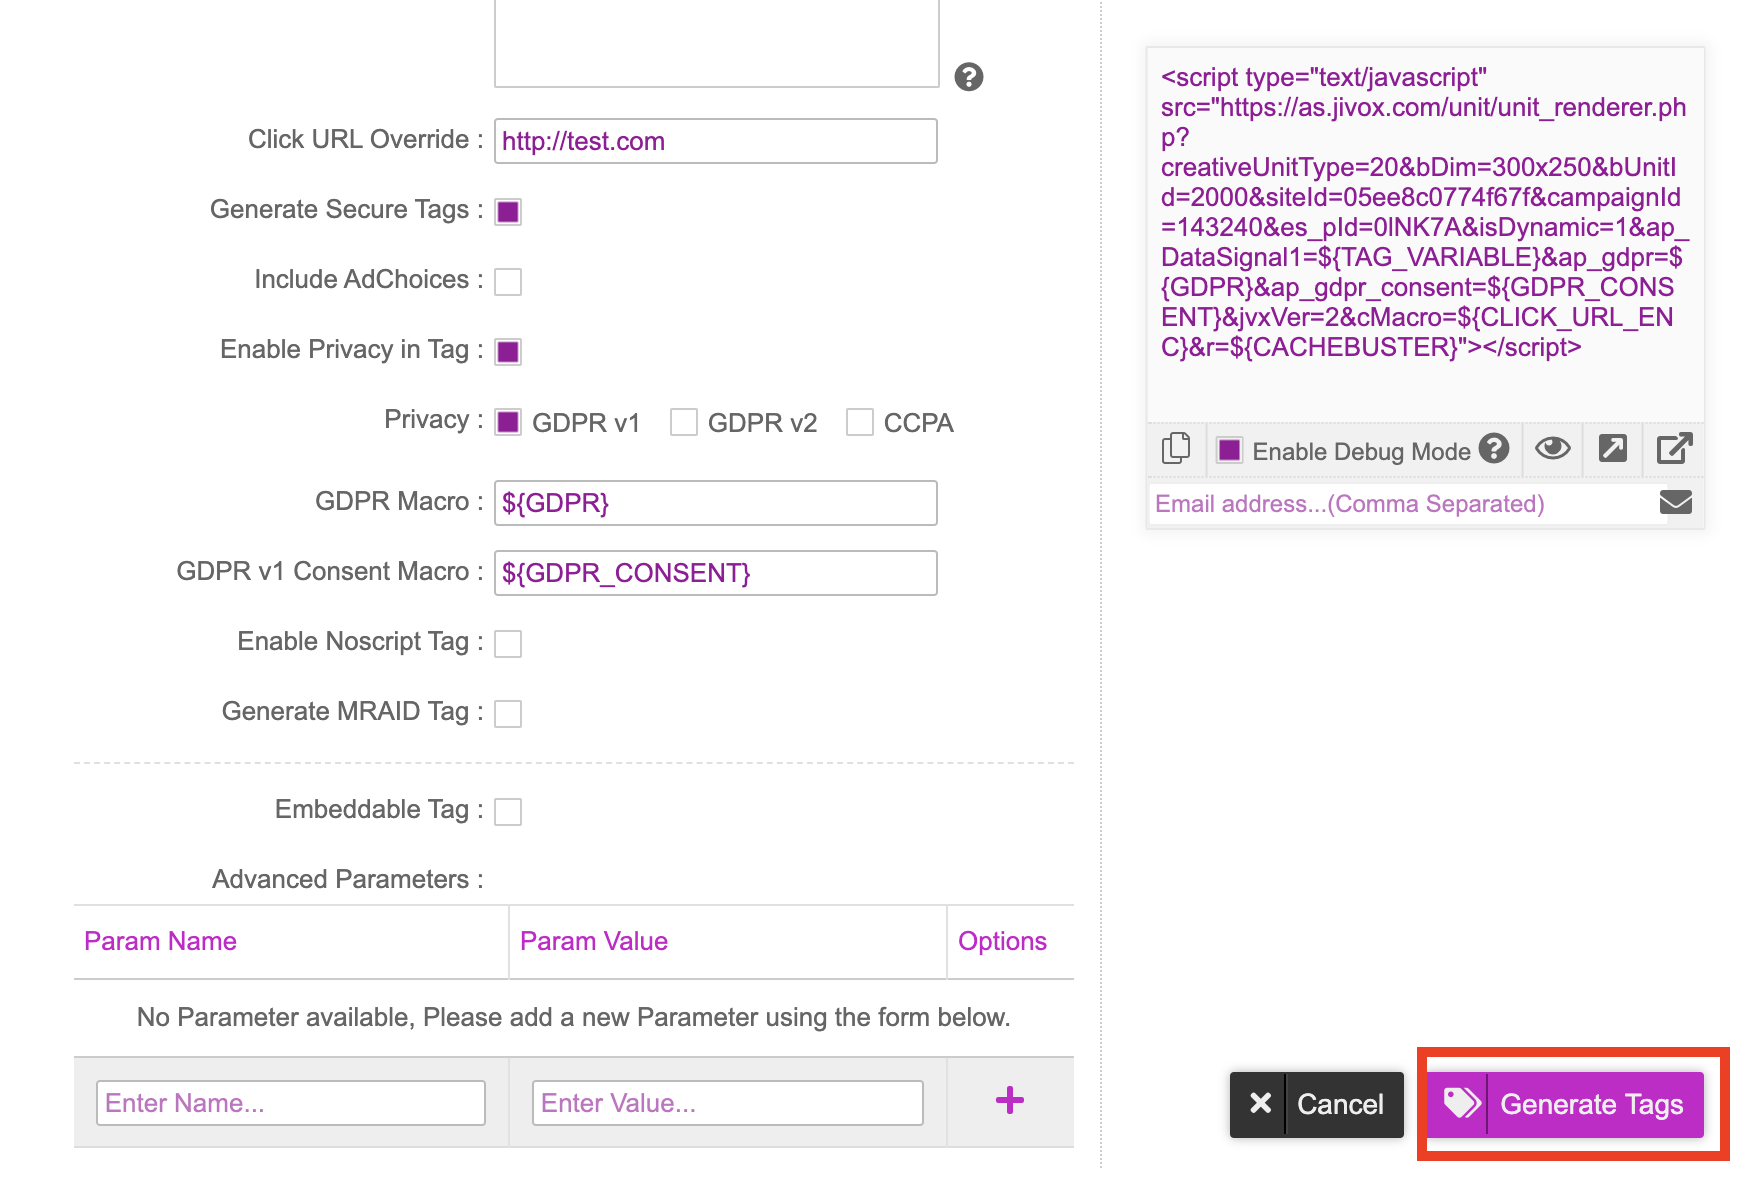
Click onto ‘Generate Tags’. This will now generate a tag for you that will save into your media plan. The tag will also be shown once generated so you can paste it into any HTML tool to view it.
Click onto the Export Media Plan option after you’ve generated your tags. This will allow you to download the tags into a spreadsheet file and use to traffic into the DSP